darrenhopper
-
Posts
191 -
Joined
-
Last visited
Content Type
Profiles
Forums
Gallery
Everything posted by darrenhopper
-
+1 for Nitromores But I reckon a wire brush should speed up the process. Try not to let the bits get on your skin though.
-
Wow, who pissed on your cornflakes? I reckon a 49cc stroker is the way to go. It's about the only thing you'll be allowed to insure anyway. They're real easy to rebuild when they do go pop, though that's really only liable to happen if you don't put oil in it. A 60mph scooterbike is only an extra £250 or so. And an afternoon tinkering with it to get it running right. If you're going to use go-faster parts on it at some stage, be sure to get a water cooled bike. And most important, they're just like a fat bird... Great fun for a quick ride but you wouldn't admit it to your mates! I'm on big bikes the last 6 or 7 years and I still use a 70cc scooterbike for going to work.
-
Alright mate, I've been using Reynolds in the UK as a supplier of high quality steel. They do a huge range of pre-formed tubesets in various grades of steel. A lot of their stuff is very thin & some of it really is Tig weld only but if you were to ring them up they'll be able to tell you all about that sort of stuff. There are some grades that can be Mig welded if you've a good low power machine & patience. They'll supply you with headtubes, BB shells & generic dropouts. The dropouts are a bit useless for a trials frame though, they're just not made for a 6" seat tube! There's also this tube notcher from Moss Europe. Really useful bit of kit and quite cheap considering the time saved.
-
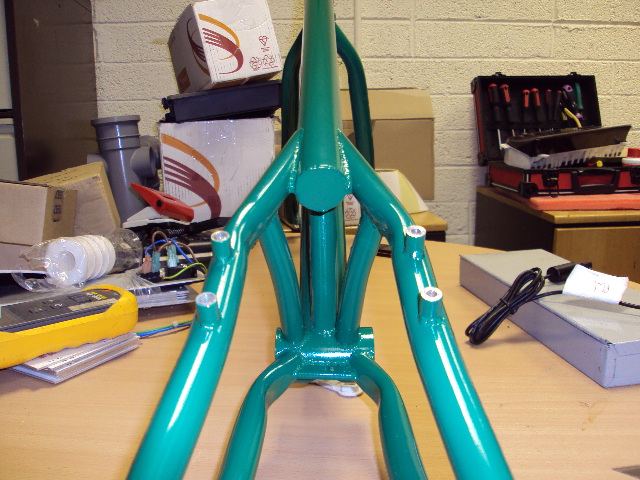
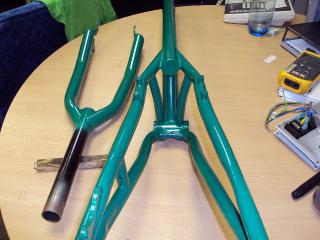
I did measure it as it happens. I was only using a cheap inclinometer for the head angle but it measured up bang on. The photos really don't do the build quality justice. Everything is in pretty good alignment. Aside from getting the +20mm disk mount wrong on the fork, everything was tickety boo. I would buy another, if only because steel frames are fantastic!
-
Yes.
-
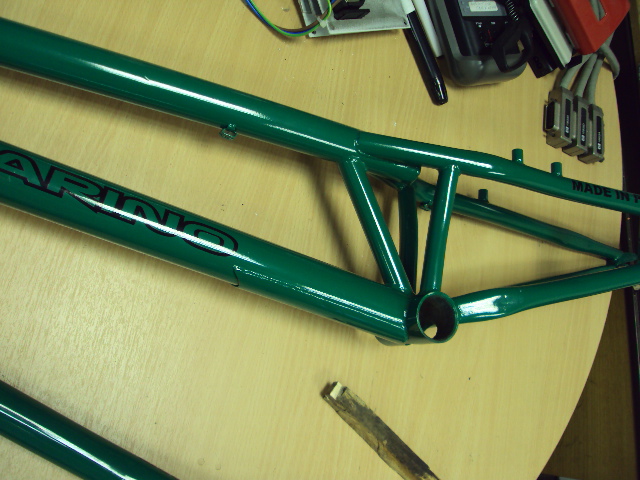
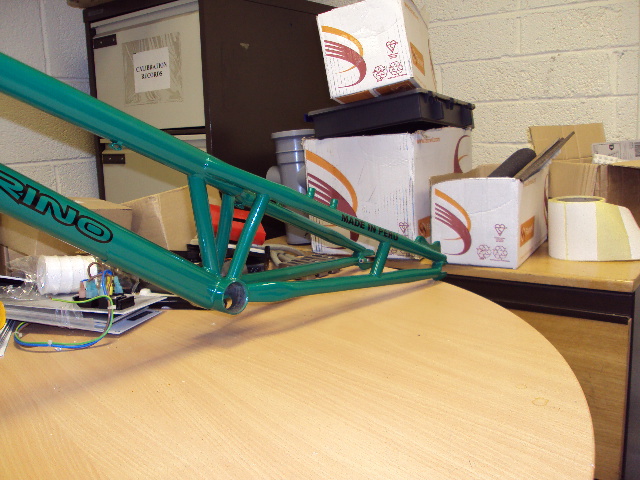
Morning, I forgot to take photos for you but the ones (I think) I've attached are the frame when it arrived.


-
Nah, it was the removal tabs fouling on the BB shell when I had a bashring on but I moved that to between the BB & Frame. Actually come to think of it that was another problem I had... Marino only threaded the first 10mm or so of the BB shell so the longer threaded section on my BB wouldn't go in past that. Fortunately I have a BB tap so I just made the threads go in further. I'll get you some snaps this evening & post tomorrow when I'm being paid for it!
-
Well Carbon lever blades don't bend...... They do shatter though. As for goodridge lines, I reckon they're always worth the money. Though if you've already got braided lines then I don't see how you'll notice any improvement, aside from them being prettier.
-
Spray Paint, Pointers On Doing A Good Job Please!
darrenhopper replied to ogre's topic in Trials Chat
And remember that light colours should look well thin after the first coat or two but they'll fill out in later coats. The best you can hope for is an even thin layer, wait 20 mins and repeat. You should get a good few coats out of each can. -
Morning all, I got astock frame sent across late last year, just before everything froze over. So I've not had much more than a kitchen session on it. The steel is alot more spring-y but it is a little heavy. I wouldn't buy a fork from him again. The one I recieved reminds me of an old Raleigh MAX fork. It's a long way too heavy & unfortunately he got the +20mm mount wrong so I had to chop it up & make my own. I had a rear disk mount added as well & have not checked to see if it is in the right spot. I'm using a maggy. Contact was good and regular through the build process. Once he'd told me the frame was built I had no contact for a few weeks but then out of nowhere he sent me a tracking number & the frame arrived in good time. The build quality is pretty good, all of the welds are perfectly acceptable. Better than mine in alot of cases! If you go for horizontal drop-outs, he offers a wee welded on pair of tensioners. These wouldn't work with a freewheel on my DMR hub. I had to go to front freewheel and a fixed screw on rear sprocket because it doesn't protrude out over the axle where the tensioner screw was to touch. The clearance on the chainstay & seatstay wouldn't allow me to run a 24t Middleburn chainset either (the chain fouled the frame), so again FFW was the only way around it. I had minor problems with an ENO fouling the frame around the BB but I think that's normal for any FFW & ENO, right? If you need to know anything else, send me a PM. I can get you some snap shots of anything you're concerned about too if you'd like.
-
You riding big wheels or little ones? I run 18/14 on big wheels but I think 18/15 seems to be more popular
-
Screw Extractors can be bought in any hardware place for relatively little money. All you have to do is drill out the centre of the bolt & insert the reverse threaded cone. As you turn the tool, it gets more & more stuck in your dead bolt. Then when it's good n'n tight the bolt will start to thread out of your lever body (or whatever it's stuck in).
-
Nah, don't use a bar. You may damage the flanges of the star. If you use a long M6 bolt threaded right into the star nut & hold it straight as you tap down it will work perfectly.
-
How Do I Remove The Startnut From My Forks?
darrenhopper replied to Guantanamo's topic in Trials Chat
Brute Force & Ignorance all the way! Make sure you've a spare & then bash it. Unless your steerer is aluminium.... -
+1 for this! A good weld will make the strongest possible join to the sprocket and will heat it up well past blowtroch territory without directly heating the hub. And you can use the longest bit of steel you've got lying about.
-
Cost more or less depends on who will do Aluminium welding near you. Any engineering place you can find should either be able to do it for you or at the very least tell you who is tooled up for the job locally. If there's an easy going crowd it's often quite cheap (or free). But for a quick weld I wouldn't expect to pay more than 10 or 20 blips. As far as strength is concerned....... It's just not going to last. You should expect to get a couple of weeks out of it so long as you're not really brutal with frames. I have had a few Alu frames tacked back together now and most every time the cracks just move along the chainstay until there's just too much weld, not enough bike & you replace it anyway. Still though having a bike for a fortnight has to be worth a tenner, right?
-
Message sent. Cheers mate.
-
Morning gang, I've a question to put to all you who have already been through the Marino ordering process. Story so far... I odrered a Marino frame & fork a little over a month ago. Once I'd been sent the photographs of the frame I sent his payment, as I understood to be the norm. The Western Union crowd say the cash money was collected too. Since then, a week ago now, I haven't heard a whisper in response to several e-mails. I haven't been sent the final pictures or any of the fork & there has been no mention of shipping, as of yet anyway. I would ring the guy but I'm afraid I don't speak a word of Spanish. Has anyone had a similar run? Or has anyone got a clever suggestion as to how I should go about making contact with Marino? Cheers, D.
-
Yeah man, that bottle will strip your frame & the next 10 frames you decide to do. Apply it with a paint brush, you won't need a whole lot of it. DON'T let it get on your skin. Wait for the paint to start to wrinkle up a bit and remove it with a wire brush. Any stubborn bits can be done again. Be sure to get rid of the paint brush or stash it with the nitromores... wouldn't do to try using it for painting something afterwards.
-
I may start saying that I've not had a look inside a Try-all freewheel for space etc. But... If there's enough room it would be qite easy to have your local tool-maker turn both the inner ring & outer ring on a lathe. I would get my hands on an ENO bearing & the snap ring that holds it in place. Measure up for space. And if there's enough of it turn out a square seat for the shiny new bearing. - That should be quite cheap, I wouldn't pay more than a tenner for a job like this. The only possible concern I can see after that is keeping it all dirt free. If you get round to doing it, be sure to post pictures!
-
And then go knacker your knees against the big stack of spacers! Cut It!
-
If you're going to do that, I suggest you clamp two blocks of wood together & drill a relief where they meet. A 4mm or 5mm drillbit should do it. Then when you clamp the hose, it will still grip but will not get squished.
-
Pinched it from a big bottle at the job. eBay has this to offer. Proper cheap. No drinky!! Edit: Won't be of much use on contaminated pads, I replace mine when they get it.
-
Alright, cheers man. Sorry to be asking a heap of numpty questions but I've never given a second thought to the intricacies of any of my bikes. So when I read that a fork is 400mm tall with a 45mm rake, does that mean that my headset line is effectively drawn from a point 45mm behind the actual front axle position... at 72˚(or whatever)?
-
Morning everybody, I'm just about to go and have myself a Marino frame & fork made up & I'd quite like to better understand how to measure up the geometries. For the chainstay length, are the measurements taken from center of the BB to the center of the rear dropout? BB rise, center of the BB to the horizontal plane? Does that plane pass through the centre of the rear dropout? I presume the wheelbase is measured axle to axle but how does one account for different fork measurements? Is there a standard length zero rake fork size used for establishing frame geometry? I should probably mention that I have more than a passing interest in all of this. So far I have built up one chopper (2,100mm wheelbase) & am in the middle of a Downhill rig. So all of this help you are about to give me.... will undoubtedly result in at least one or two trials frames. Cheers, Darren