


greenmeansgo
-
Posts
45 -
Joined
-
Last visited
Content Type
Profiles
Forums
Gallery
Posts posted by greenmeansgo
-
-
Apologies if this has already been posted and I've missed it, but http://hasthelargehadroncolliderdestroyedtheworldyet.com/
For extra geek jokes, check the source code.
if (!(typeof worldHasEnded == "undefined")) {
document.write("YUP.");
} else {
document.write("NOPE.");
}
<!-- if the lhc actually destroys the earth & this page isn't yet updated
please email mike@frantic.org to receive a full refund -->
</body>
</html>
-
02:26 Love the manual to hop up the wall. Smooth!
Impressive riding throughout

-
Ok sounds like you've several quicker options, but I'll certainly look if you've had no luck in a few days. However, I doubt you'll find them on older bikes at the tip, as before disk brakes there was no need for the option to unscrew the brake bosses and they were just welded on to frames (I think).
-
Ok cheers, the consensus has convinced me to ditch the master/split-link that came with the chain, and just join it the old school way.
Thanks
-
Not sure where you can buy them from, but I think I might have a couple kicking around. I'll have a look and get back to you.
-
Try Airwalks. Seem to have thinner soles than many skate shoes, so you feel more through the pedals.
-
Am I the only person who uses space and shift + space to scroll up and down pages?
I'm going to use that short cut now I know about it

I managed to read the comic up to page 23 (really not in the mood to work today). Very informative, but they could have condensed it into about 3 pages for the non-computer geeks.
-
Washers did the job, cheers
Now what's the deal with the special split-link? To use or not to use? Advice/ wisdom would be gratefully received!
-
Hmm.Its weaker! As the 'split-link' has thinner shaped plates, so more prone to snapping...After all, a chains only as strong as its weakest link - so I'd just push the pin back through
I definitely agree with your logic, but I'm sure I read something by Sheldon Brown along the lines of pushing the pin out and back in weakens the join because it's no longer as tight a fit as it was from the factory. And so you should use the split-link that comes with the chain (at least that's how I remember it). I also thought the thinking behind them was for people who like to remove their chain regularly to clean it, so they don't have to break links all the time (I don't come under this category).
Other thing is I've shortened the chain to get good tension, so if I wanted to use a standard link and push the pin back, I'd have to either shorten the chain by one link (doubt I'll get away with that), or replace the split-link with a standard link (which means the chain will contain two pins that have been pushed out and back in again, which is surely worse than only containing one).
So what's the consensus on split-link strength/ what I should do? Confused now

-
Genius.I've also got a kmc 710 on a rear mech. As said already, you could put washers either side of the jockey wheel, but however i just removed one of the cages, then used a bolt to tighten it up. Seems fine, nothing has bent yet, and it saves some weight!
Yeah, probably also called that. I mean the link that comes separate to the chain when you buy it. It has one outer link plate with two pins, one outer plate that slides over the other end of those two pins and a clip that holds the second plate to the pins.Master link as in the split link?You could take that link out.
Isn't this link supposed to be a stronger way to make the chain than pushing a normal pin out and back in again with a chain tool? I'd rather use that link and modify the rear mech I think.
Anyway, thanks to everyone for the help and ideas
-
Thanks - I'll give that a go (there's not much thread to play with on those bolts, but probably just enough)
*feels like an idiot for not thinking of this obvious solution before posting*
-
I've just put a bmx chain on my bike to complete a single speed set up, and I want to use my rear mech to tension the chain. Chain is a KMC Kool 710, and the rear mech is Shimano STX. All very nice, the chain line is ok, but the master link won't run through the mech.
I've bent the cage out a bit around the jockey wheels by removing the jockey wheels then using pliers, but the section between the two jockey wheels is a right git to bend and this is where it still catches.
Has anyone already successfully done what I'm trying to do? Any tips on how to do this without breaking things would be great.
PS: I've already tried to just "man up" and do it, so any other suggestions?
-
What's the reason you're not allowed? I'm guessing it's some combination of your dad being worried about your safety when using the angle grinder (slipping, shards of aluminium going in your eyes etc), or your safety from riding with what he perceives to be weakened rims. Or maybe it just sounds like lunacy taking power tools to your expensive bike (and it did feel kinda wrong grinding my new rim the other day).
You'll have much sharper braking with a grind (I did my rims for the first time the other day), which will make your riding safer. You're not taking much material off the rim with a grind, you're just roughening the surface a bit, so it won't affect the strength appreciably. Wear gloves and safety specs/ sunnies when using the grinder. There - all your safety issues covered!
Sometimes though you just have to accept that the answer's no when you're a teenager living at home with your parents - in which case check the pad review thread
-
There are two sizes you need to know in order to replace the BB: shell width (the width of the part of the frame that the BB screws into- usually 68mm or 73mm) and the axle length.
Which axle length you need will depend to some extent on what cranks you have, but if you're keeping the same cranks then just replace it with a new one of the same size.
-
Yeah I remember seeing some of that video before. Around about the time I was last riding regularly!
-
I've seen a couple of episodes, and really enjoyed them. He's trying to knock like 80 days off the world record I think. Really funny seeing the cultural differences he has to deal with too.
-
Hmm, wet weather probably isn't too sharp an idea for learning. Might be good if you're looking for that extra challenge, because it really makes you balance properly (else you stack), but I usually find it too slippery to enjoy it very much. You can practise smaller stuff to work on your balance without needing too much confidence.
Practising manuals in the rain last night was good fun though!
I saw a video recently of someone riding in the sleet and snow, so there are people who do it (and make it look effortless).
-
I got a pair of UGP shin pads off ebay for £10. They have a plastic insert that limits shin damage from bear trap pedals - nice. You want something hard in there to stop pins/cages biting through the fabric of the pad when you slip a pedal. As for brands/ where to buy from I have little experience other than the ones I bought.
-
I definitely hesitate for a while. Maybe gain confidence on whatever the move is by practising on something else first, then come back to it. Sometimes I just try to work out what could go wrong - e.g. check clearance by lifting the bike over the obstacle. Watching someone else do it first sometimes helps to gain confidence - i.e. seeing that it can be done.
-
I really wouldn't go drilling holes in components - it will weaken them, and invalidate any guarantee they might have.
-
Rodrigo Y Gabriela
+1
Some of Zakk Wylde's solo album "Book of Shadows" is pretty good.
-
This thread has got me thinking - I've not used Ebay a hell of a lot, but I can see why they've introduced this new policy to protect buyers from big sellers with a few thousand positive feedbacks. I've seen lots of retaliatory negative feedback which affects people with low scores the most. Doesn't the new policy include something along the lines of buyers can't leave negative feedback until a week after the transaction, so they've had time to calm down and sort out any problems with the seller?
I don't think it's a very good policy from the seller's perspective mind, but I've generally dealt with good people on Ebay. My way of choosing who not to buy from is a bit like the T-F validation idea - don't buy from sellers who type everything in capitals, who can't be bothered to write full sentences, take photos in focus etc. Also not to buy expensive items because of the risk involved.
Paypal can only order a refund if there's money in the seller's paypal account (I think?), so holding the money for a while on expensive items seems like the only way to secure this?
-
They are designed for use with special magura mounts on the seat stays/forks. They can also be run on standard V-brake mounts with an adaptor. Why not give the shop a call to discuss what it is you're after?
-
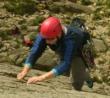
I've been dead keen to get back riding trials, amassing parts slowly to rebuild my bike, but having sprained my ankle rock climbing last night, and now watching that vid of wrists breakingI saw the vid of that in your sig, looks nasty , I'm thinking I should find a safer hobby....only that never seems to be as much fun!
Quick Clip
in Videos
Posted
Onto the table looks good to me. Off was ok but you'll improve balance with practice - there were lots of little hops before you got your balance properly and into a position to drop off. Keep at it!