Private Repress
-
Posts
403 -
Joined
-
Last visited
-
Days Won
56
Content Type
Profiles
Forums
Gallery
Everything posted by Private Repress
-
Thanks 👍🏻 The rims are Mavic D521s that I powder coated black. The tyres in the pic are Maxxis ikon, 2.2 inch. Truthfully they are fine for a front wheel, but I ended up with a Maxxis holy roller on the rear which is 2.5 inch. For me these frames work perfectly with a 90mm stem, so that’s what I went for, with 7° rise. It’s an Easton EA50. Hope that’s helps, good luck with the build! Get some pics up 👊🏻
-
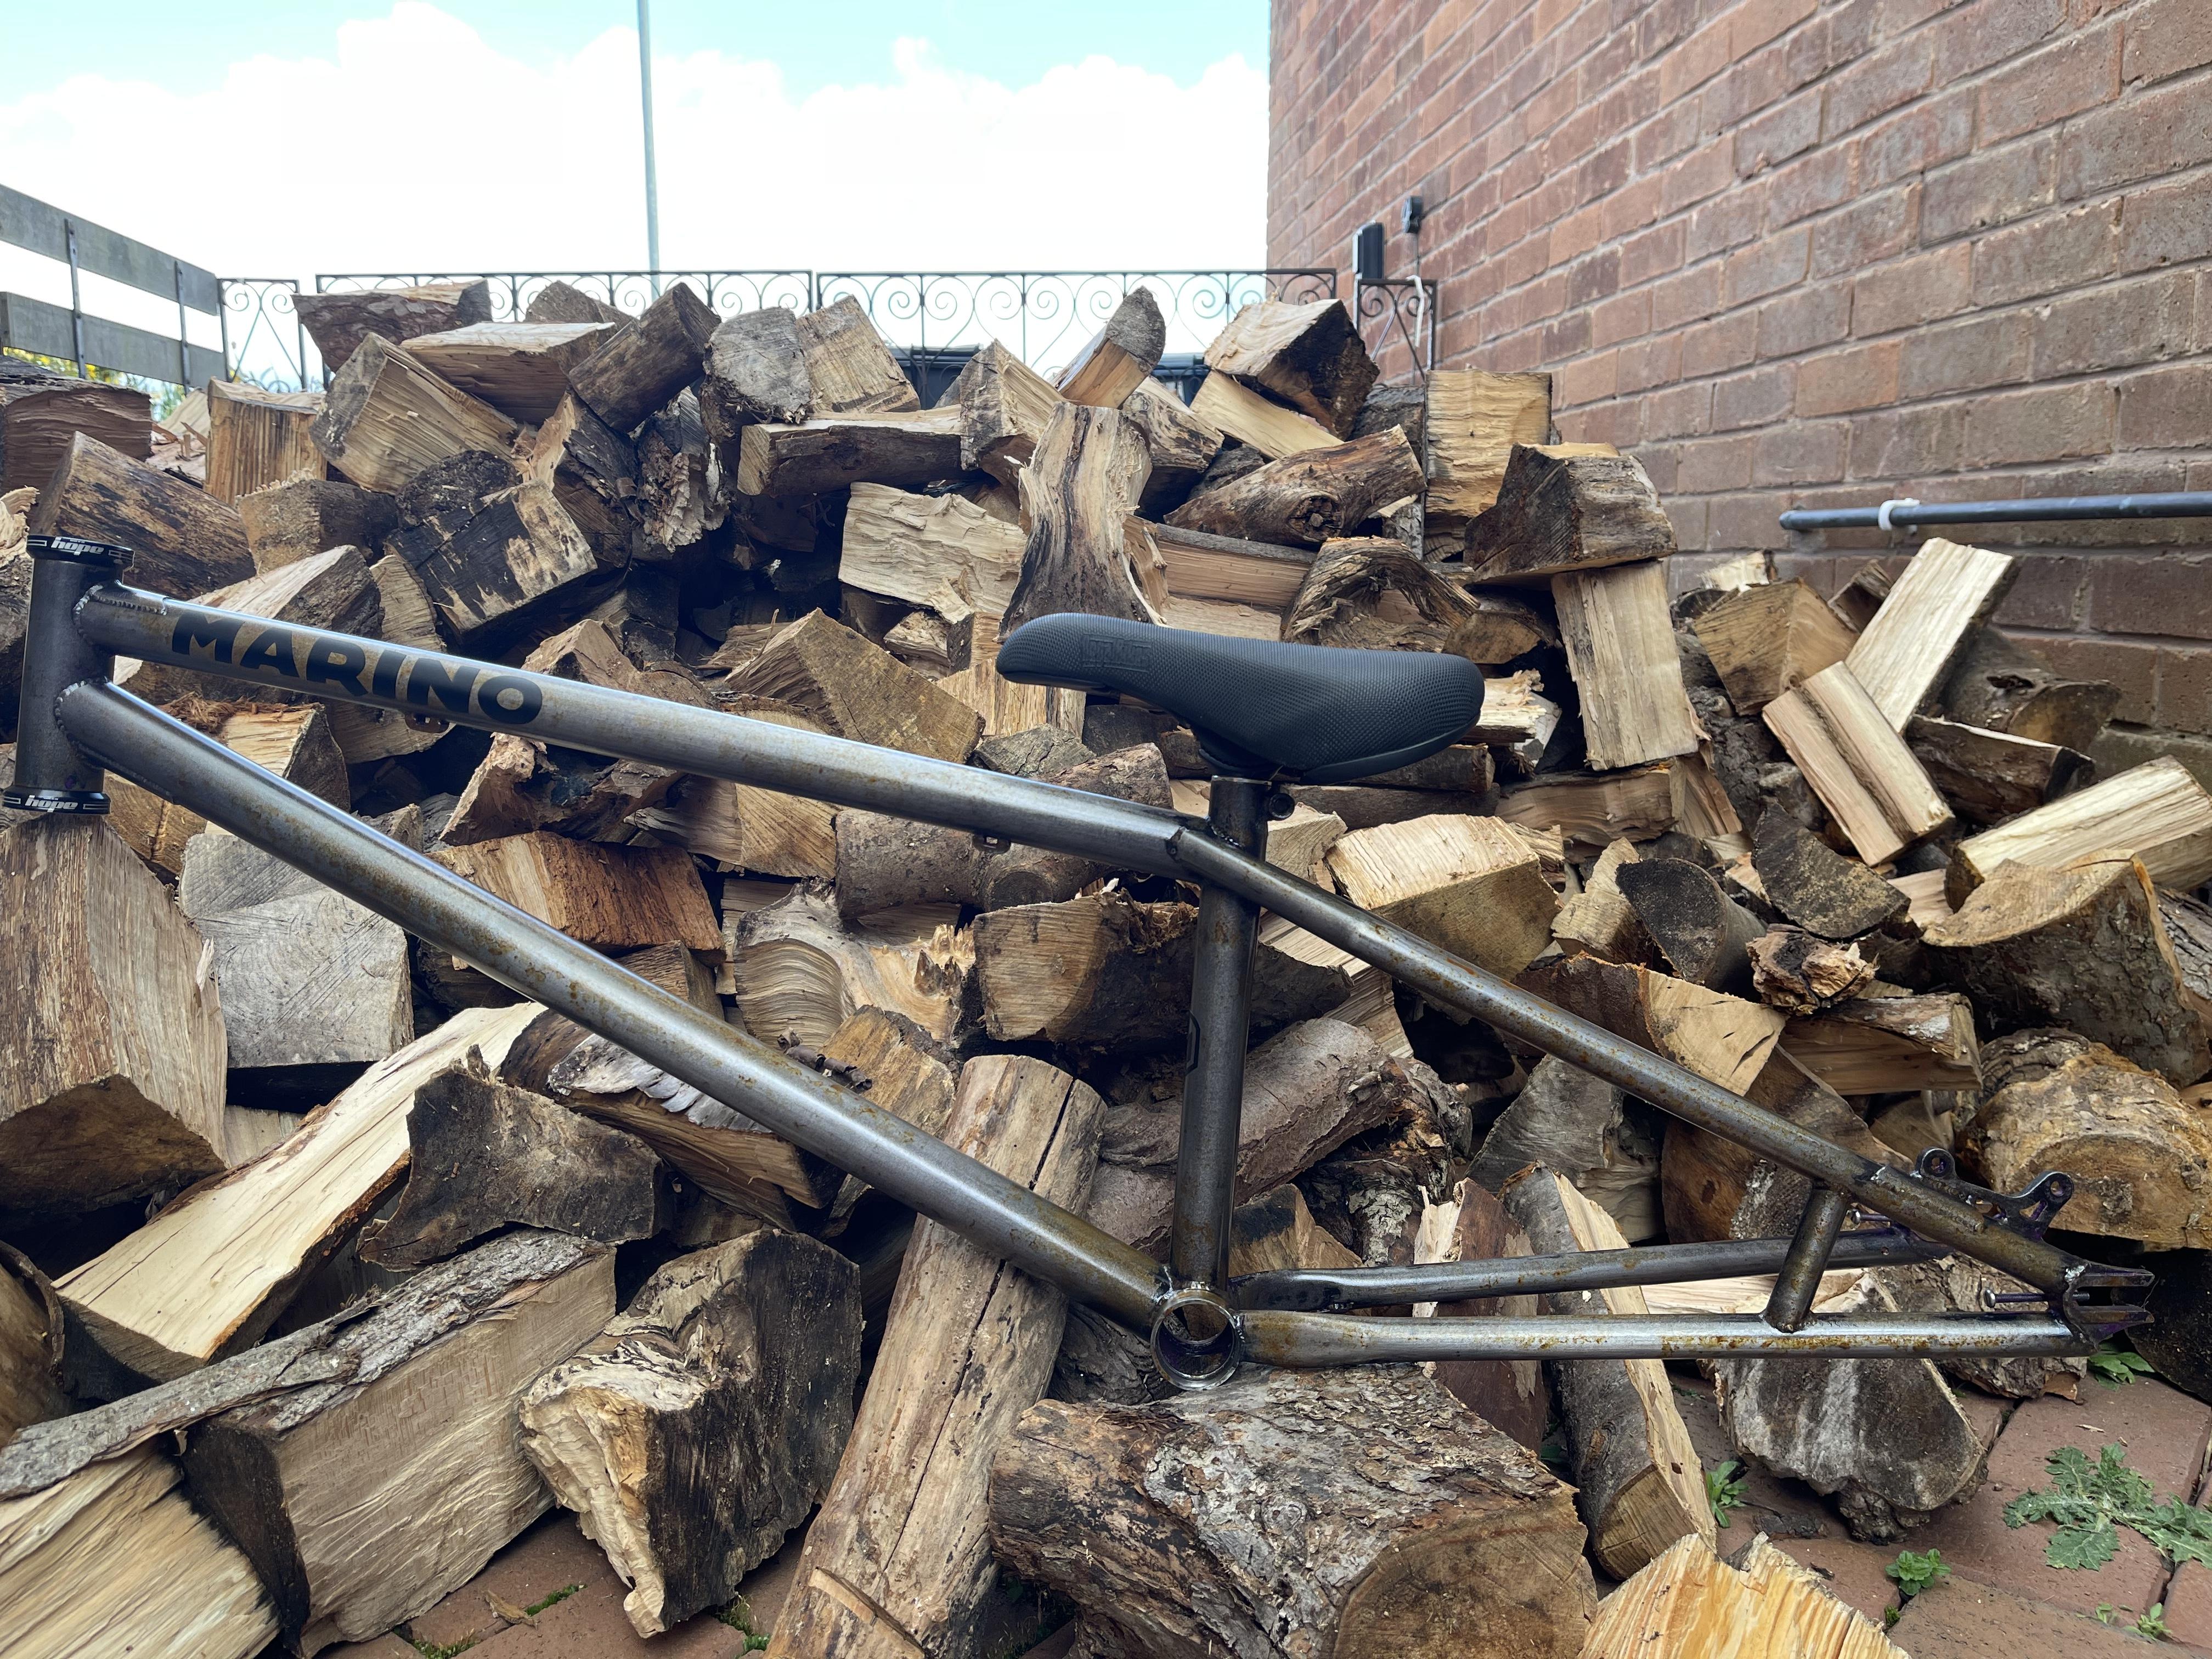
Marino street 26inch build / refurb
Private Repress replied to Private Repress's topic in Trials Chat
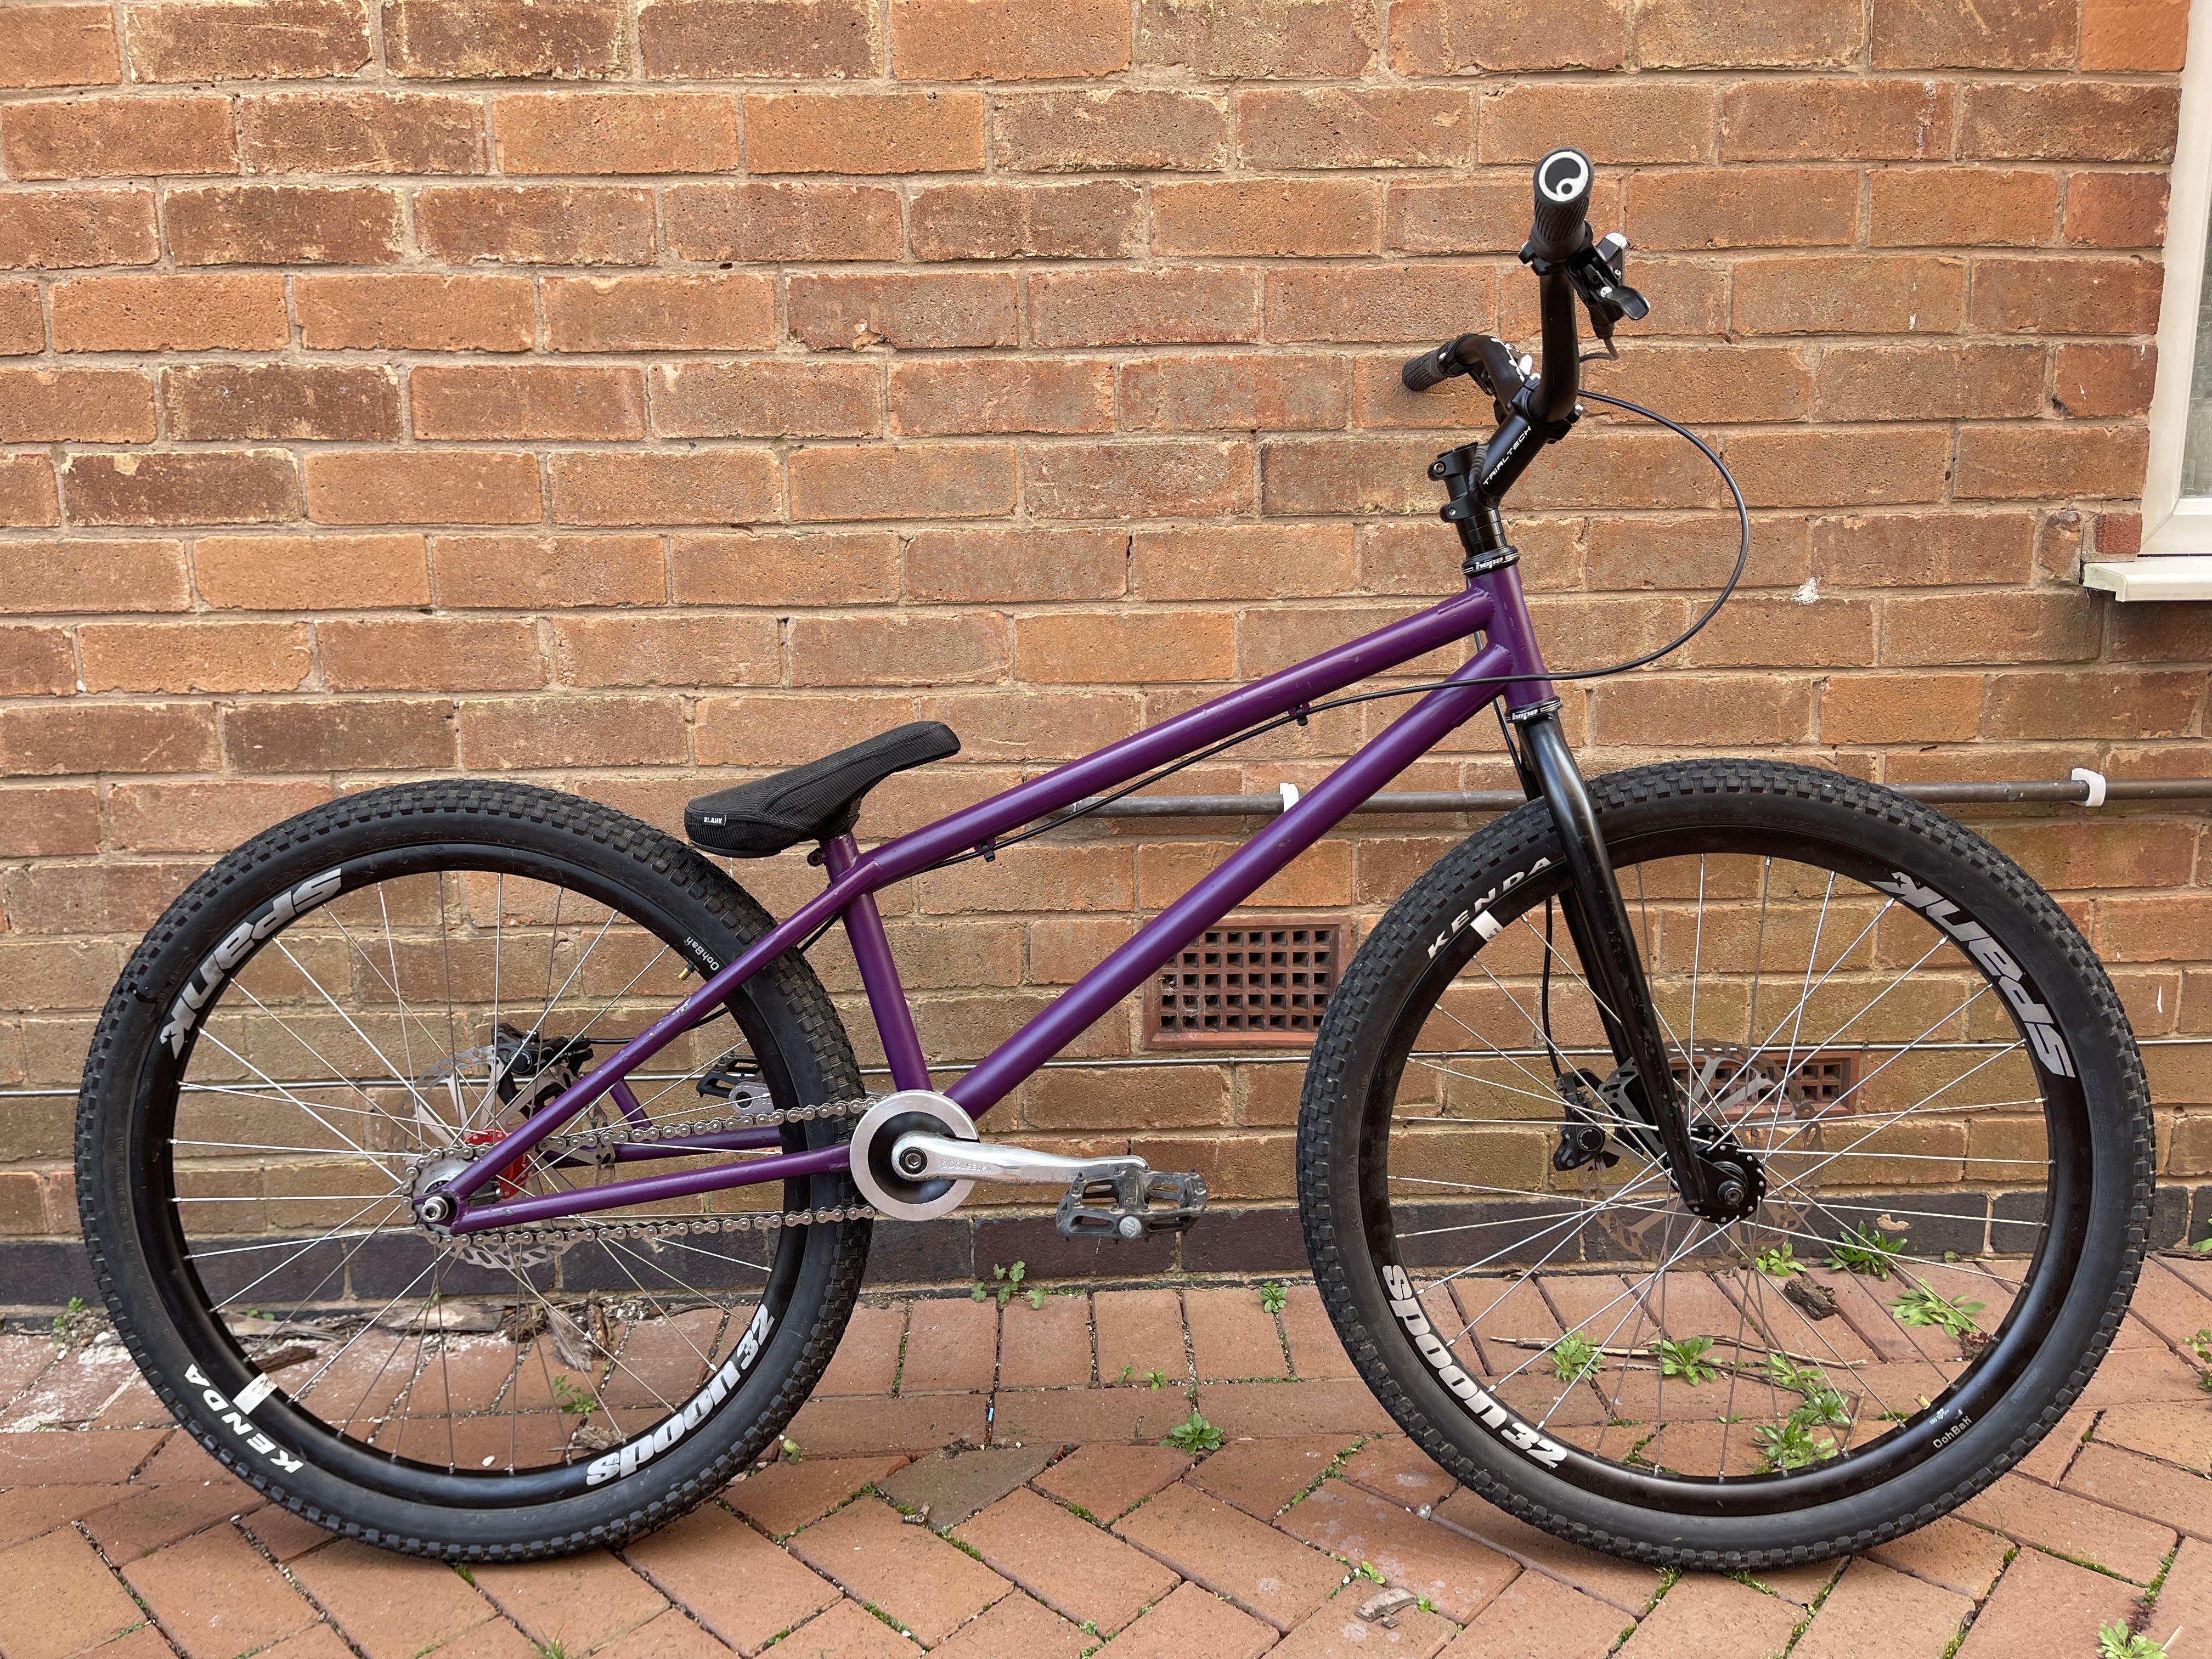
Oh and this is the bike in its complete state before undertaking the work: silver bar and stem to be added, I was running a quill adapter at the time. wheels will be changed to a set of Pro 2s on wtb rims. Cranks will be a set of old RS7s that I used to use on a trials bike, I’ve sanded them down and began to polish them while I wait for a hens tooth 36t 5 arm 94bcd chain ring to be delivered from France 🤦🏻♂️
-
Marino street 26inch build / refurb
Private Repress replied to Private Repress's topic in Trials Chat
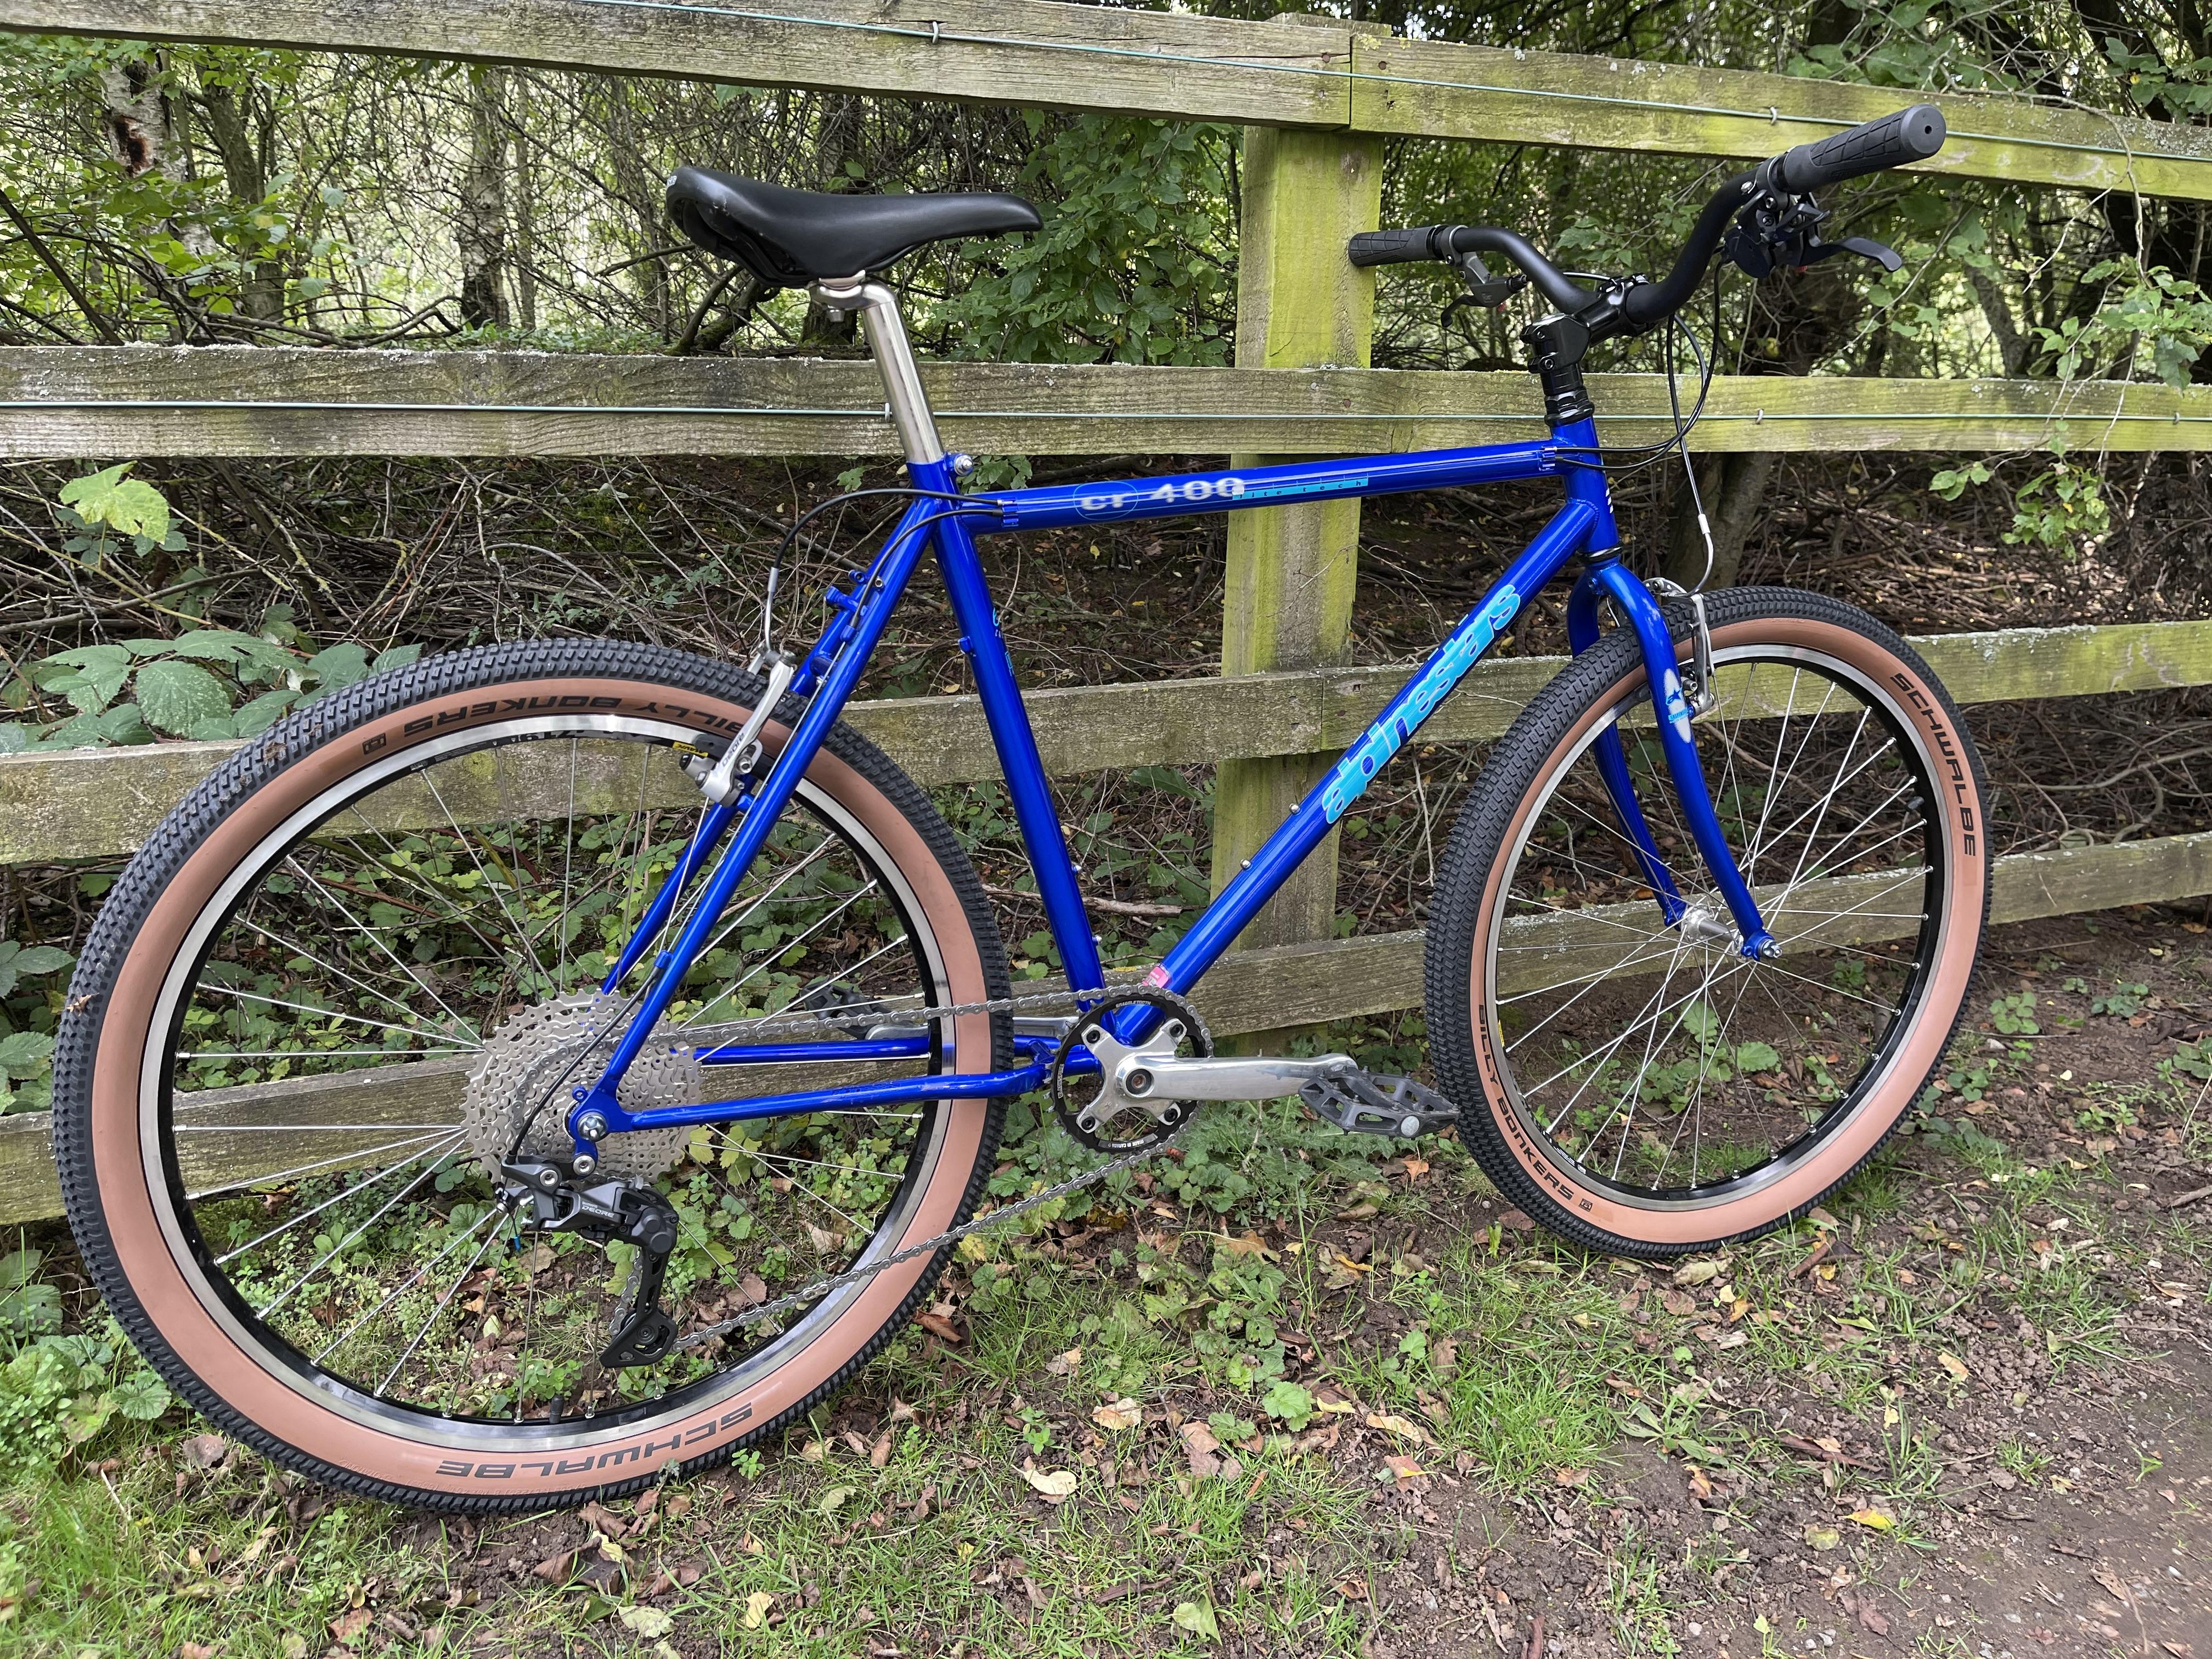
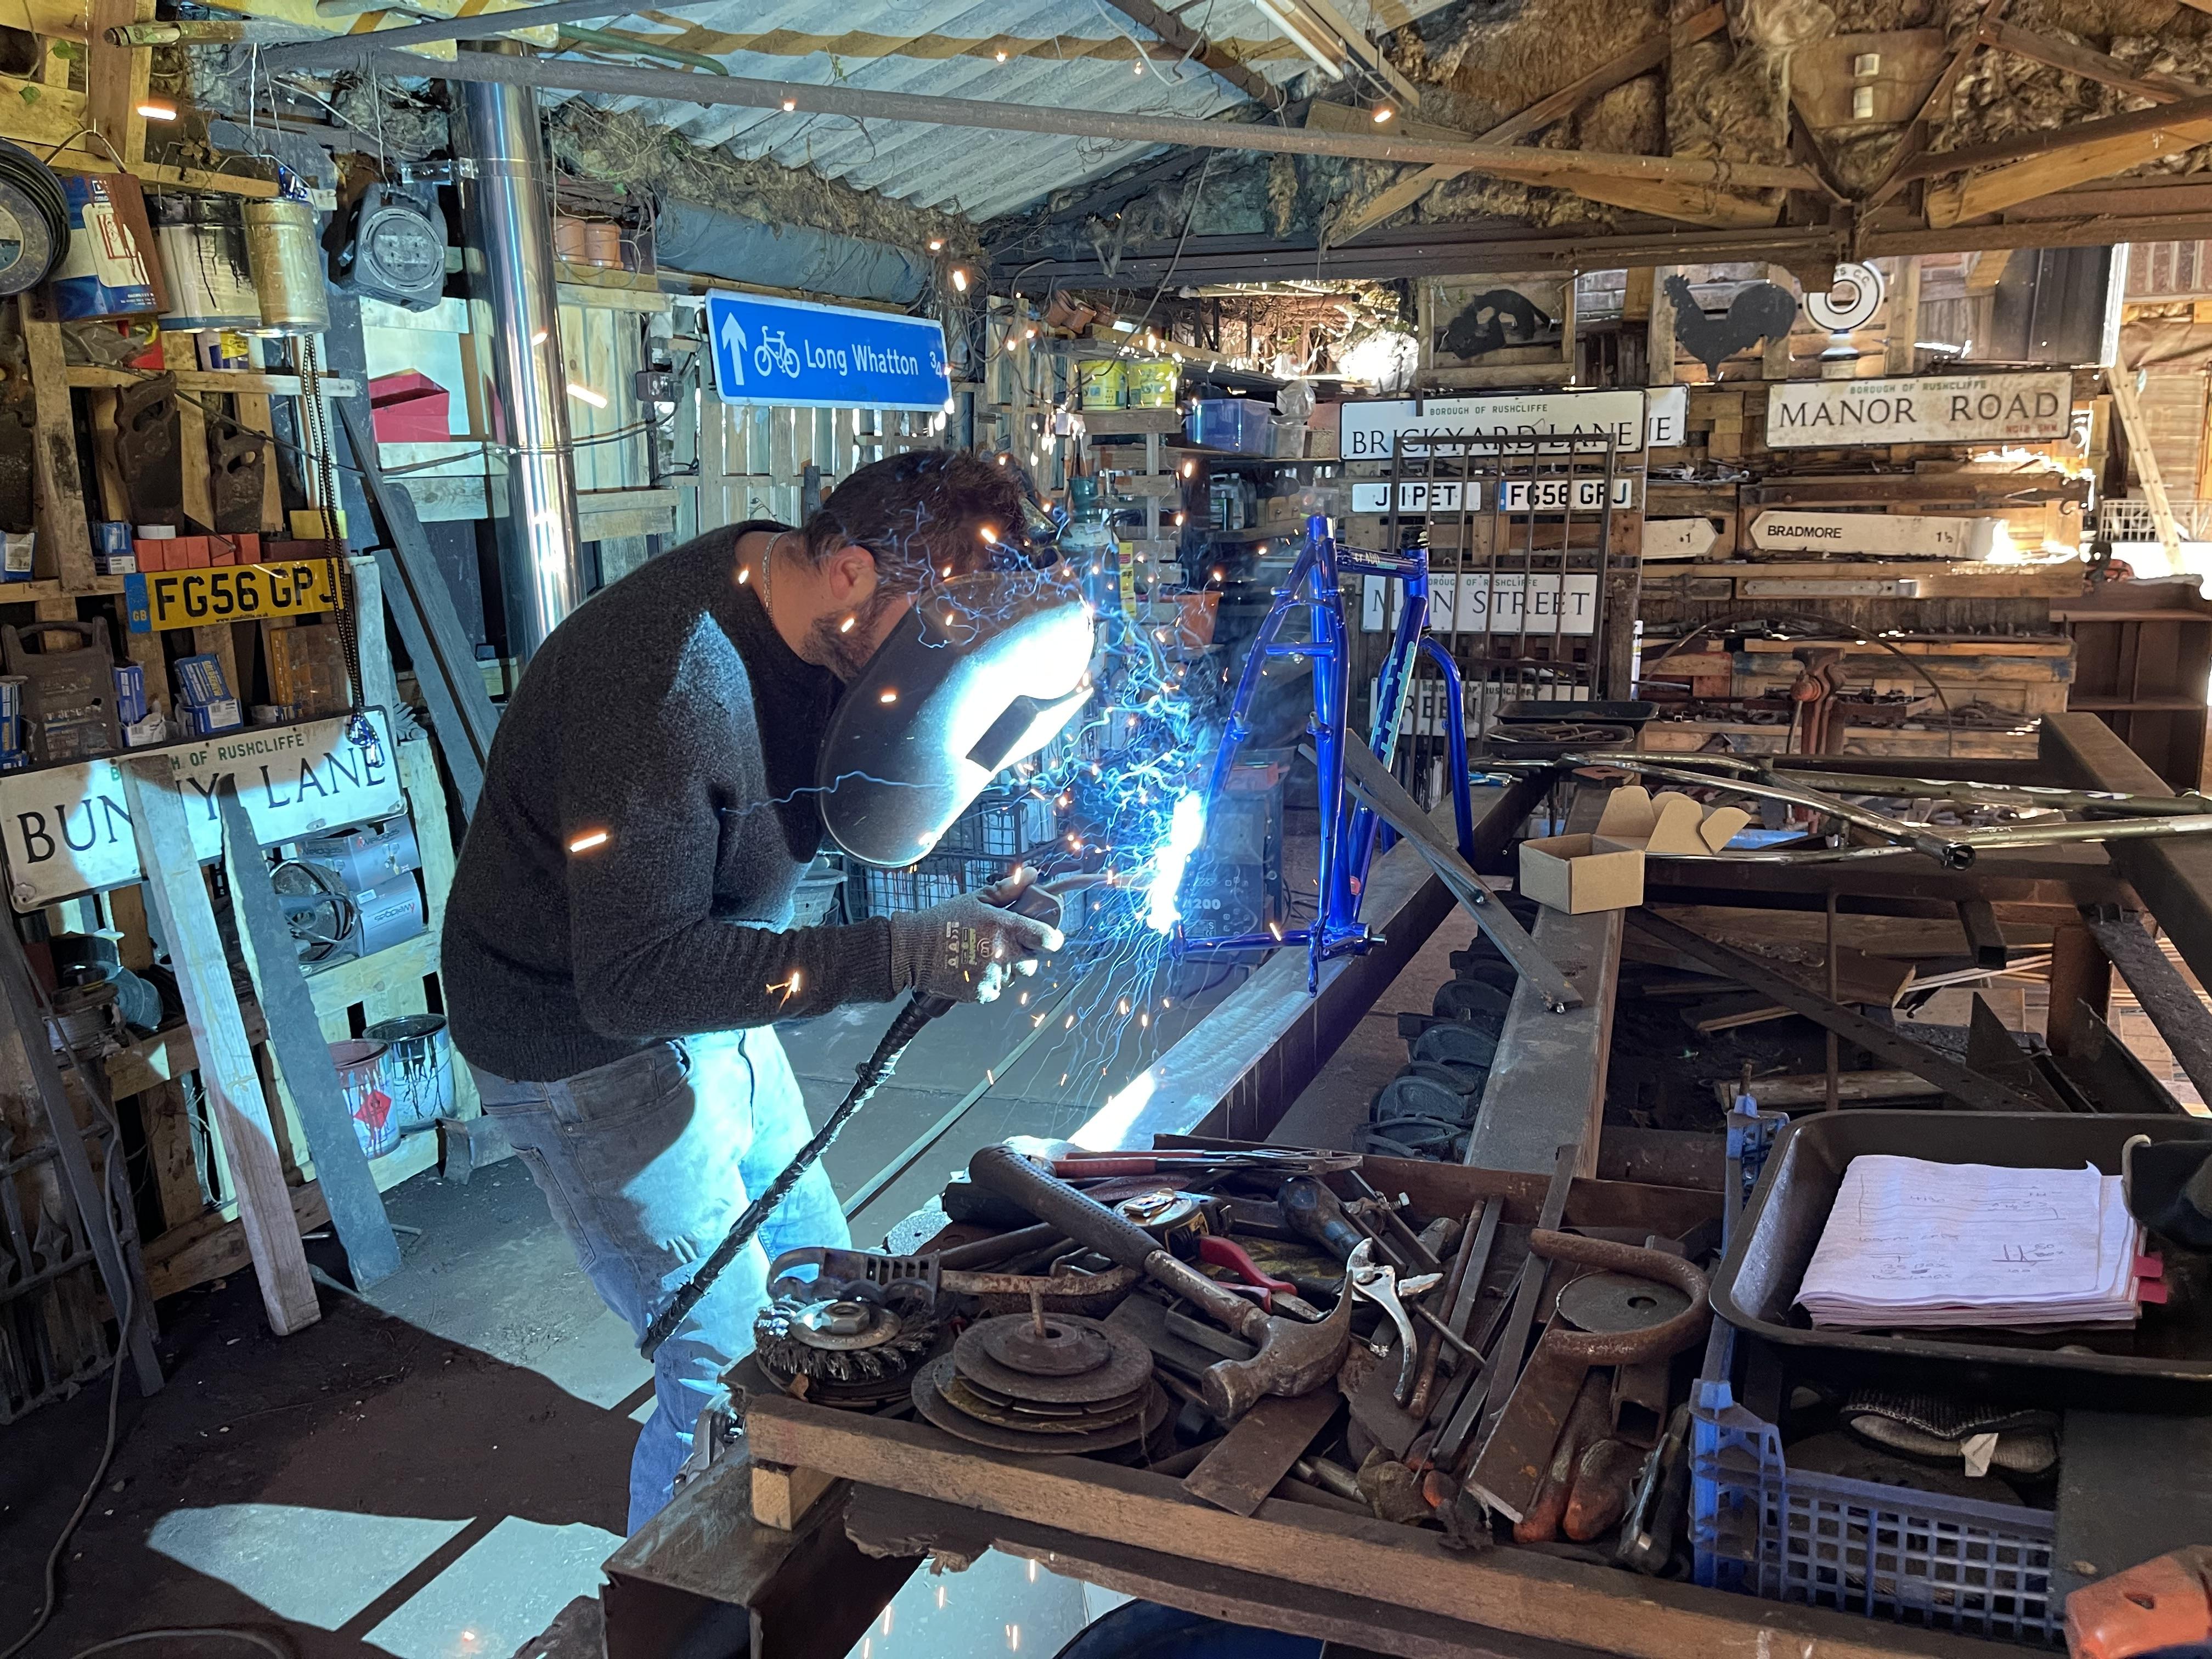
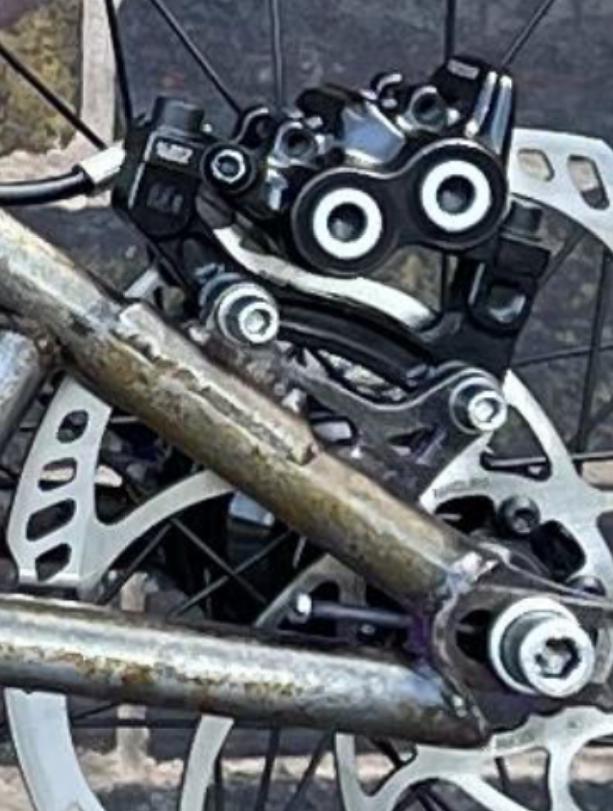
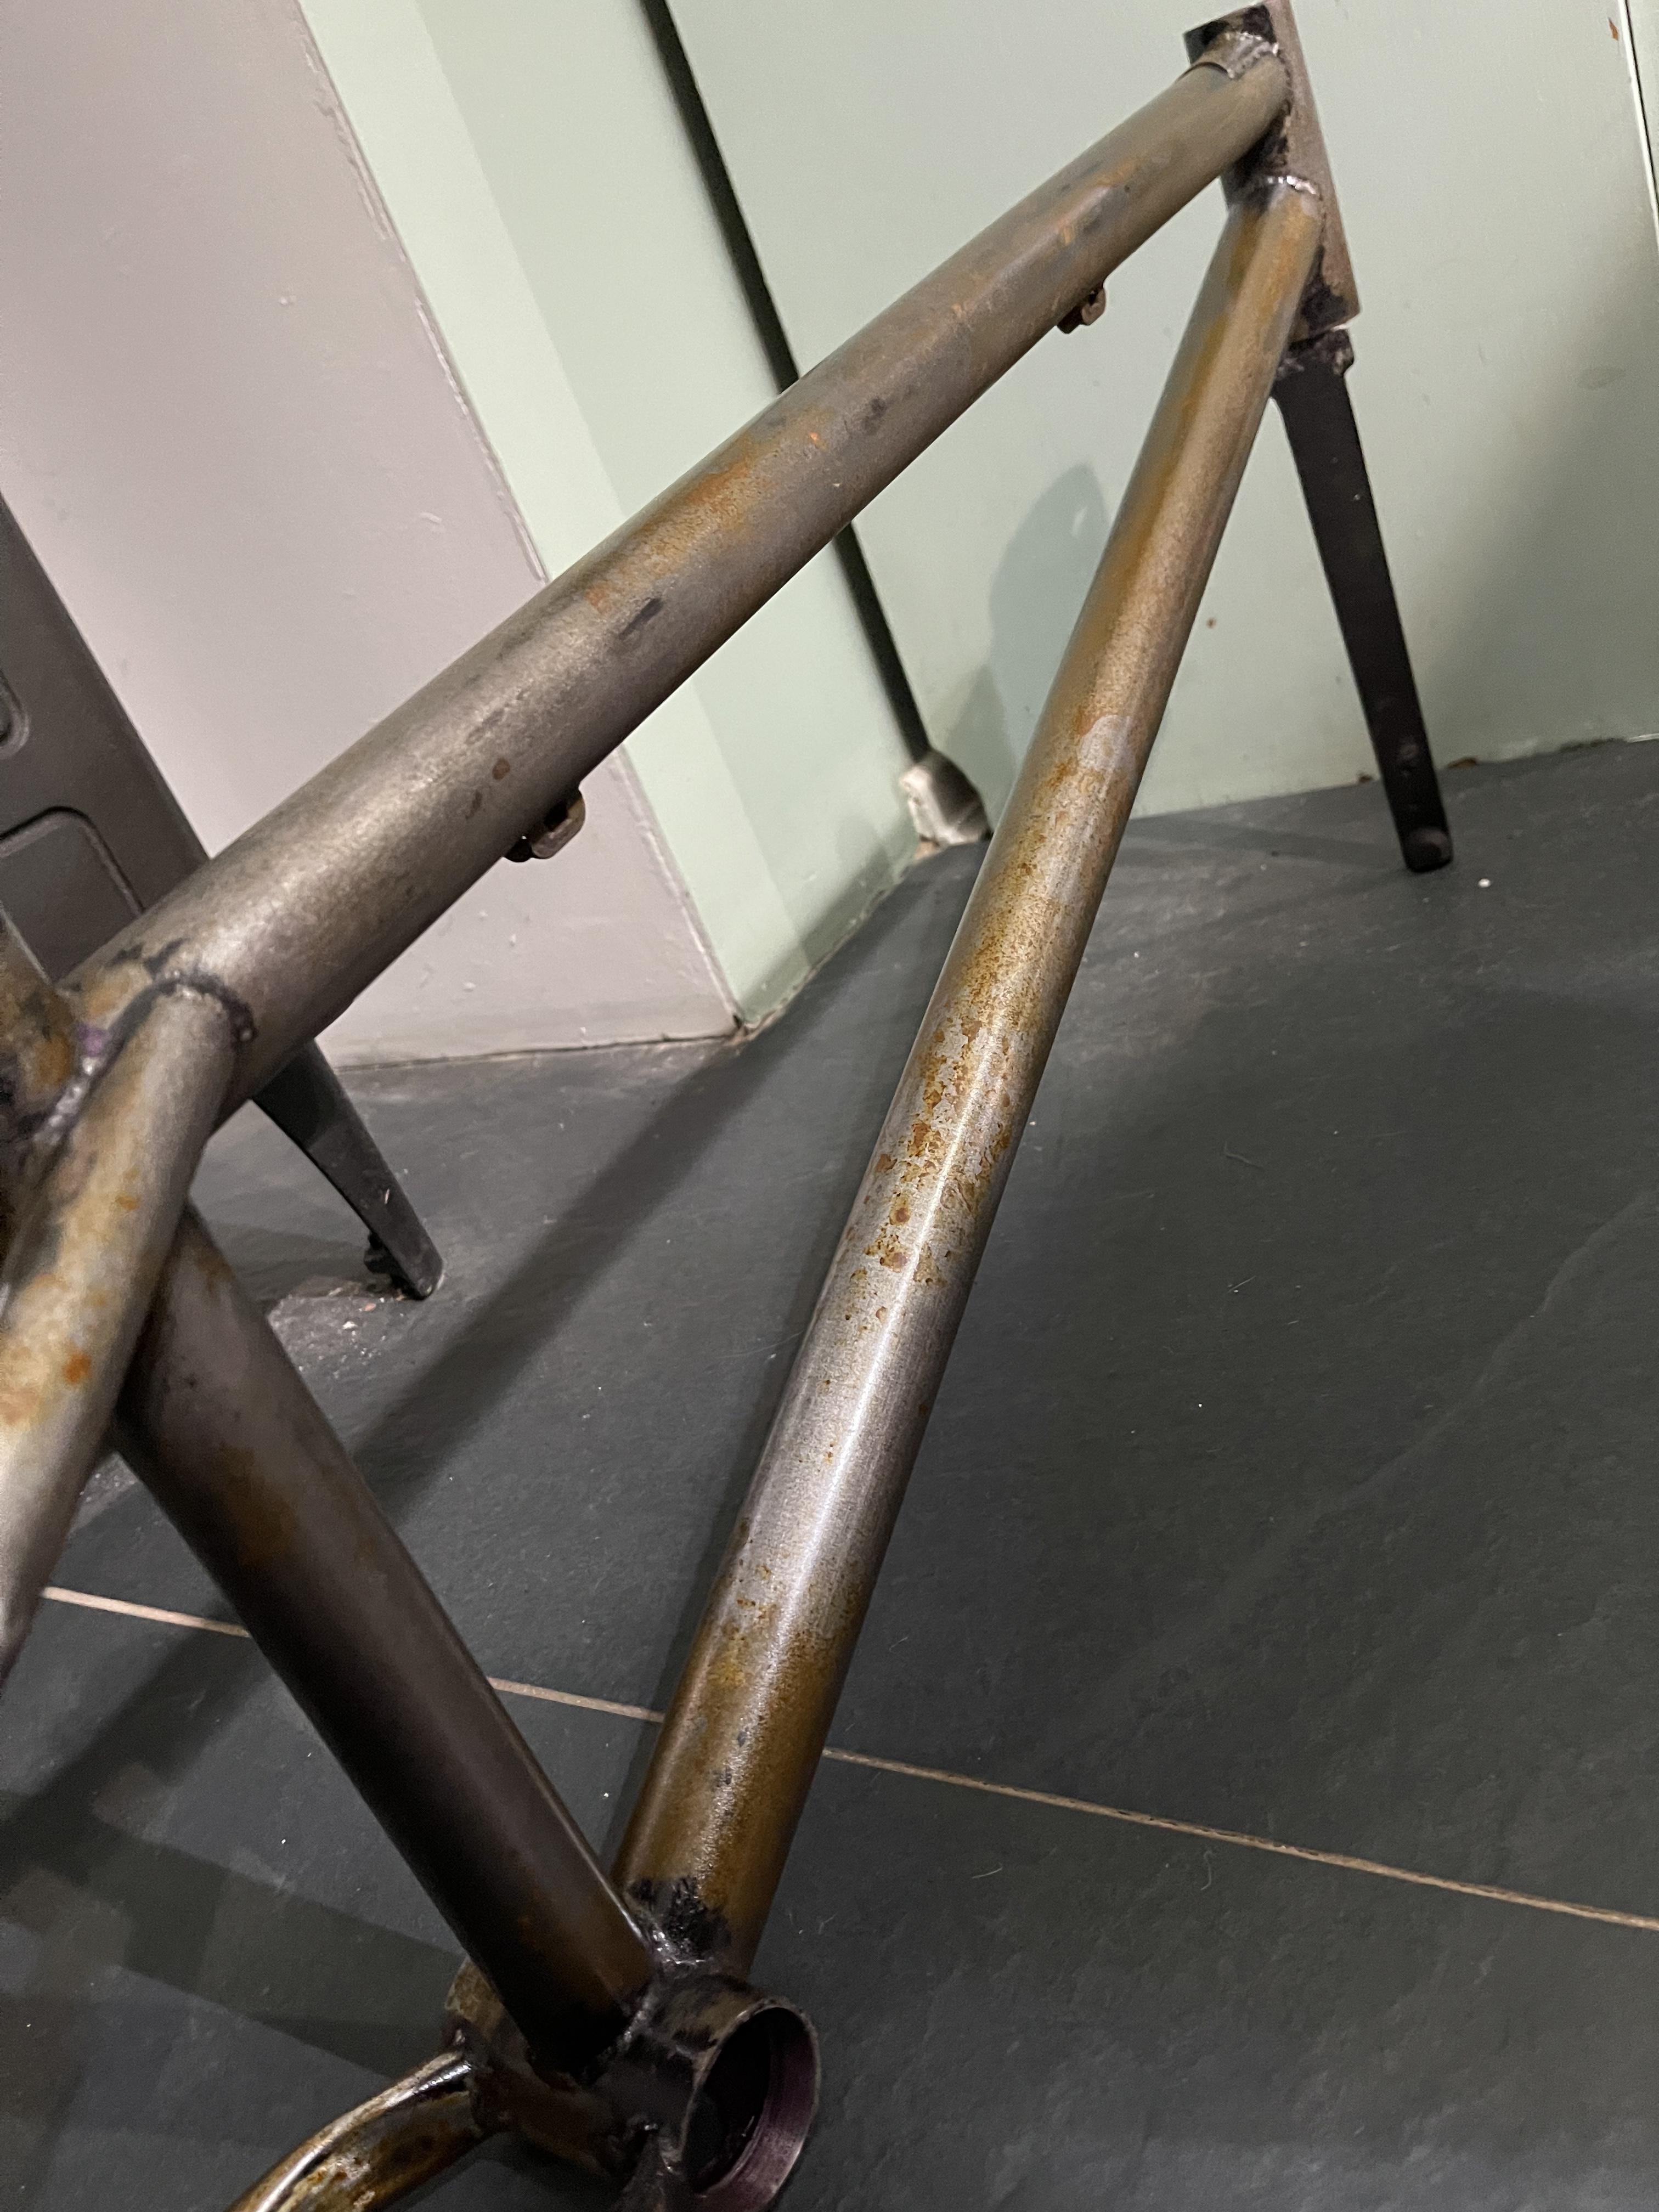
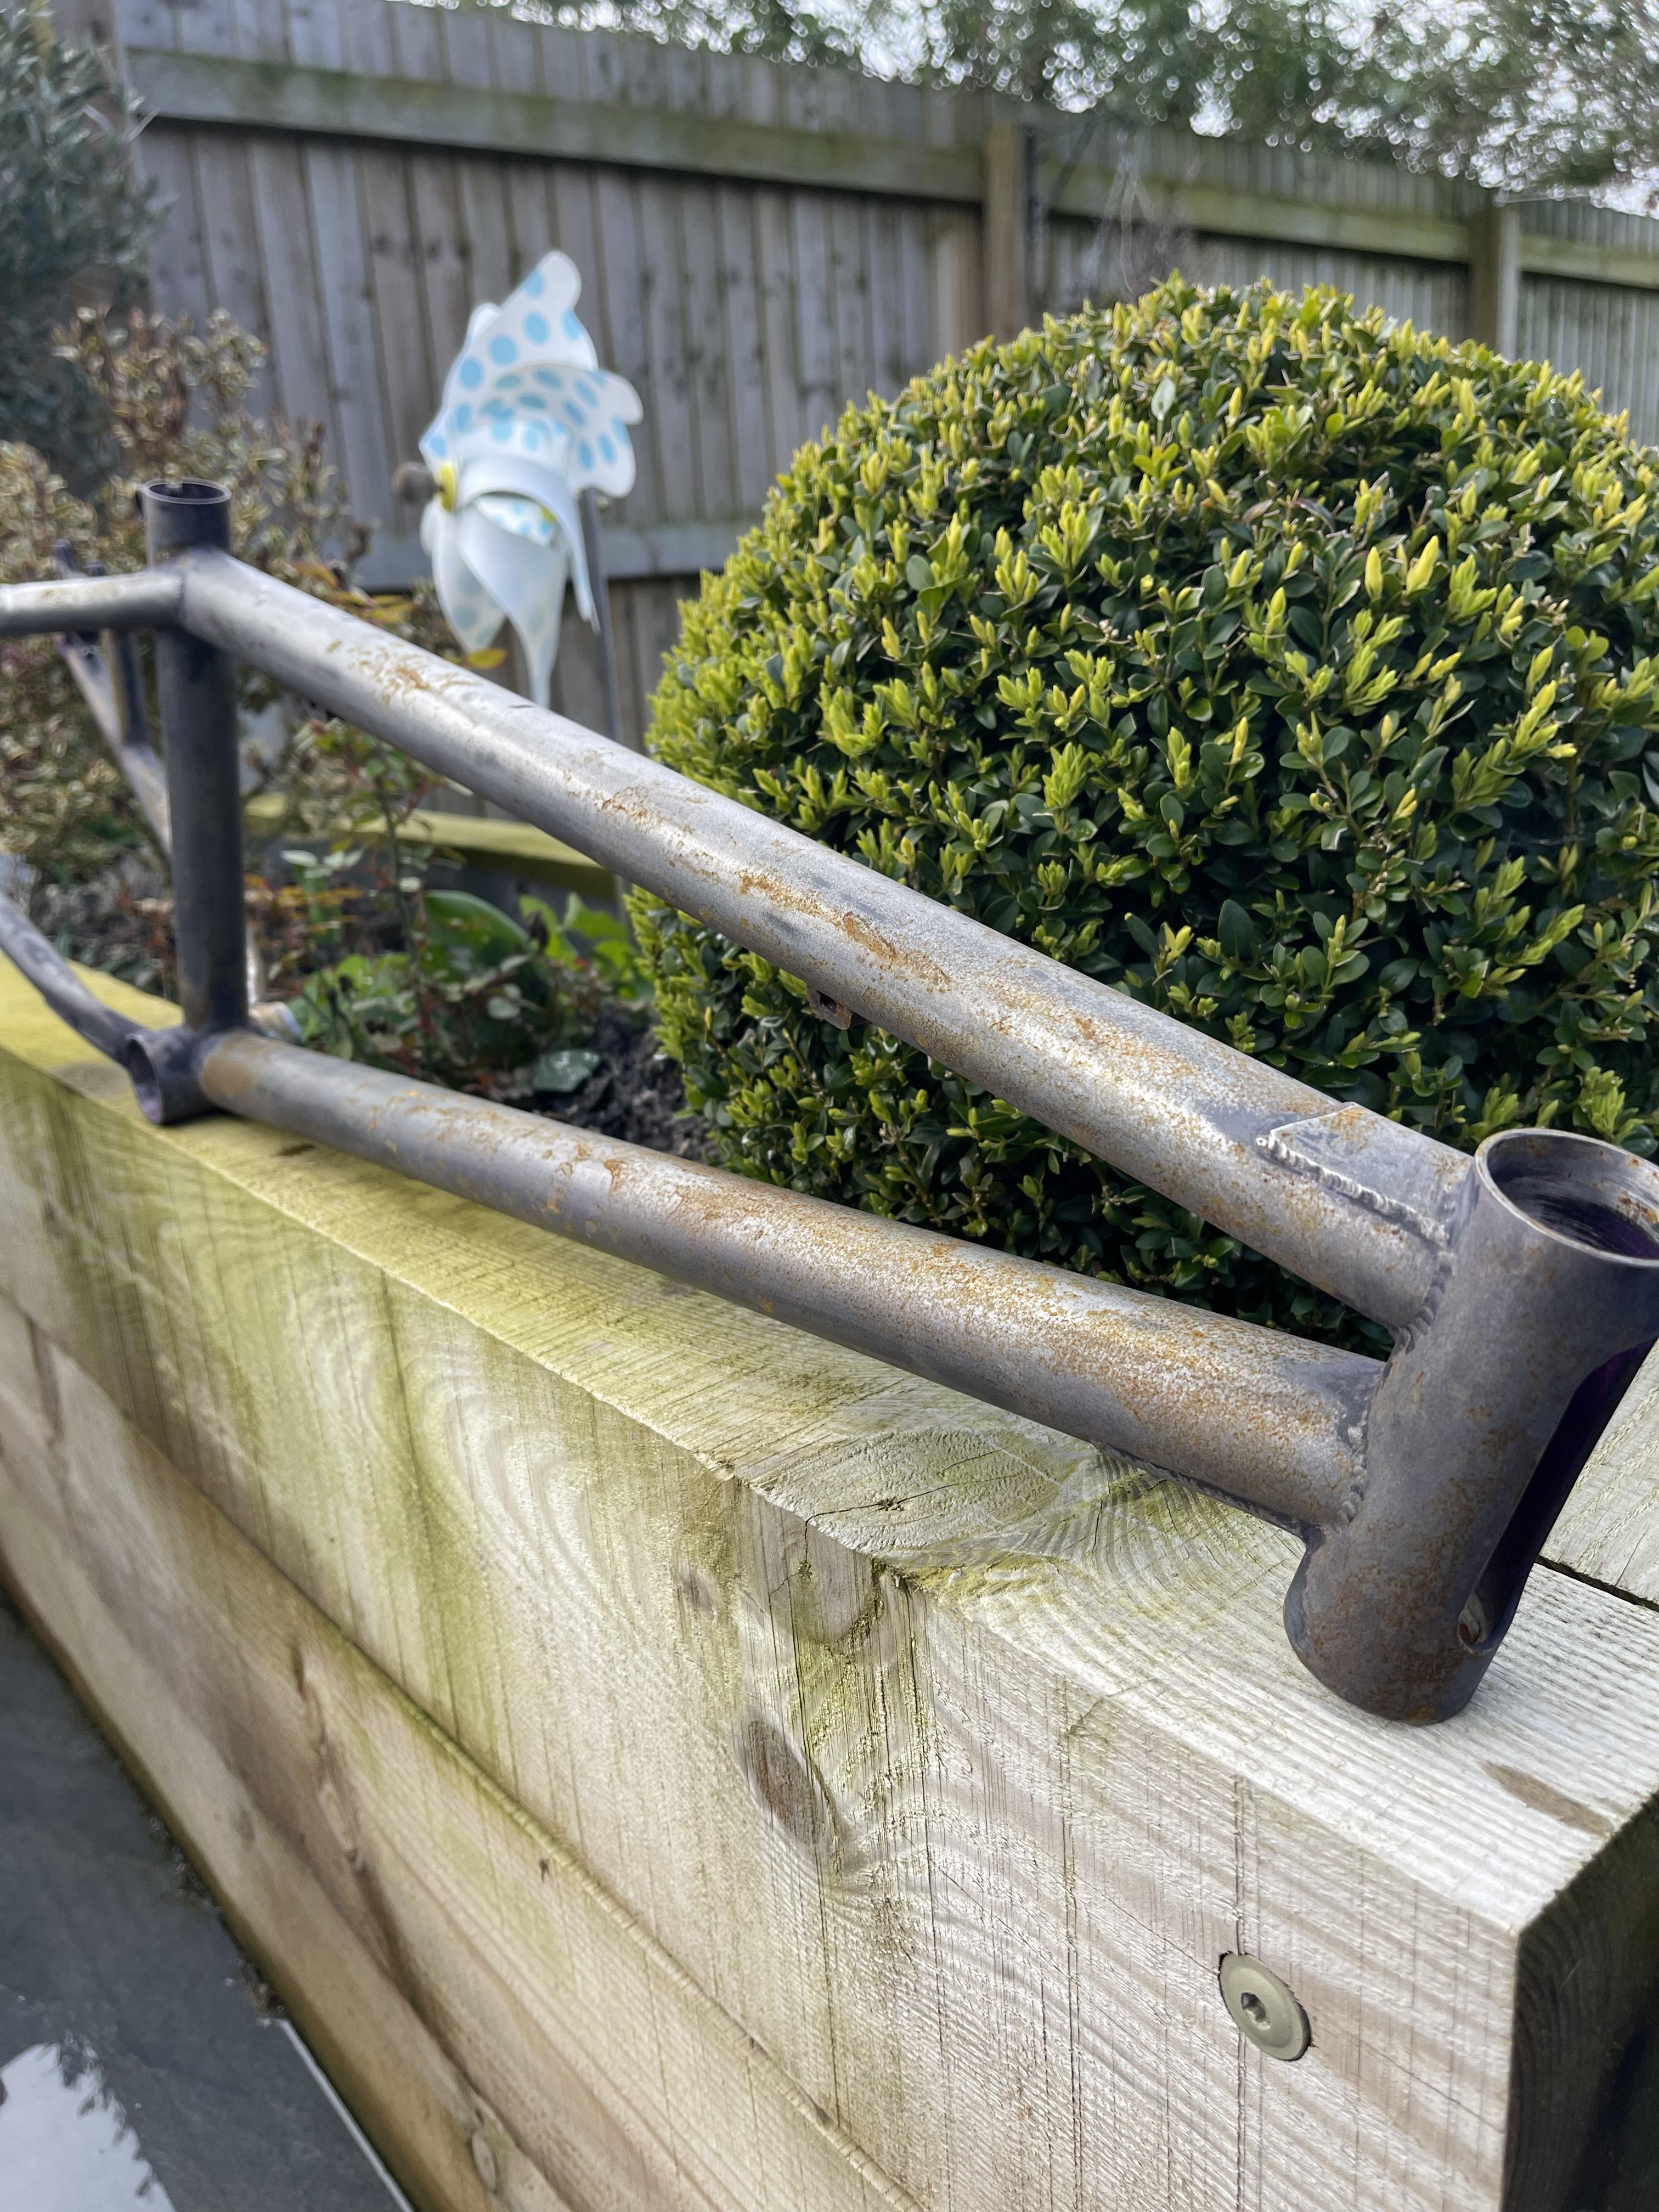
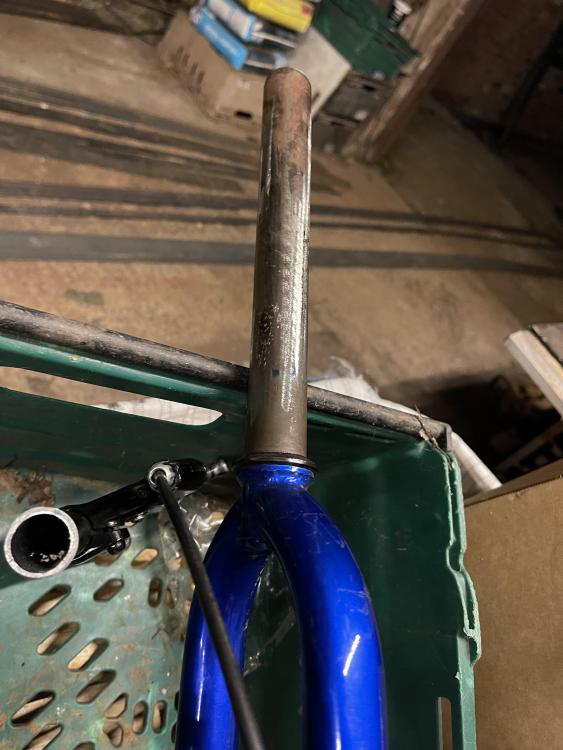
I replied to @La Bourde before I read your comment @Swoofty. You are bang on in terms of how they have improved. I know first hand as I have a 24inch Marino that I bought from them in 2021. The build quality is far superior. I did consider taking the mount off all together and starting again, but at the same time the mate that did the welding isn’t a frame builder, so we went down the path of least resistance and made good of what was already there to save messing about with alignment/creating a new mount etc. I’ll see how it holds out, if it goes again then I may well go down that route. just spent the evening at my mates getting another project sorted. Not trials though, it’s a 1995 alpinestars, I’ll do a thread on this separately, but some pics for your viewing pleasure… Forks… a 2mm plate welded to the back to spread the load of the new disc mount. This is the first time he’s done disc mounts, and I just guided him where things needed to be etc. all things considered I’m really happy with it. Some cleaning up to do which I’ll tackle with a grinder and a dremmel. These were 1 1/8th threaded forks, which we cut the steerer down on, tacked an inner shim to, then extended the steerer to make it threadless: Very happy with the way these turned out. Rear disc mount being added: This was tricky, because the way the the rear triangle tapers in, so it kind of ended up with a little over hang: I’ll build the bike up, check everything is working as it should, then I’ll consider taking off some of the surplus mounts and possibly doing something to fill the gap on that rear mount overhang, before painting.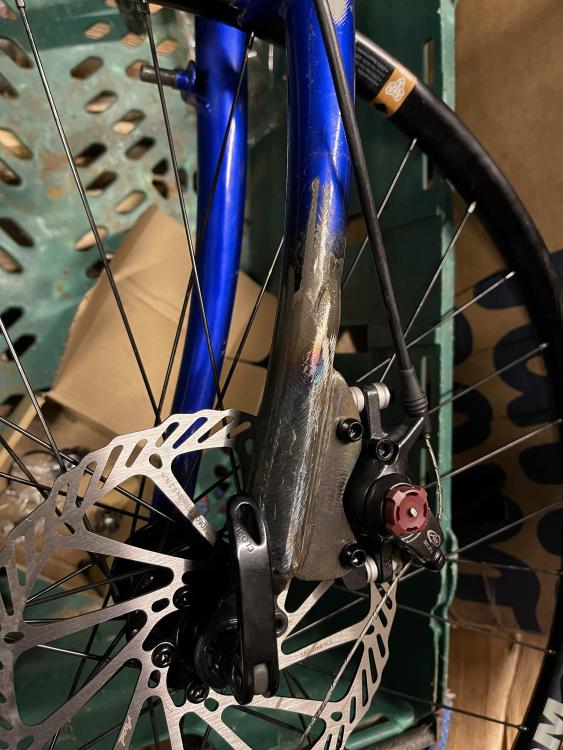


-
Marino street 26inch build / refurb
Private Repress replied to Private Repress's topic in Trials Chat
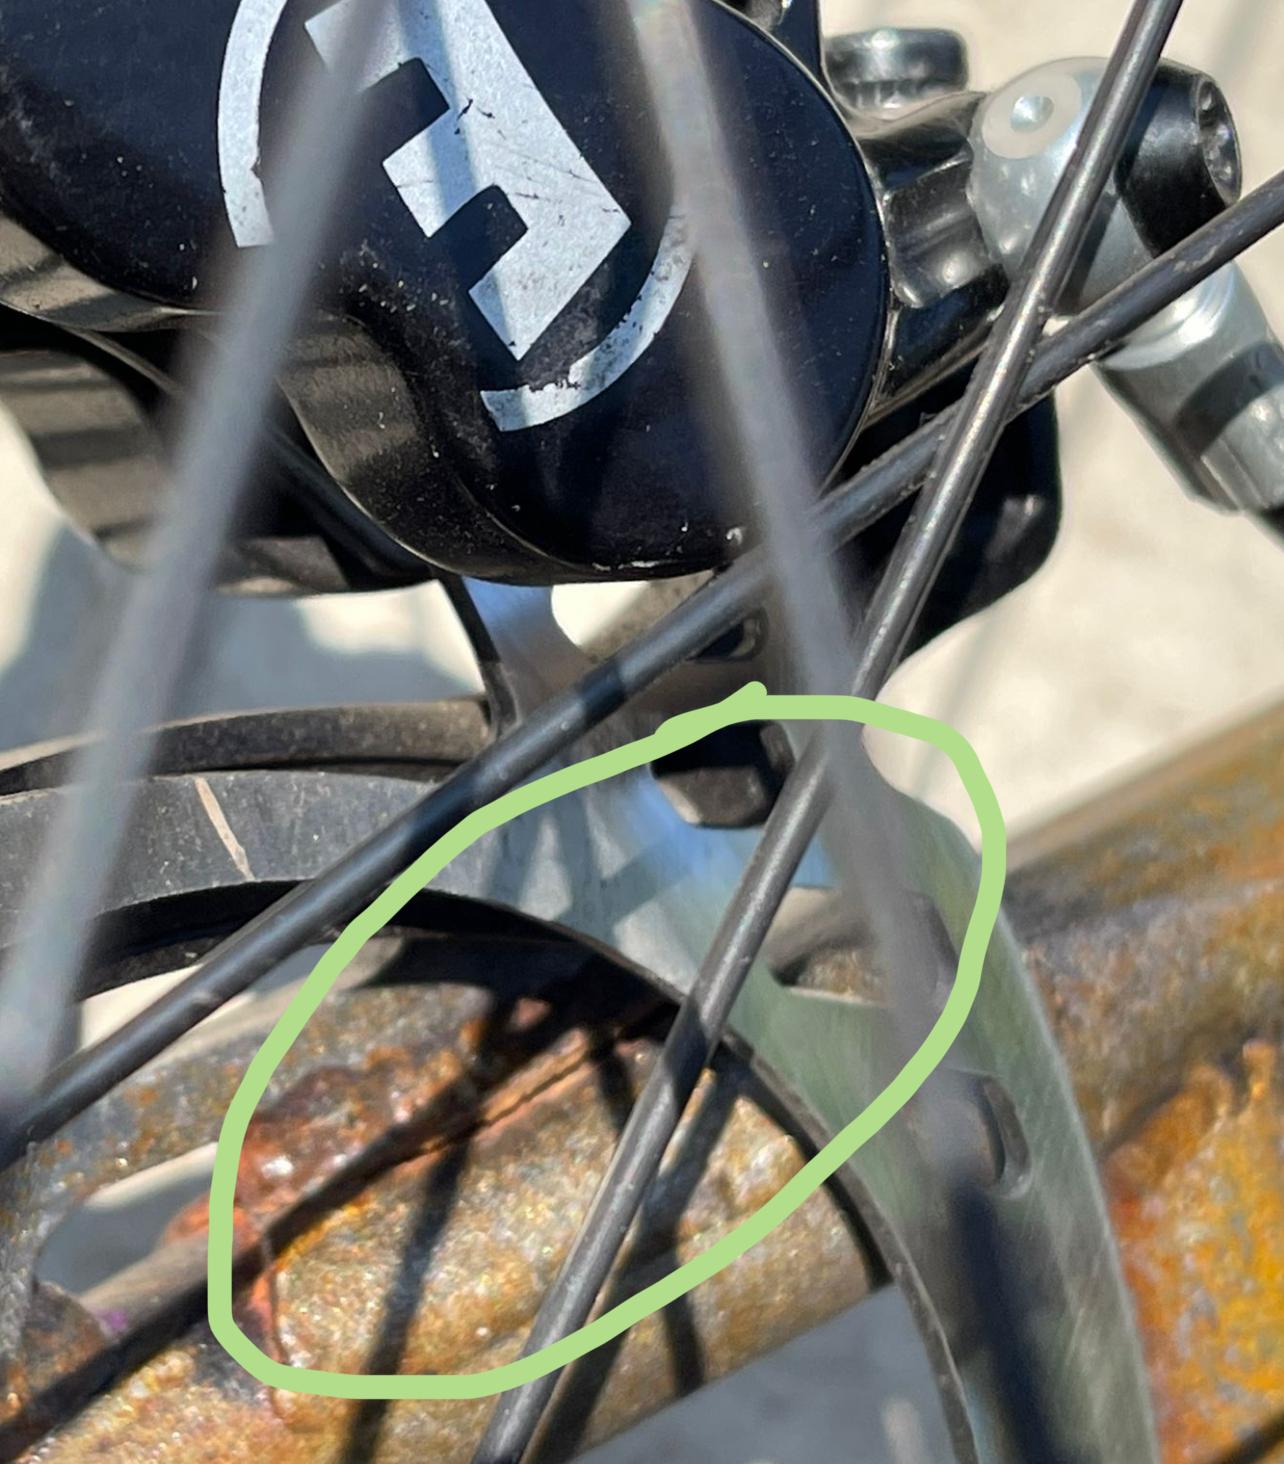
Sadly I don’t, but it seemed to me that the it went on the very edge of the weld, where the mount met the additional reinforcing plate of steel that is welded on to the seat stay (hope that makes sense). In Mario’s defence, this is an early frame that I bought second hand with little knowledge of its use. I’m not the lightest person, but at the same time I’m not a heavy rider. Running 203mm rotors was probably pushing my luck. Still going to run them though 😉 -
Marino street 26inch build / refurb
Private Repress replied to Private Repress's topic in Trials Chat
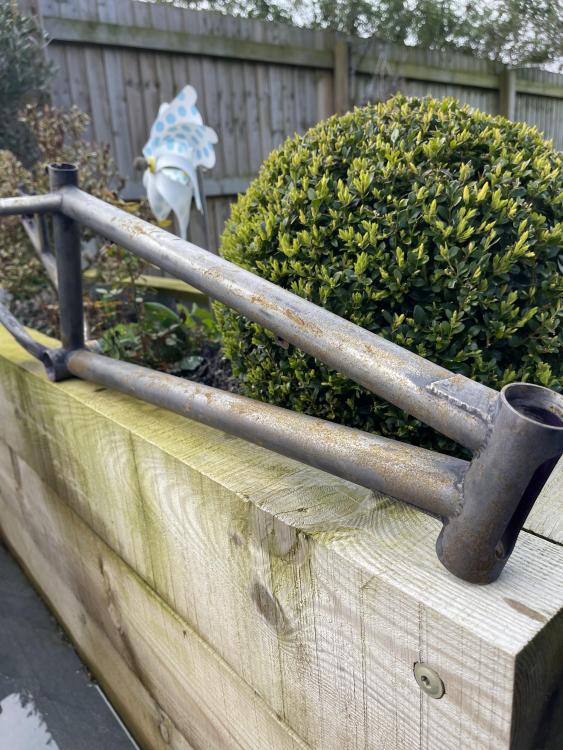
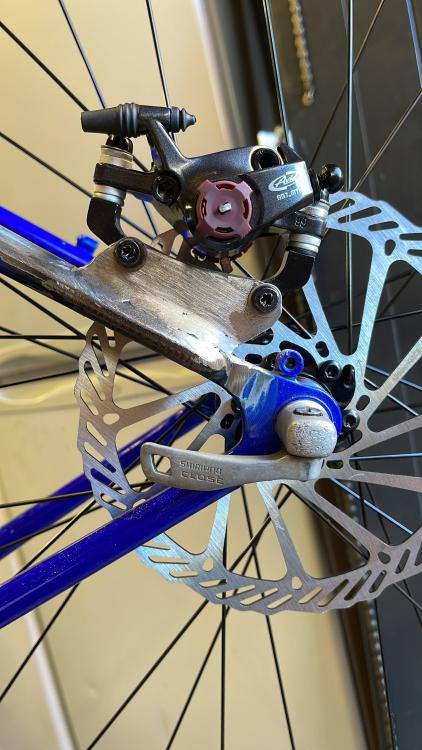
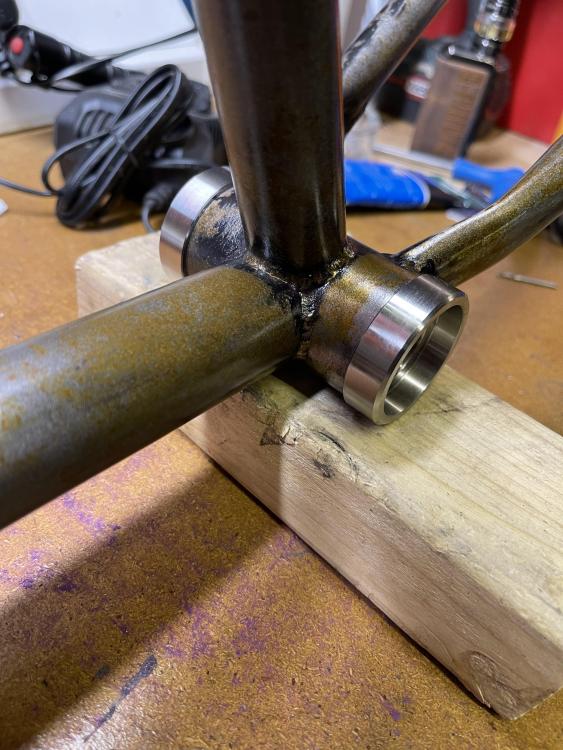
Yes, this is a shot on the inside edge of the mount: To be honest, when I got the bike I thought the mount looked a touch flimsy, and was in the dilemma of do I run 180 or 203 rotors. I decided on the 203s with a view ‘I’ll just get it welded if it snaps’ 🤣 So for the fix, I had the gap in the middle of the weld completely filled, hoping that now there is more contact area to create a stronger bond. Here is what it looked like before: If you compare it to the now welded mount, there is a lot more material in contact with the seat stay.

-
Marino street 26inch build / refurb
Private Repress replied to Private Repress's topic in Trials Chat
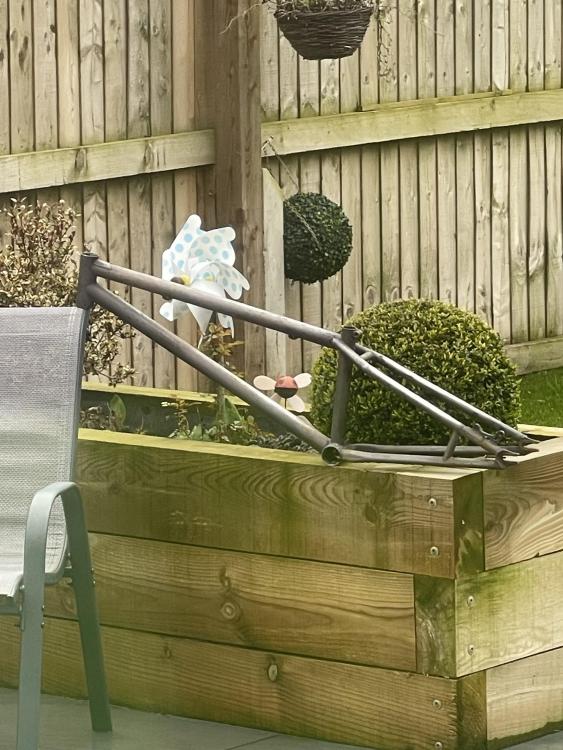
So after a switch to back wheel cracked the rear disc mount earlier this year the bike had been sat in the garage, until today. welded up and ready to ride again 🙂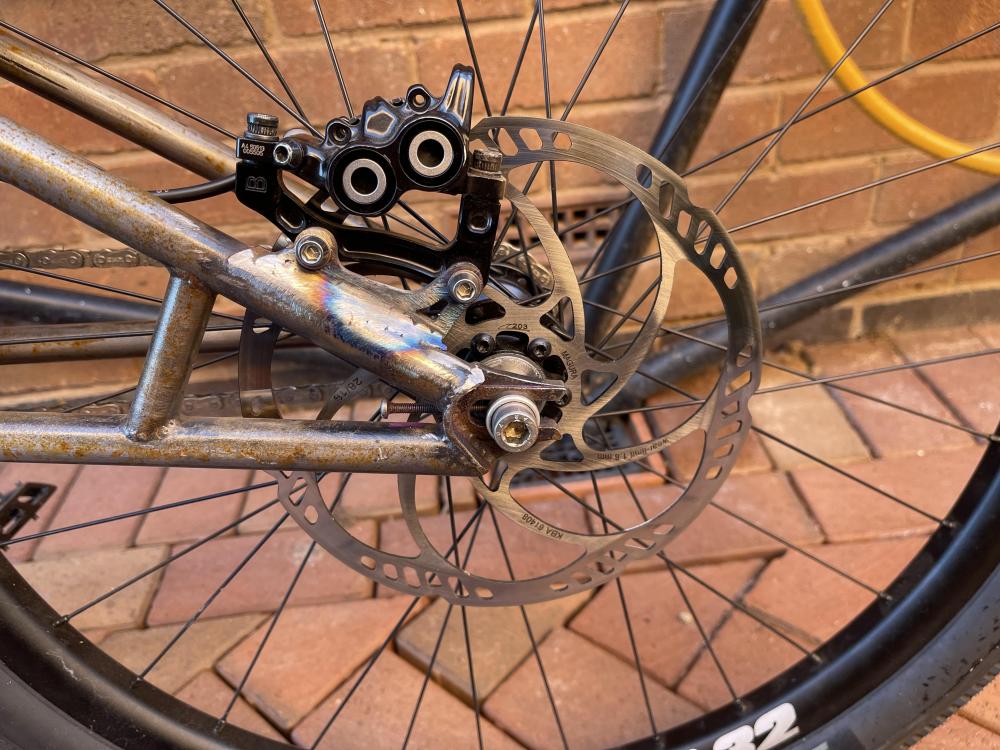
-
Which Rimpact Tubeless insert is the best for trials use?
Private Repress replied to Sam Song's topic in Trials Chat
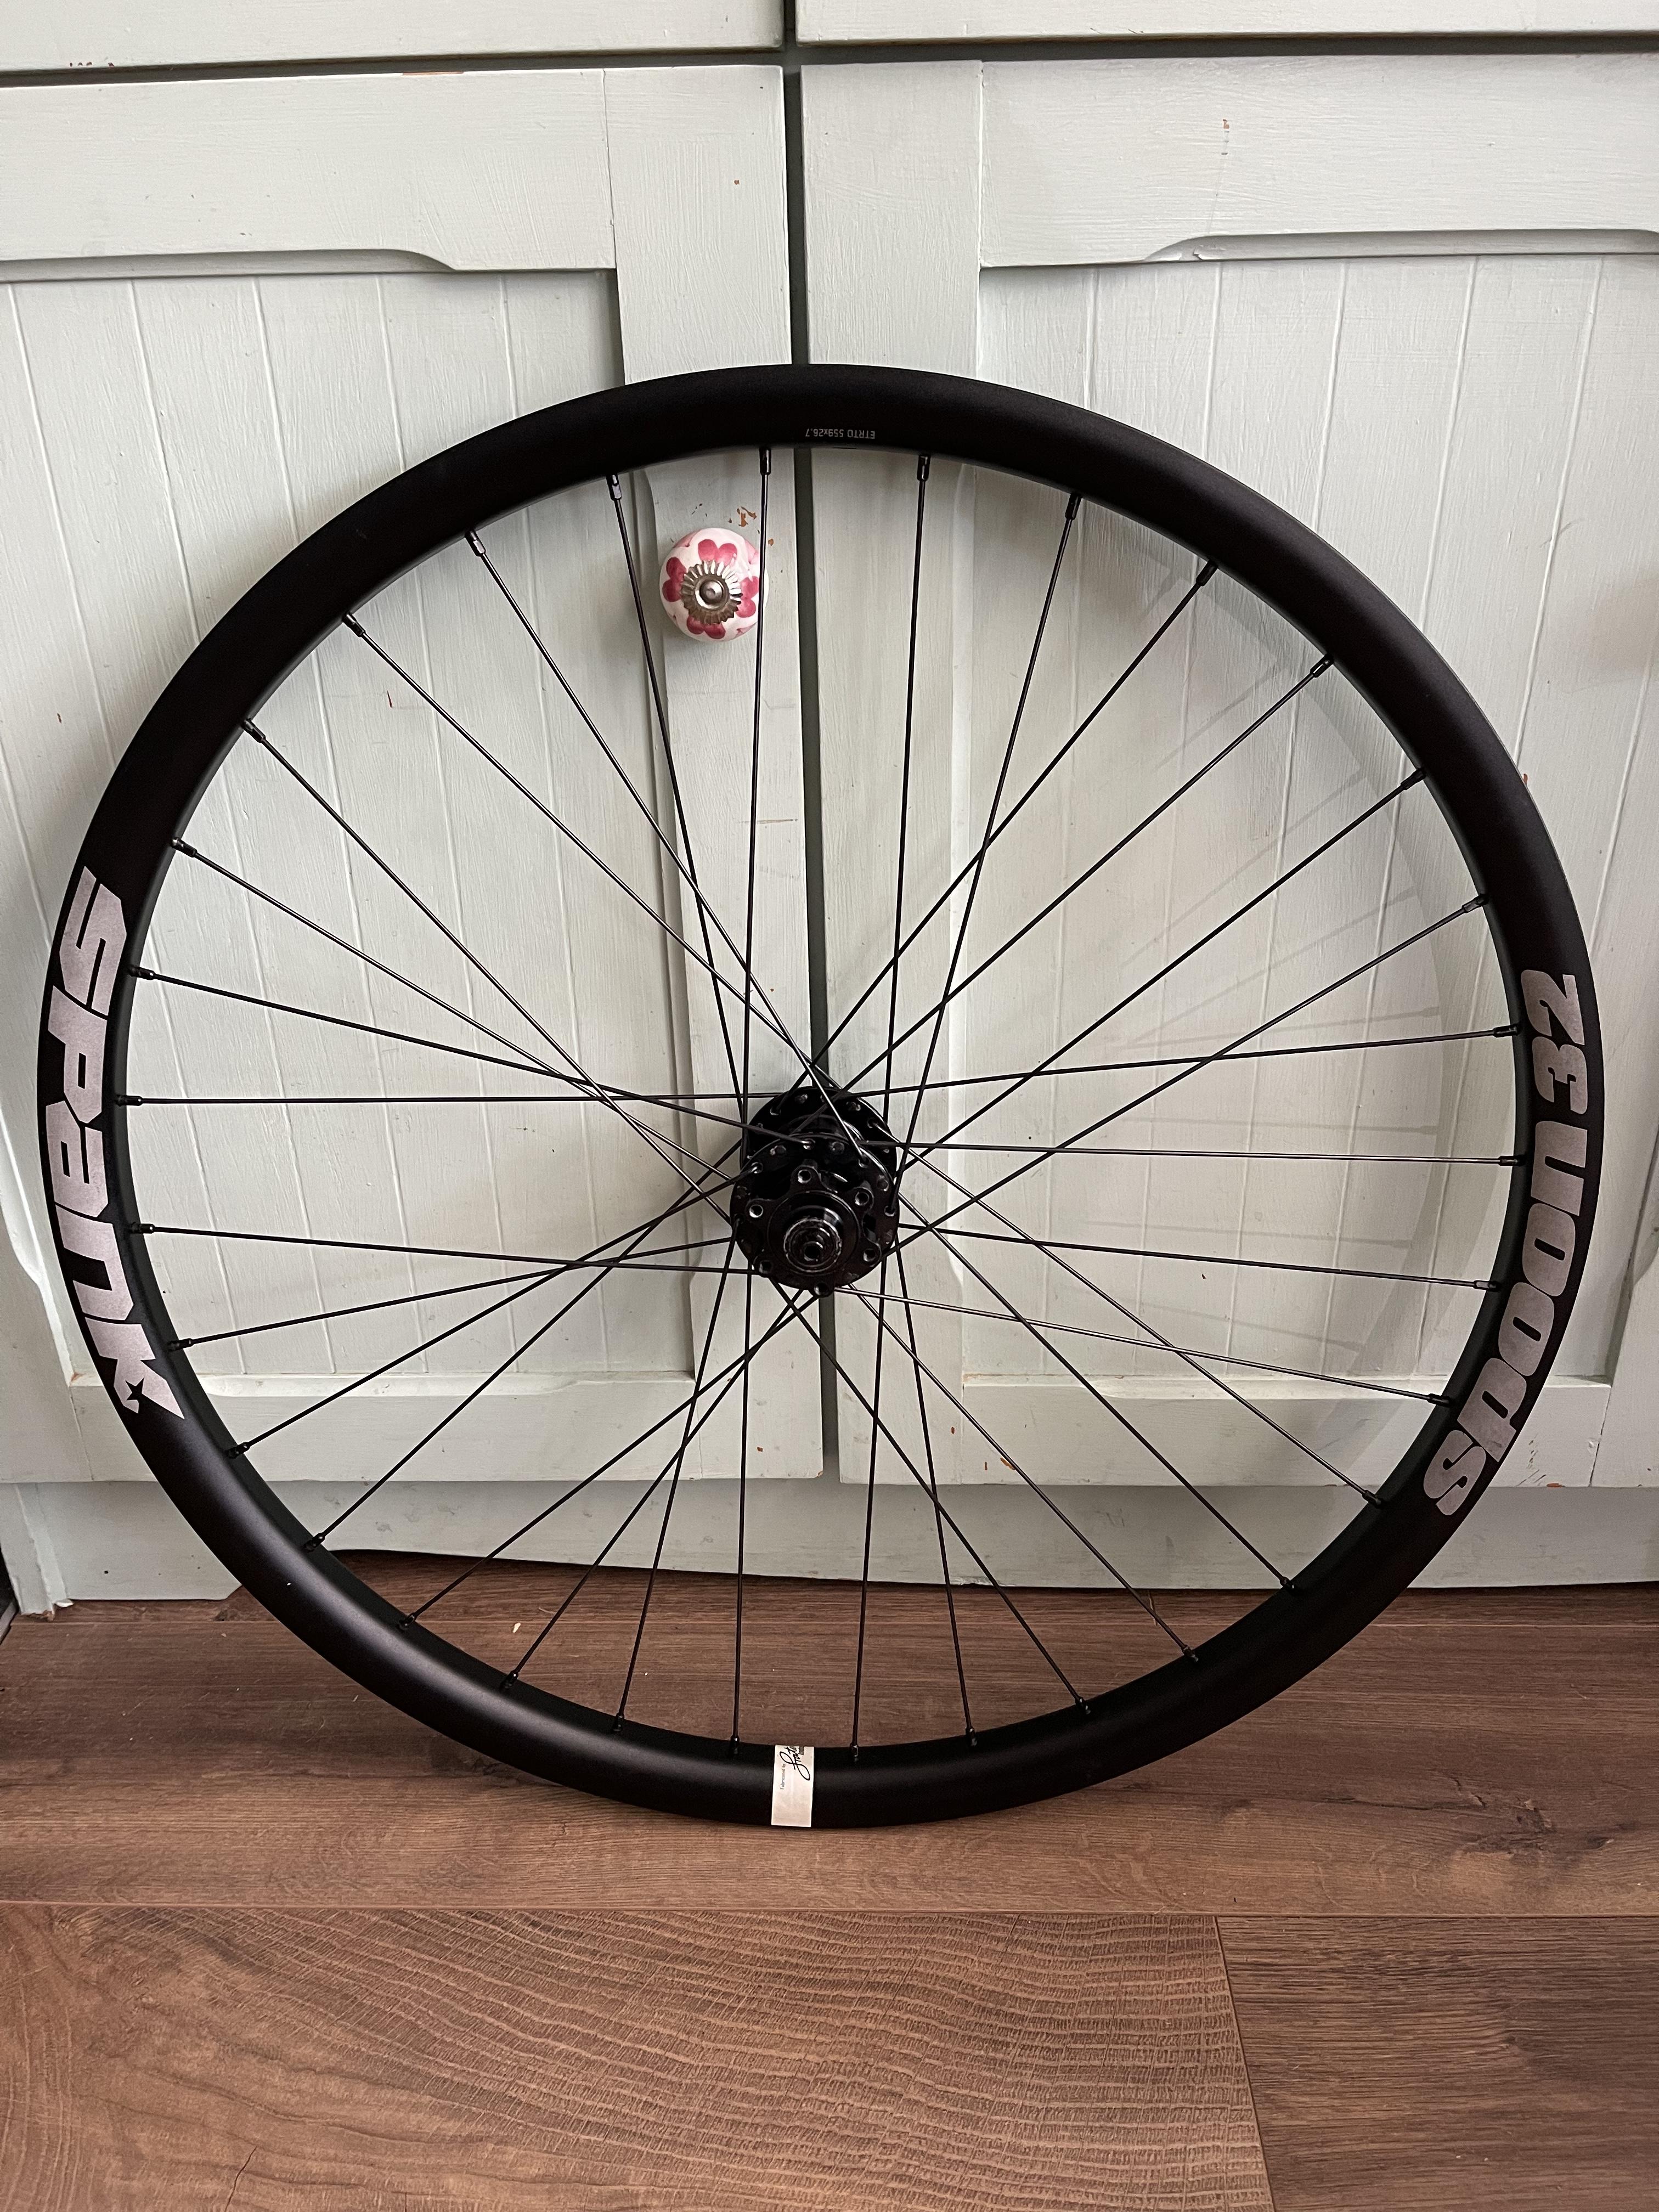
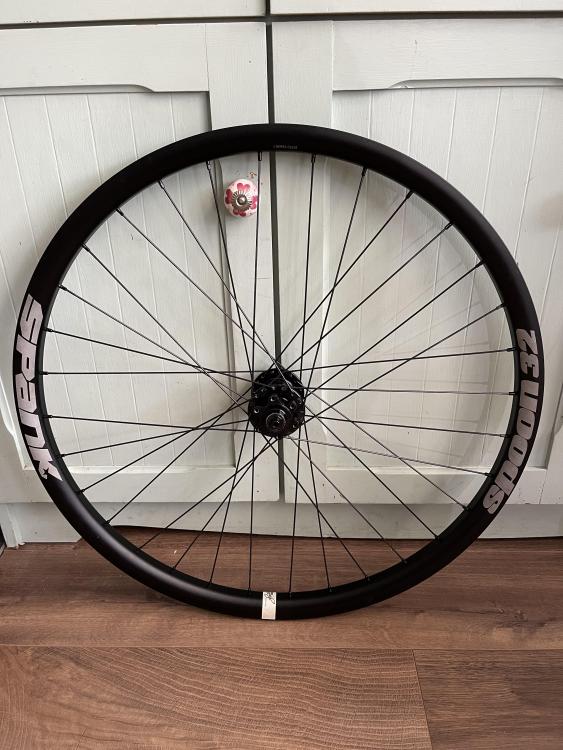
Yeah I’ve used the v1 in a bike for a couple of years with no problems too. I ordered a v1 yesterday for my 26inch marino, I’m running a lightweight billy bonkers on the rear and got a pinch flat earlier in the week using a tube. I’ve managed to set it up tubeless on a spank spoon 32 rim, but feel that the sidewalls are no where near good enough to run it without a rimpact - I’ll report back on how I get on. -
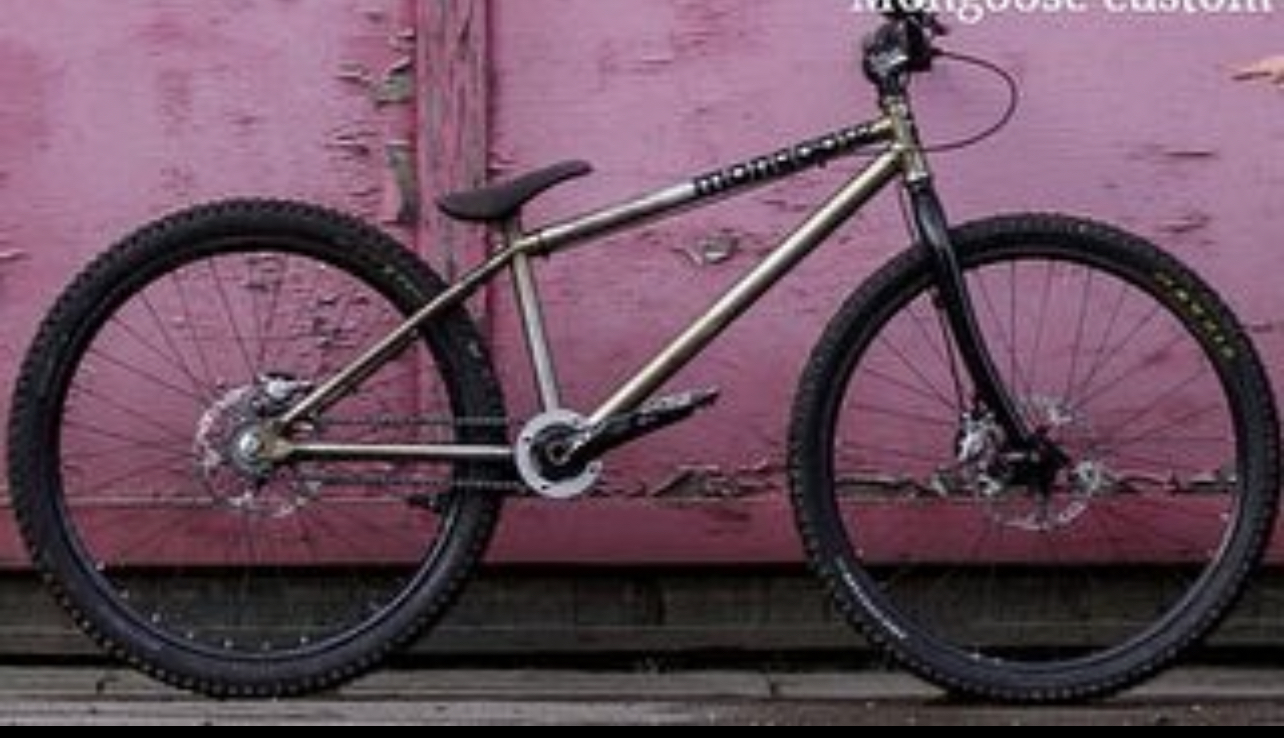
Nice to see a classic being ridden, as you say it’s such a shame that so many retro rides are being shelved. I'm lucky enough to have that frame too, I agree it’s an absolute blast to ride, so much fun!
-
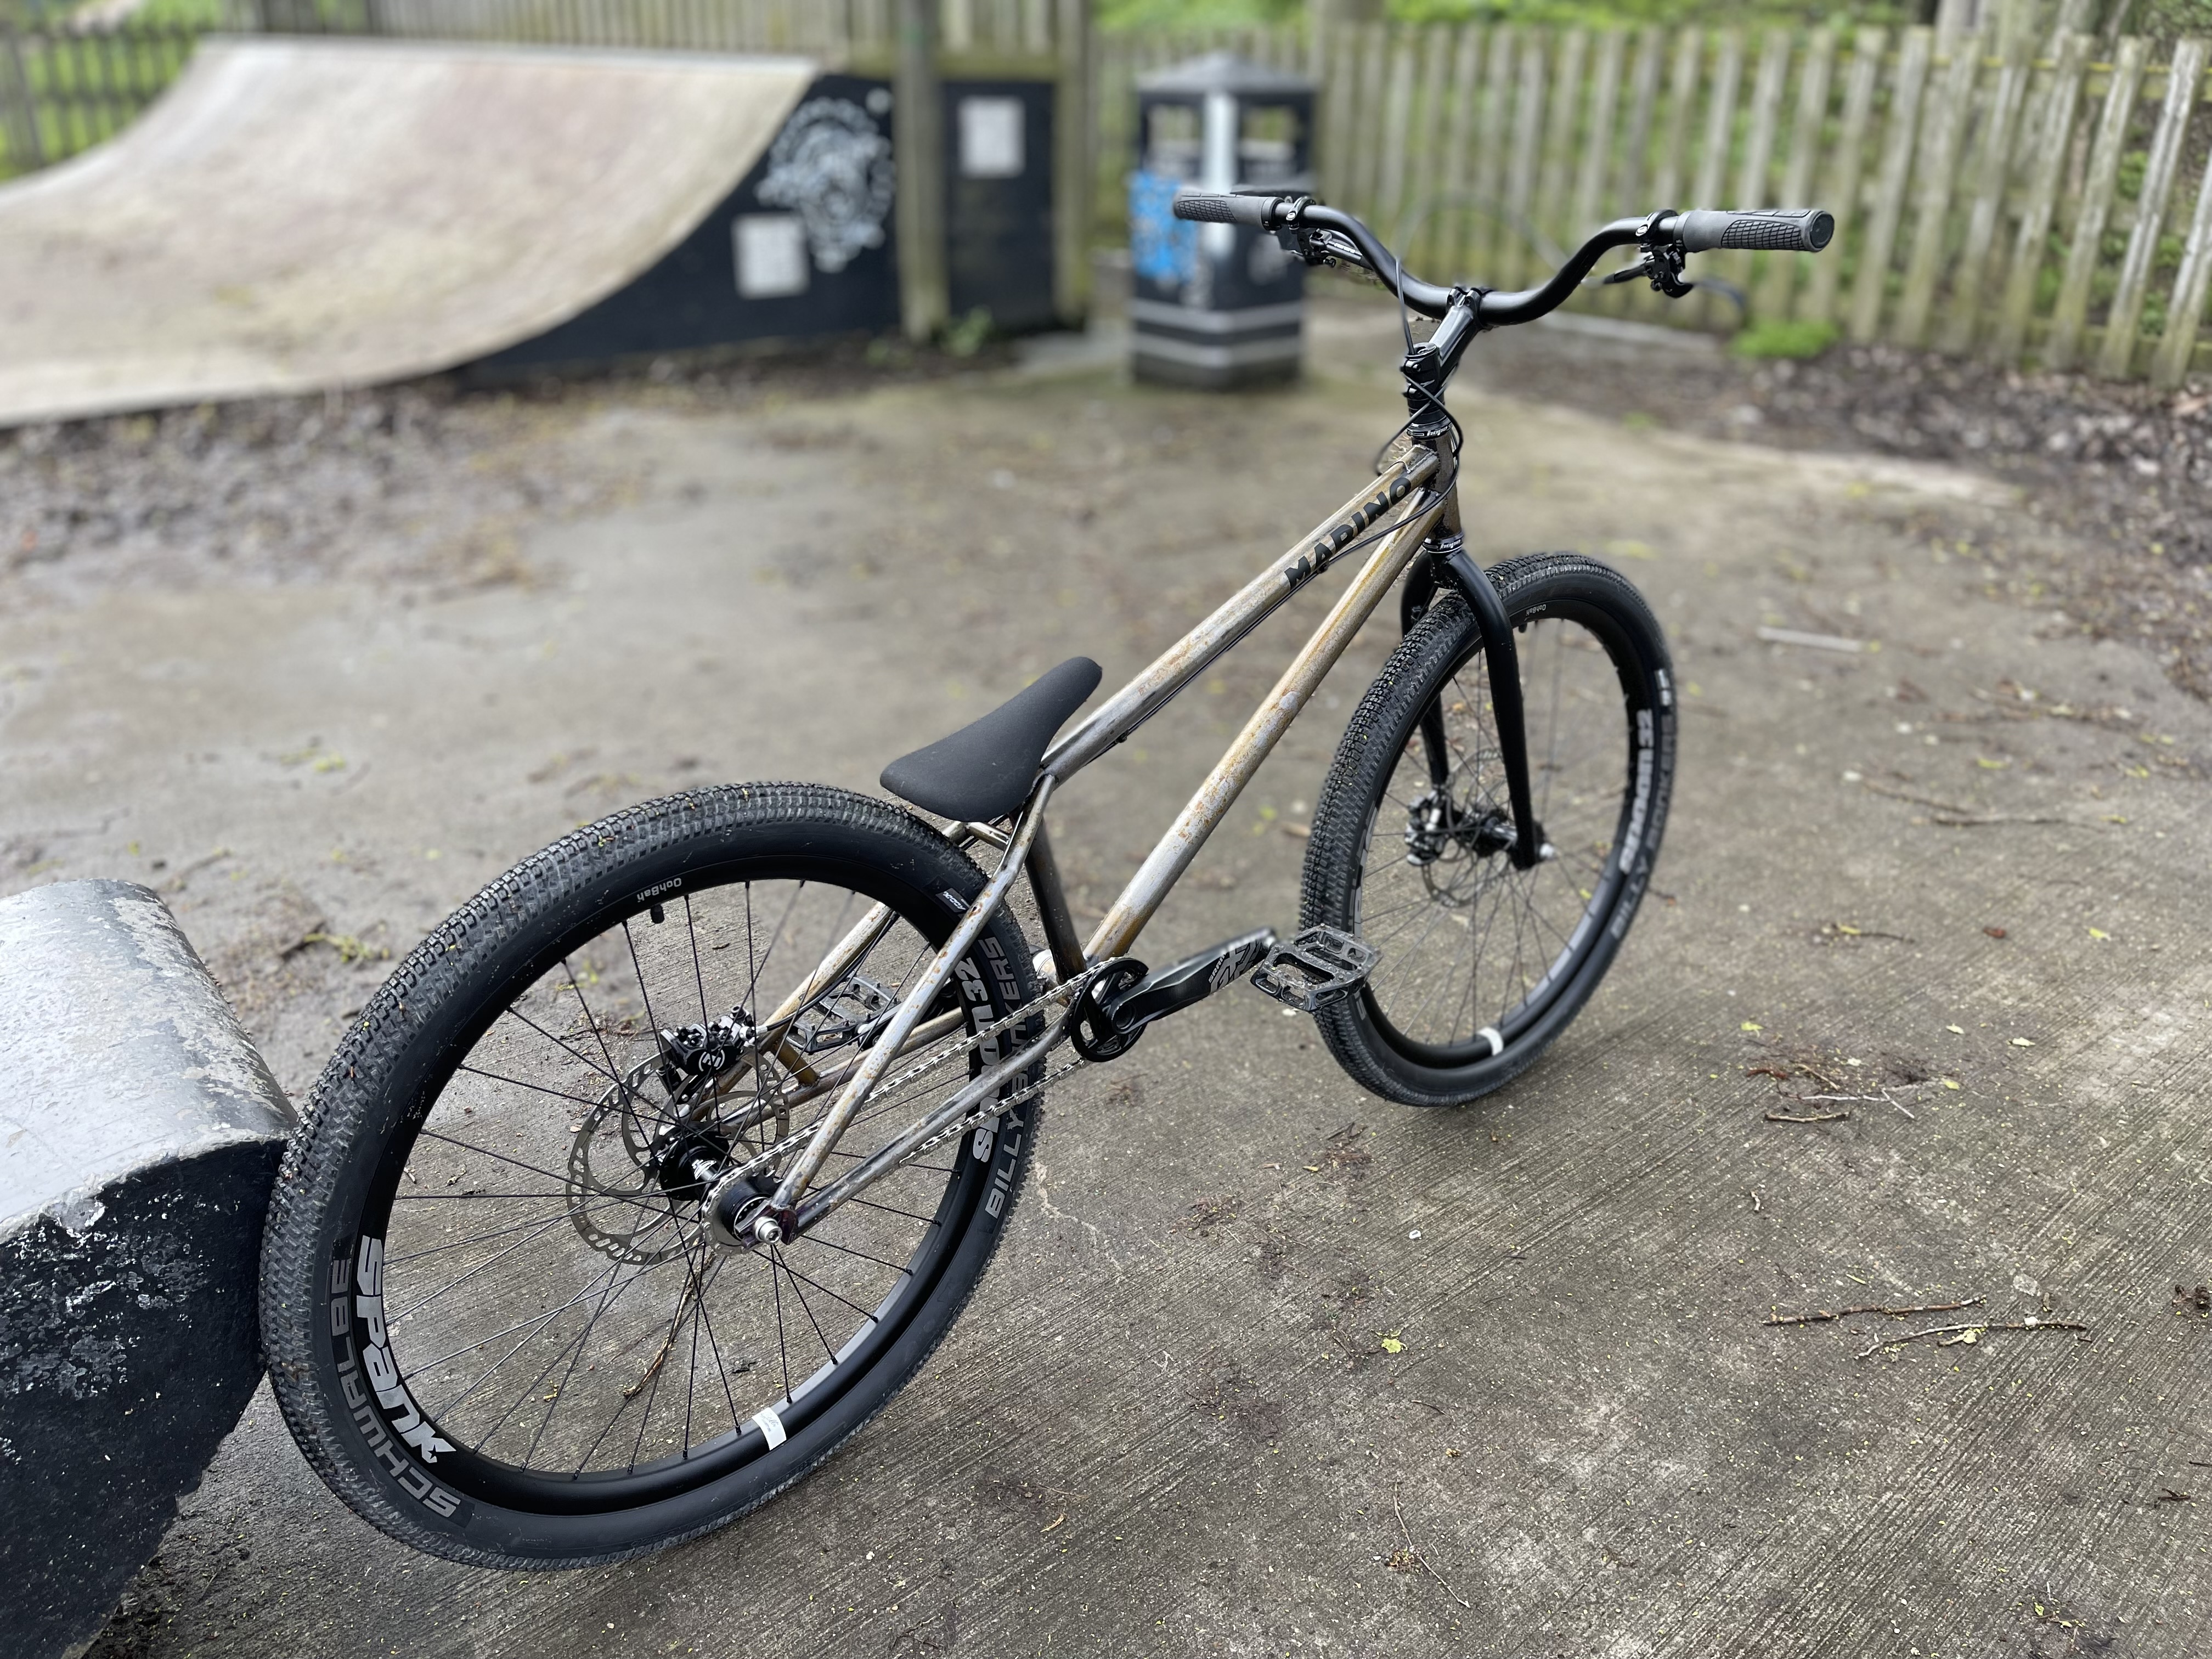
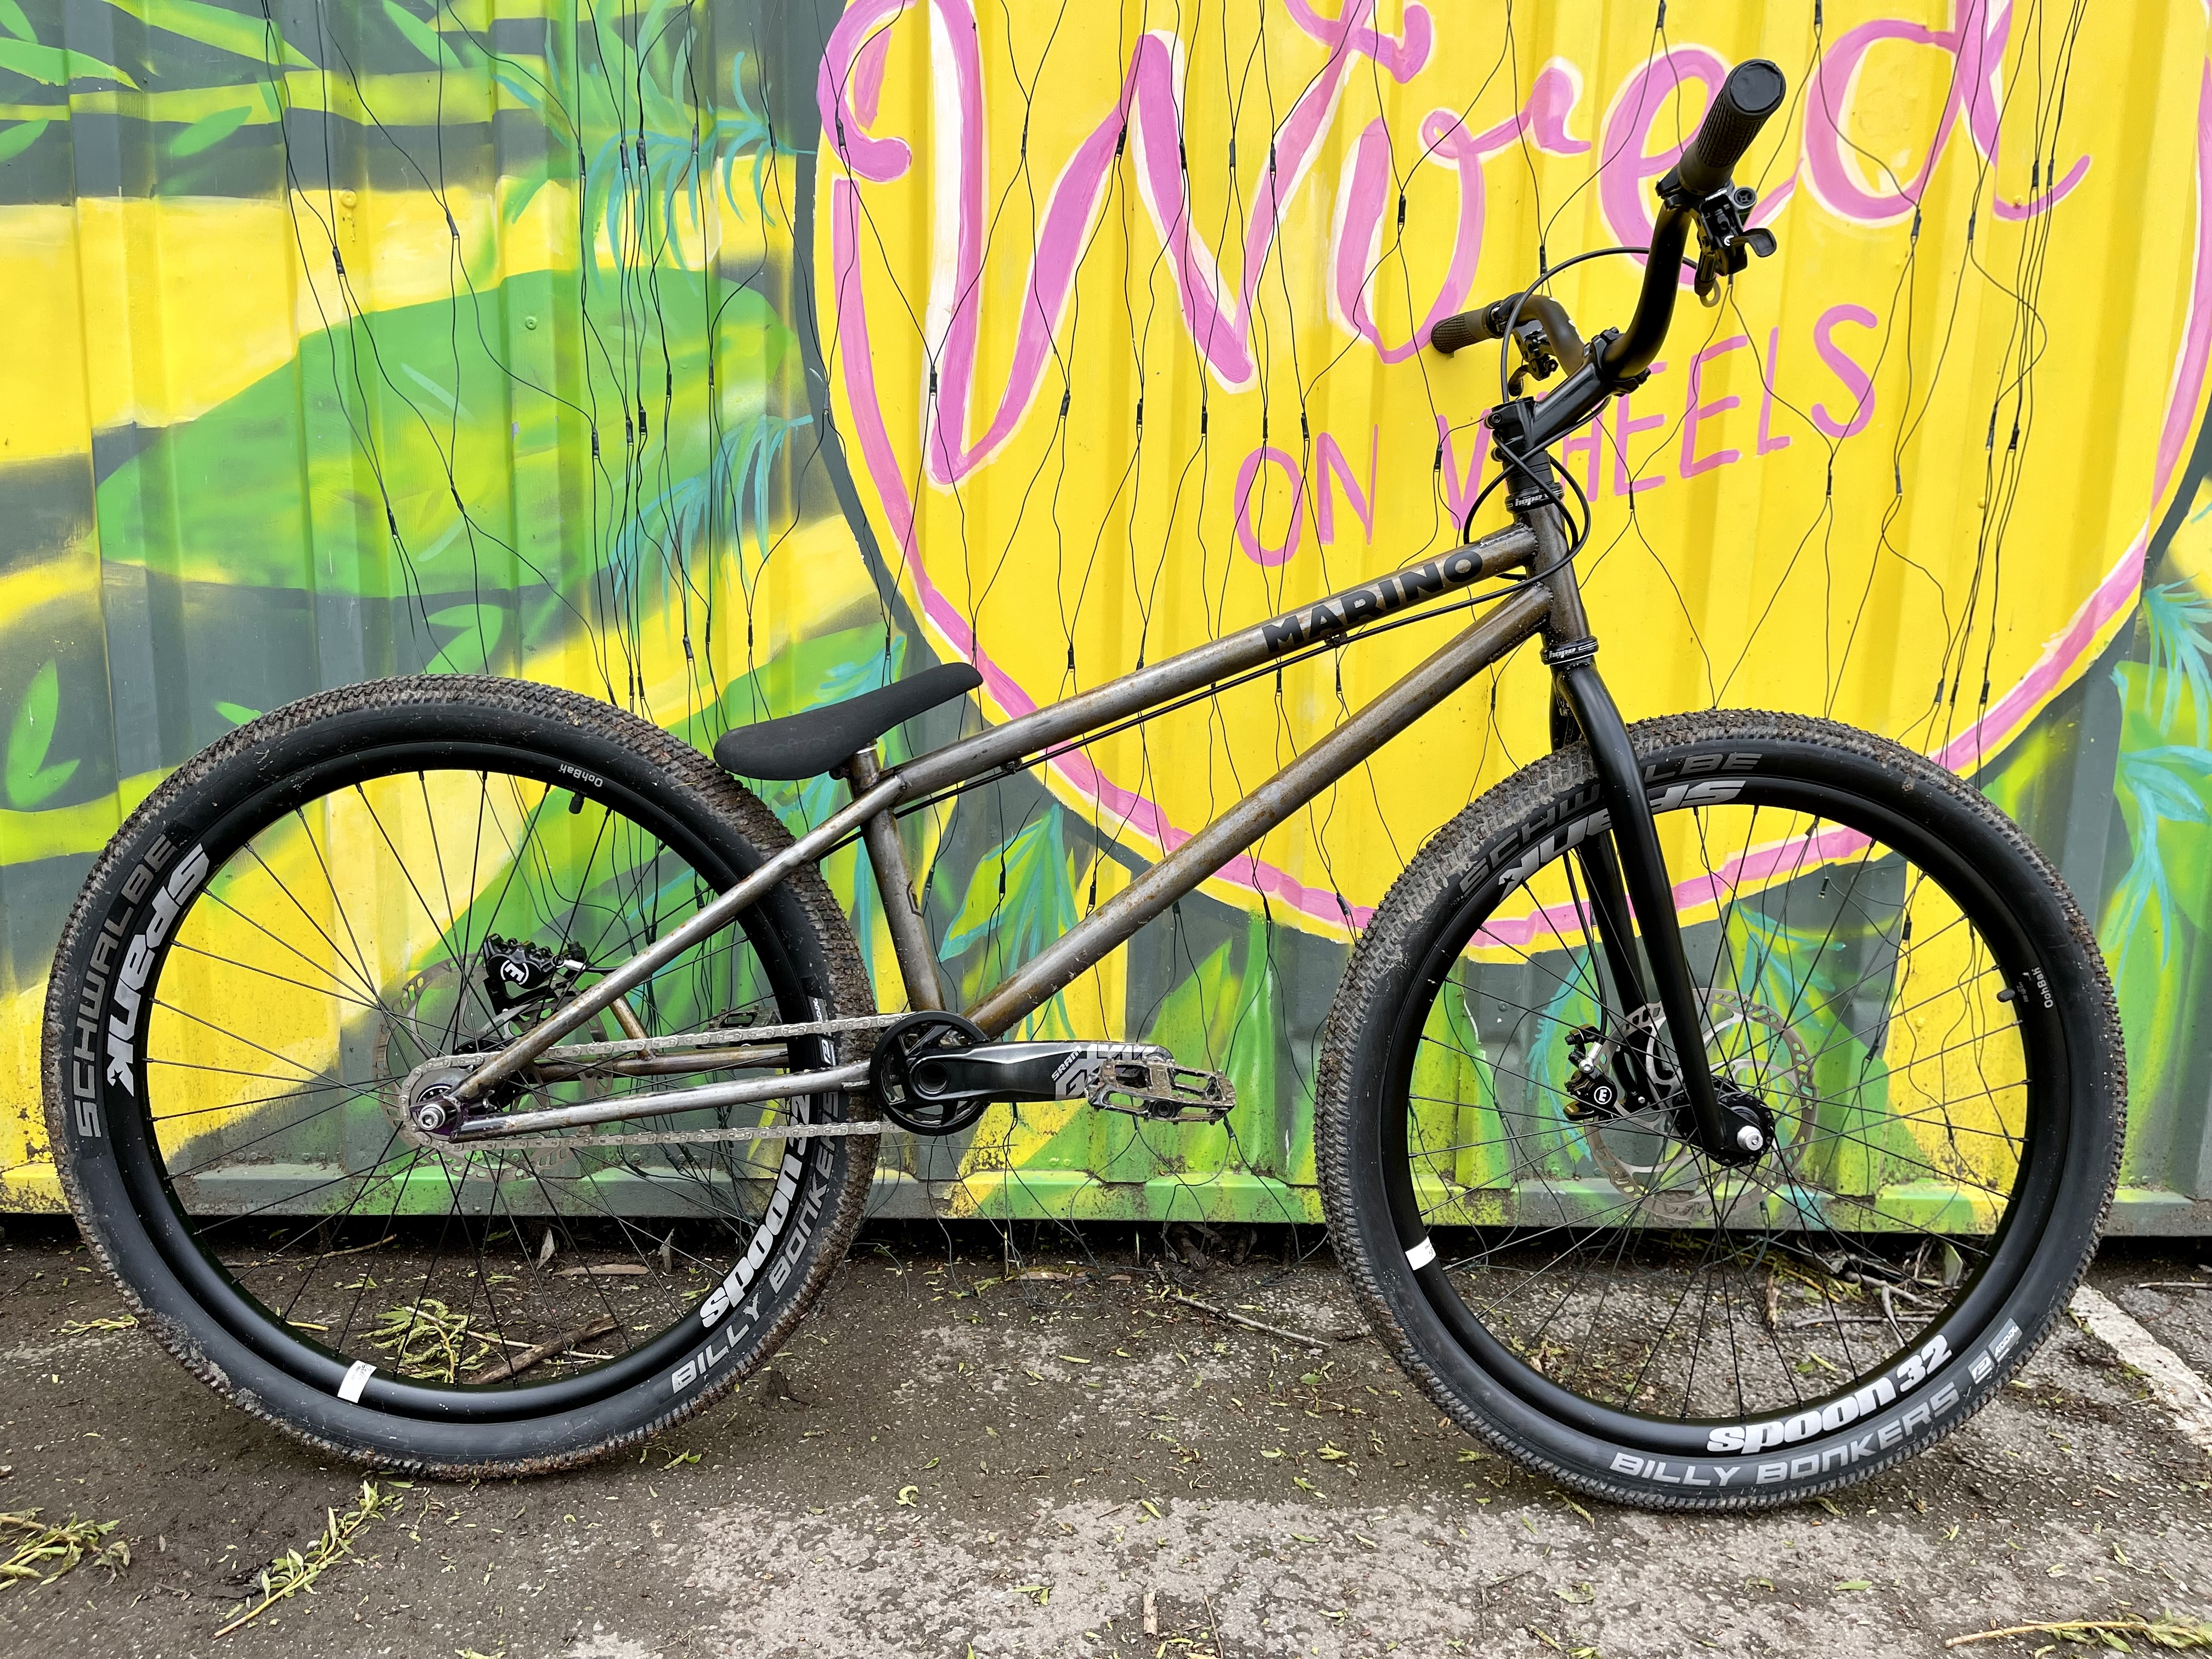
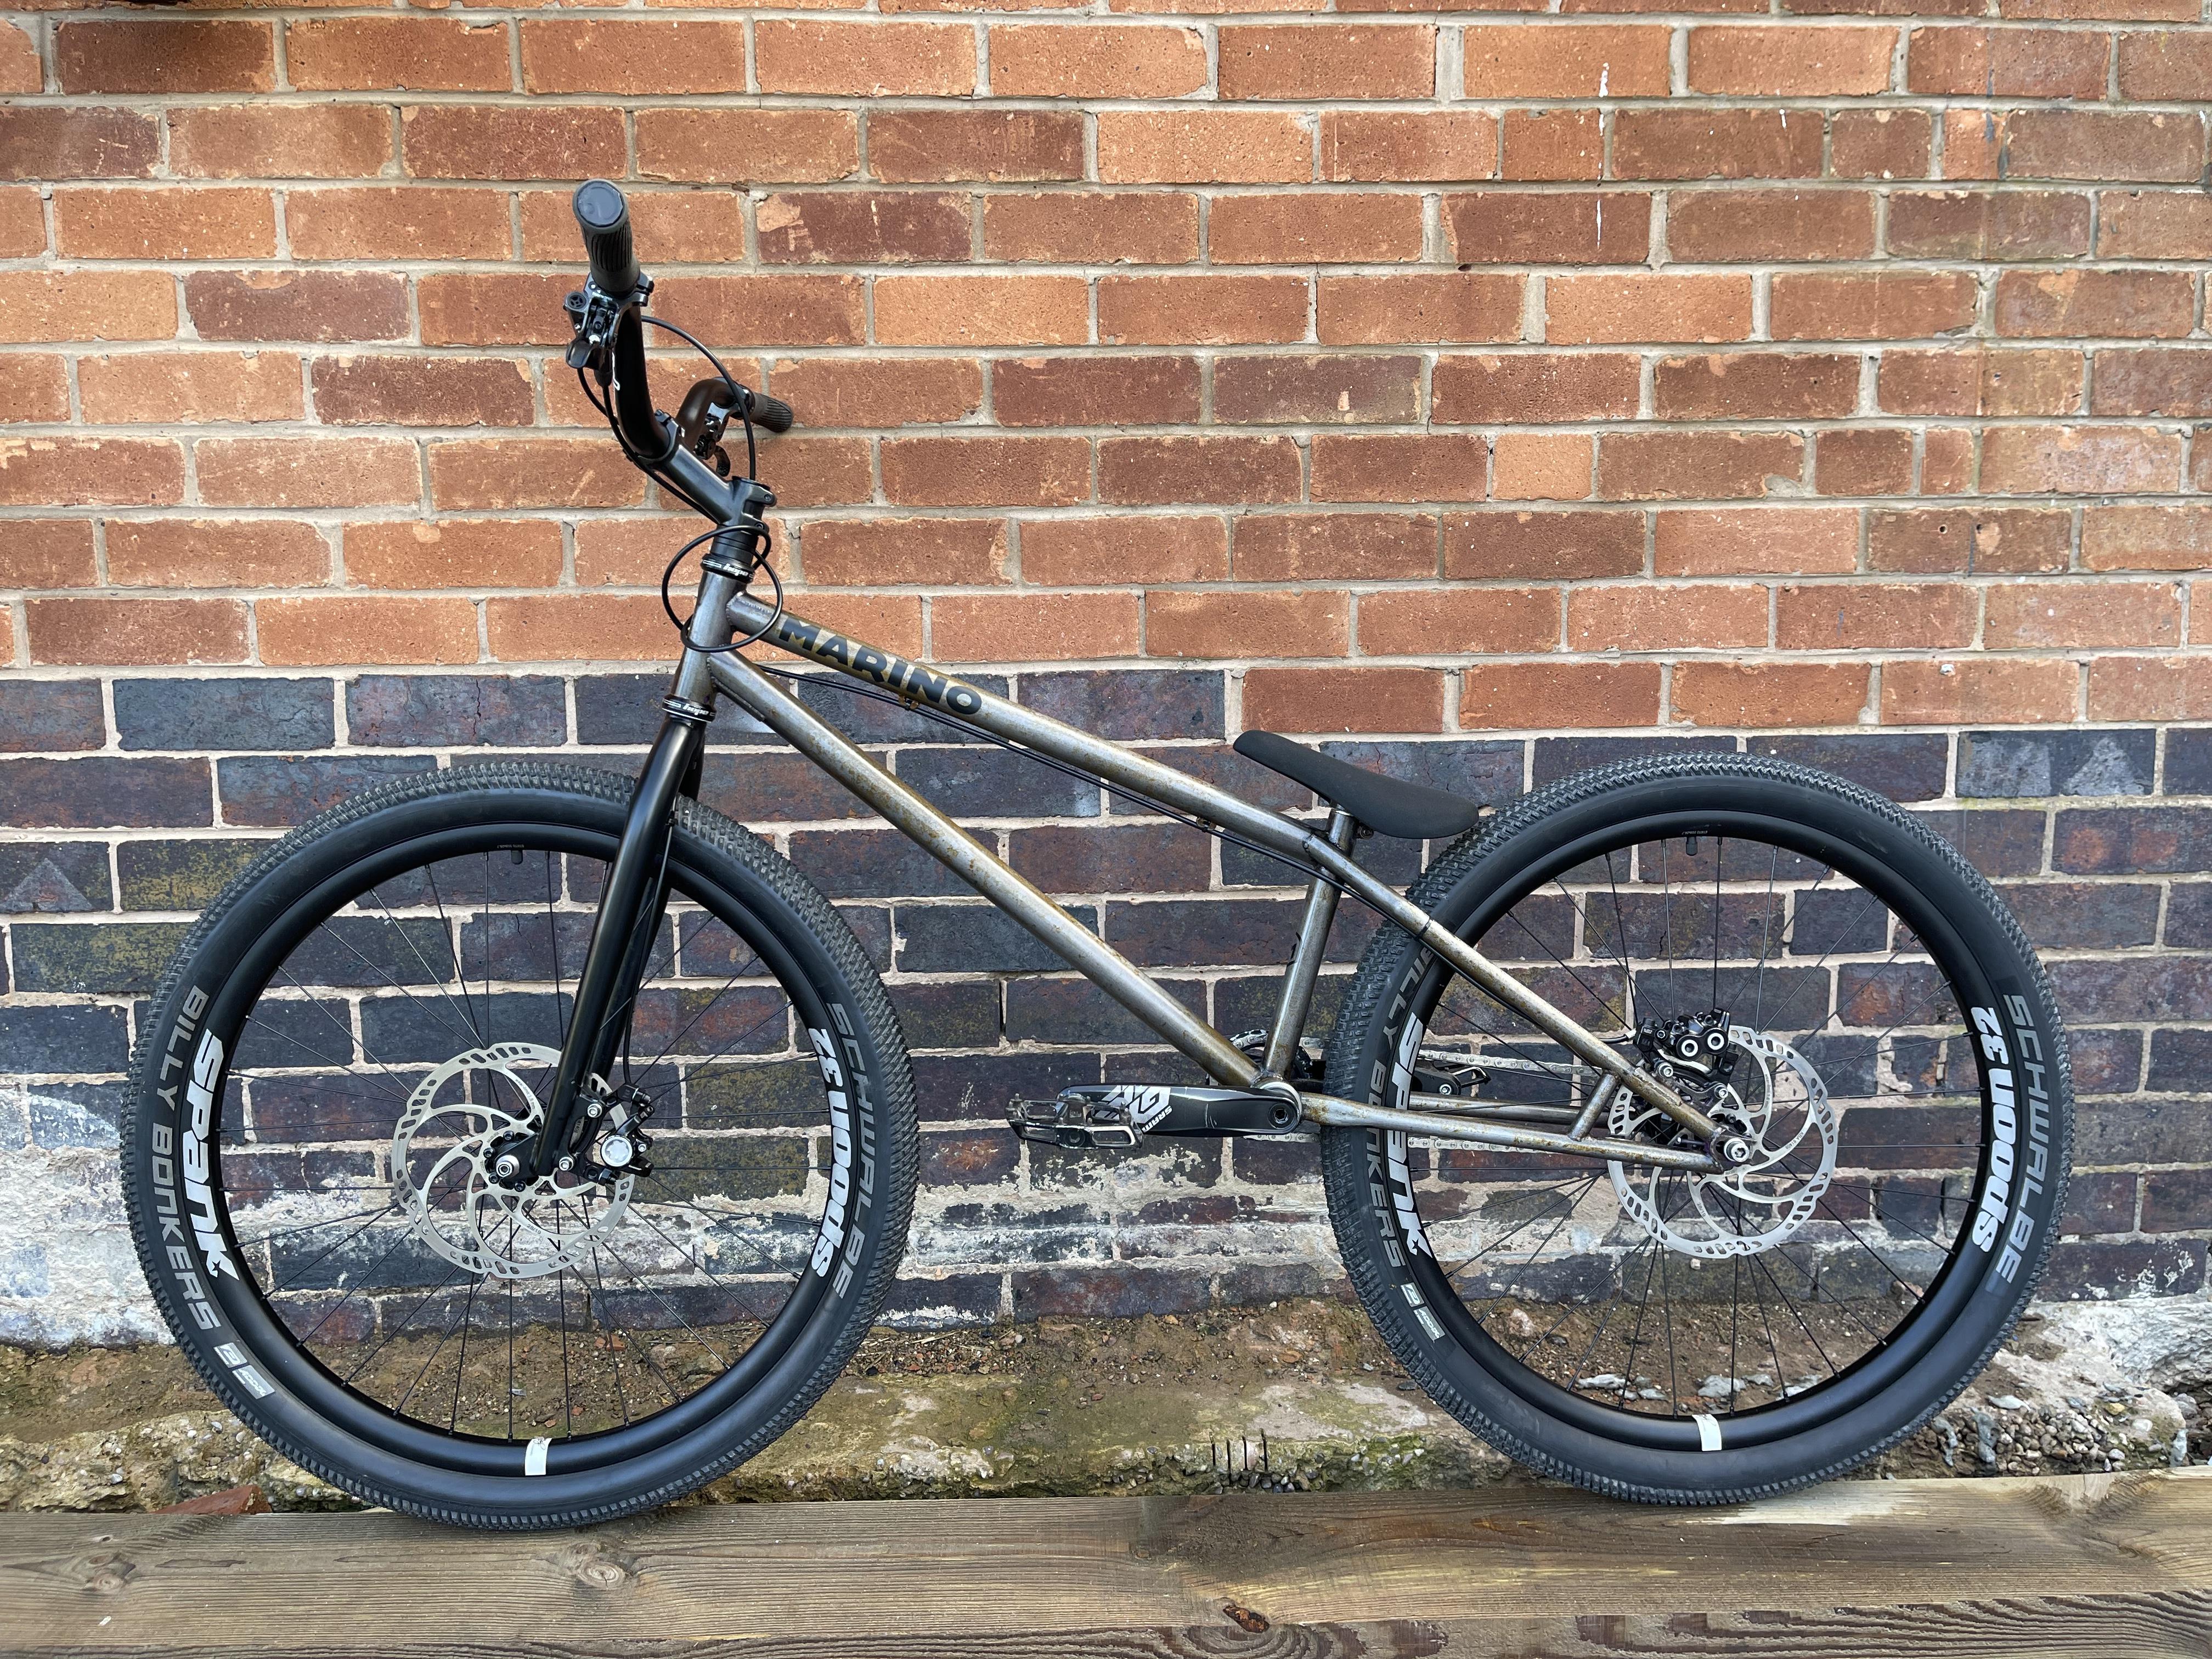
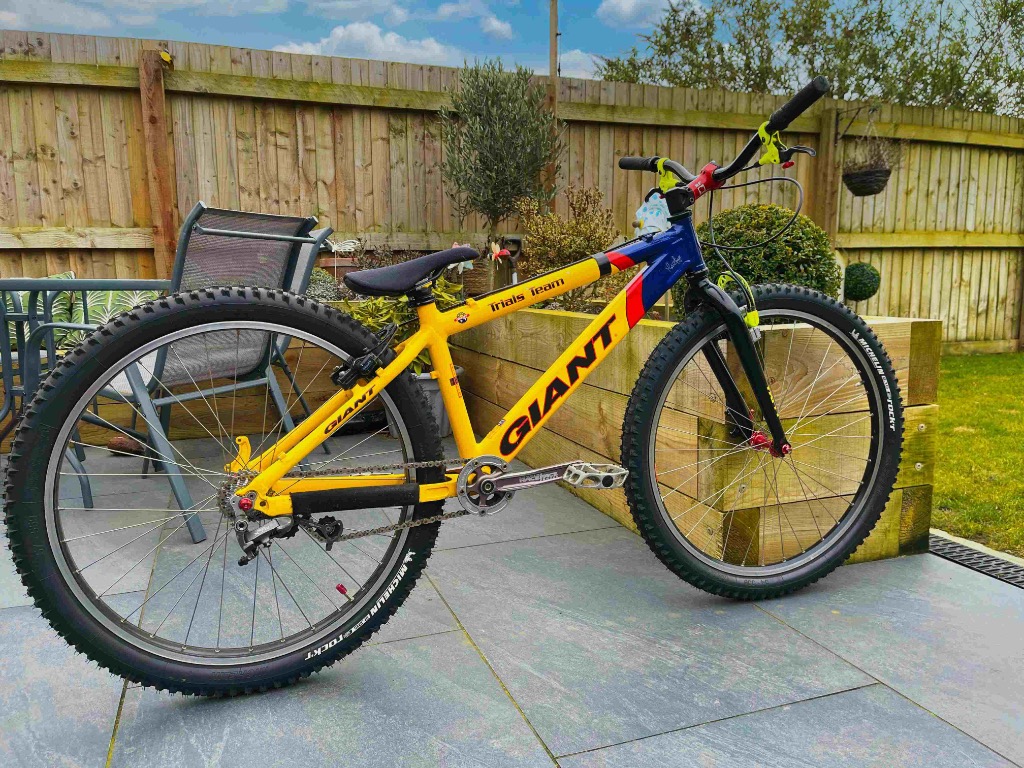
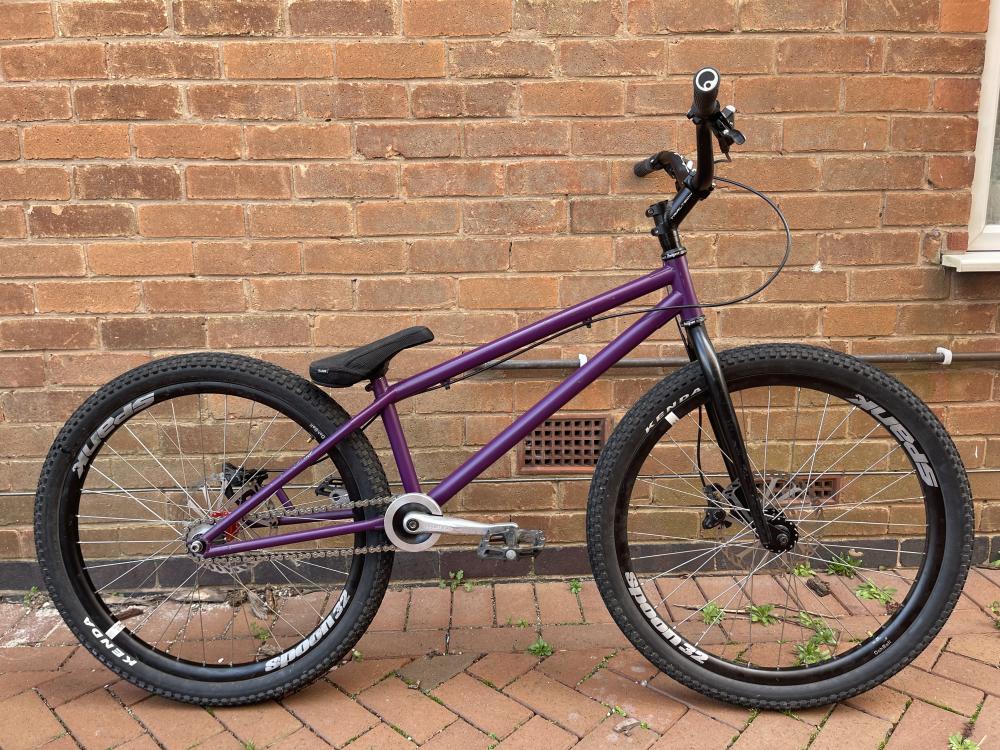
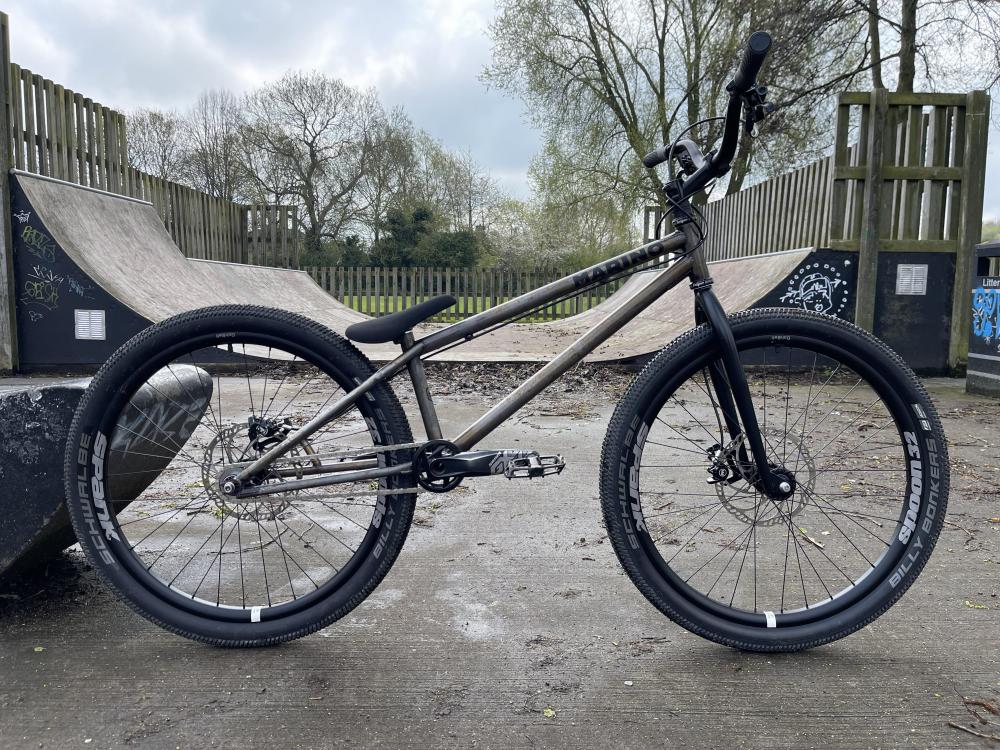
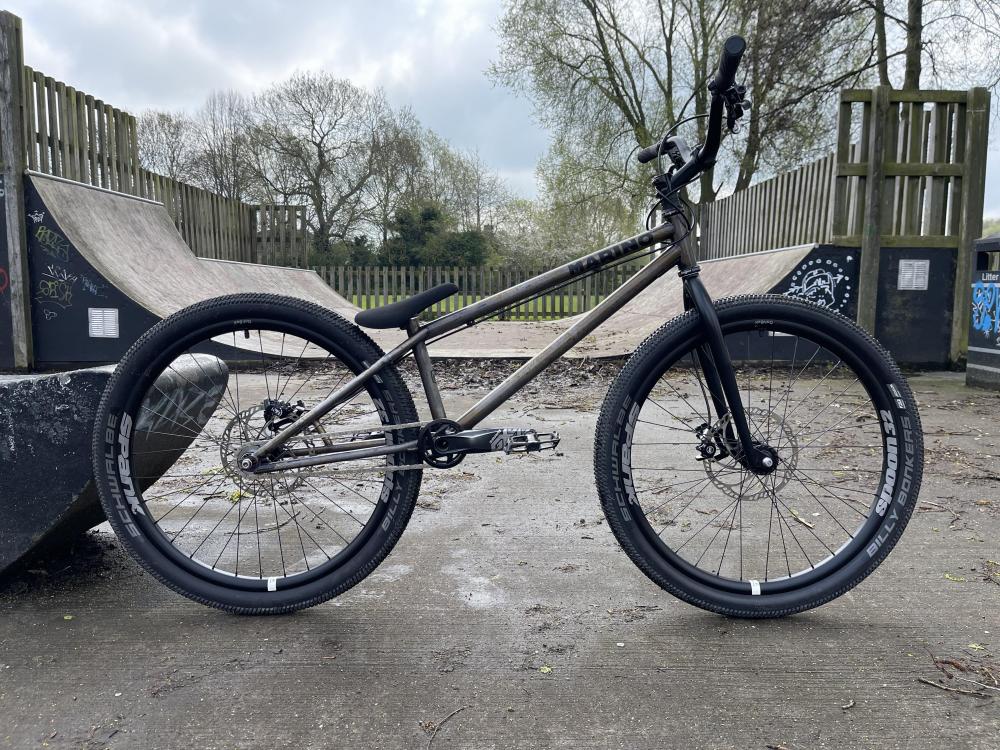
Frame: Marino (based on early hex geo) Fork: Marino Headset: Hope Stem: Wake 90x25 Bars: Arcade riser Seat: inspired combo Wheels: hope pro 2 ss on spank spoon 32s Tyres: Billy Bonkers (decent compound) Chain: KMC Cranks: Sram GX Cogs: inspired integrated bash and sprocket, gusset wide base on the rear - 22:17 Pedals: DMR v12 mk2 BB: custom stainless cups to convert from Spanish to BSA, running GXP bearings Brakes: shigura - Shimano XT levers, MT5 calliper on the rear and MT4 up front both with standard pads and HC storm 203mm rotors Grips: Ergon This is how it was when I got it:


-
Marino street 26inch build / refurb
Private Repress replied to Private Repress's topic in Trials Chat
Quick vid of a small line I did today -
Marino street 26inch build / refurb
Private Repress replied to Private Repress's topic in Trials Chat
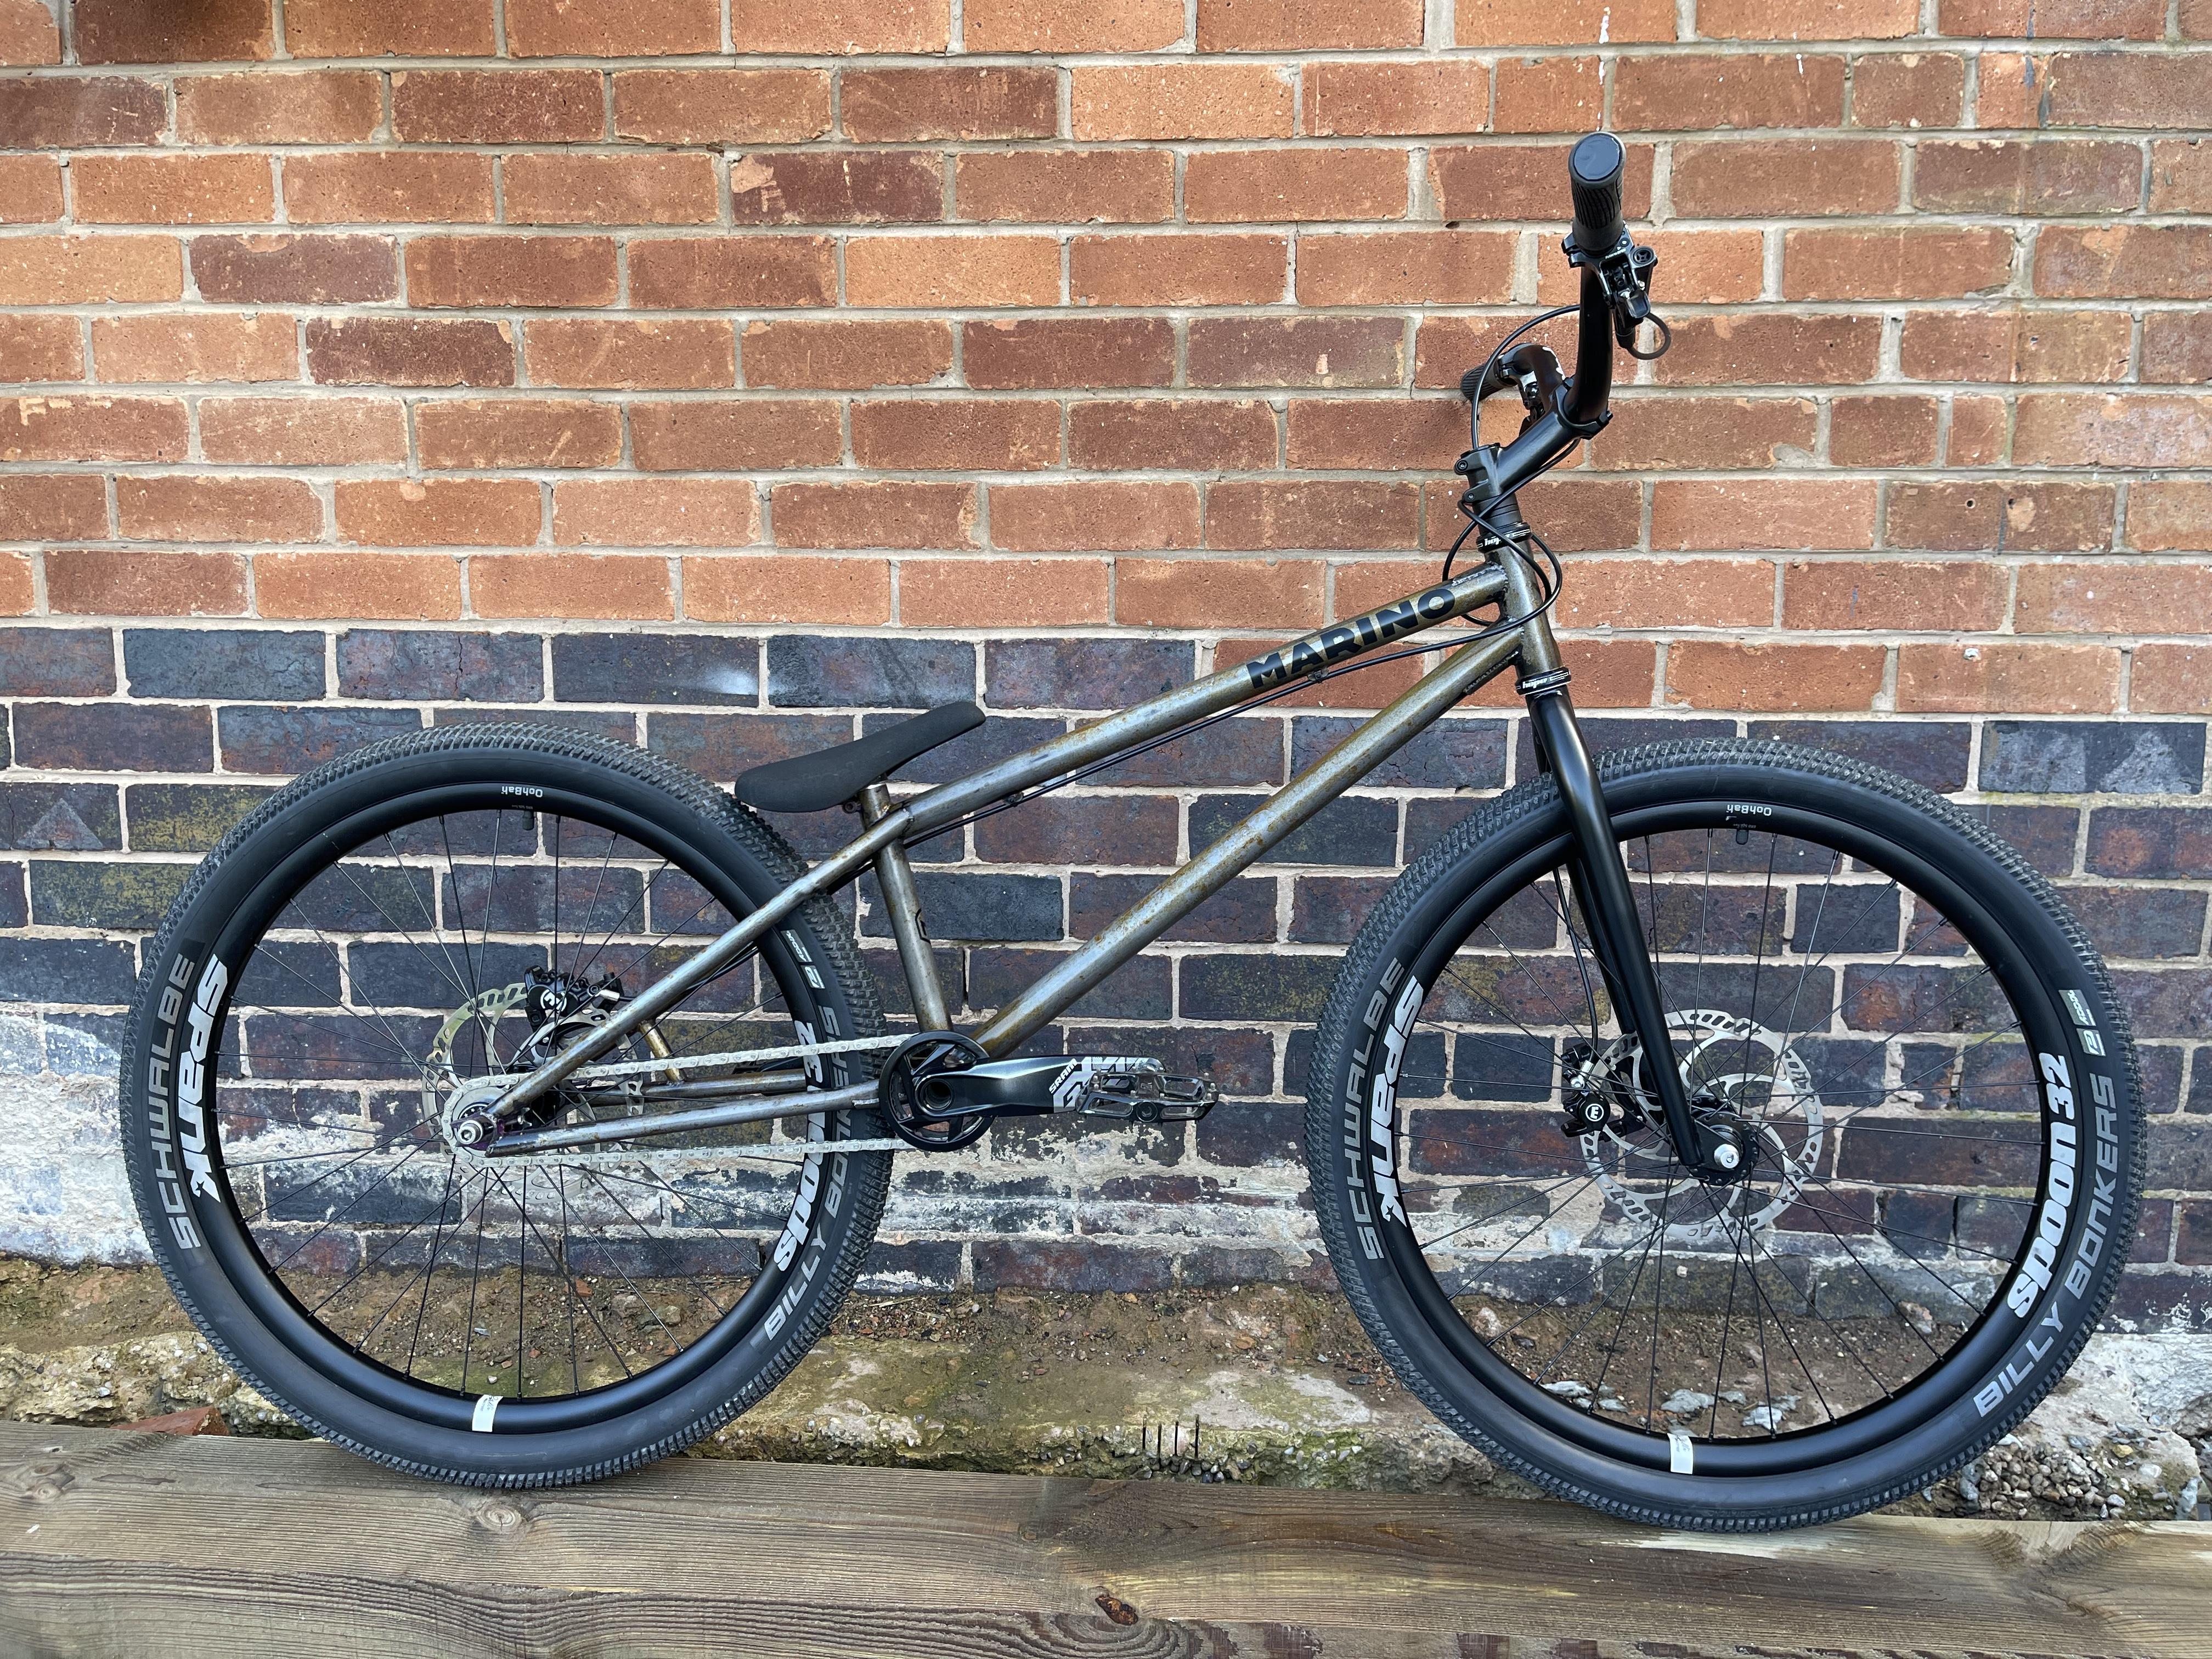
A few more pics from todays ride:

-
Shimano Lever + Hope Calliper - 6 Months on
Private Repress replied to Chakers1998's topic in Trials Chat
I thought my shiguras were exotic, but this is impressive! Now you need to settle on name… Homano? Shimope? Haha -
Marino street 26inch build / refurb
Private Repress replied to Private Repress's topic in Trials Chat
Thanks mate, I’m so happy with the finish, really looking forward to a proper ride on Saturday -
Marino street 26inch build / refurb
Private Repress replied to Private Repress's topic in Trials Chat
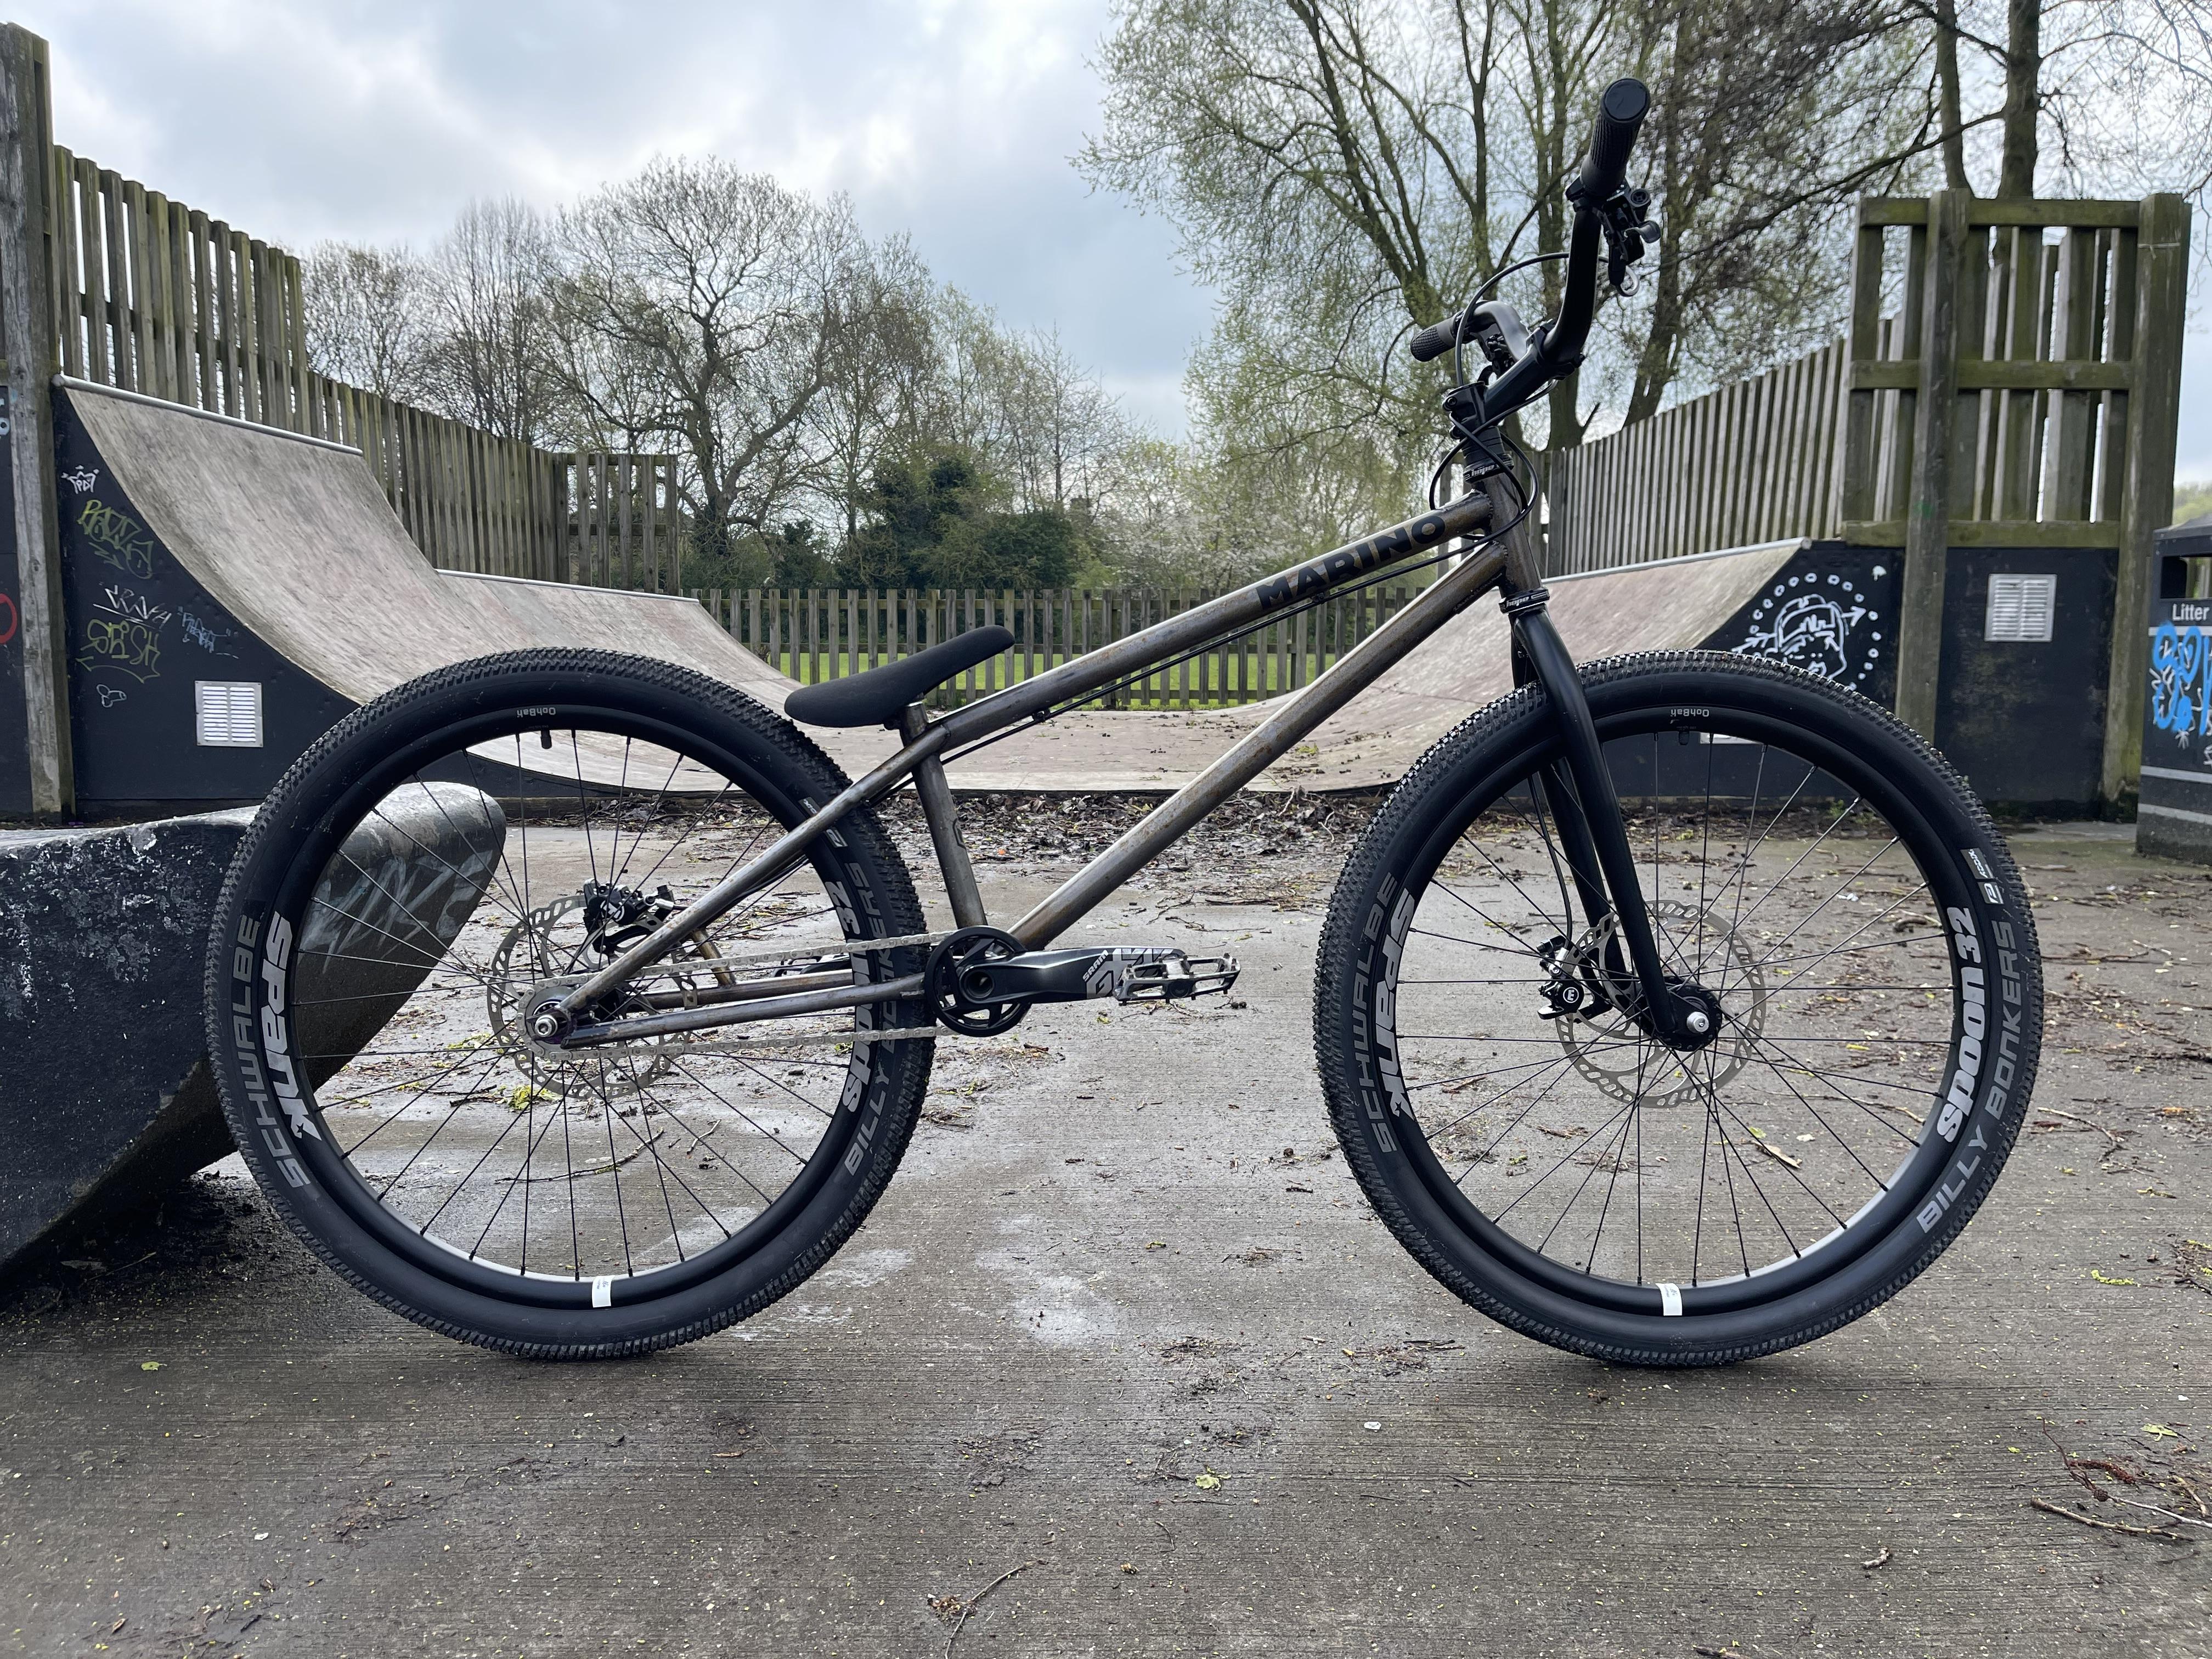
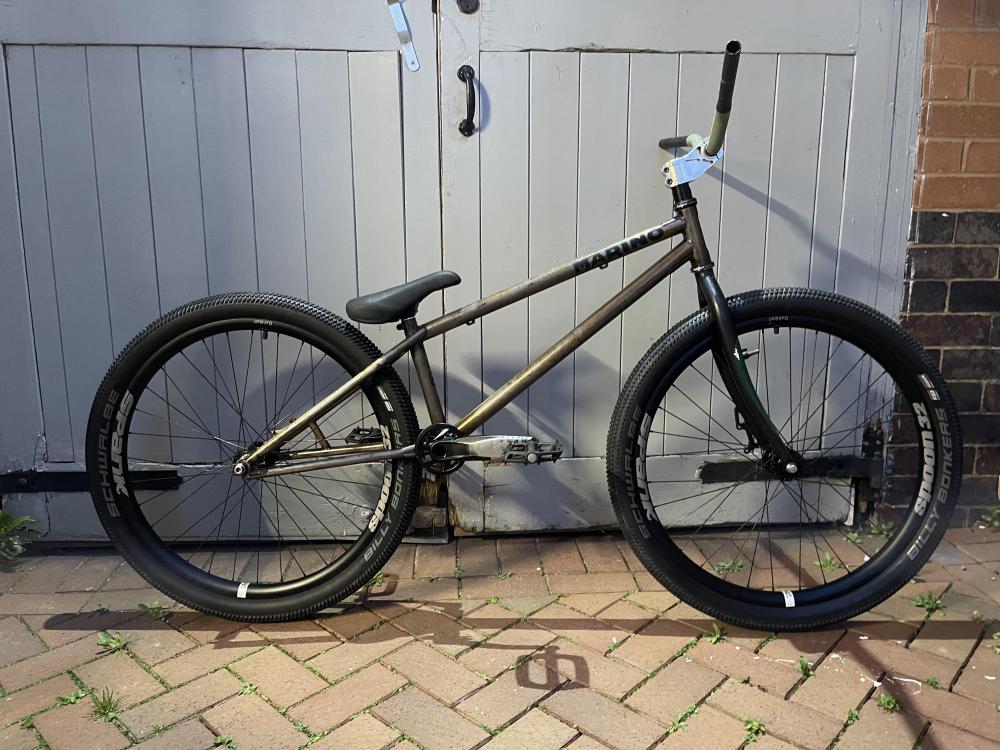
Build complete! The bike feels great, running a 90x25 stem keeping the front a little lower relative to the bb - feels a little more old skool like that somehow.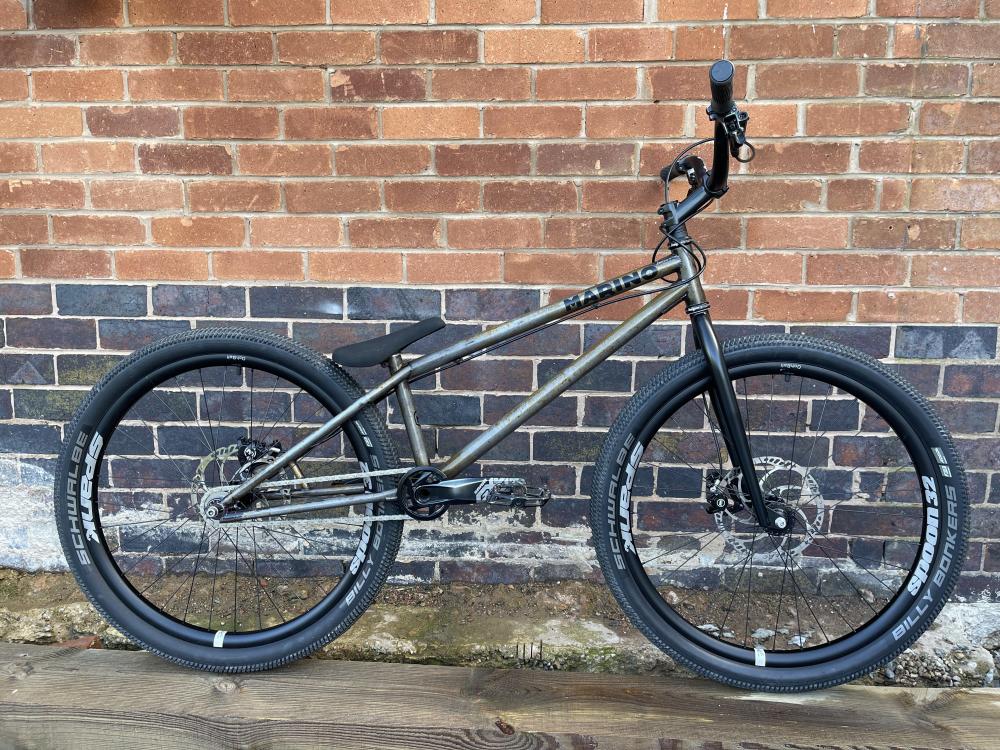

- 30 replies
-
- 11
-

-
@Swoofty To be fair, if I was being weight conscious I probably would have gone for aluminium and used a compound to prevent ceasing. But the stainless steel was readily available and didn’t cost me a penny (I’ve built several wheels for my mate so it was a favour). Thanks again for the pointers on this conversion and inspiring a solution!
-
Marino street 26inch build / refurb
Private Repress replied to Private Repress's topic in Trials Chat
Thanks @Luke Rainbird, I’ve had fun doing this one. Yes the geo is based on the early Hex, so the numbers I posted above need to be double checked once finished. Been itching for a modern street 26, so I’m really looking forward to having a blast on this -
Marino street 26inch build / refurb
Private Repress replied to Private Repress's topic in Trials Chat
Thanks @The Dark Knight Main numbers as follows: Wheelbase: circa 1030mm Chainstay: 380mm BB: +20mm (I need to check this with the correct forks on it) Head Angle: 73.5˚ -
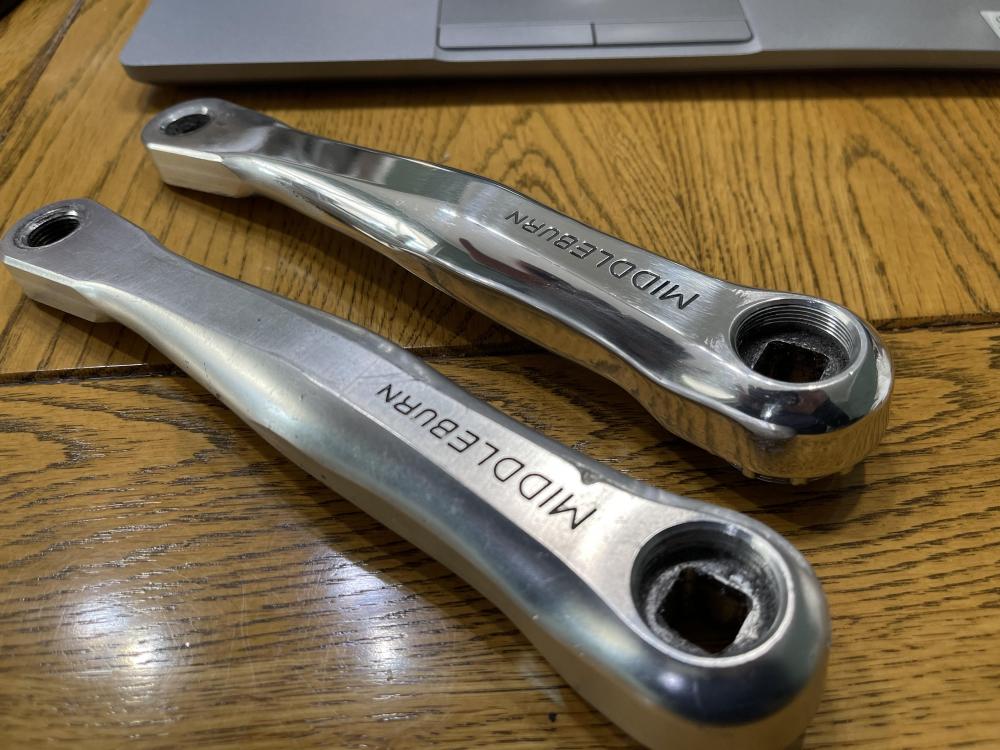
The heavy one, stainless steel haha
-
Marino street 26inch build / refurb
Private Repress replied to Private Repress's topic in Trials Chat
Disc wise I’ll be running either 203mm magura storm HC rotors, or some Shimano 180mm, I’m currently undecided. The brakes themselves will be shigura. The bike came with Shimano XT’s front and rear. I happen to have a spare MT5 calliper, which I’ll run on the rear with standard pads (manual heaven). For the front I have an MT4 left from selling a bike in bits, so I’ll pinch the calliper. Hoping to pick the forks up tomorrow and get it built in the evening. I’ll get a picture up as soon as it’s done -
Marino street 26inch build / refurb
Private Repress replied to Private Repress's topic in Trials Chat
Tonight I actually got a bit impatient, I’d dropped the forks off to be powder coated last week, but wanted to see how the cranks would feel under my feet, so built up a rolling rig with some bits I had kicking around. the forks, bars, stem and seat will be changed for the final build: Thankfully the cranks feel great so far, but keen to see how they perform when pedaling! Looks wise, I’m stoked that it’s not a million miles away from what I set out to achieve: (squint a bit haha)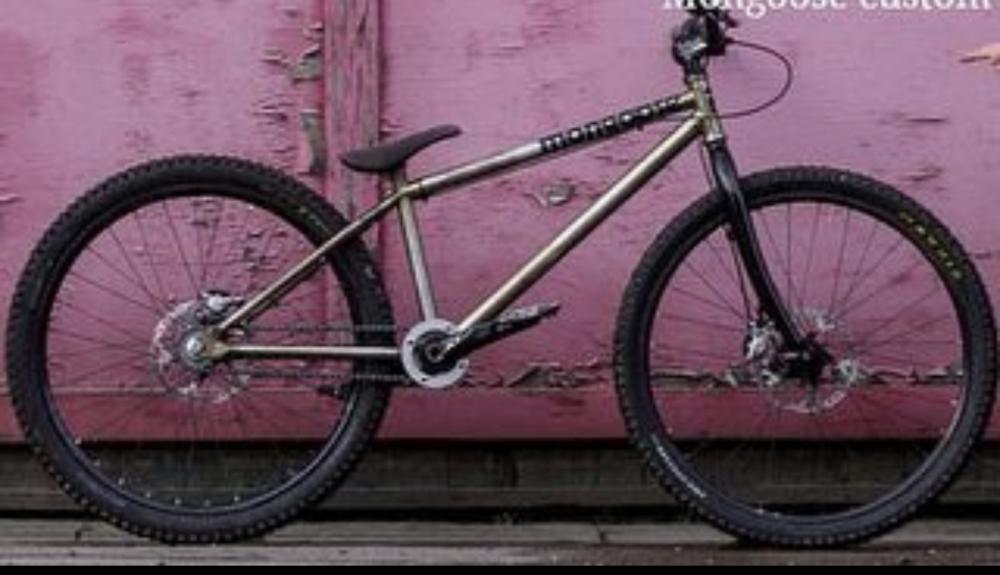
-
Marino street 26inch build / refurb
Private Repress replied to Private Repress's topic in Trials Chat
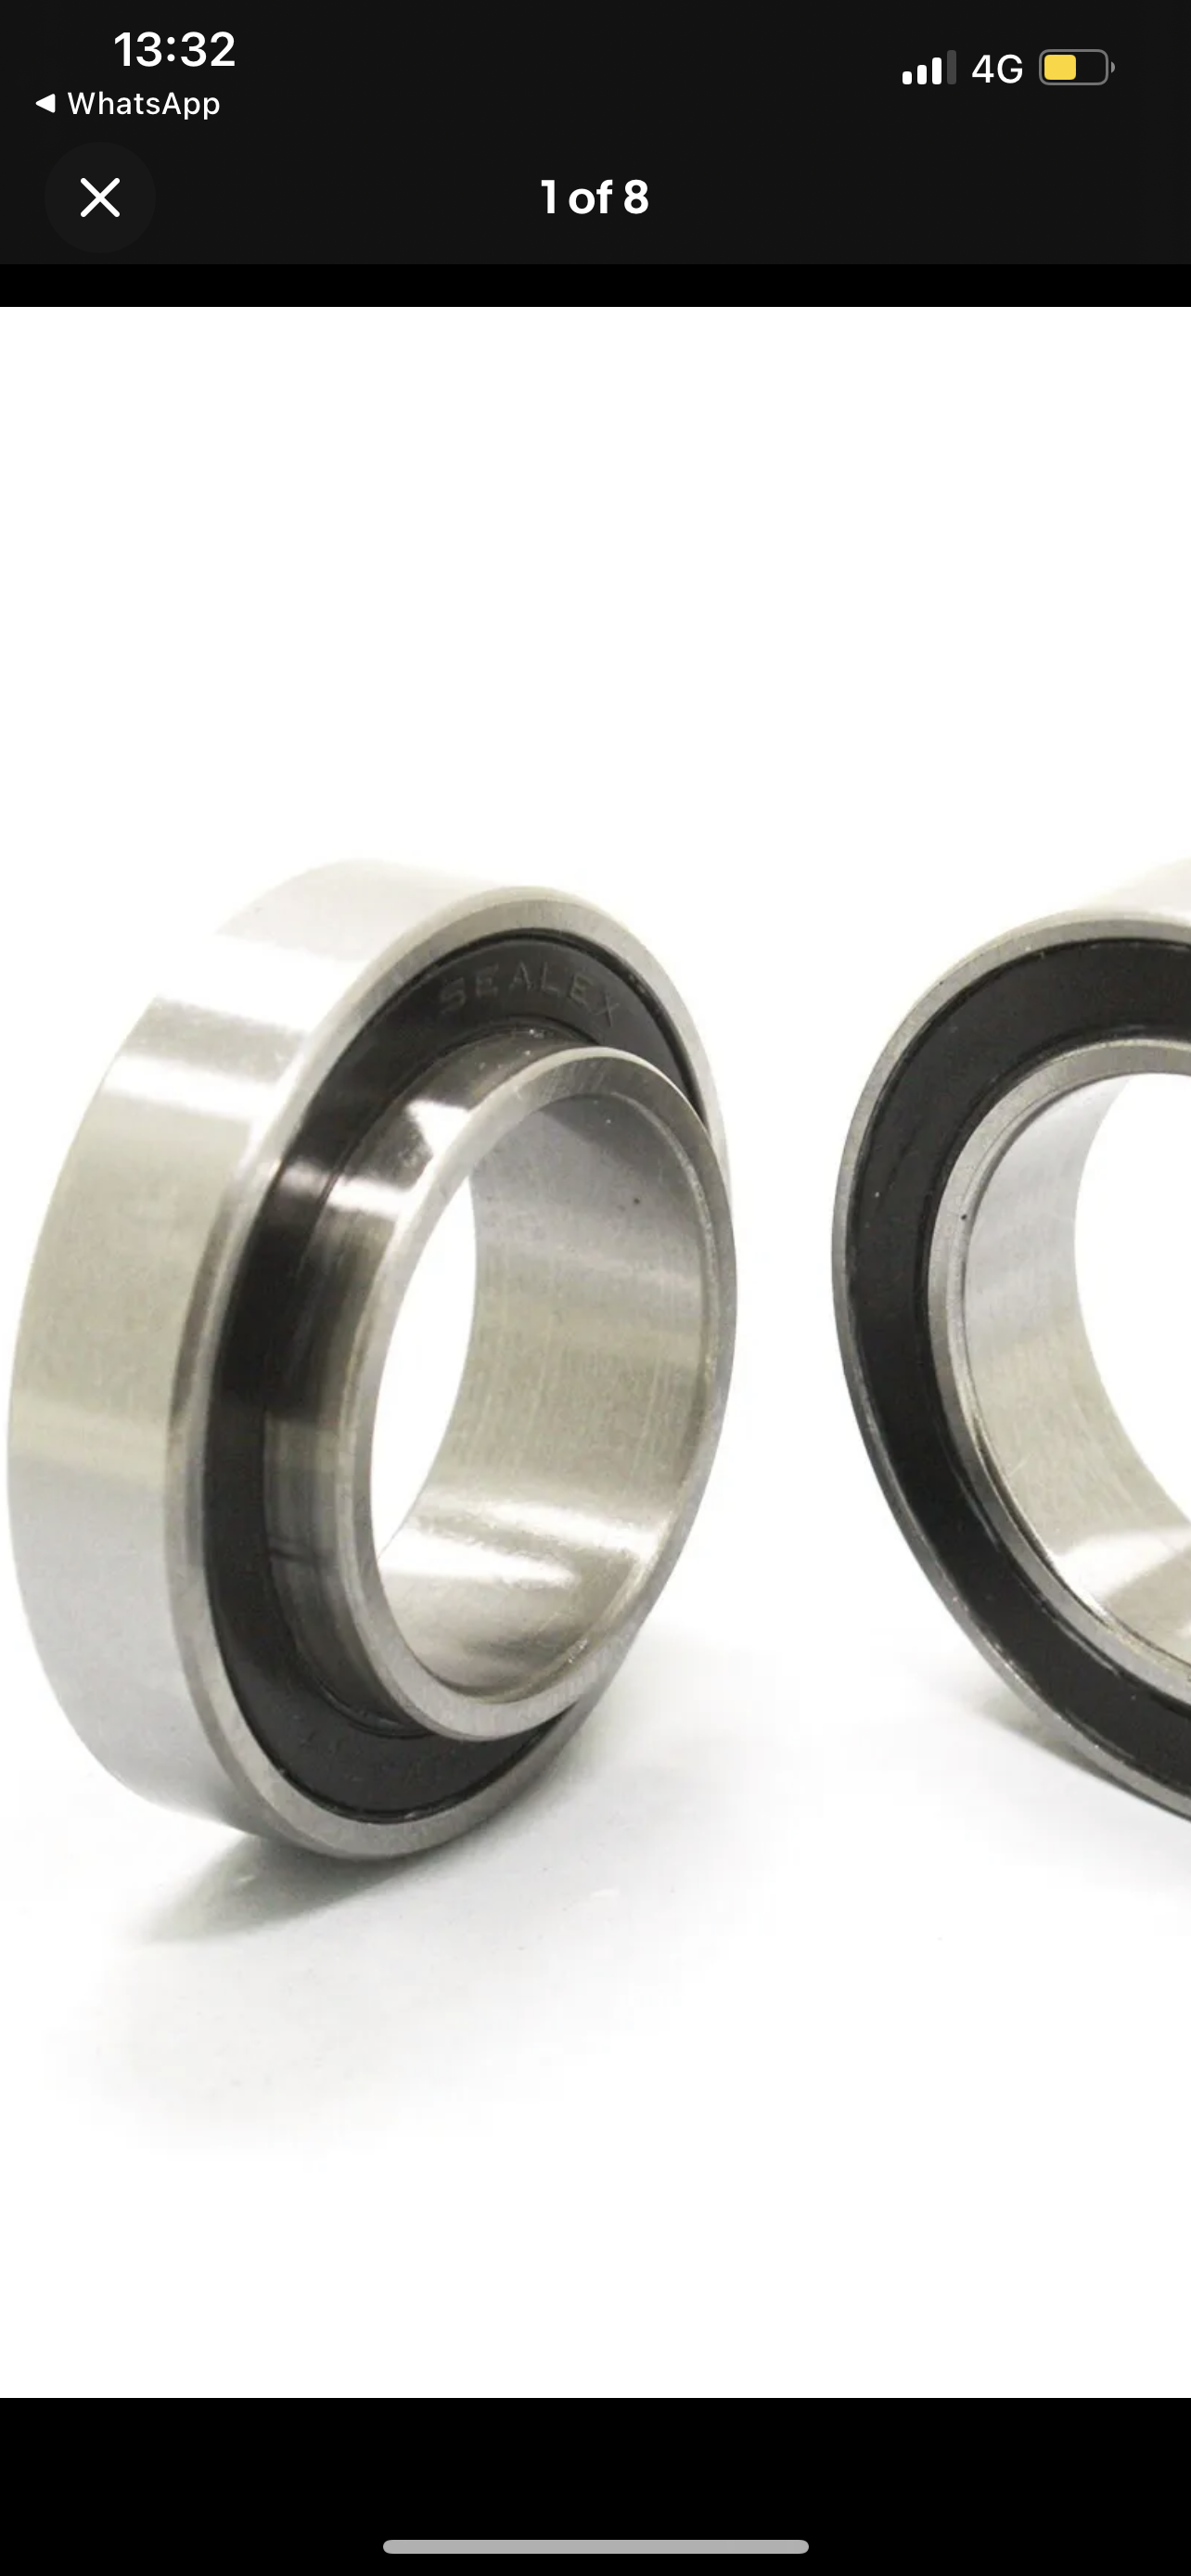
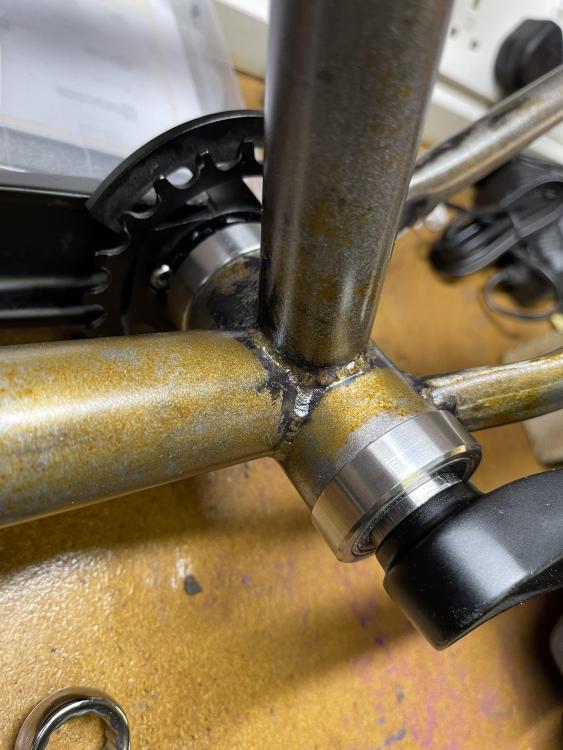
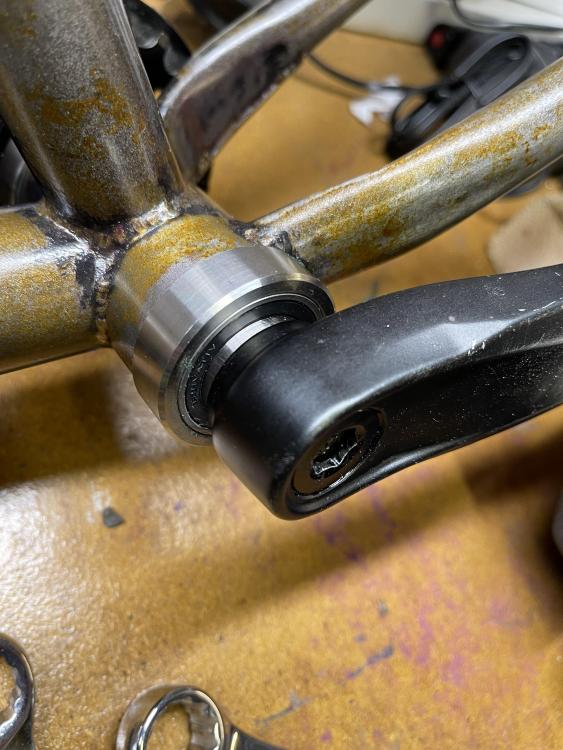
Now to tackle the bb. I could have kept the middleburns on, but having used the SRAM gxp cranks on the 24 inch, and on my enduro bike - the stiffness and clean look of them felt like it was worth a battle to get them to work. I spent hours searching for some sort of adapter to no avail. I asked for advice on this forum and @Swoofty mentioned a product, which were press fit bb cups that housed a bb30 bearing. This is what I needed, but with cups that would house the SRAM bearings. So I ordered to SRAM bb replacement bearings (which are such an odd design due to the stepped crank spindle): I then got in touch with a mate who works in a company that does a lot of machining. He was able to get a colleague to make these beauties: I picked these up yesterday - and god was I impressed. The tolerances these have been made to is spot on. Needless to say, I got to work fitting them: once pressed, I then pressed the new bearings in and fitted the sram cranks: the true test will be riding it, but it feels good in terms of movement by hand.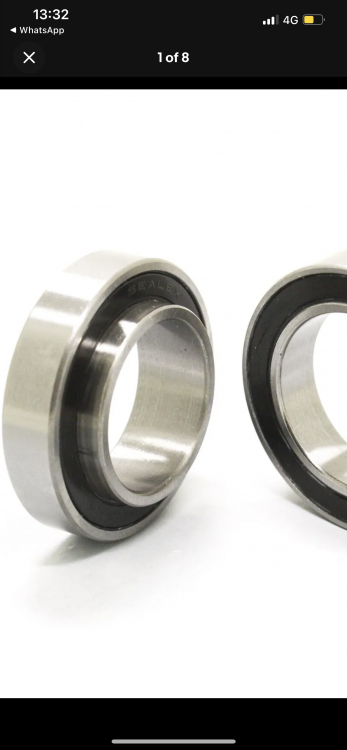

-
Marino street 26inch build / refurb
Private Repress replied to Private Repress's topic in Trials Chat
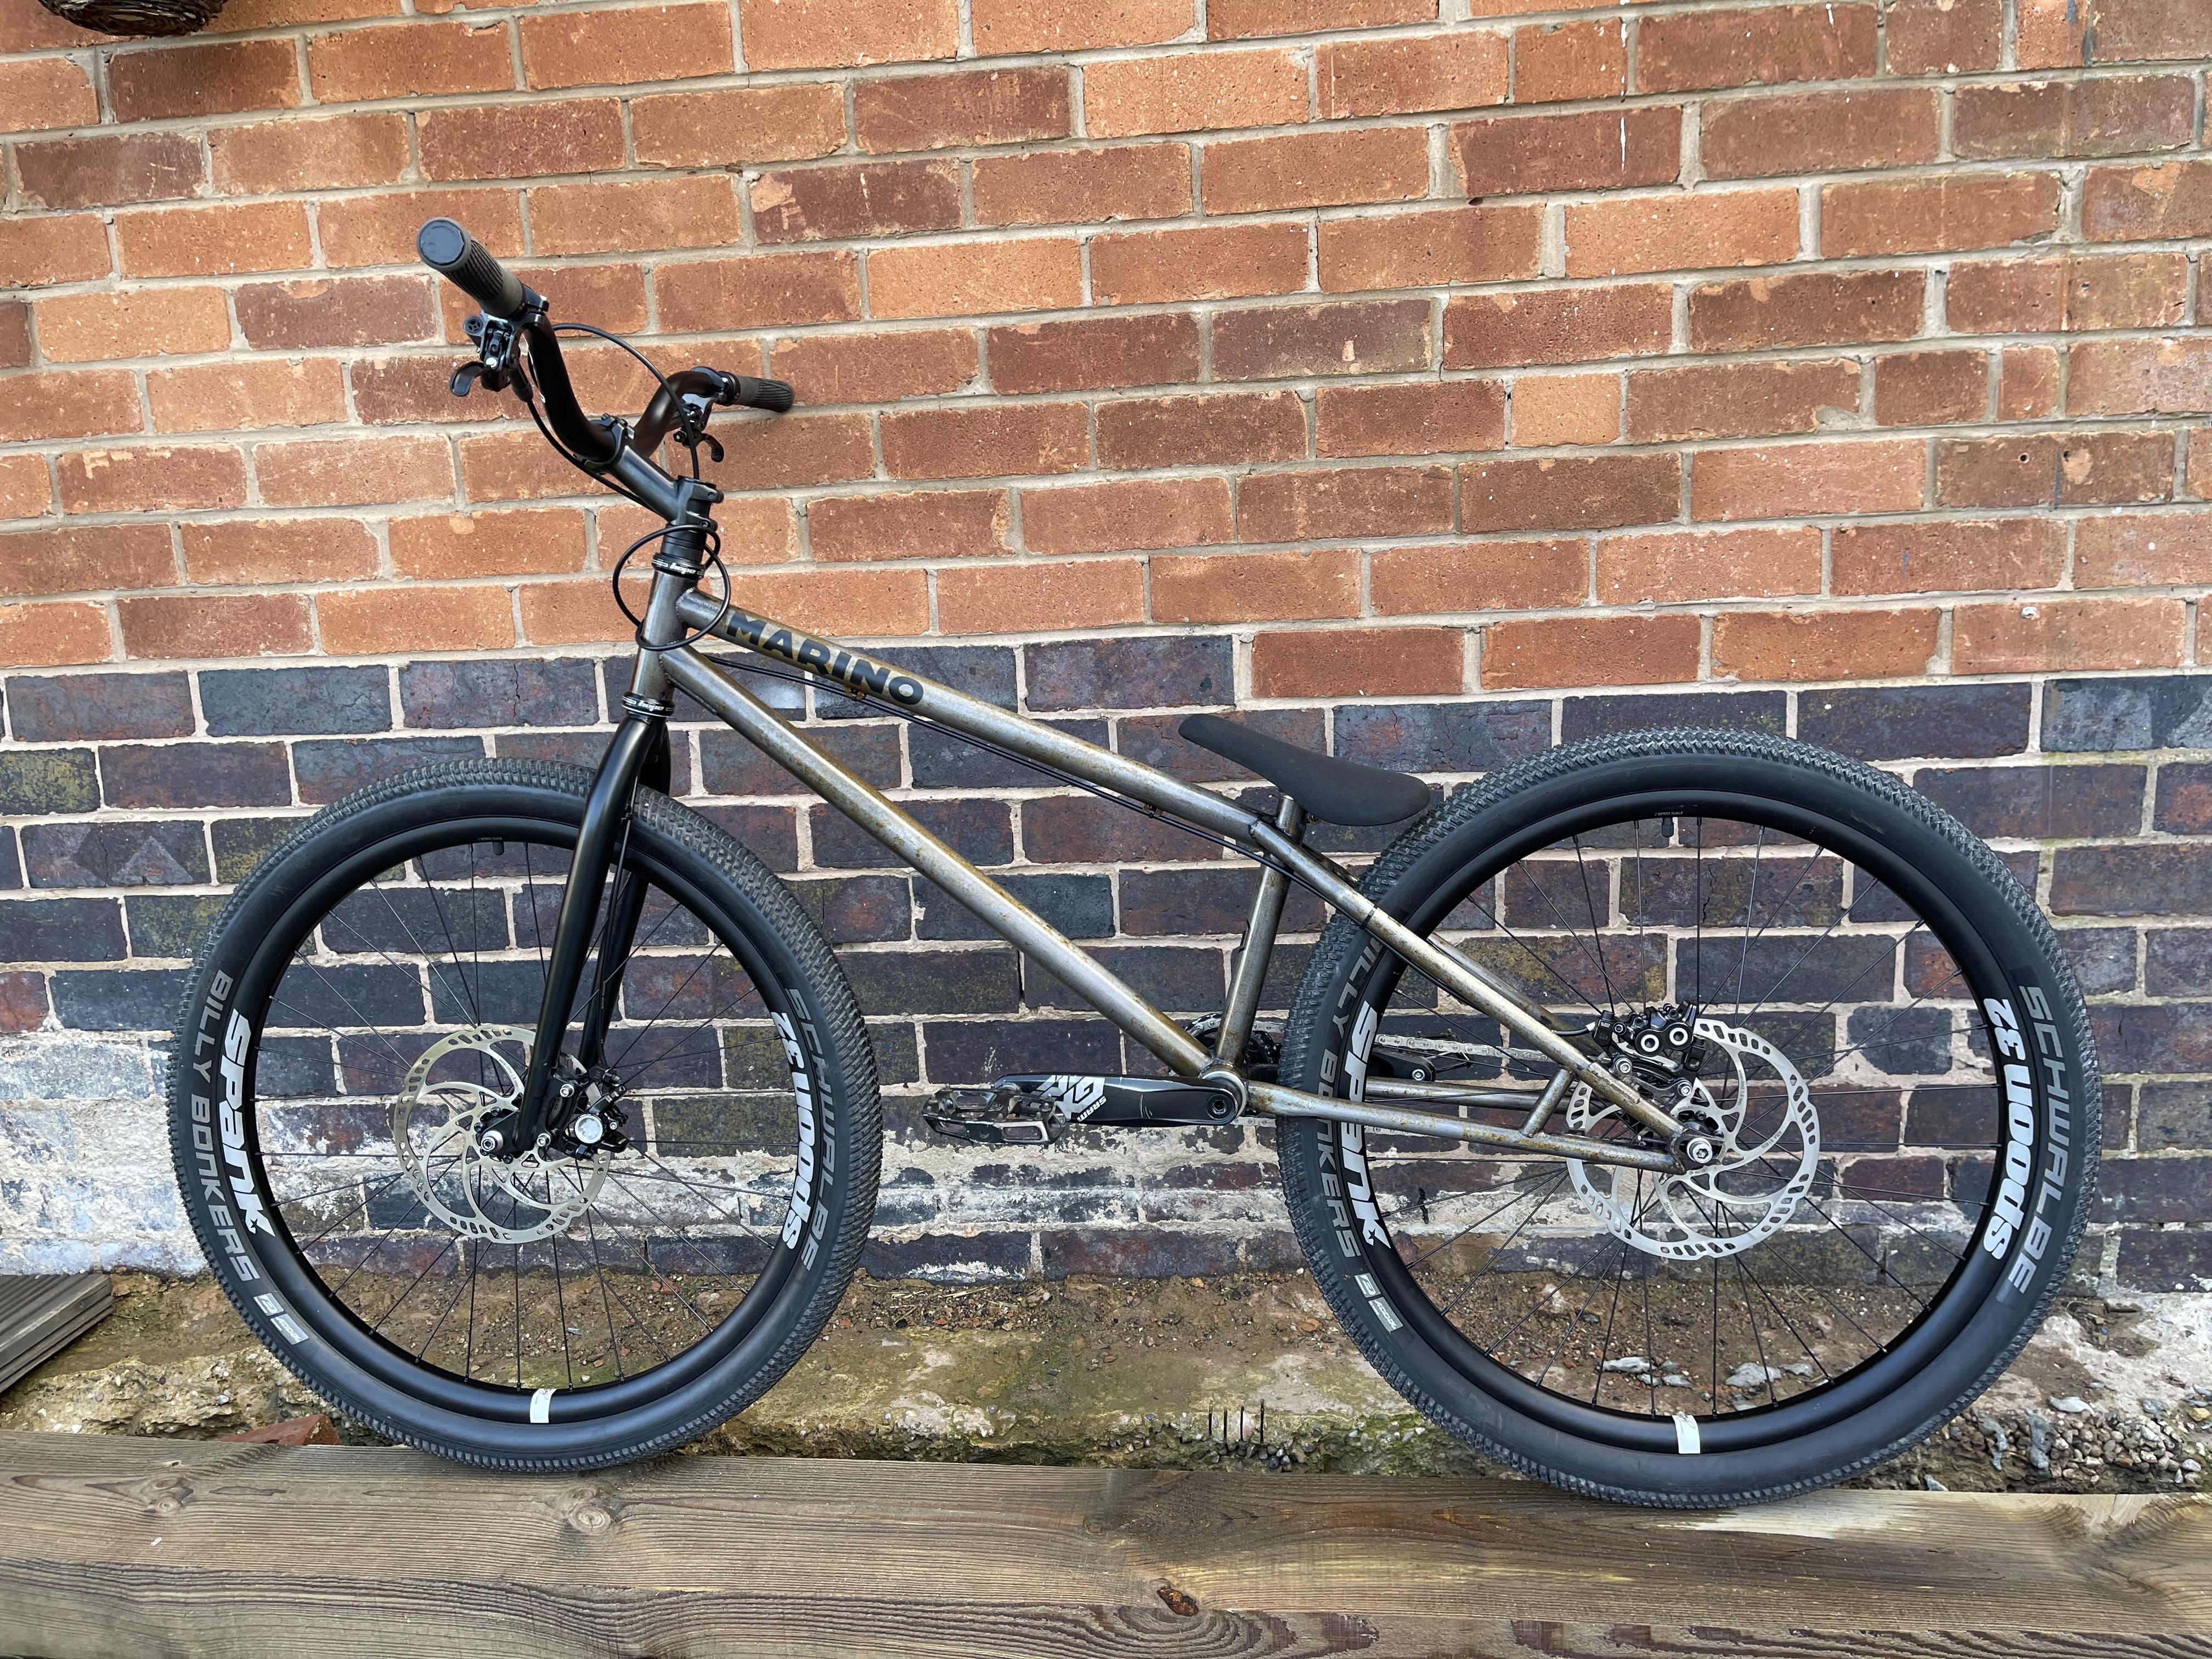
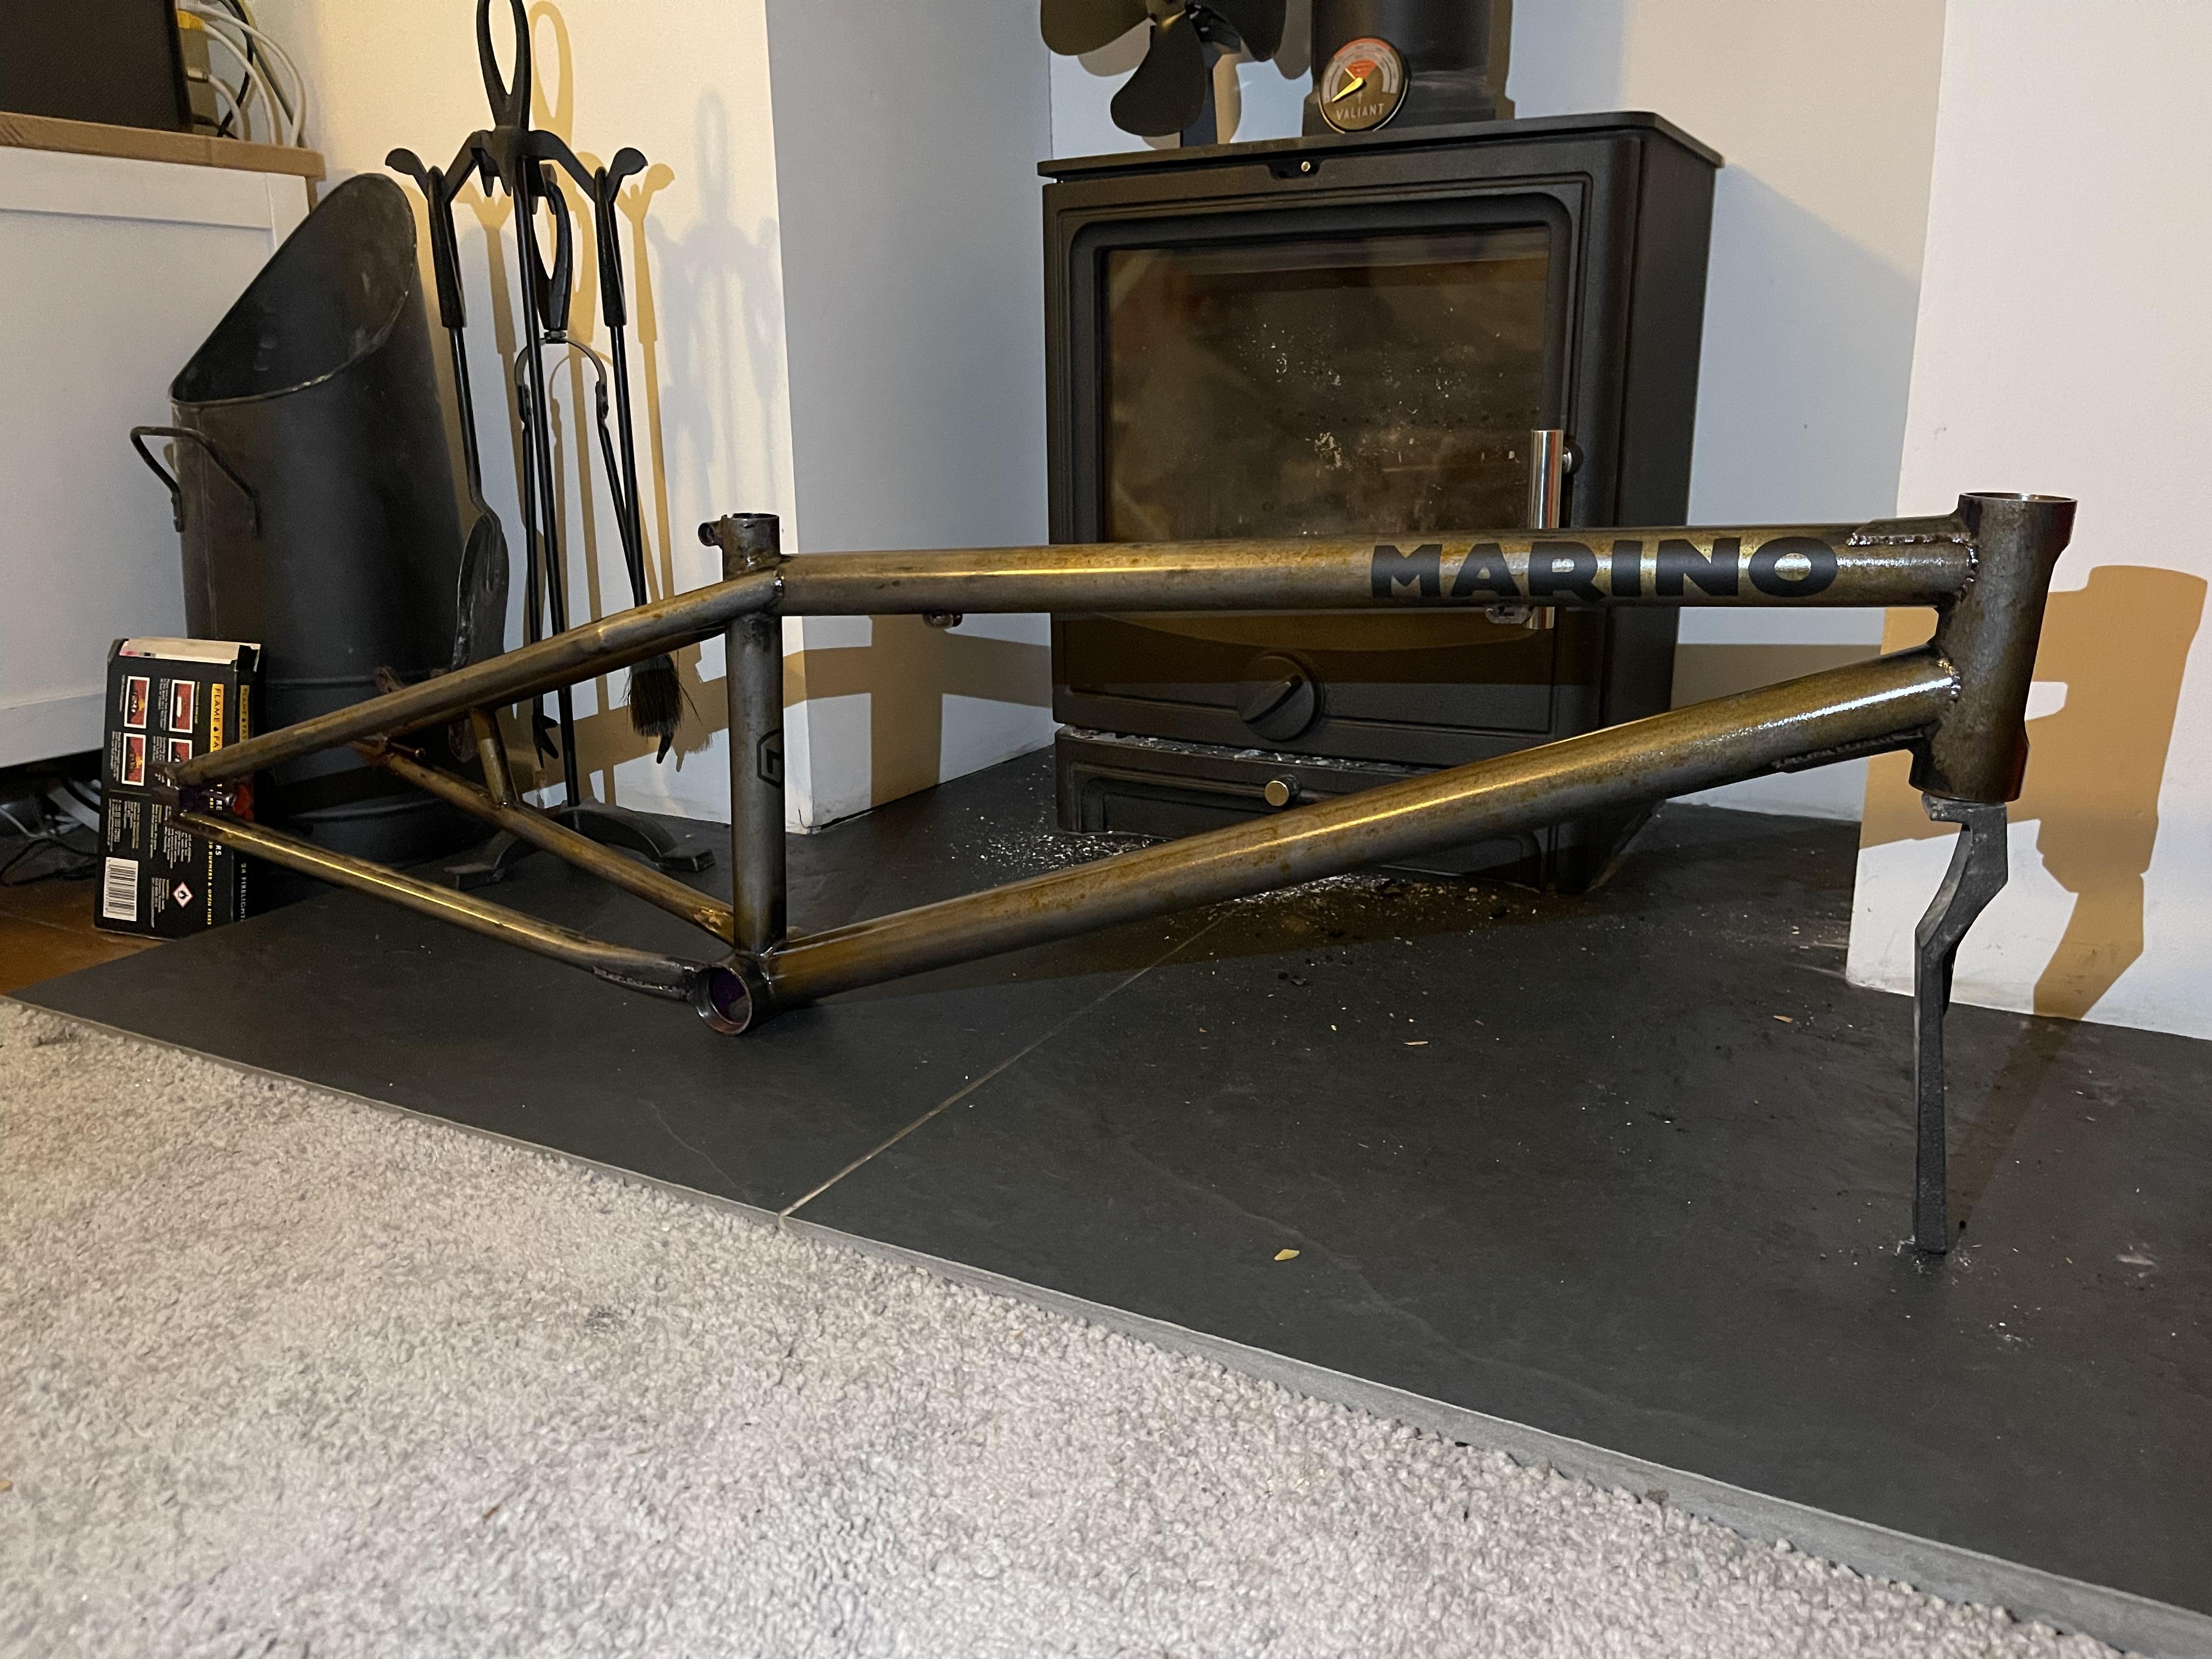
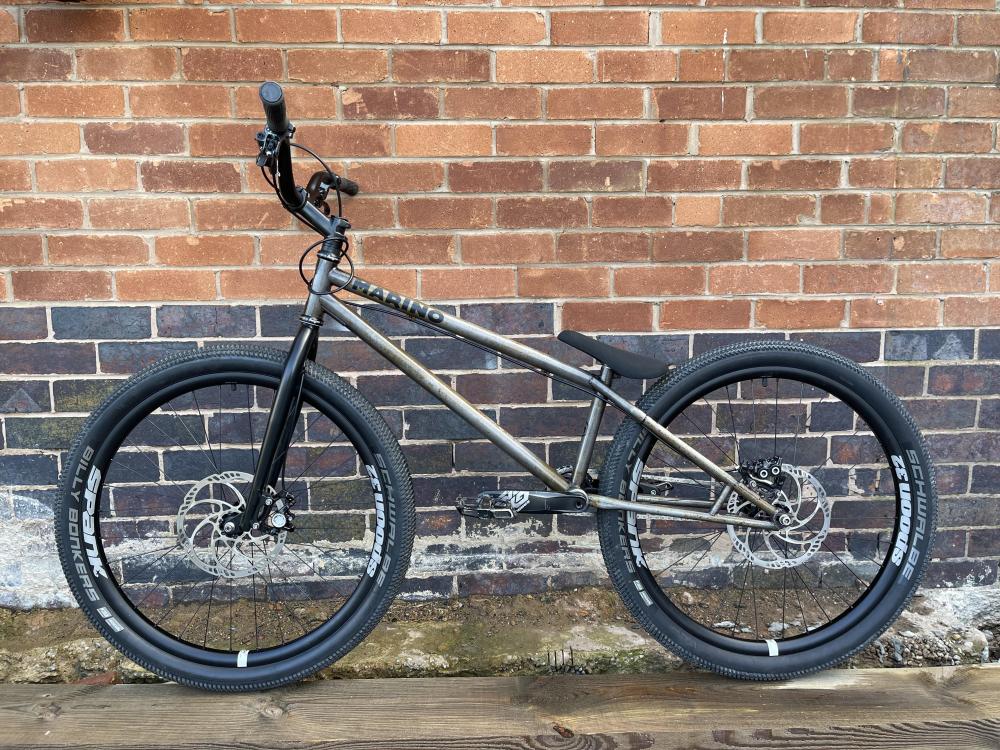
So after another 3 coats, and allowing it to dry overnight I added some decals: the pictures really don’t bring out the bronze of the lacquered rust, but it looks so damn good in person.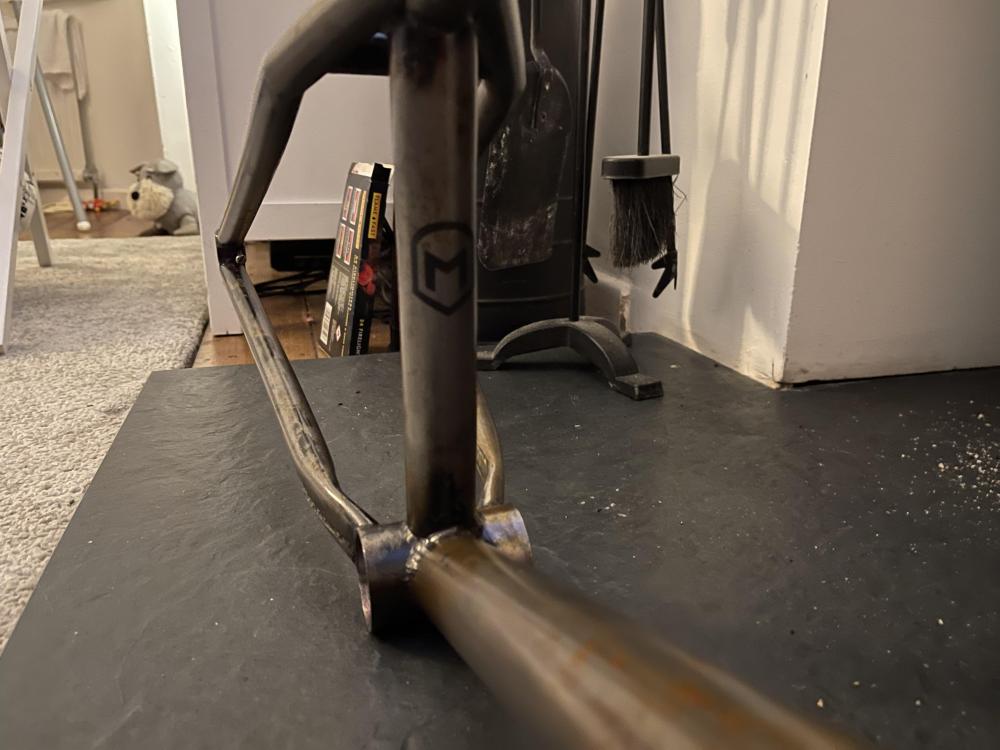


-
Marino street 26inch build / refurb
Private Repress replied to Private Repress's topic in Trials Chat
Next job was to clear coat the frame, I bought two cans of clear coat from somewhere like Poundland, hung the frame on the washing line and proceeded with this ultra professional application, with a total of around 5 coats. I was pleasantly surprised with the results: At this point only two coats had been applied: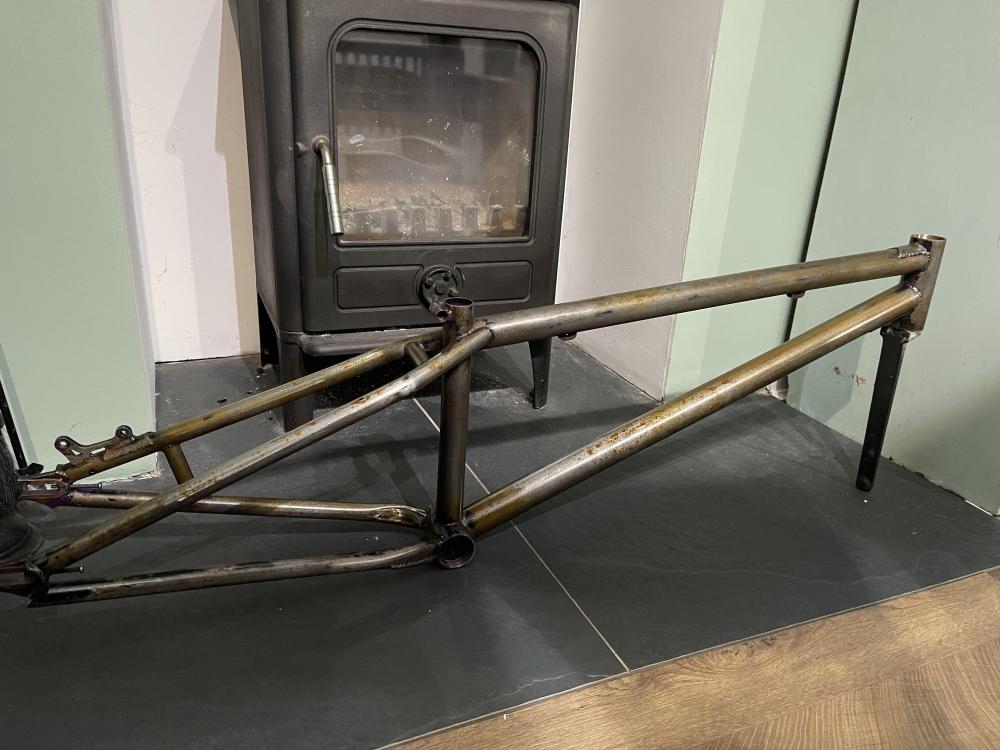

-
Marino street 26inch build / refurb
Private Repress replied to Private Repress's topic in Trials Chat
With surface rust starting to form I got in touch with @Ben Davies who is a master at making graphics. Absolute top bloke who I can’t recommend enough. I sent Ben some pics of what I was after along with some measurements and he came up with these: While I was waiting on the frame to rust , I rebuilt the rims it came with using black spokes onto some black Hope Pro 2 trials hubs which I already had - using these hubs also meant I didn’t need to split the 24inch Marino, which has pro 4s (if I get on with this bike I’ll possibly rebuild the wheels with the pro 4s). A fresh set of black Billy bonkers tyres will go on for the build.
-
Marino street 26inch build / refurb
Private Repress replied to Private Repress's topic in Trials Chat
I quite liked the dirty look, deciding to leave some bits of the black paint, and even some of the purple - a nod to those that have owned it before, giving it a little bit of character (in my mind). But to get it looking more like Akriggs build, I needed rust. I contemplated forcing the rust with chemicals, but had time on my hands whilst I worked on a solution for the bb. So the frame spent a week in the garden after being soaked in water: