


japslap
-
Posts
198 -
Joined
-
Last visited
Content Type
Profiles
Forums
Gallery
Posts posted by japslap
-
-
9 hours ago, Paperclip said:
I found those sas rims to soft and flexible for the rear I know you'll be doing different things and it has quite the amount more spots than I had used so you should see how it fairs up. I do find the shade of gold these rims are appealing.
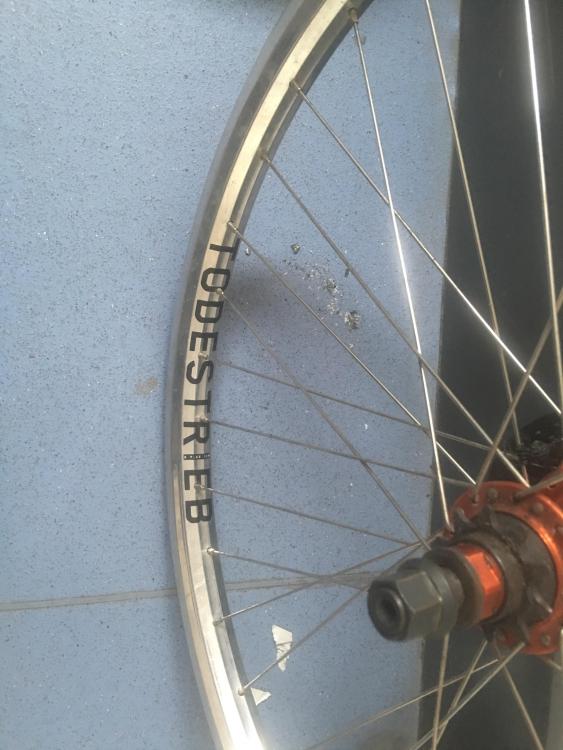
Yea I know where your coming from, so far it's holding up well, haven't used it much and only just done the initial re-tightening of the non drive side after first use, my profile is 48 hole so had limited choice, thinking I should have gone 4 cross, other than that I have a set of todestrieb chrome rims I was toying with putting on but there laced to a fixed hub and unfortunately the death mobile runs a Spanish bb or I'd have a front free wheel set up on the right
-
11 minutes ago, japslap said:
Thanks man, difficult to get in those shots but when the sun hits its like there's a bit of flake in there too
")
I know tell me about it lol kids go back to school tomorrow so there's still a chance of summerish weather
-
31 minutes ago, Ceccarelli said:
Nice colour

Thanks man, difficult to get in those shots but when the sun hits its like there's a bit of flake in there too
-
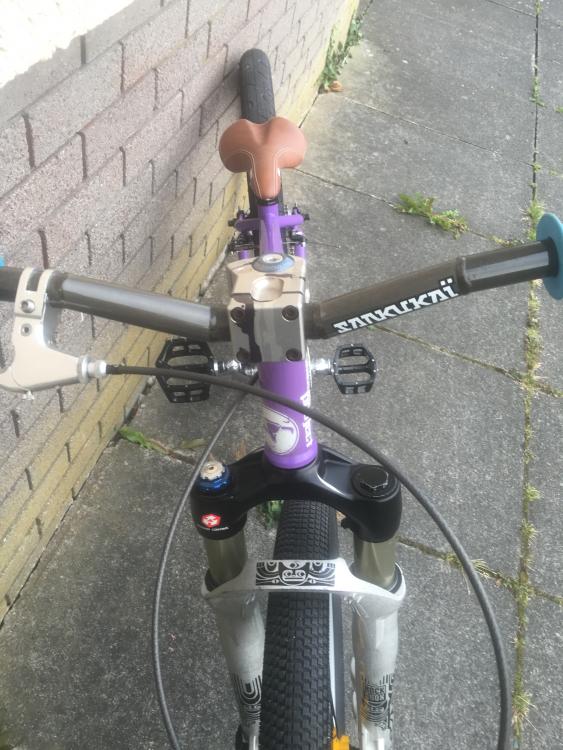
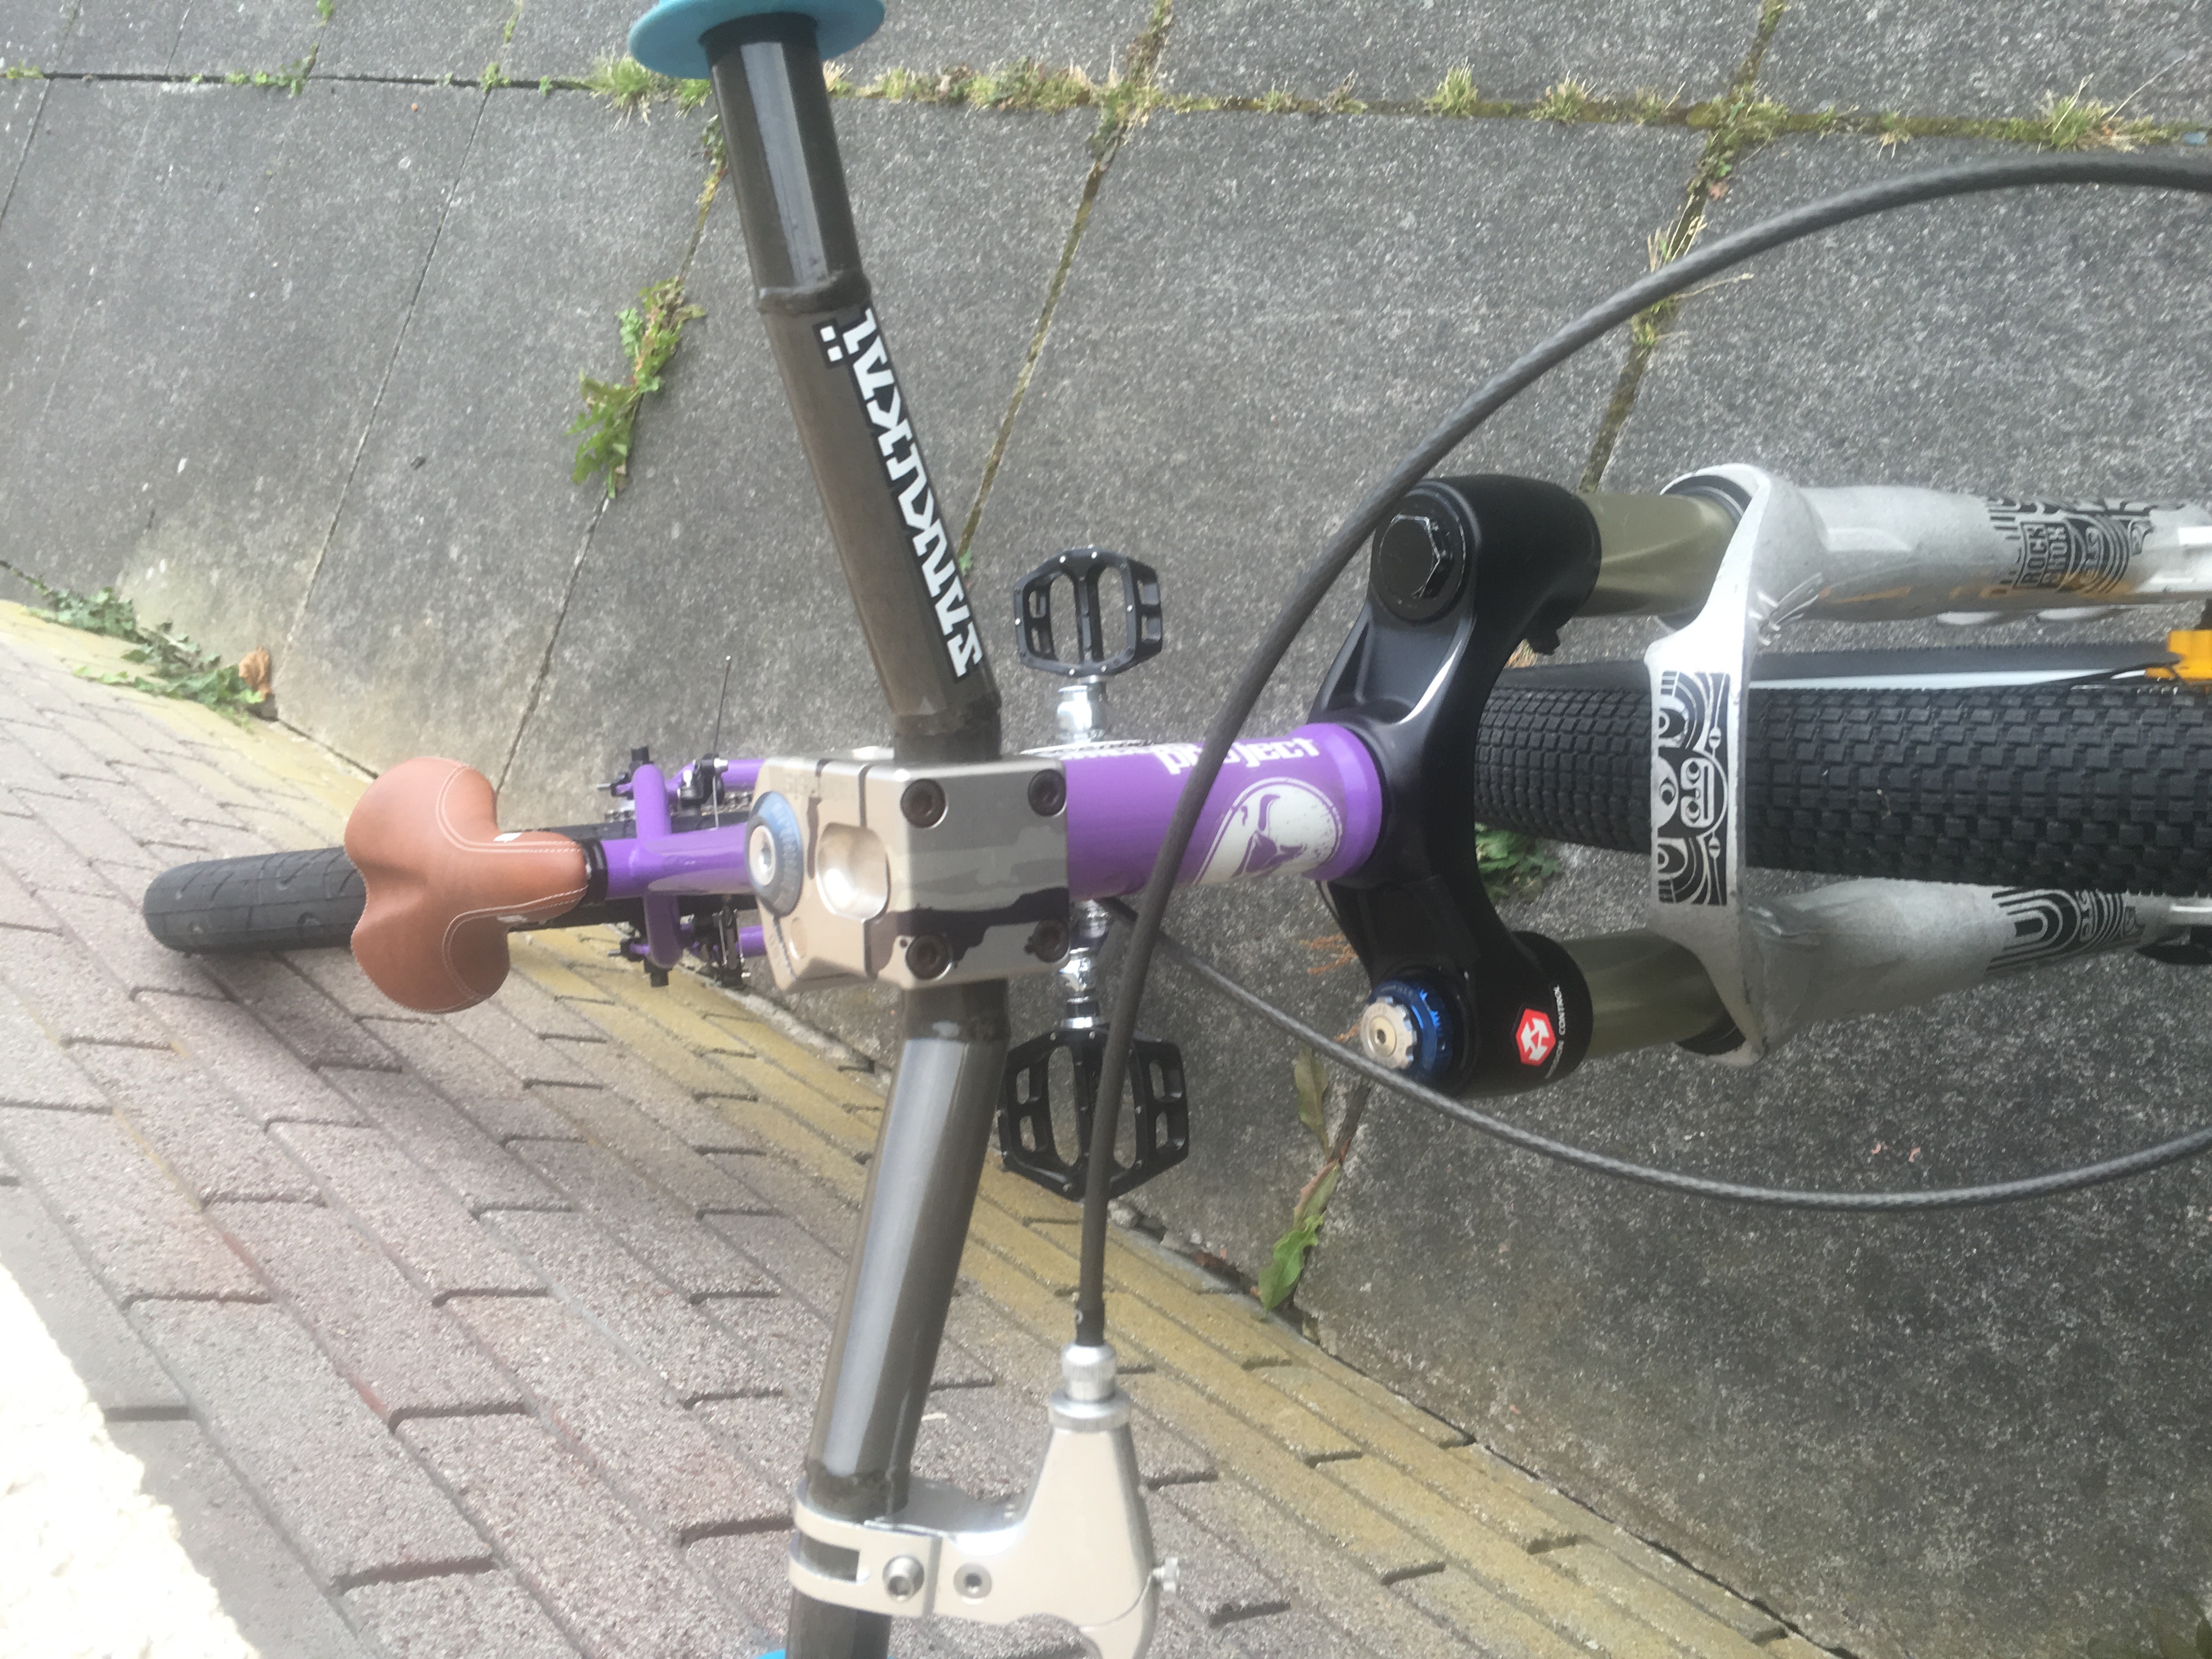
Yea it's lhd, my first lhd drive wheel build, trying different things out on this build, getting some short chubby pegs for the right hand side for grinds, also in the process of a custom grind guard for the right side of the totem. Honestly thought more eye brows would be raised for using one of the biggest sets of single crown downhill forks on the market as landing gear lol
-
Yea man had my doubts myself with the tig welds but after breaking a few alloy bars wanted to go chromoly and a little different than usual, 4130 chromoly tig welded was about as far out as I could find lol have you experience with the sankuki bars yourself? Any other suggestions to try out instead?
-
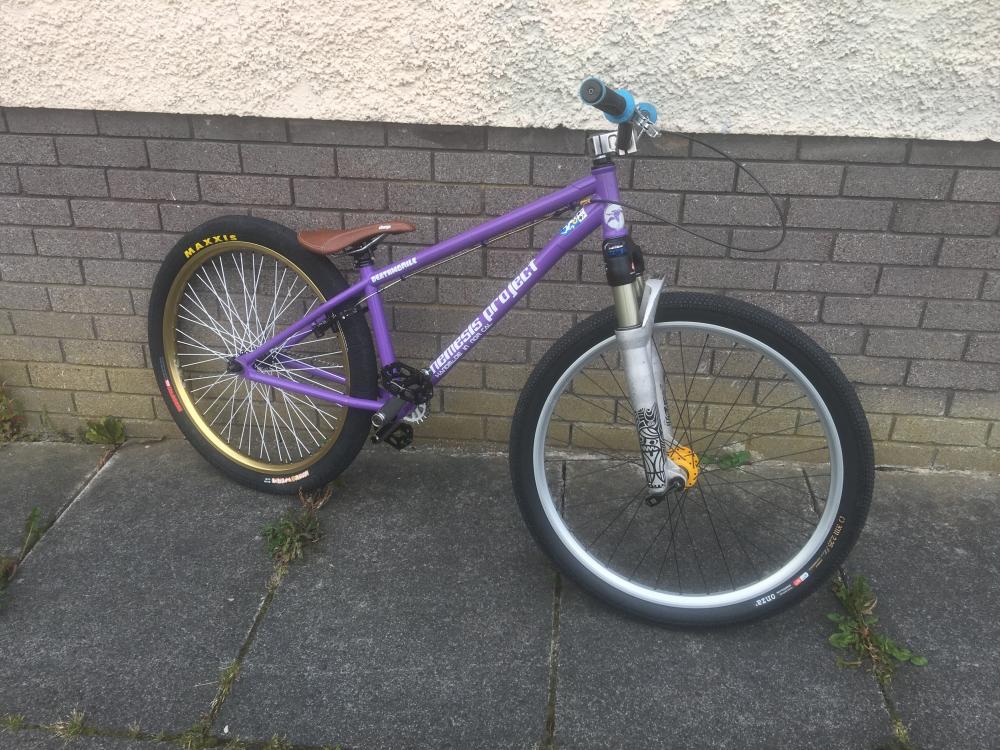
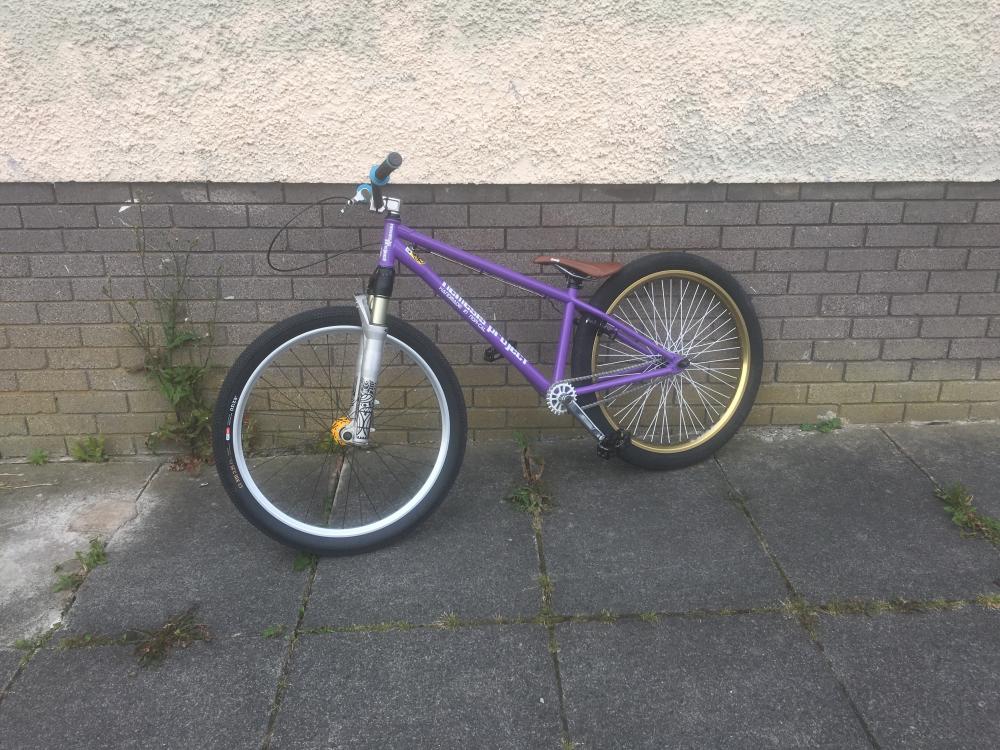
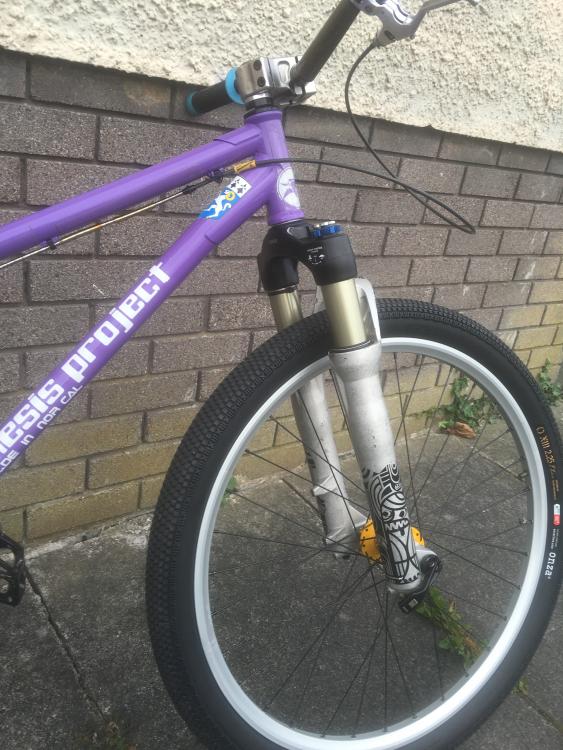
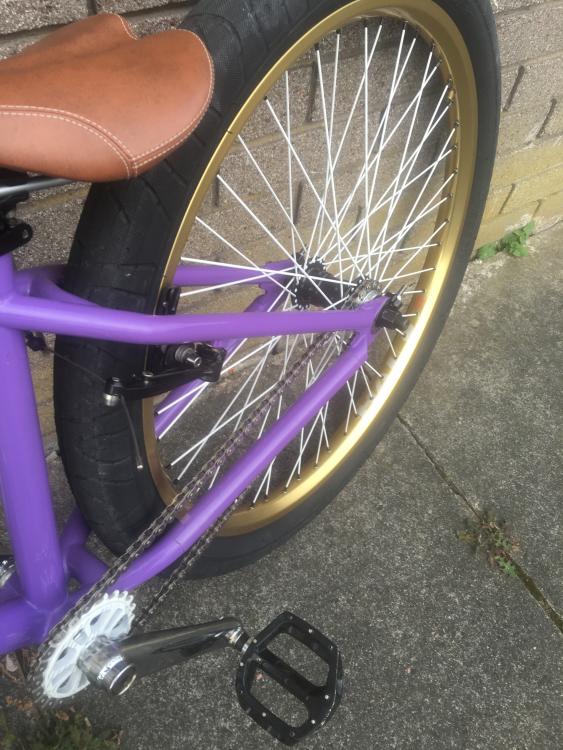
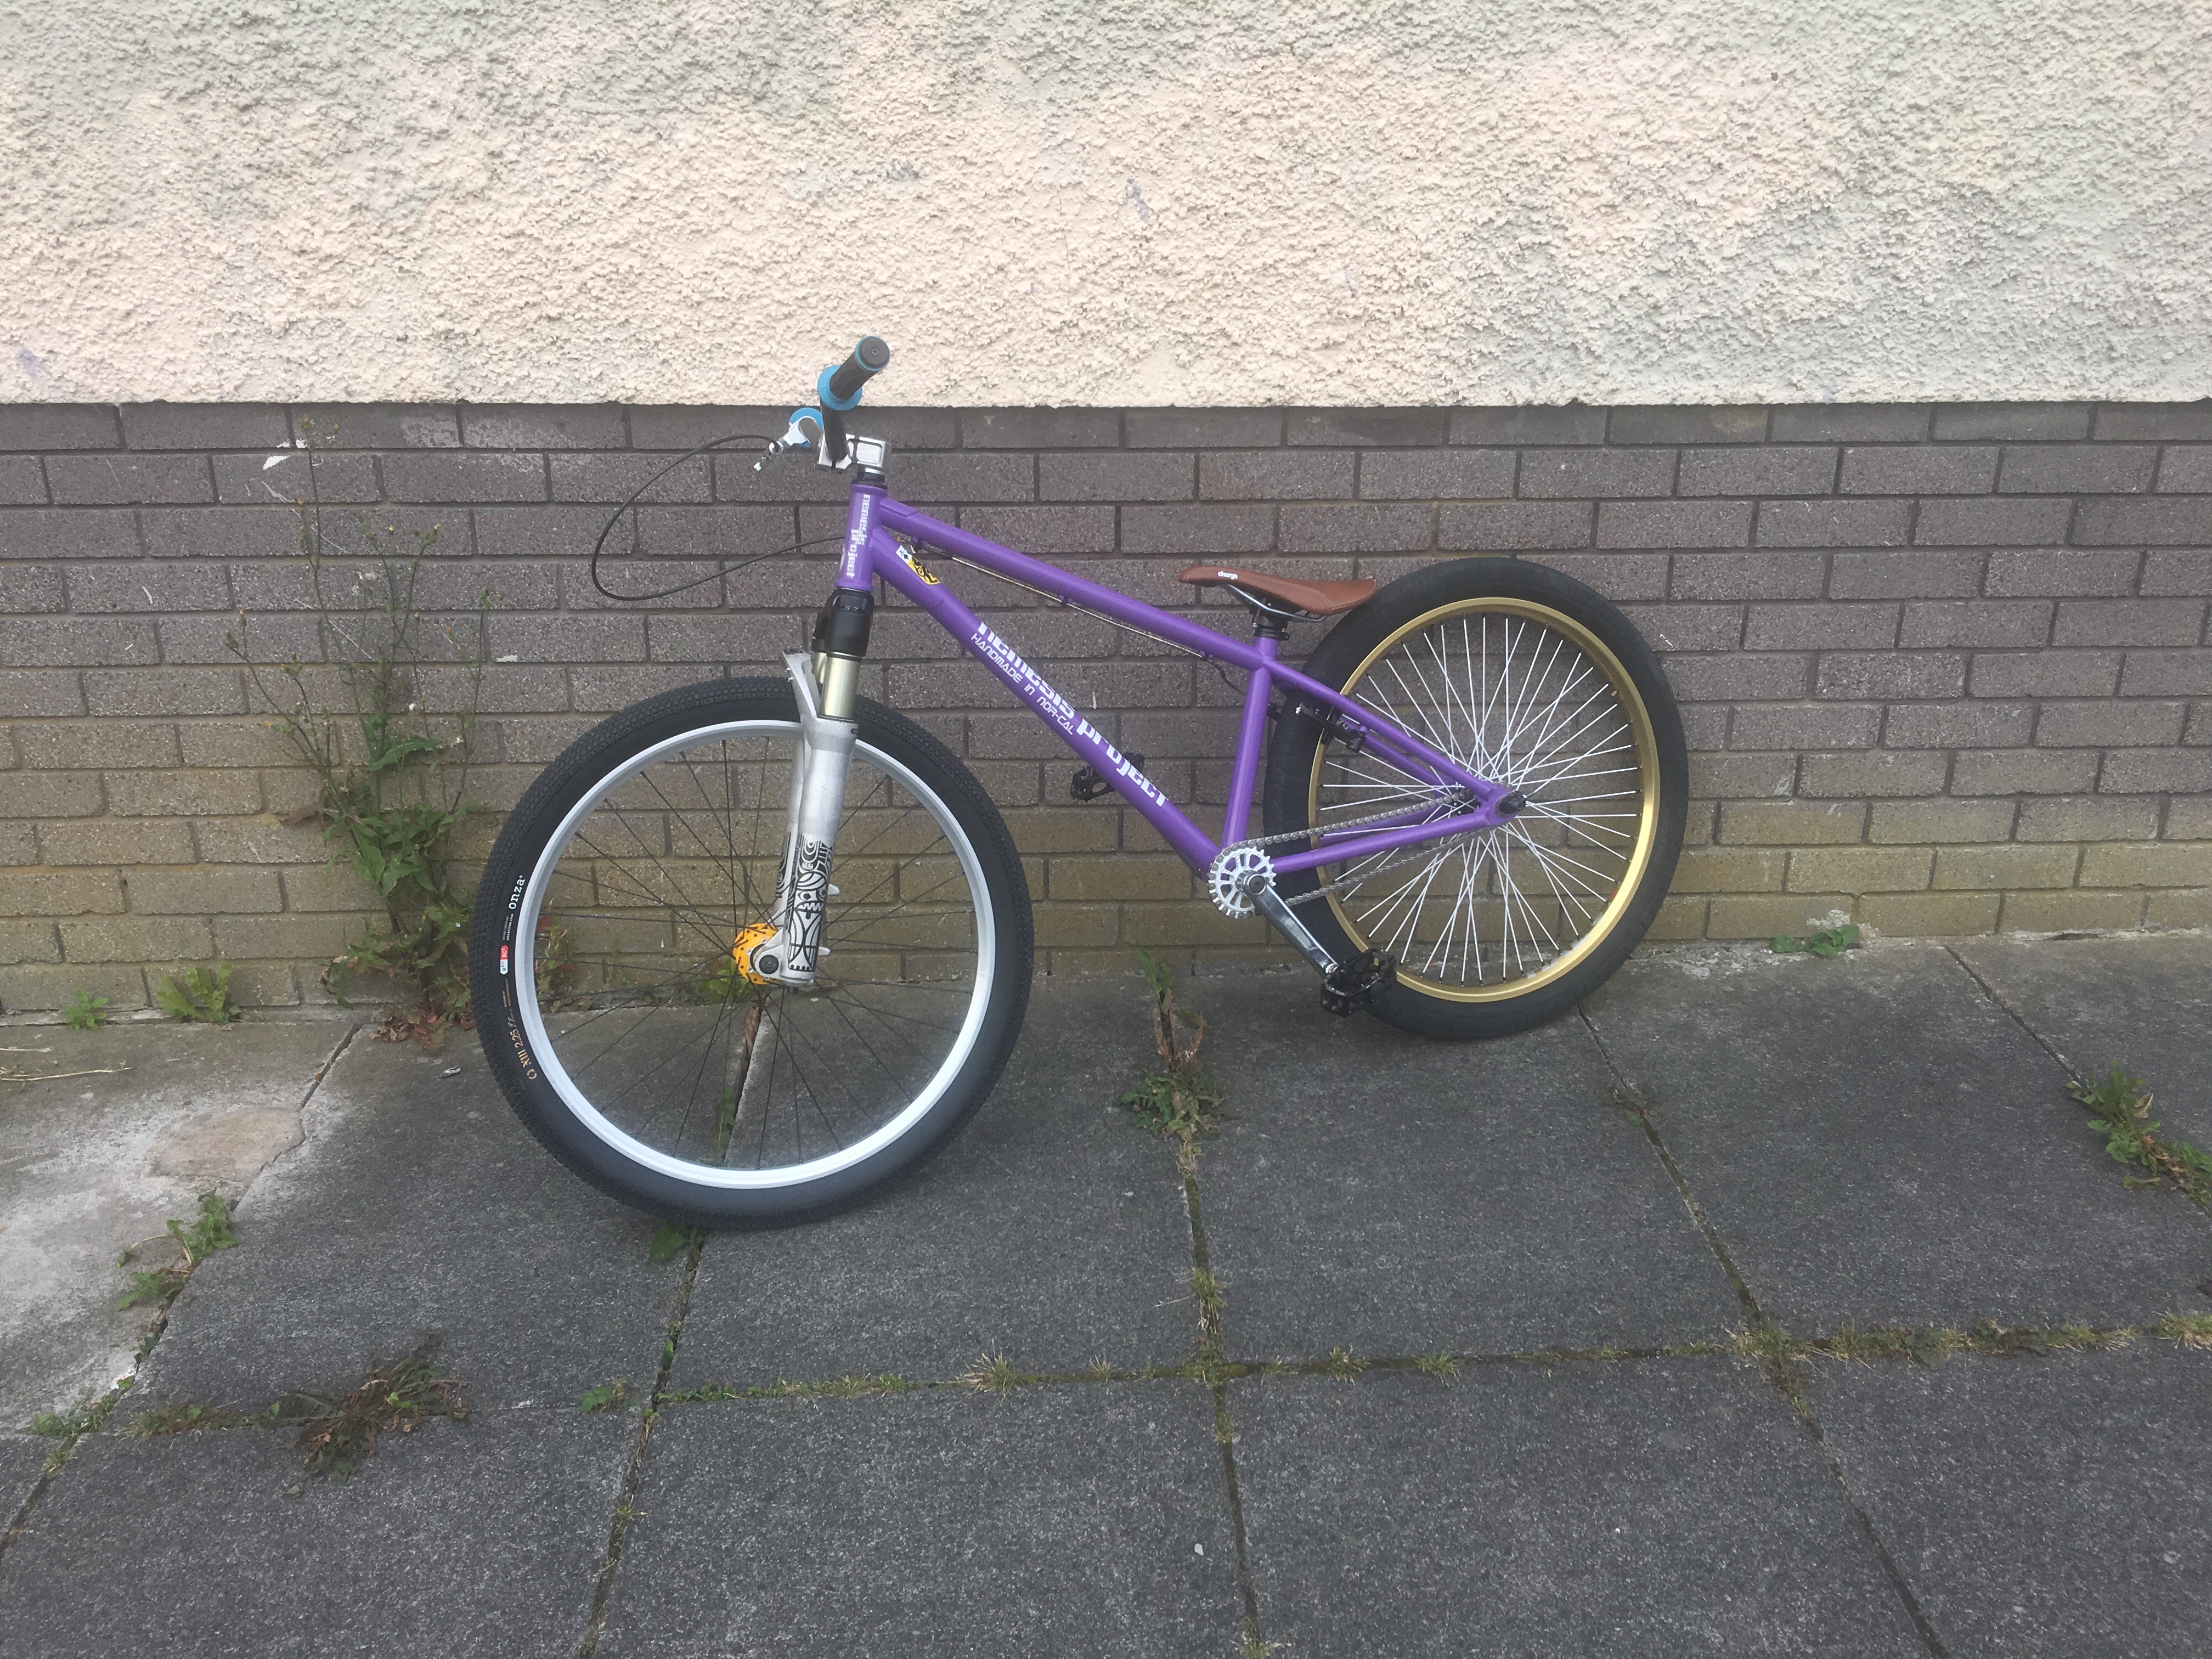
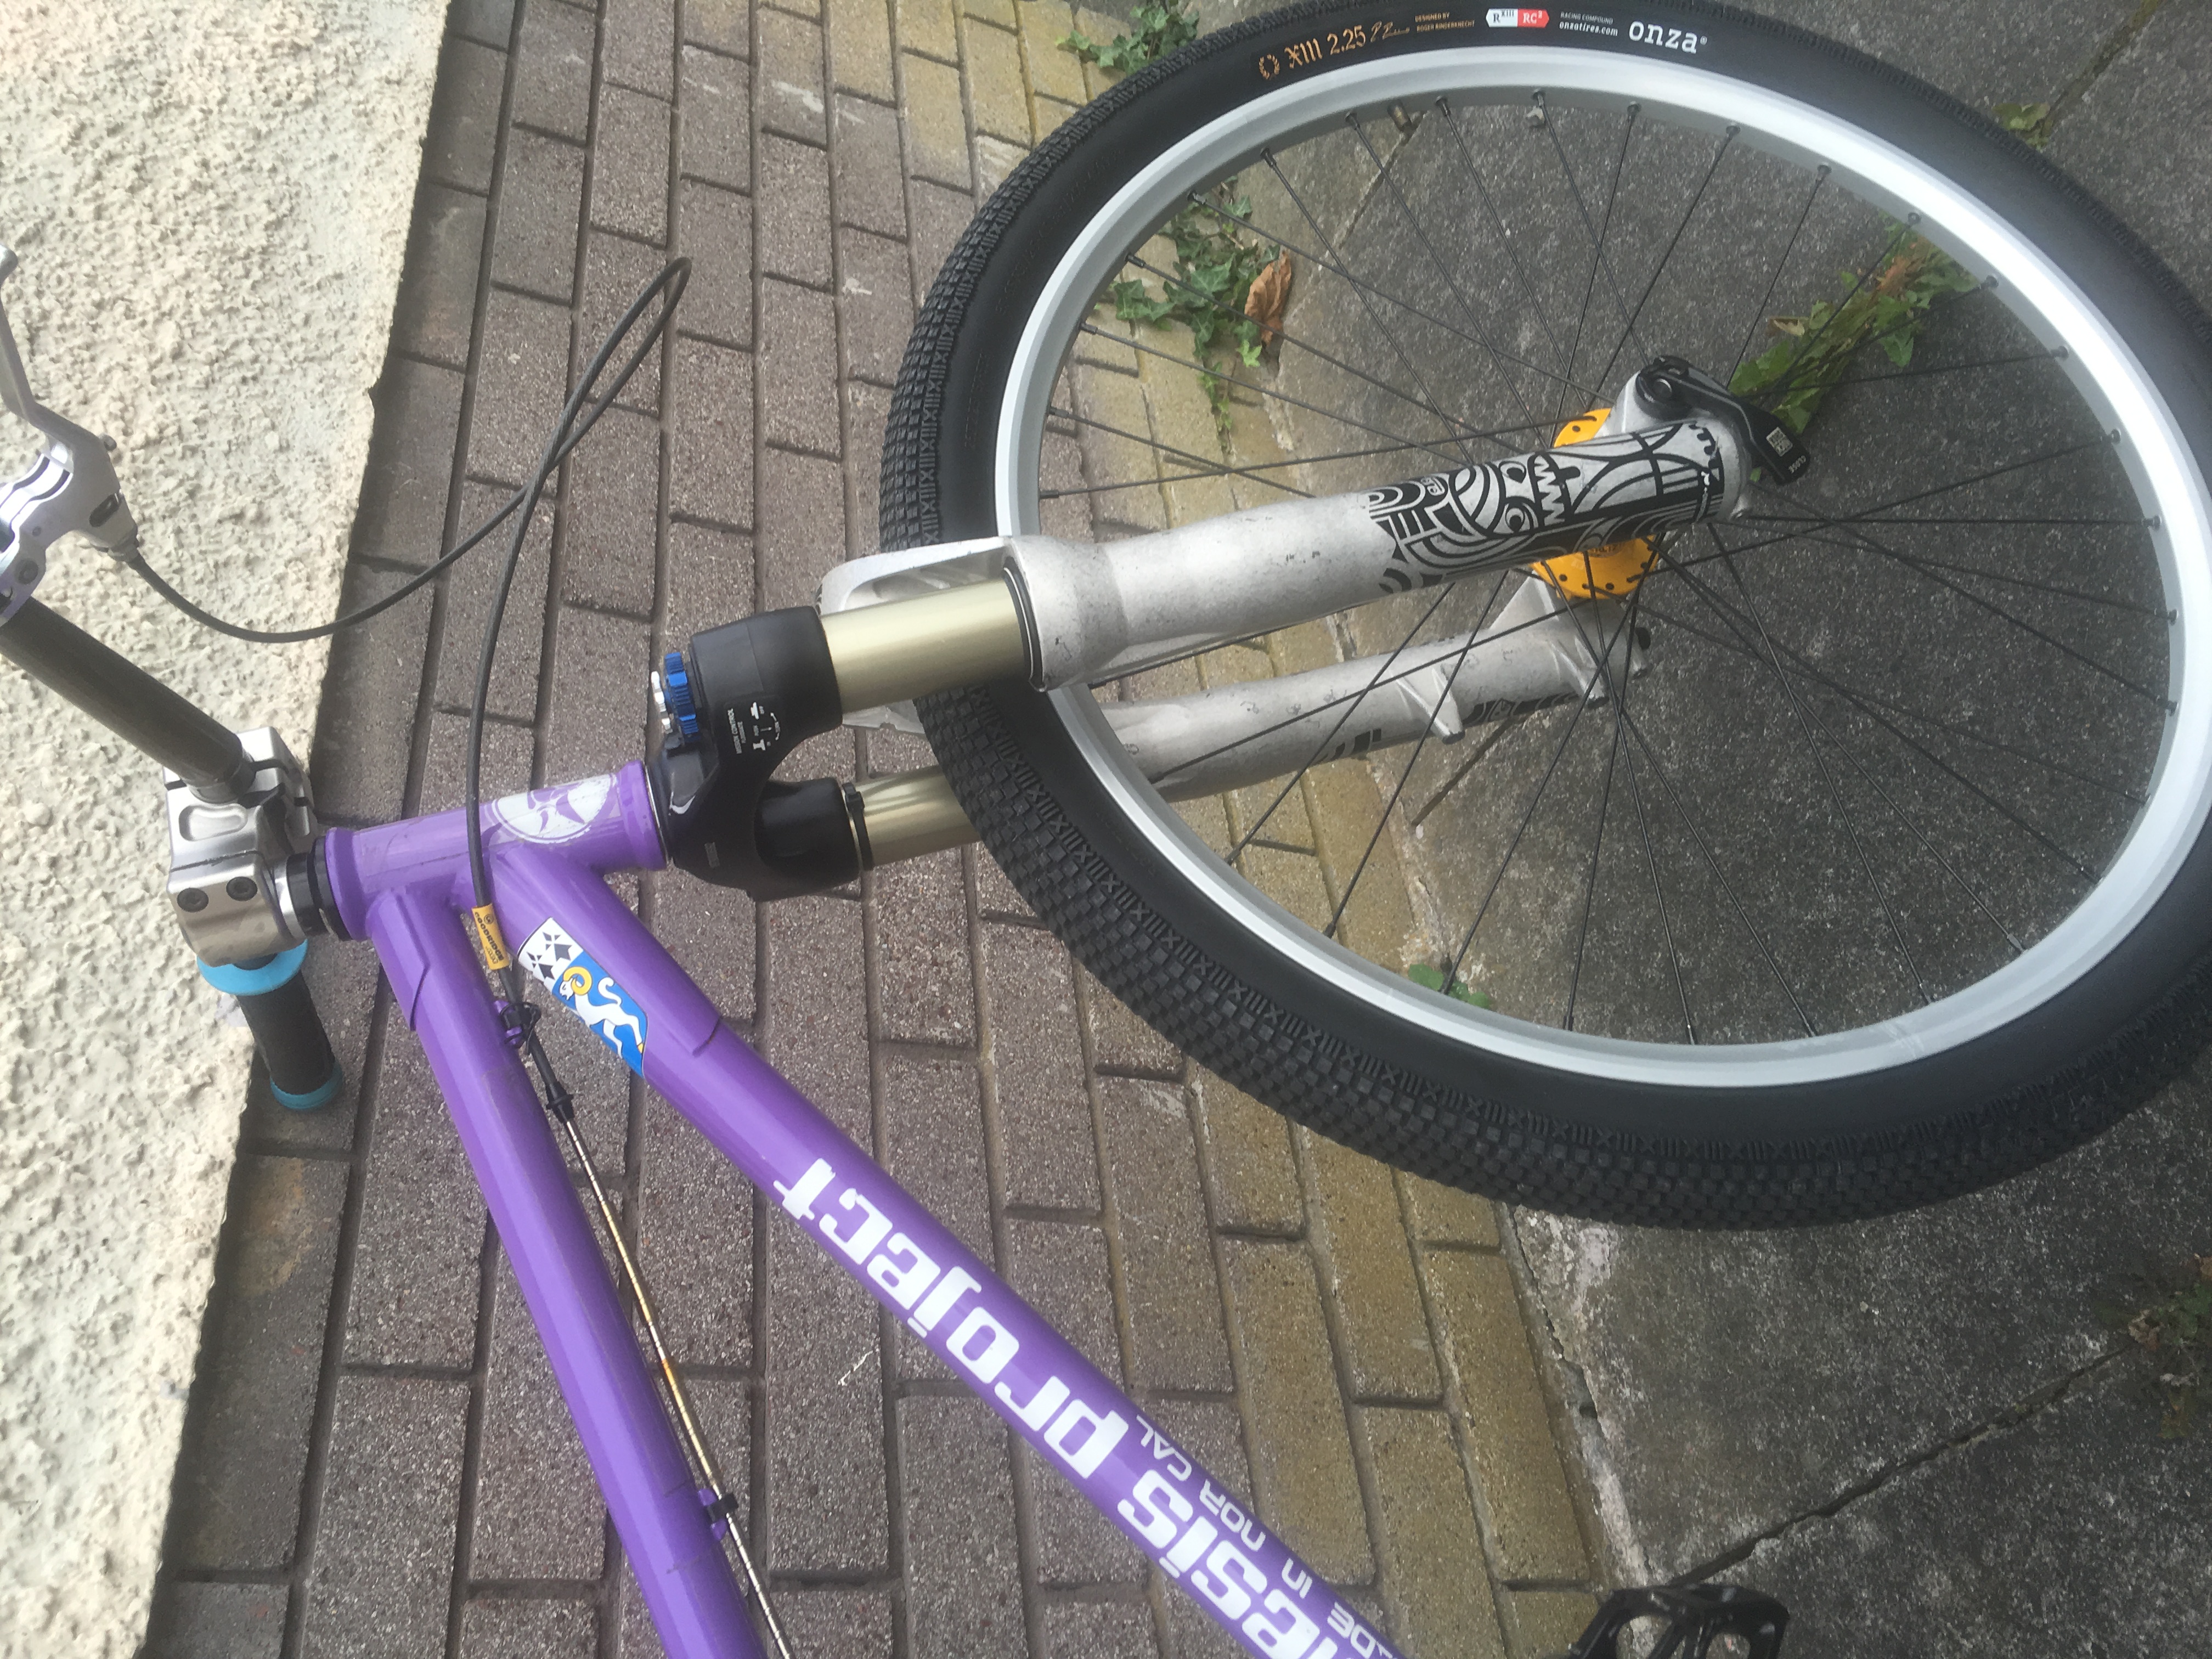
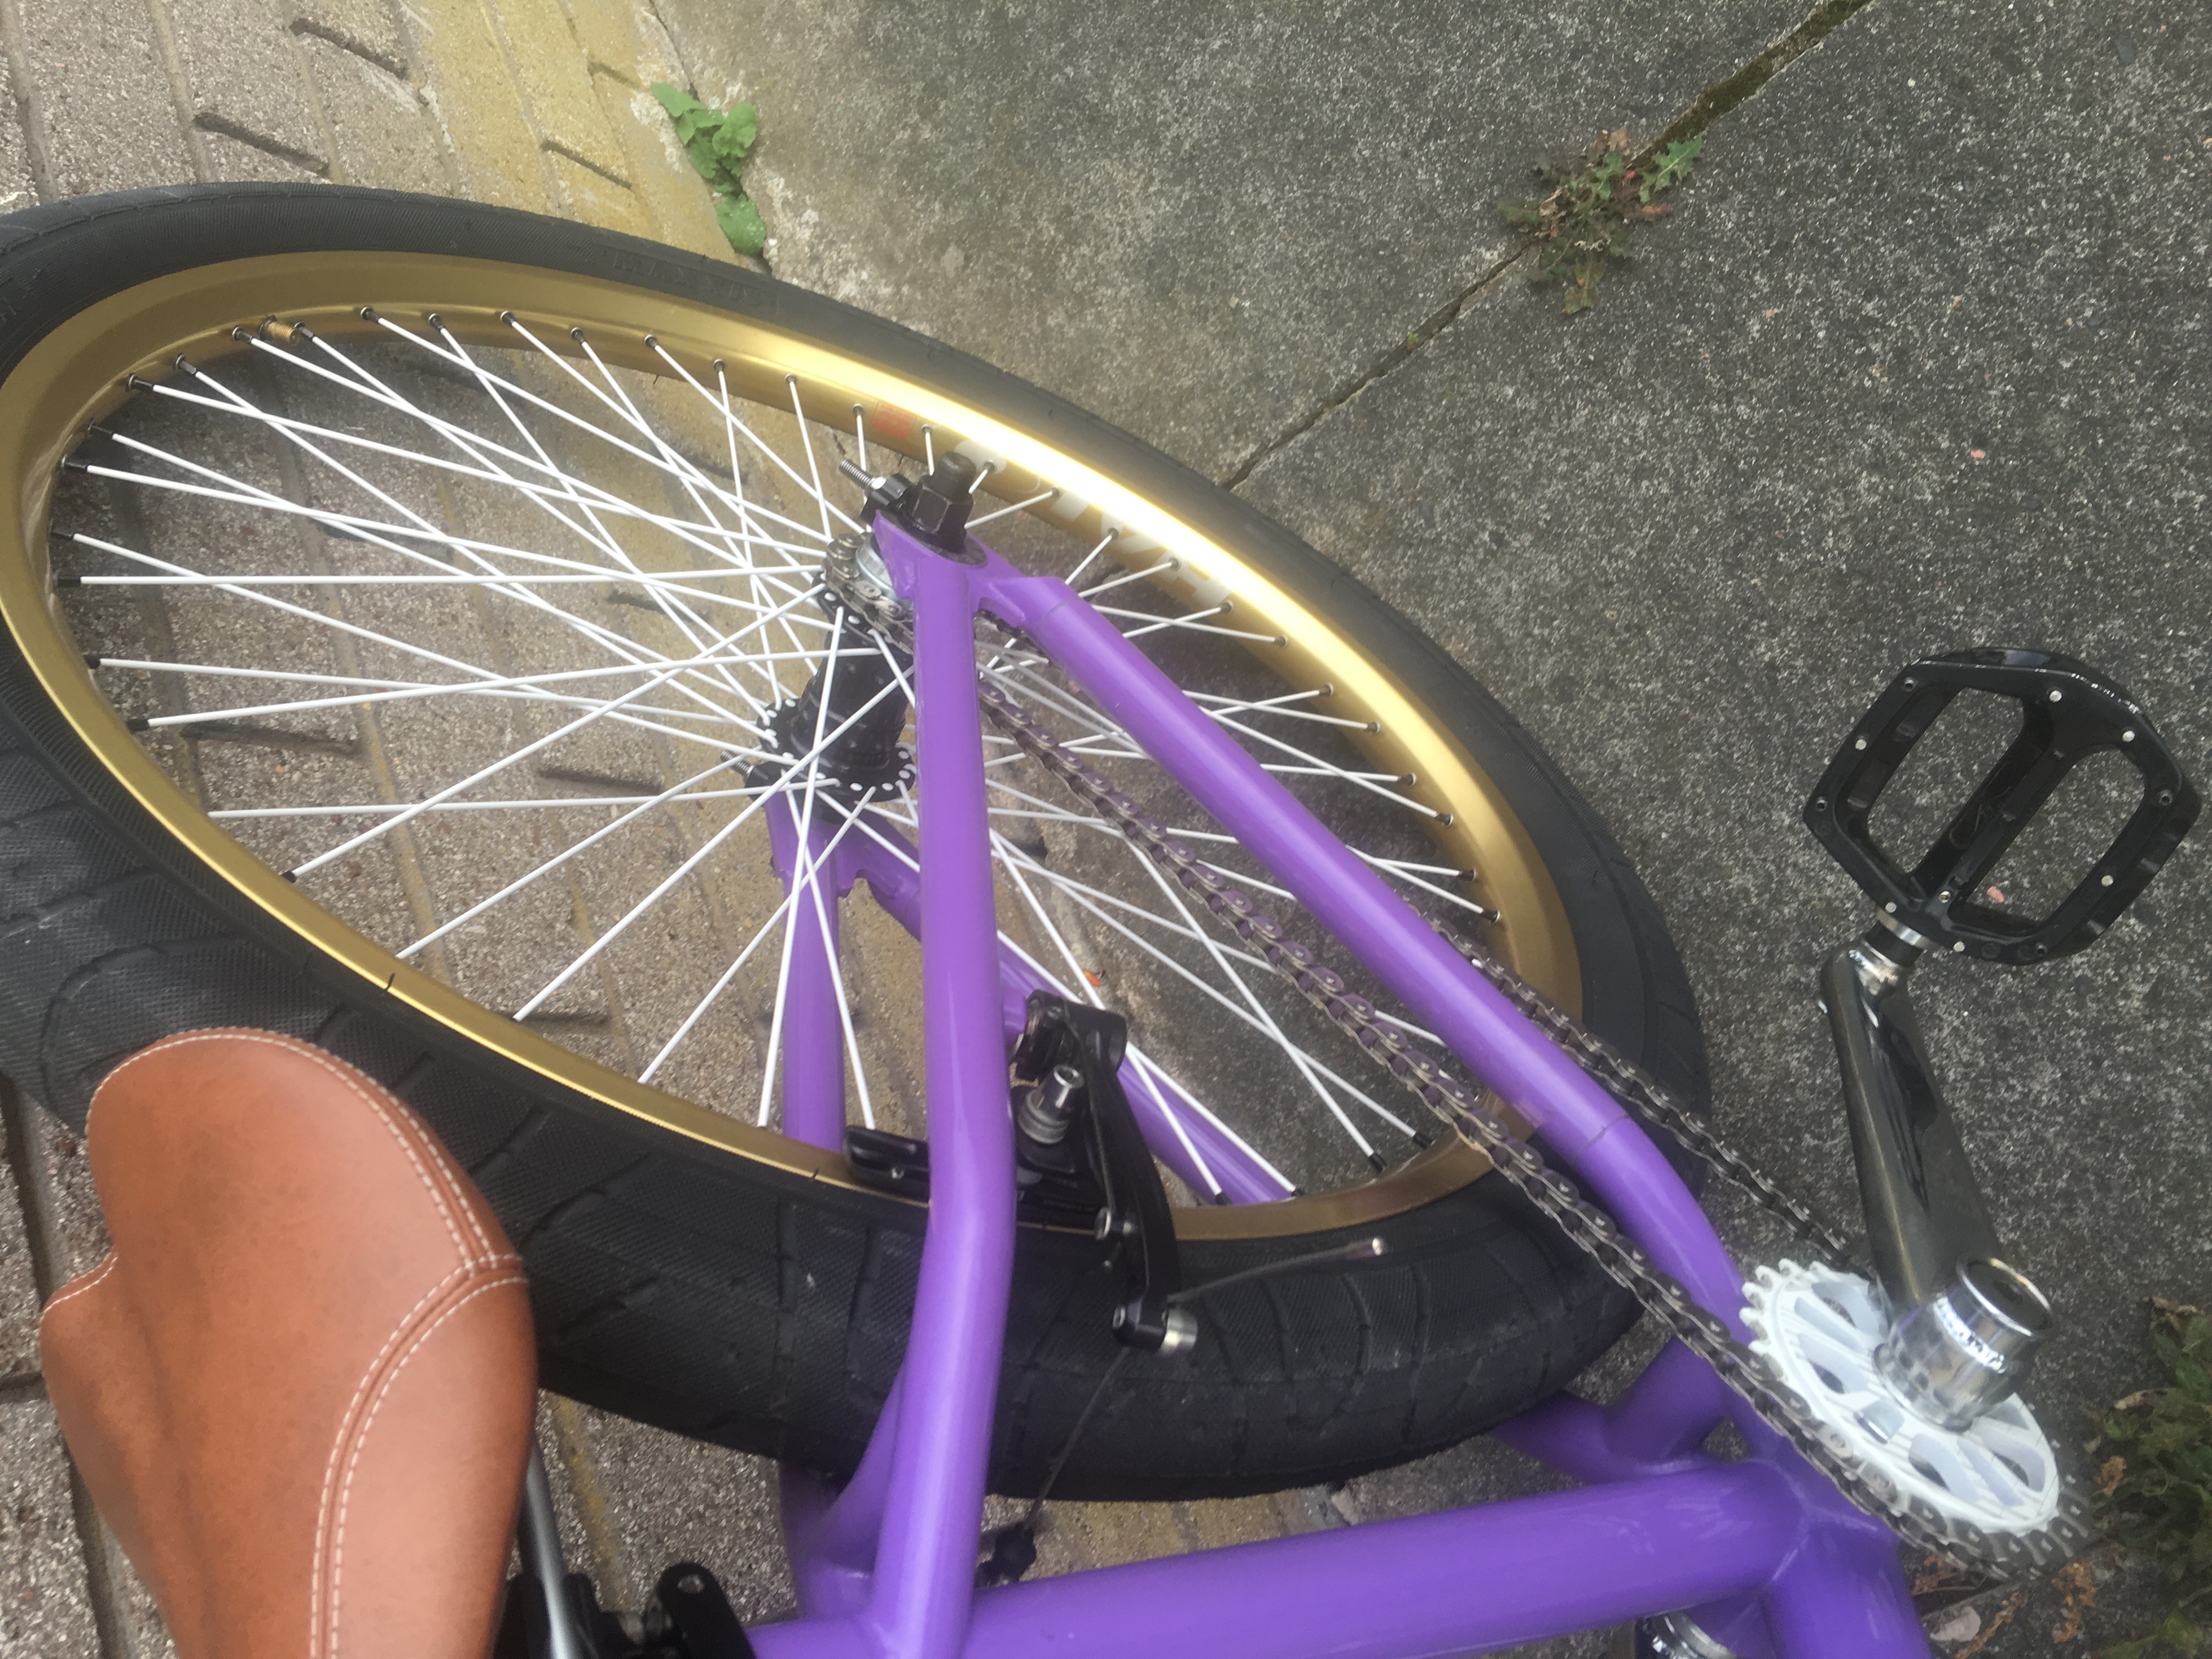
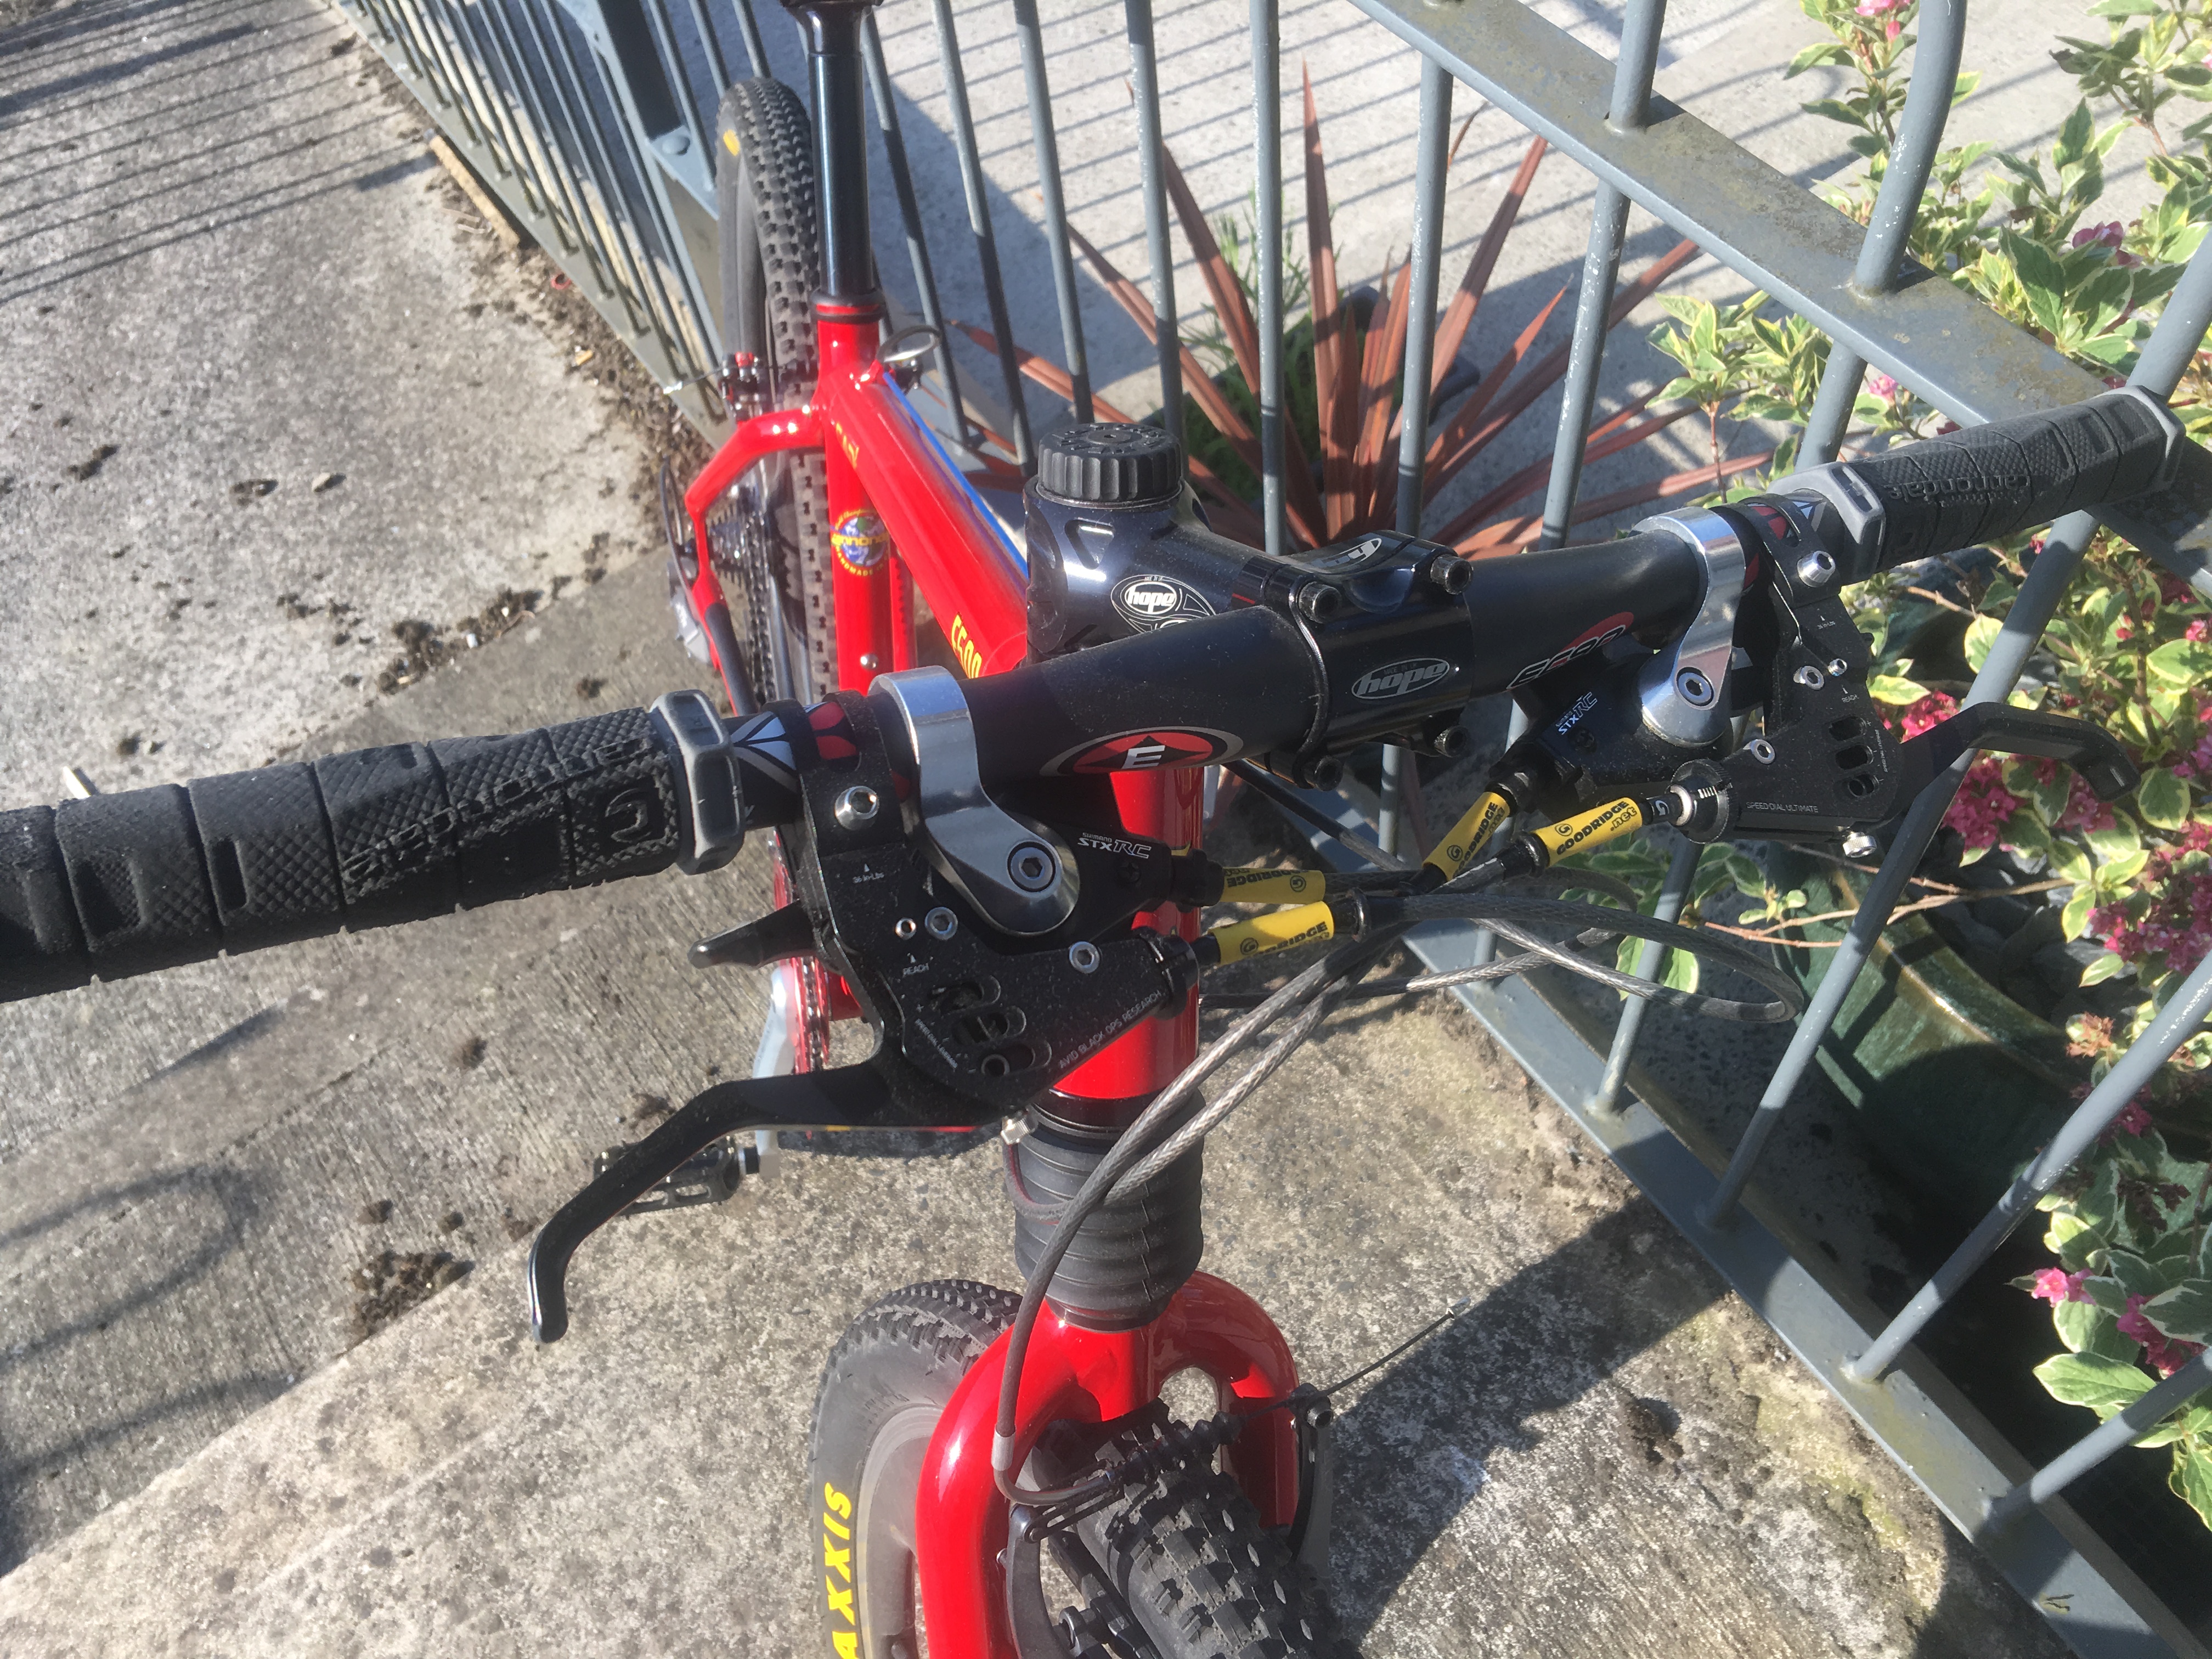
Been putting this tank together for a while, nemesis project death mobile frame, (ex factory rider frame)
48 spoke halo sas rim with profile high flange left hand drive bmx hub with maxis hook worm 2.5 tire
sun rim on nuke proof hub with onza XIII tire (2.3 I think)
rockshox totem coil slammed to 80mm ( in these pics) since then tinkered to 90mm on a firm coil and mission control fluid gate removed
nempro camp stem (no.099) stem
thompson seat post
24 bikes sankuri bars
avid ultimate rear v brake and lever, extra long good ridge, nokon cable for bar spins
charge spoon seat
definetly not a light bike but to be honest I never thought it was going to be or tried to make it light, just something to last a while, still tinkering with it and changing things after nearly every ride but that's just part of the love I have for it
Hell im not even sure what kinda of bike type it comes under, grinding pegs coming soon lol
-
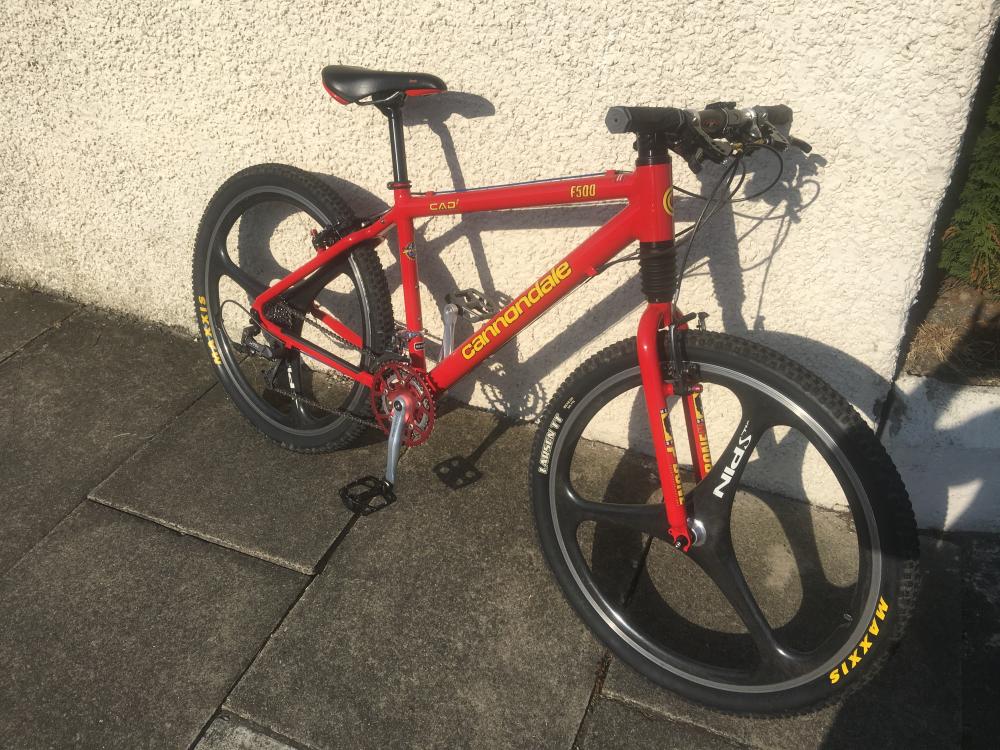
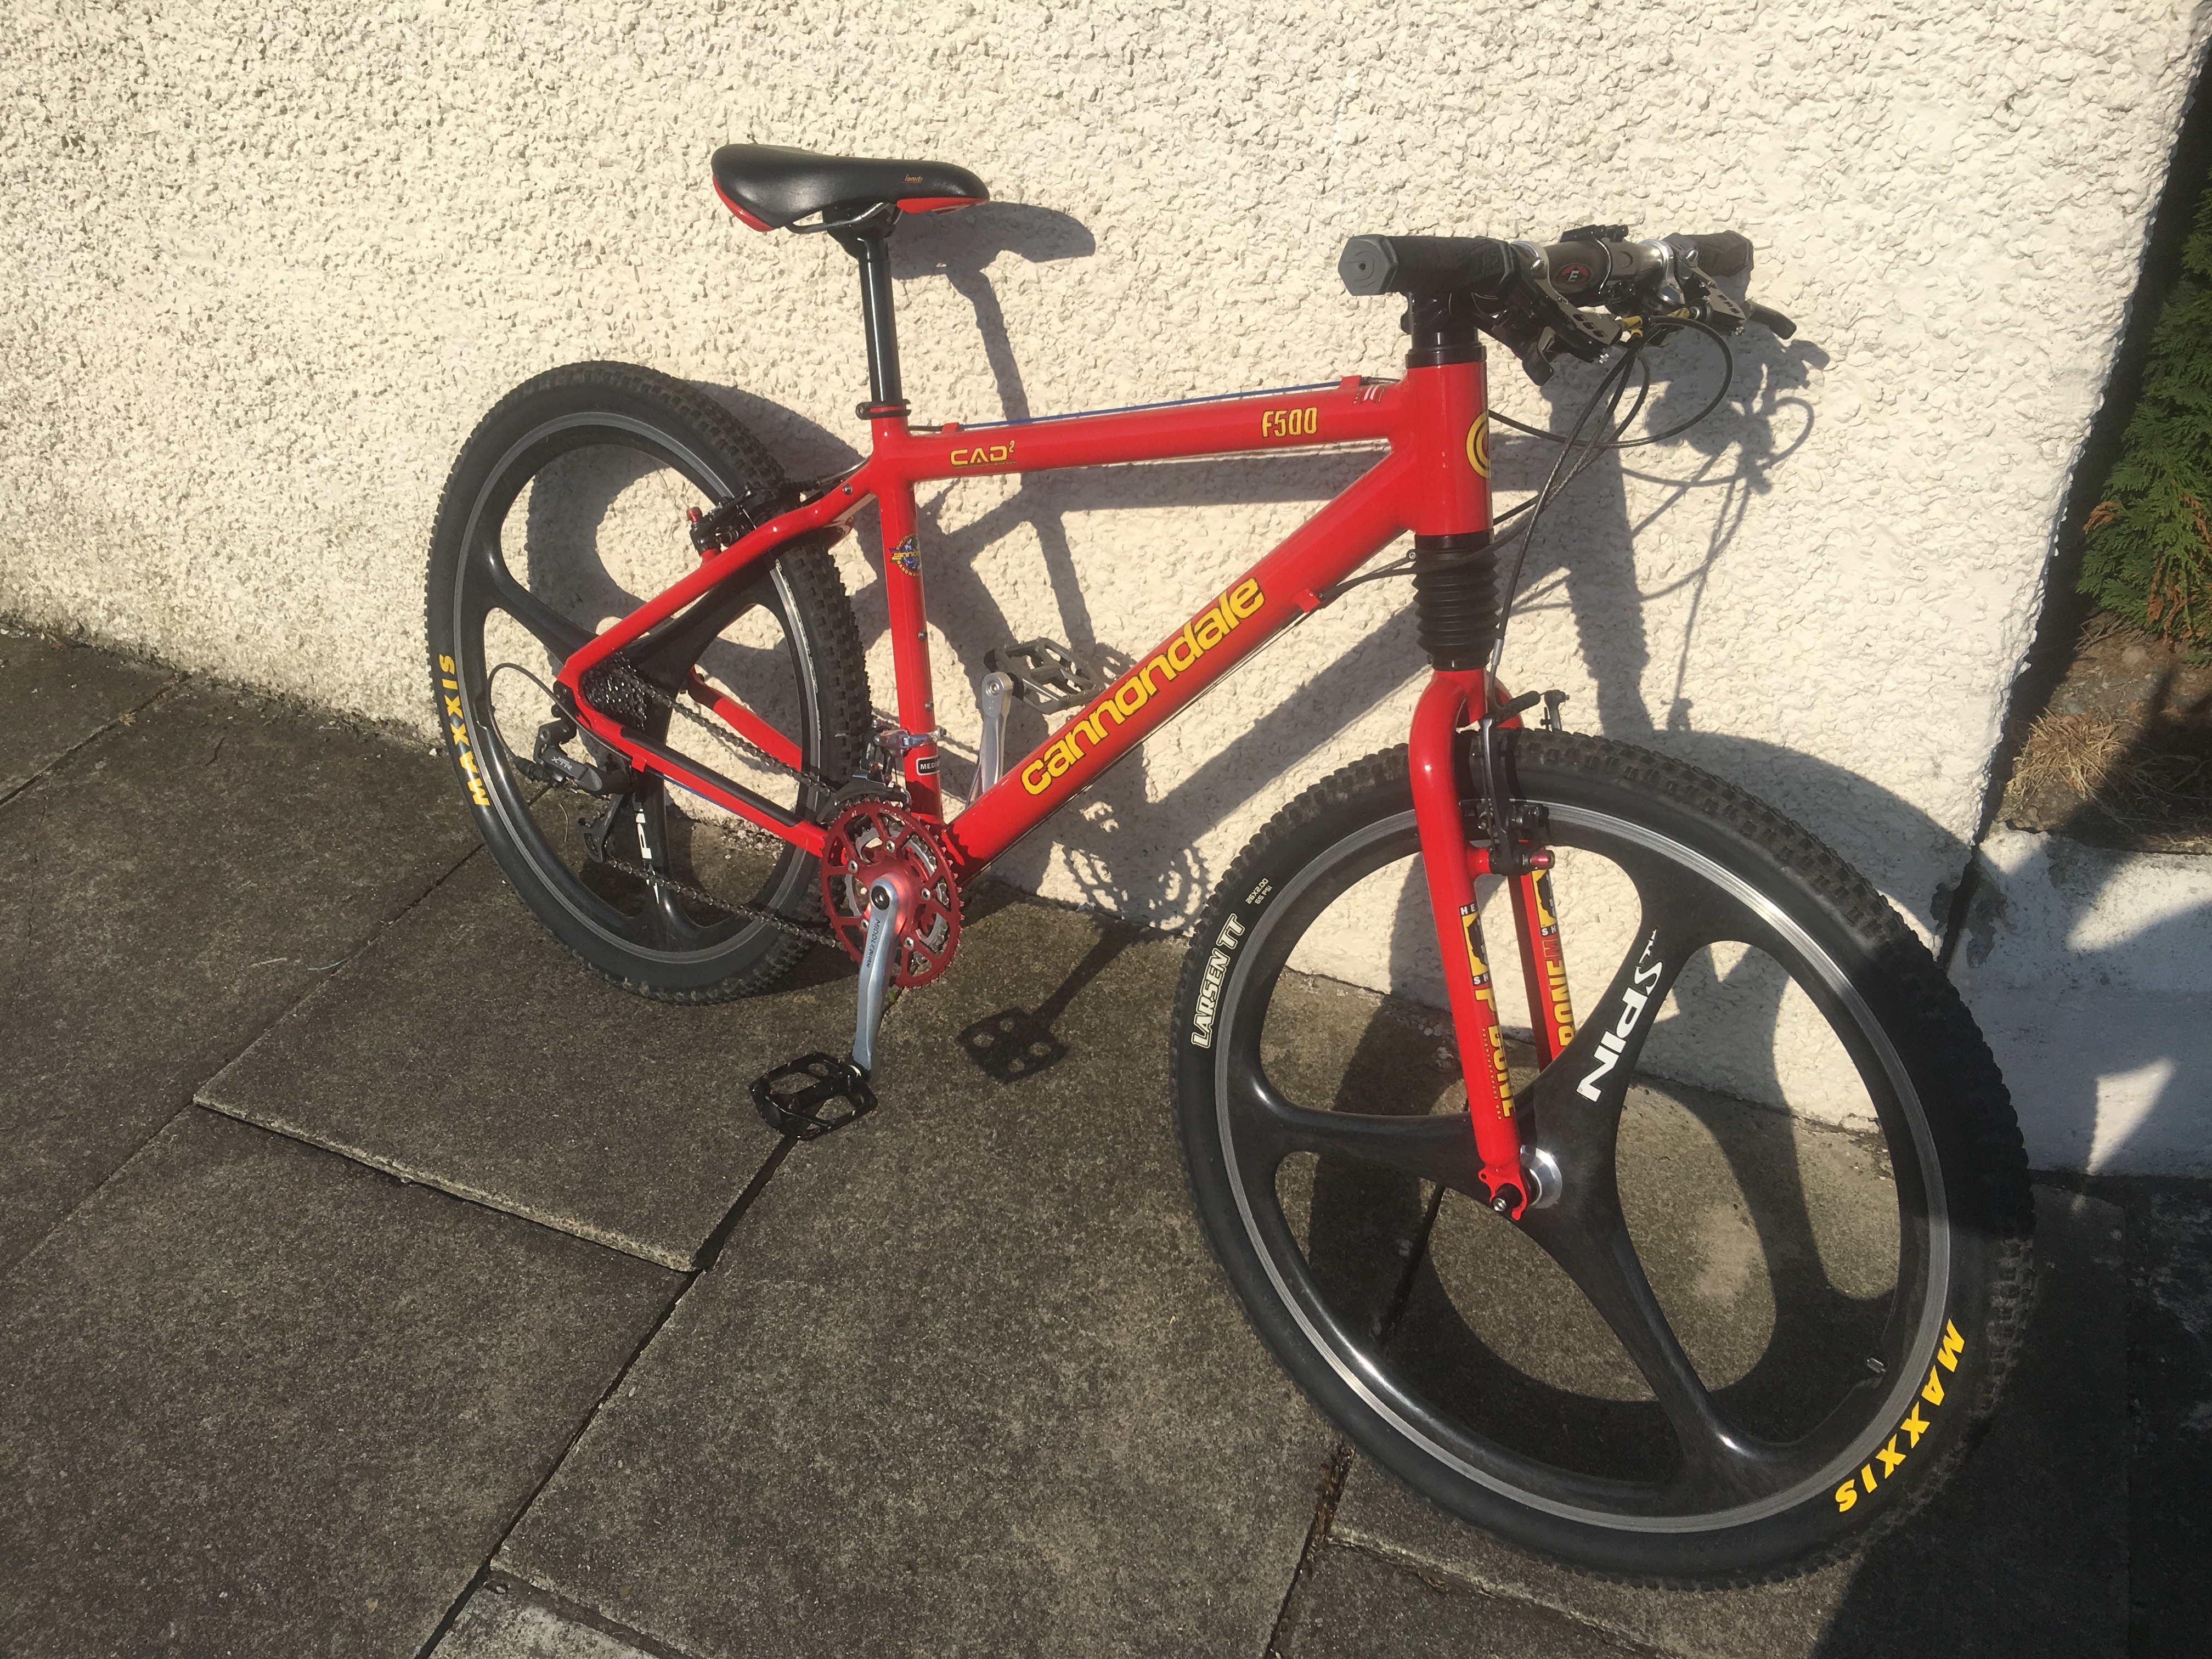
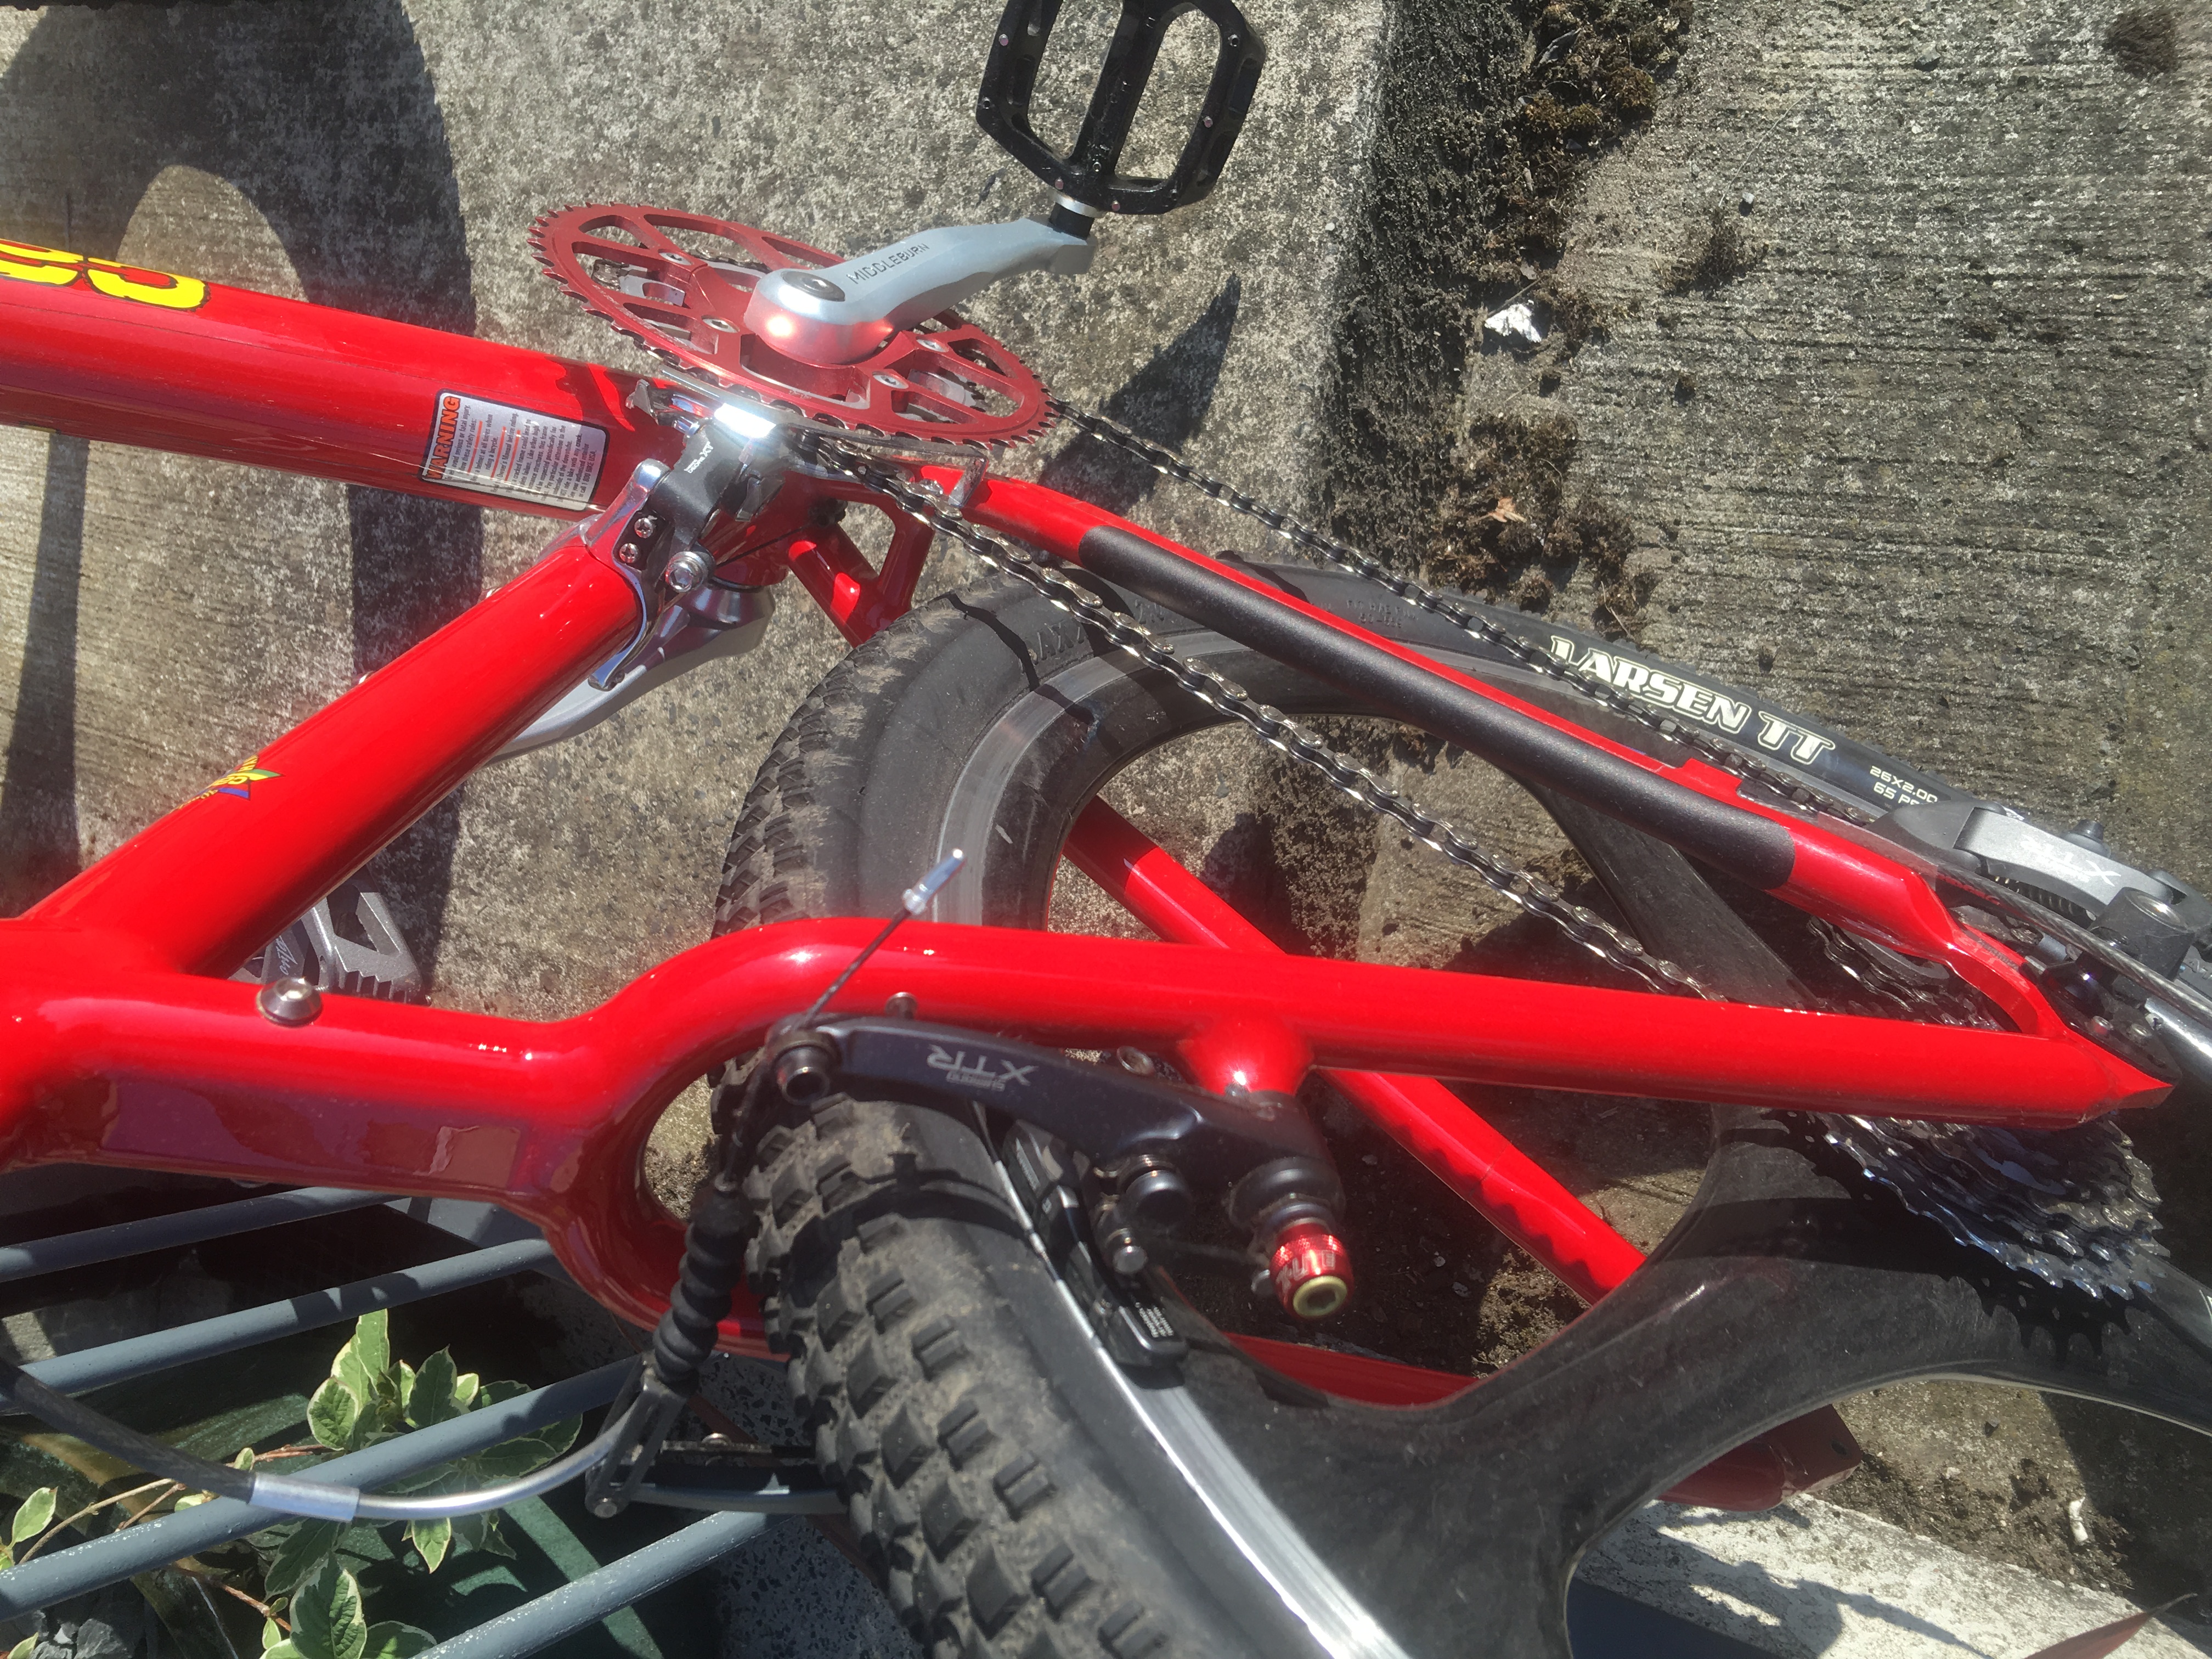
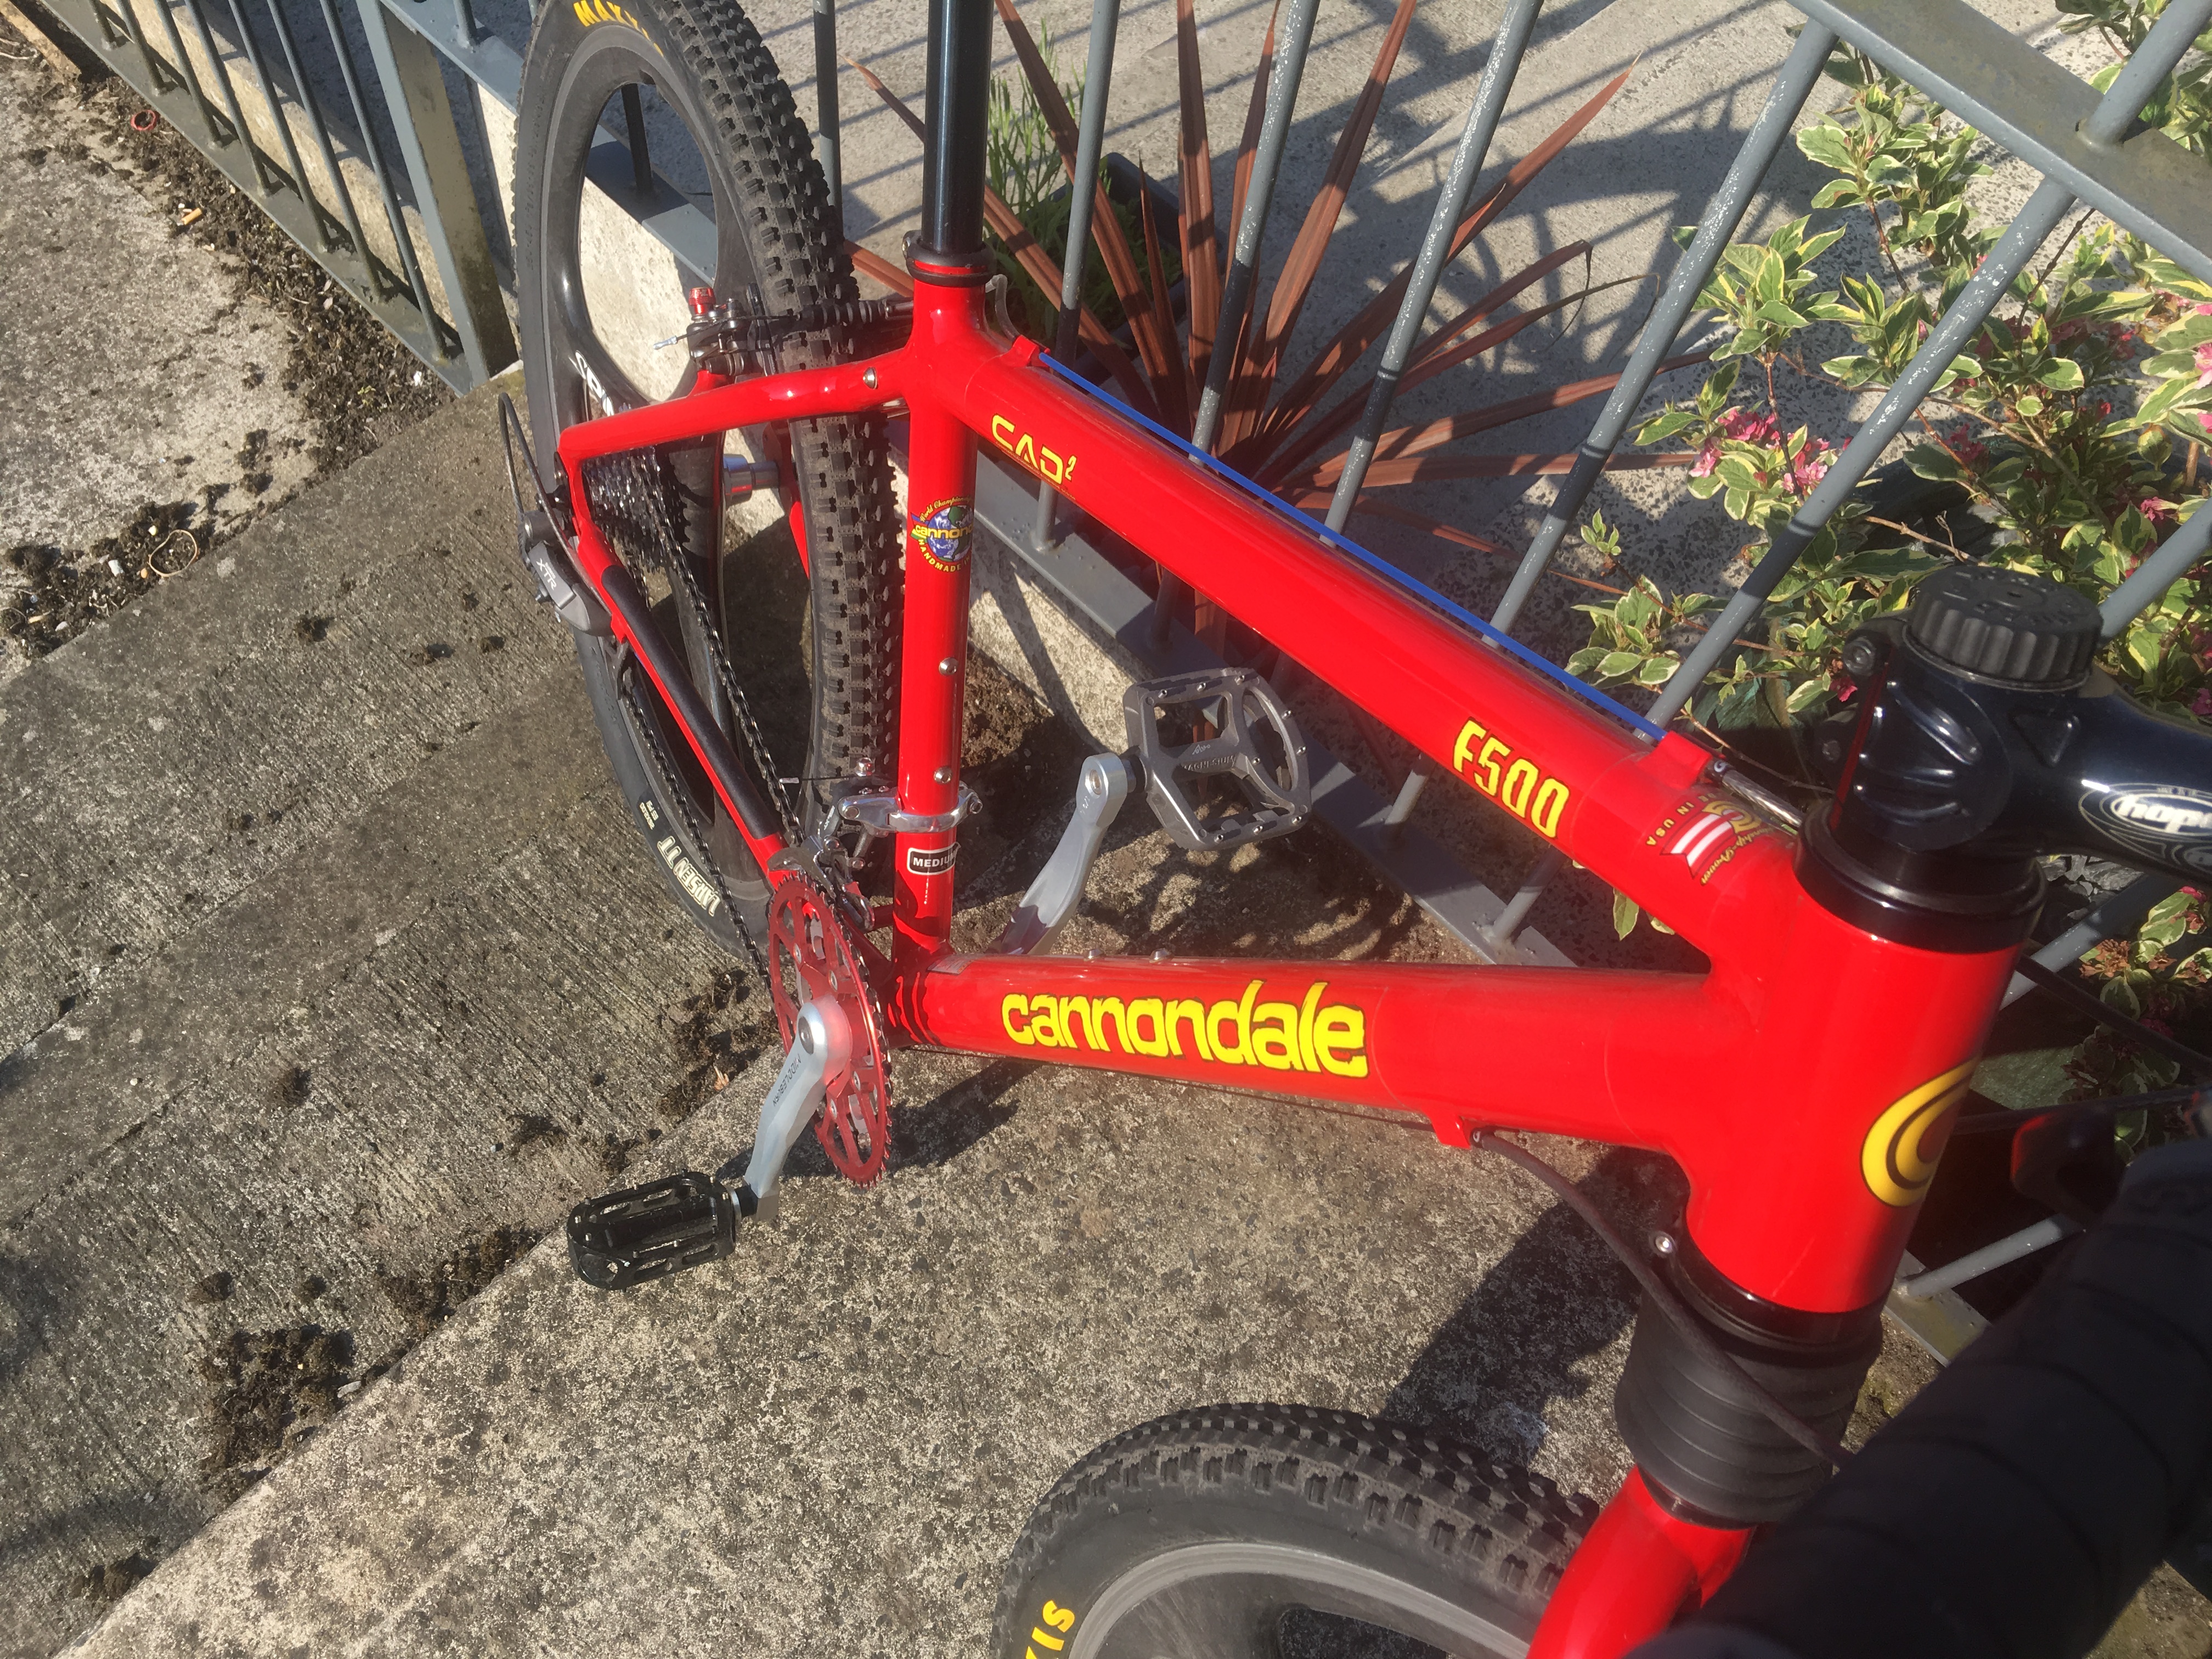
1997 cannondale f500 in Dodge Viper red, modernised (where appropriate), barn (actually a garage) find, been working on this since I got it around 2009, finished most of it, upgraded headshok cartridge with an oil damped unit with a lockout, most recent was the middleburn cranks and Isis bottom bracket. The avid black ops levers and xtr v brakes have some of best modulation I've came across, still a few tweeks to make, seat post (thinking Thompson) and seat, not too shabby for a 19 year old bike, no bubbling under the paint as with most dales I've seen from this kind of vintage, still puts a smile on my face riding it


-
 4
4
-
-
Ok a rough weight measurement for the original design just came through (apologee's but only old scales available and this is what I've been told but will confirm myself on modern scales as soon as I can) and it's at 9 oz so roughly 255 grams.
Of course if someone has one handy and a set of modern scales It would be great to see what they come up with

-
Cheers for all the feedback positive and negative again fellas, I've passed it along, seems like the main issue with why people wouldn't use it is because of the look or weight. I can totally see this point and pointed this out to the maker who said "Some people say that they are hefty an ruin a bikes aesthetics, but I think most use them just to practice new tricks until they get it sorted or at comps, but take them off when street riding and show boating". I think he'll still be taking the feedback all on board to see if he can modify it to increase the demand.
Personnally I know as a single parent on benefits (thankyou tax payers) I'd rather use one as I can't always afford to replace a frame and need them to last as long a possible, but like trying new things like rails etc.
-
Ok quick update, been given a price, I've been told they should be £15 direct
-
get him to make a chainstay size one WIN !!
this would be EPICS!
totally agree! -
I've got one of the original ones, which is getting a bit tatty now - I'd probably buy one if he rereleased them.
I'd be even more interested if he produced them without the massive white logo on the side
he can produce them in different colours and with or without the logo, cheers for the feedback
Customable logo design and you're onto a winner.
get him to make a chainstay size one WIN !!
If you could make them transparent so you can see the frame colour through it then I would get one, the wouldn't look as bulky too!! because they do look crap
Make a light one and yes i probably would buy one.
The Ideas above have been passed along, cheers for the feedback and suggestions fellas
-
thanks for all the response so far with the votes, this is my first time with a voting poll, I suppose I should have put different options in, like possibley for the people who voted no,
Would you have said that because maybe you don't feel you need one because you don't mess up much anymore or maybe you just don't want something like that on your bike a messing with the clean lines of the frame?
-
Hey fellas,
I've been looking for an armourdillo for some time now for my frame as I know they can save some nasty dents on down tubes when practising rails etc. I couldn't find anything that really matched them, I've managed to get in touch with the legend that produced them he's thought about producing them again but is unsure of the demand that there would be.
Which is why I've started this thread to kind of test the water and see what the demand would be, he's also thought of modifying the design, so I guess if anyone has used one before and thought of better ways it could be improved would be helpfull also.
-
Been building this up for a while as a bit of a all rounder, spec is;
Indentti the Judge frame
Onza mongo 2 headset
Onza wise guy forks
SDG big boy seat (hope seat clamp)
Simintra stem
24 bicycles chromoly bars
Coda grips
Front hope trials brake 180mm with danger boy lever
Rear hope trials brake 160mm with danger boy lever
Front wheel; hope pro2 (blue) on a mavic ex721 rim, blue hope skewer (onza porcupine 2.1 tyre)
Rear wheel; Chris King ISO (black) on a mavic mx321 rim, blue hope skewer (dmr moto 2.3 tyre)
XT cassette (9 speed)
XTR (long cage) rear mech
Nokon Gear cable outer
Kona cranks 22tooth with a DMR ring thing
Straitline pedals (jeff lenosky)
-
this reminds me of a post in the new members chat about wearing/notwearing shinguards, went somthing like;
'i dont know what you guys are going on about, it doesnt even hurt. infact me and my mates find it funny'
Ha ha I remember that same thread, I don't even think they where newbies things like the above was said, in fact one lad even said that shin pads are gay

-
Mate of mine spilt his shin bone before, and got a free ride to hospital in an ambulance and all, heee yaaa at least you didn't have the double length terror pins in your v8's! I used to use foot ball shin pads under my jeans when my feet used to slip off mine, but don't seem to have the problem any-more
-
Well I'm sure alot of you havent seen my bike so here goes. I have an all stock Adamant 26 all flat black with hope front brake.
And this... Has a proper bash guard now BTW
Hey man nice bike, It looks brand new, so you've got a hydraulic gyro on for the back brake and a normal front!? could you not run the front brake down the steerer tube to free it up for bar spins? anyway just a thought, looks sweet anyway man enjoy
-
I can't answer your poll because you've asked Whats rotor for best power and strength but I've only tried a couple so therefore a can't help, you'd have to have tried all of them to answer your poll!
-
To give some relevant guidance to the OP, it unfortunately does come down to personal preference with disks. What I posted above is probably more relevant to situations where you are looking to reduce speed (downhill or xc applications), whereas for trials we are more interested in the initial bite of the disk which is aided by the edges of the disk...
totally agree, I've always got by with a hope trials disc but if that's not an option why not try both and see which you prefer!
-
I hope nobody is waiting for me to start the thread, i have only bleed HS33's once and it was 6 years ago, I had to read the manual. there are a few others on the forum that would do a better job, I just wanted to put it out there
Perfect you obviously did it right then
 perfect candidate
 -
yes but it is an easy option if you are struggling and do not know what to do, i no id rather a professional do it than me just so i know it works right, where as if i take mine apart i wouldnt have the slightest clue where to start.
Well if you really did want to do a quick drive ring service on it you could read the instructions with the link I've give you before http://chrisking.com/tech/tech_PDF But if you'd rather not chance it, (although it is the easiest thing to do yourself but if your not that competent with a couple of Allen keys (which is all it takes)) then Chris King them selves have directed me towards Bromley Bikes in Kent, as they operate a Chris King service centre in the UK, of course there's tarty bikes but reading this thread some people have had difficulties with hubs skipping, personally I've had Chris Kings for years and serviced them myself but I guess I must be lucky because they've never skipped on me, good luck
-
Pads are so cheap anyway, why waste money on something that only MIGHT be decent?
can you reiterate? what pads are cheap anyway? what pads only MIGHT be decent?
-
Ive brought a bleed kit but ive only used it once and that was ages ago so i cant remember can anyone tell me how to use the hope bleed kit.
I normally use alis idea
Remove the top cap with seal and pads
Attach the adapted sealed top cap with the hose on it that goes to the bottle (where you put you oil)
Add the oil to the bottle above
open the bleed nipple
Push the pistons in fully
Insert a block/piece of wood to stop the pistons moving out while bleeding
Attach the bleed nipple pipe which leads to the empty bottle (make sure the bleed nipple is as vertical as possible position (remove one screw that mounts the calliper if needed so that you can point it up))
Attach the valve to an inner tube with 30psi
Watch as it pressurises the system and pushes the oil around the system and out the bleed nipple
Pump the lever a few times slowly until the pressure pushes any traped air out the bleed nipple (should be 3 - 5 slow lever pumps)
Close the bleed nipple
Remove the adapted top cap and seal
Replace with top cap with seal
Wipe down
Turn the calliper upside down (as there is still a bit of oil in it at the top of the bleed nipple) and wipe
Replace pads
Replace wheel and pump the lever slowly until the pads align and centre properly
I found that using the bleed kit works best from a completely dry system-maybe after you've serviced your calliper and there is no oil in the system at all.


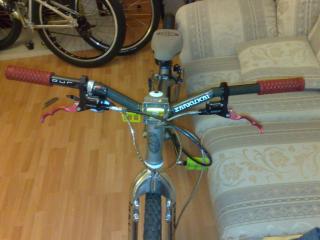
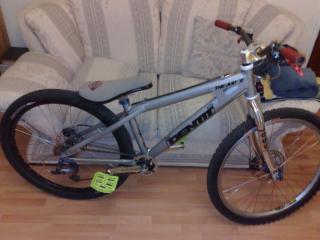
Post a pic of your non trials bike
in Bike Chat
Posted
I've made a few changes....