RobRook
-
Posts
131 -
Joined
-
Last visited
-
Days Won
1
Content Type
Profiles
Forums
Gallery
Everything posted by RobRook
-
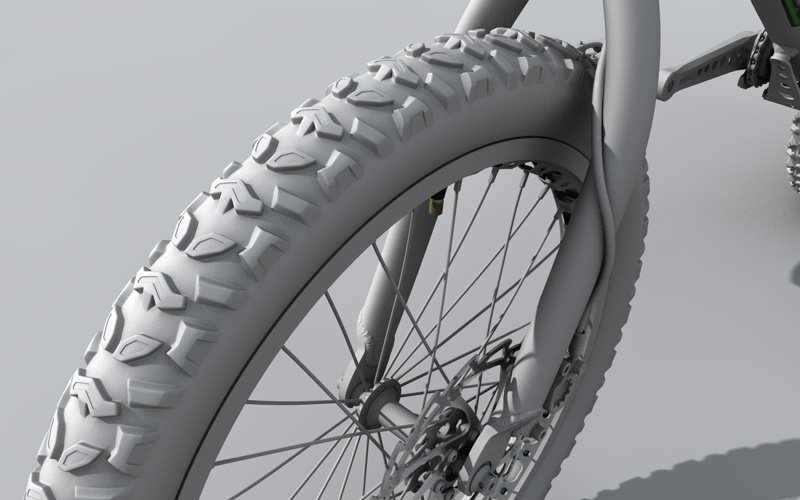
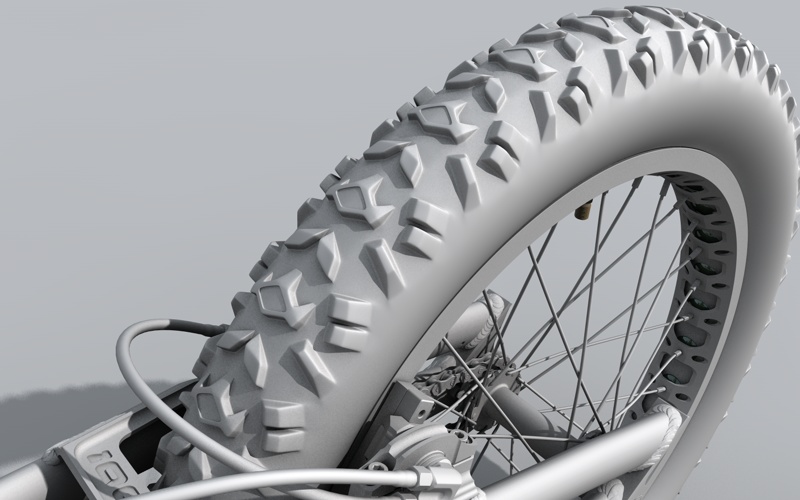
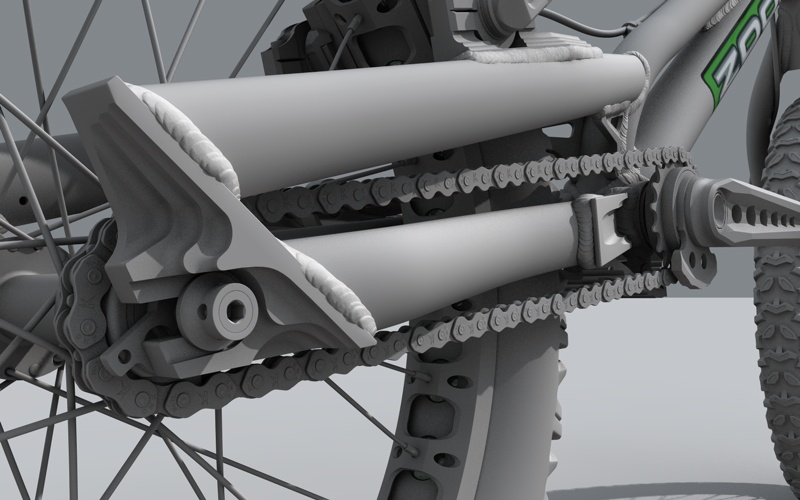
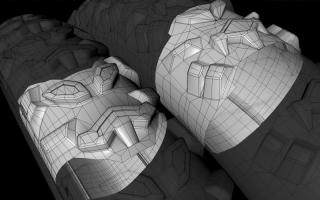
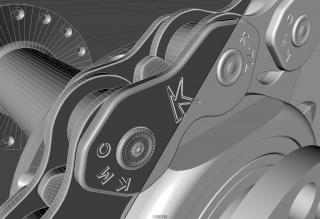
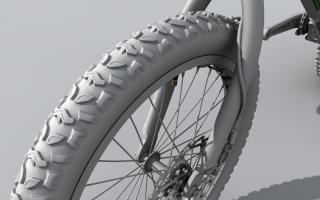
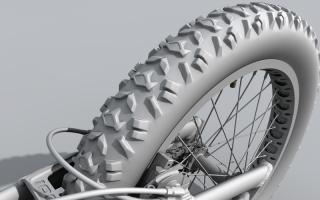
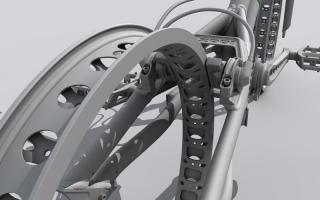
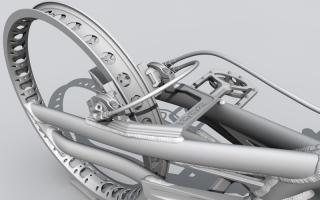
Thanks everyone! All the great feedback you've given me on this project has been an amazing help. It's kept me motivated big time! I've attached a few wires of the chain & tyres for you guys. •Erm.. The method used for the tyres was to create the basic shape of the tyre (So an inflated inner tube shape) •Work out roughly how many segment I'd need to create a single section of the tyre (6 I think it was) •There are 34 repetitions of the tread pattern (So 204 rotational segments) •Deleted all the polys except the 6 I'd need for one segment. •Took a photo looking down on my tyres and placed that in the top view and started moving points around to line up the tread pattern. I'd correct and dents in side view or 3d. •I'd then extrude the tread and position those polys where they needed to go (I used a photo from tarty to get reference to new tyres as mine or pretty worn) •Once I had the basic tread shape I started cutting in lines to help the NURBs modifier give sharper results. •When I finished that, I used an array object to create the other instances/segments of tread, connected them together, then stuck it all into a NURBs object. Giving the result you see in the close-ups I would do a video tutorial, but I sound common as muck being from Essex, and aparently I "mumble" and it literally takes hours to do the segment anyways Oh and the comment about the leaking Echo SL.... Never had a problem with it Must have been one of the lucky ones haha.. I did burse the hose once while riding though (no injury luckily); just where the long hose joins the master cylinder. I tend to sit in the v where the rear tyre goes between the frame, so that probably kinked it As a result I no longer sit on that part, just on the tyre, well it is wide enough haha Tyre Segement Smoothed Wire Chain Wire & Shading

-
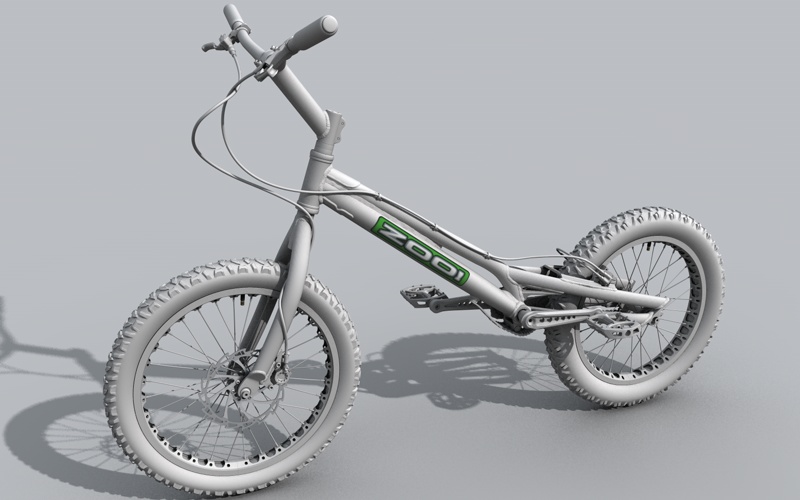
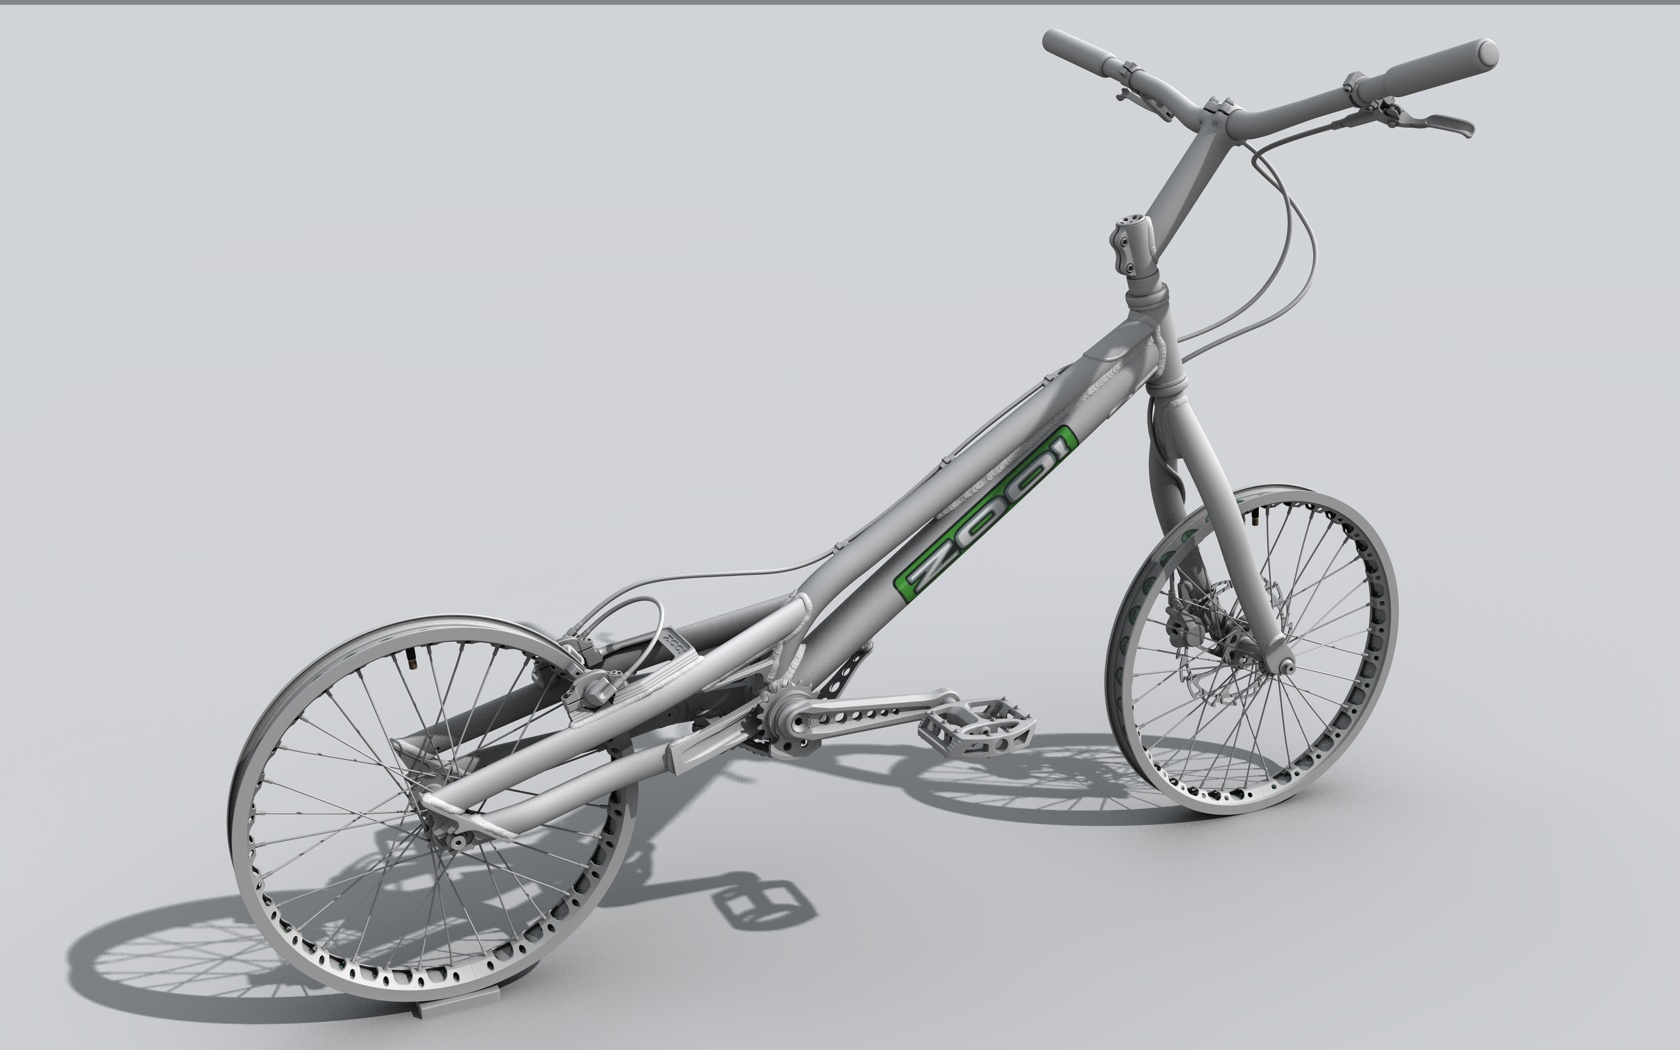
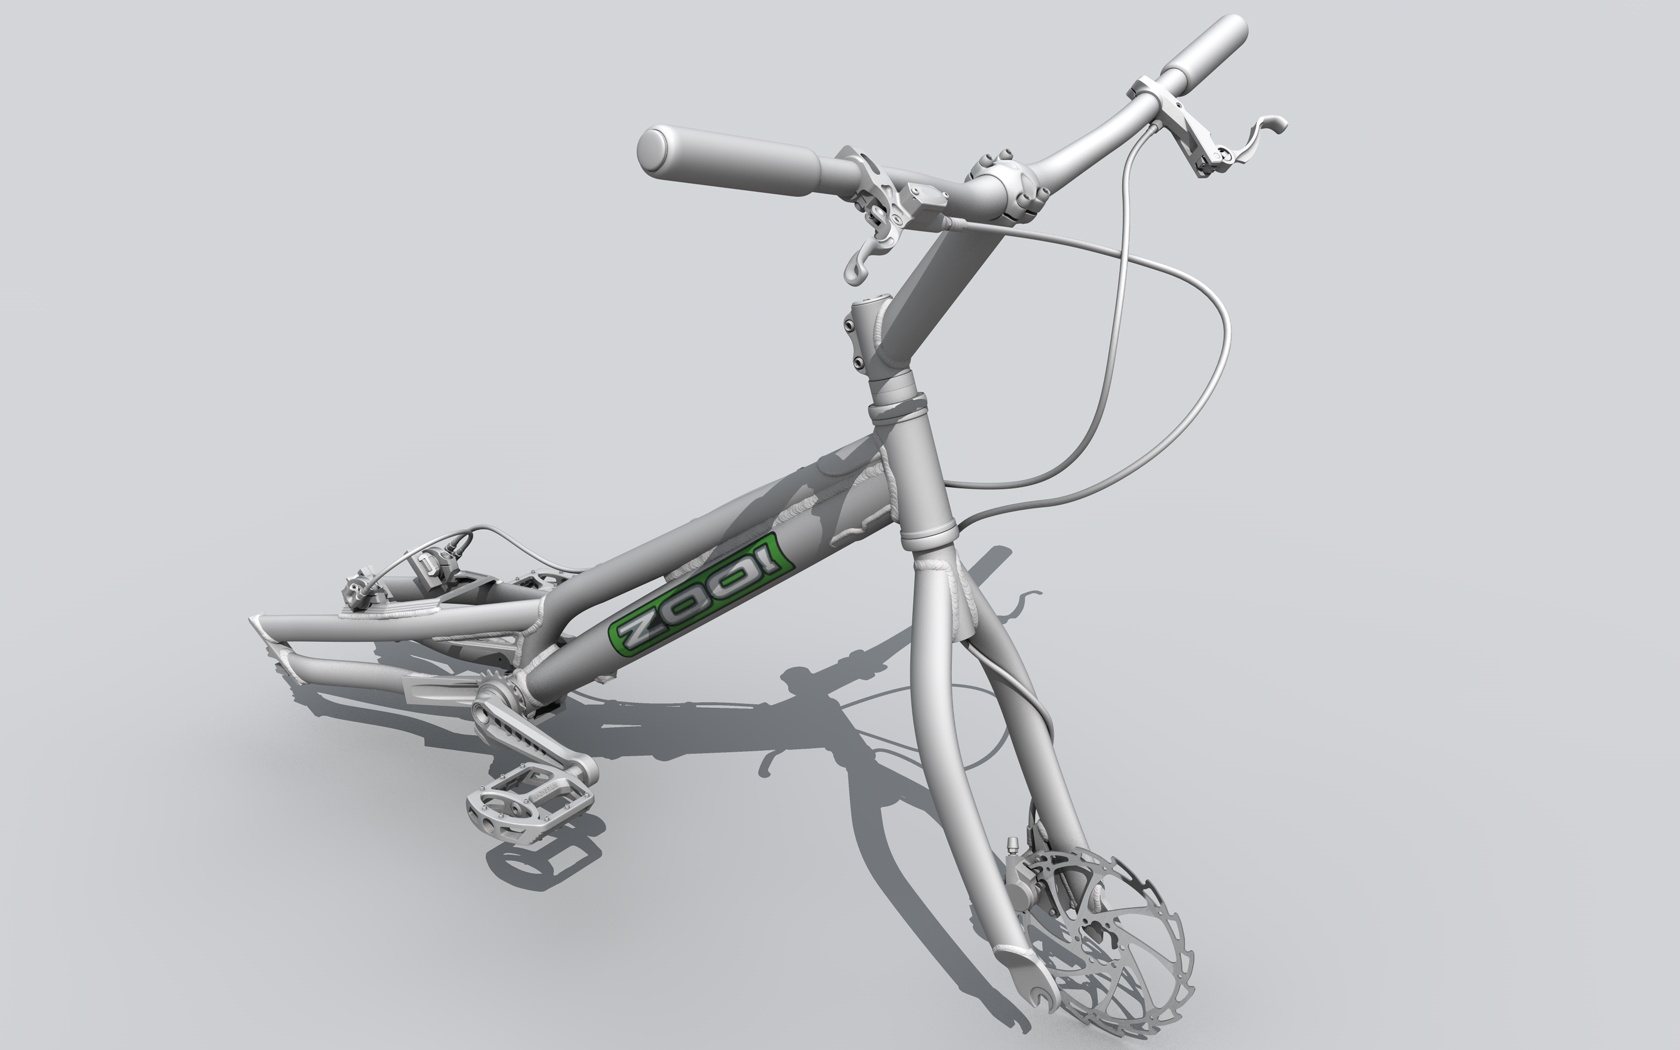
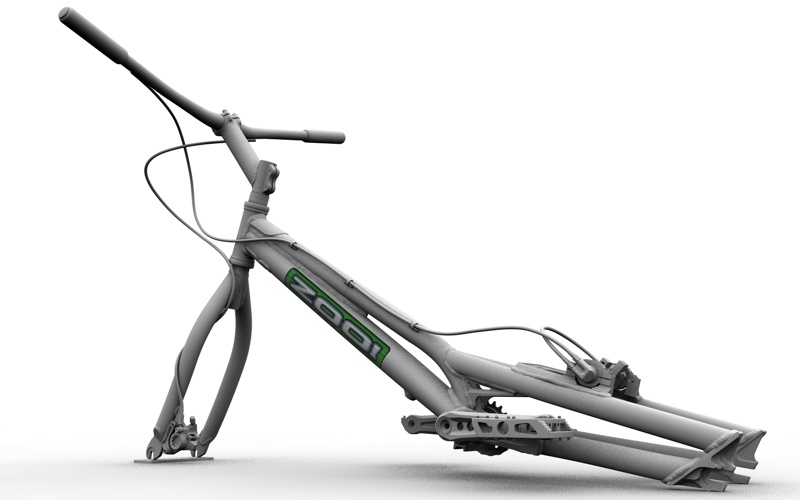
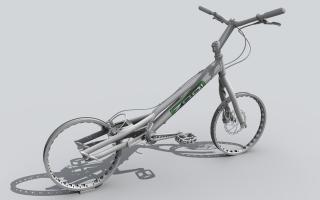
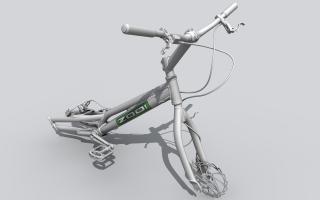
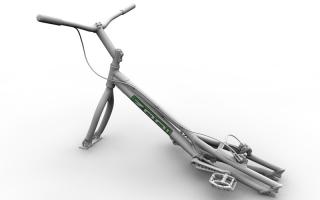
Well Guys! Modelling finished!!!!!!!!!!!!!! Only texturing etc to do now.... Enjoy!!! Front Tyre Rear Tyre Chain with KMC etchings Full Views


-
Thankyou!... I'm hoping that some day I can work in the industry to some degree. I really do enjoy it Easy Yoshi Haha!! Cheers, Rob.
-
Cheers guys!.. Unlikely, but it's a nice thought
-
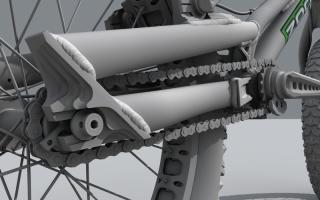
It is indeed been awake for the last 27hrs so thought I'd do a load of stuff.. Only the tyres, chain and chain stay protector left to model
-
Here we go...


-
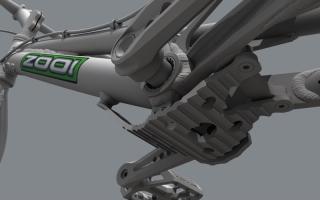
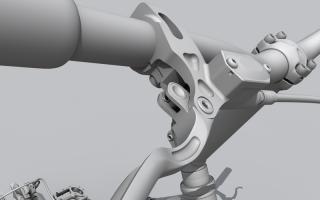
Right! I have progress! And me thinks you will like While I'm rendering off a few angles of my main update, I shall give you this small update to warm you up Bash guard with bolts & washers, done...

-
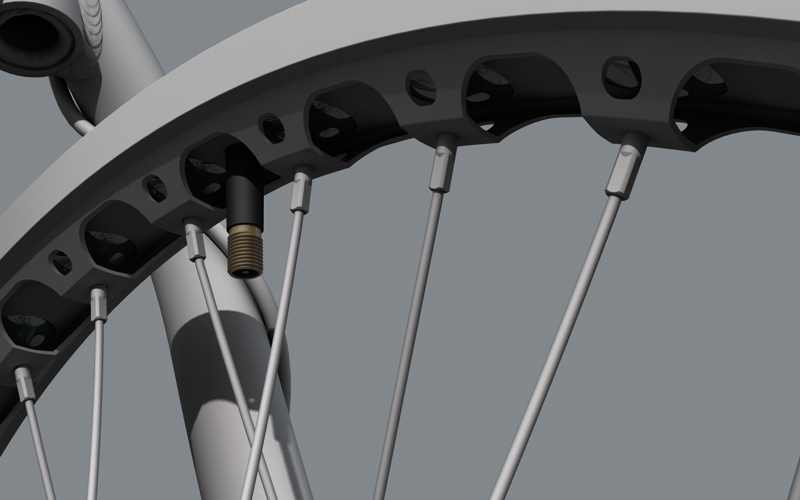
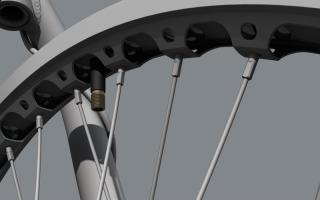
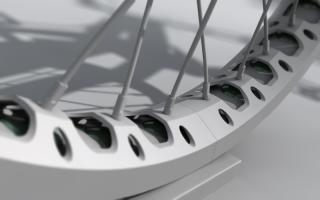
Thanks for all of your comments... Luke Rainbird: No lol, I haven't done the internals. Maybe if I was paid haha, but not when you'll never see it. Plus I've never seen inside them before Davey1991: You might wanna get that seen to Leistonbmx: "inside of the brake clamps and mounts???" Don't get where you mean Thanks to AndrewG, Borat, MadManMike too ---------------------------------- Echo SL Rims Made


-
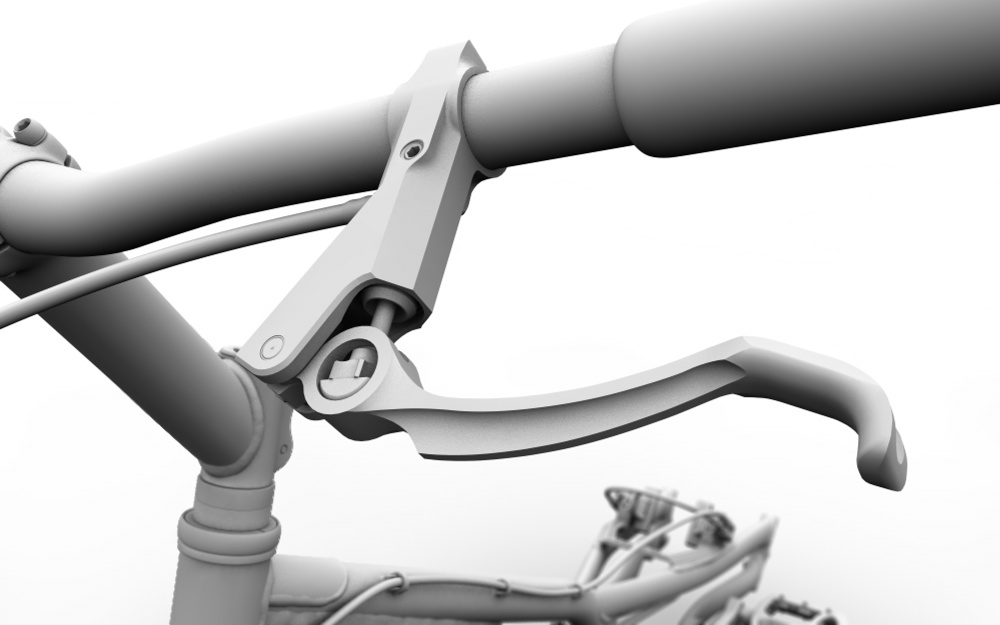
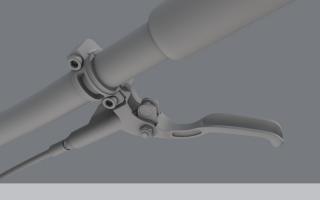
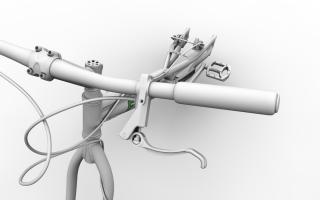
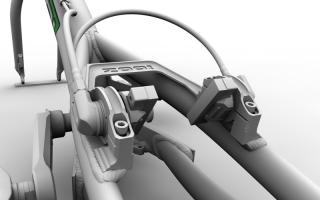
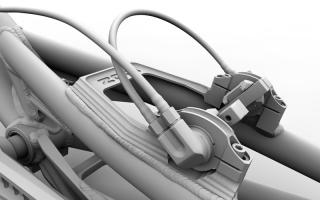
Brake Levers Done!!! :rip: :rip: :rip: :rip:

-
Ouch!.. Never cut myself on mine, it isn't sharp enough unless a lot of force is put into it or it's grabbed strangely. I think they thought that's where you pull the lever and didn't realise it's a one finger lever hense the demo photo I posted up.
-
One Lever down, one to go Couldn't be the same could they


-
Exactly what I say too. It'd look cheap and amateur using a photo texture, and it'd reduce the visual quality of the model. I'd say anyway
-
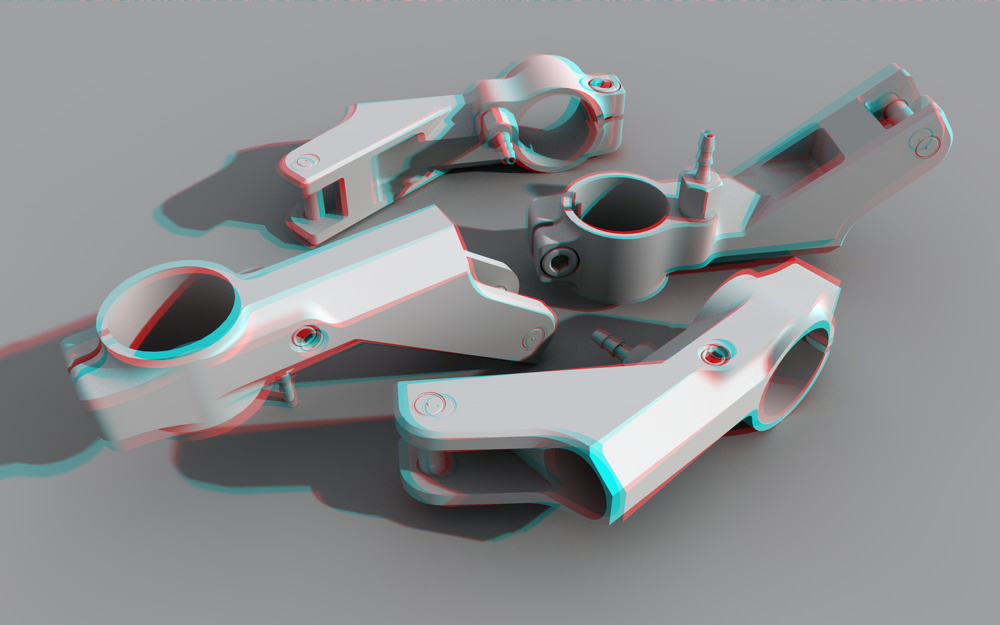
Yep Just need a pair of the typical red/cyan glasses. Just got a pair through the post so thought I'd try it out. And it's weird seeing them in real 3D.
-
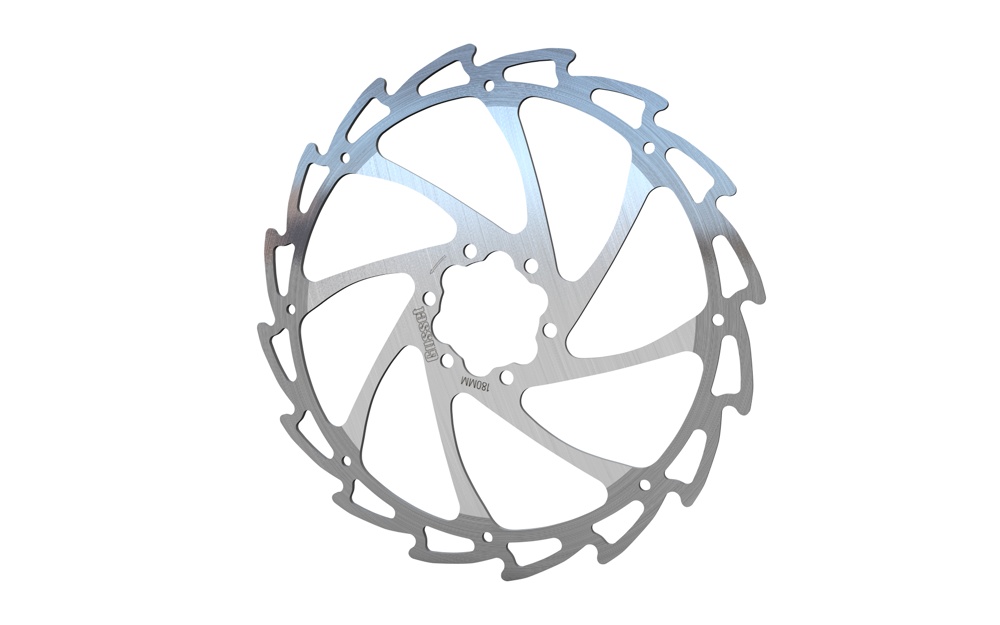
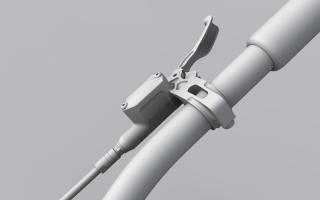
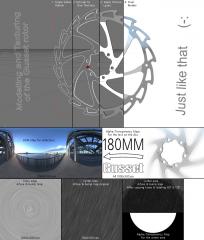
Thanks everyone! Really appreciate your comments forteh: I dont use direct photos, I like to use good texture & bump maps to get a good result. (See below) ____________________________________________________________________________________________ I've done a little breadown of the rotor (I was bored) Will also help those less familier with 3D to see how it's made I'm part way through modelling an Echo brake lever at the moment. Just the piston, TPA & Blade to go... (See below. Even better if you have red/cyan glasses) Think I need to sleep though, so will carry on with that later today (Thursday

-
Indeed, it's not a photo, it's 100% 3D
-
Thanks Jamie, Kristaps & Mikee! Tom: Yea will have to do more meets next year. My brother & Shaun want to get back into riding after new year too so more to come along Done a test render to see how real I can get the rotor looking. Will start modelling one of the levers tomorrow.

-
Thanks Sam! Yea, me neither mate, and I'm the one modelling it
-
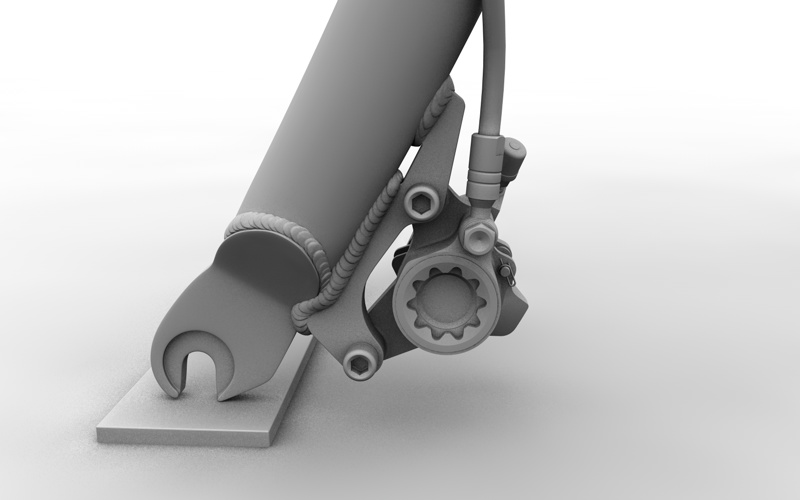
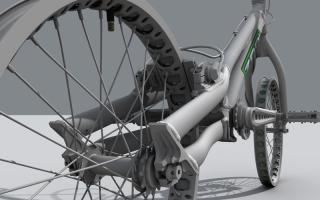
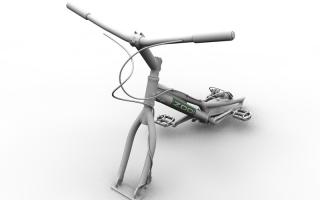
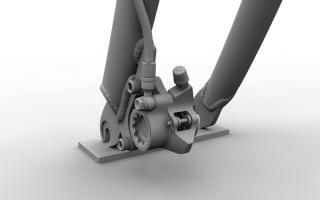
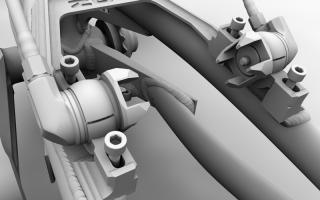
Front brake caliper finally done! Never again! Rear brake was above and finished.


-
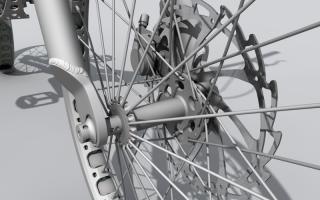
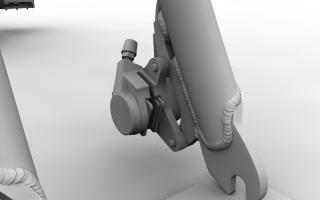
Right, I have an update, albeit not anything massive. Just the rear brake, which I think looks pretty cool Hope you like

-
Thanks buddy! Really appreciate your comment about how accurate things are Thankyou!! Little update, not much. Been doing other things. Brake clamps & started the brake cylinder

-
If it made you smile, can you image what I done
-
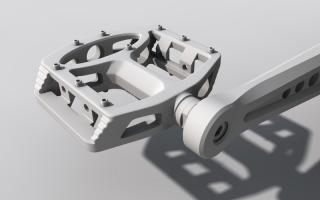
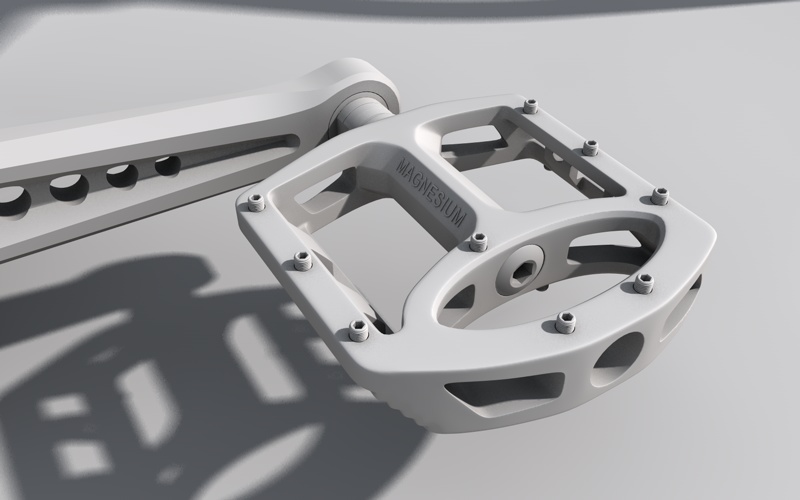
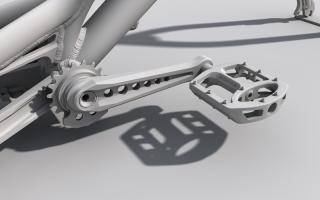
You're right! I didn't notice that haha.. I can see what I done though; I was working from the left pedal when modelling it, but put that as my right pedal in the 3D world. Doh! Thanks for spotting it And you can correct me on anything you see, I don't mind. There's surely going to be a few things to spot as I stare at the thing all the time so I miss them Thanks! Will keep you in mind if I want to do my own site Skoze & Matt Burrows: Thanks guys!
-
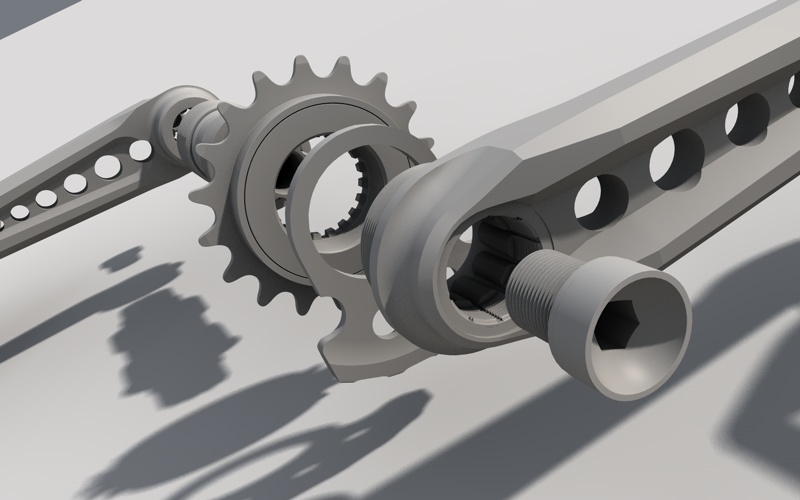
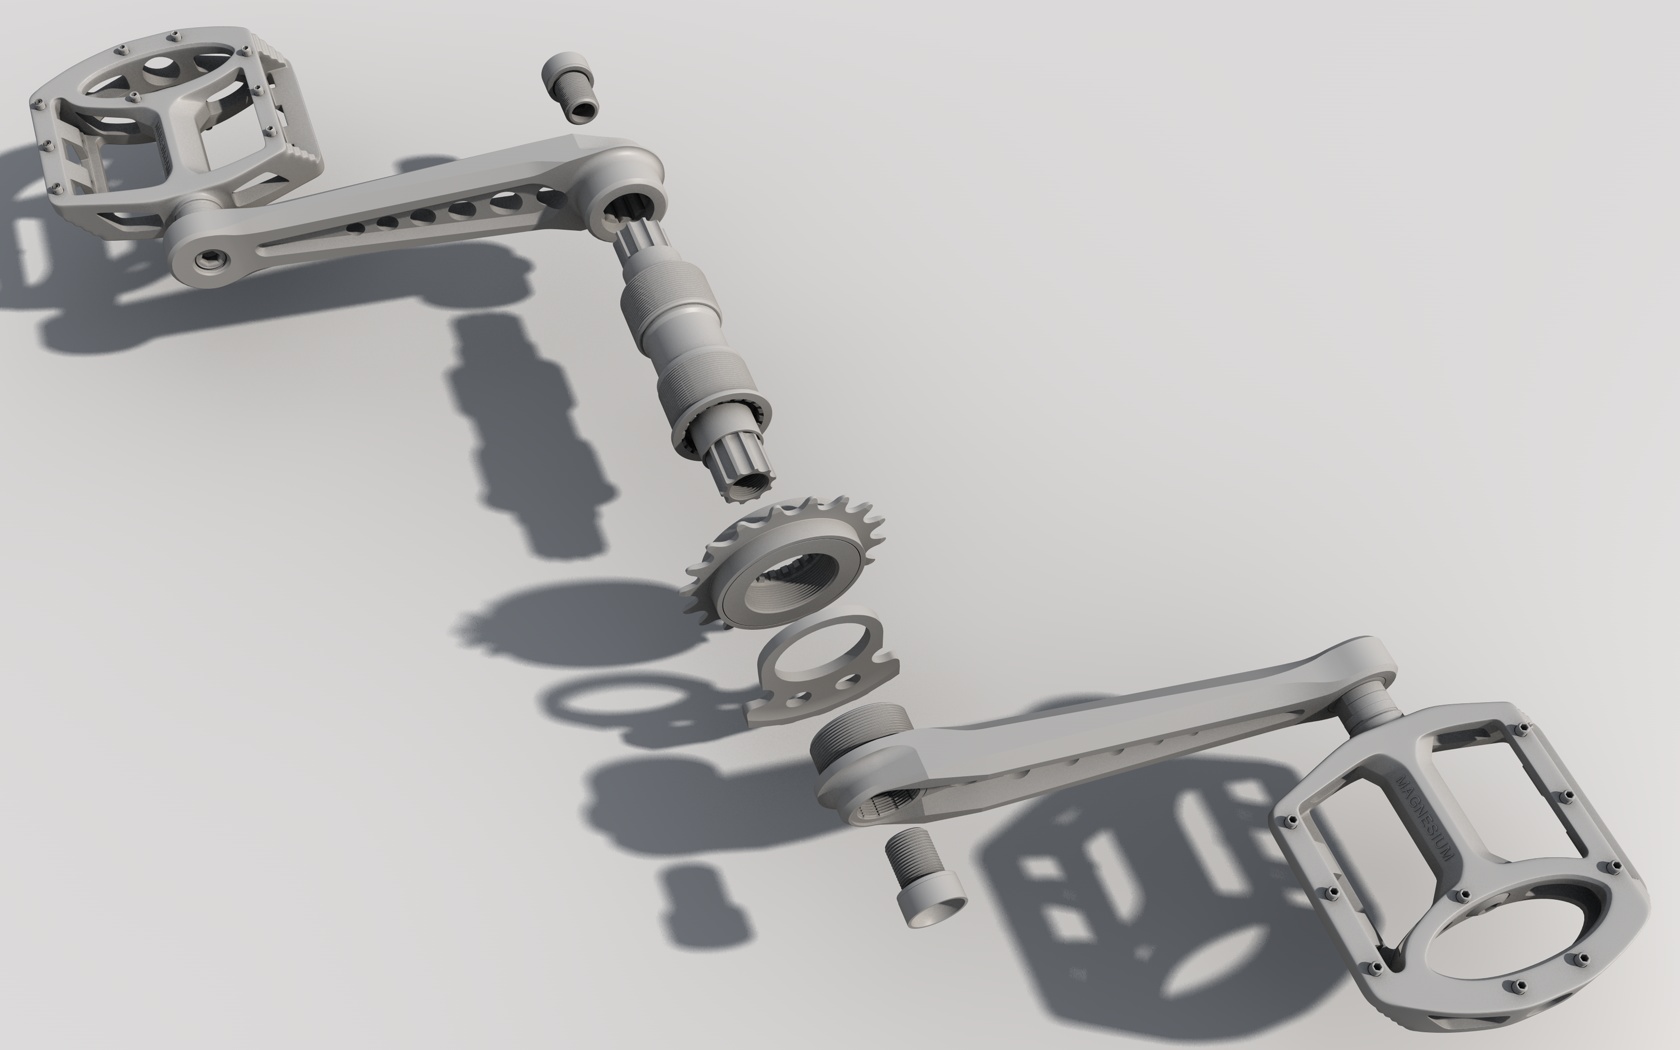
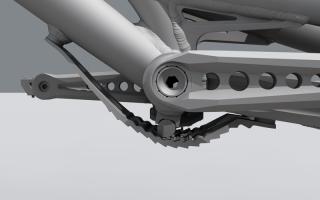
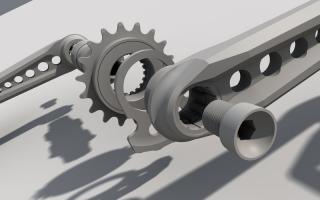
Bottom Bracket Area done Just done the crank bolt. forteh: Pedals now have the concaved center, but it's not very noticable Rob Leech: Yep, shall be modelling everything. No bump maps or texture replacement here Bronz: Haha, I'm actually out of work right now. I work as a bike and go-kart maintenance guy on a holiday park between March & November. But I shall be getting some kind of portfolio together for 2011. I need to. T-Proboy13: Thanks!

-
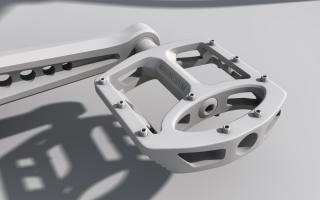
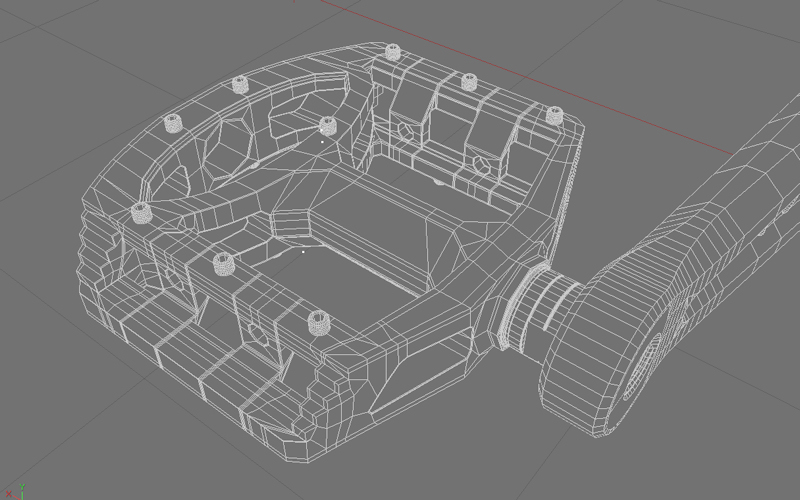
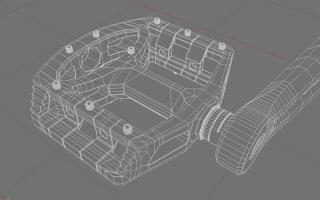
Cheers.. Yea I'll be adding materials and textures once modelling is all finished. The concaved surface is very shallow on the real pedal. About 1mm. You wouldn't really notice the difference. But saying that; I'll see if using a deformer makes a visual difference. I can show you an unsmoothed wireframe.

-
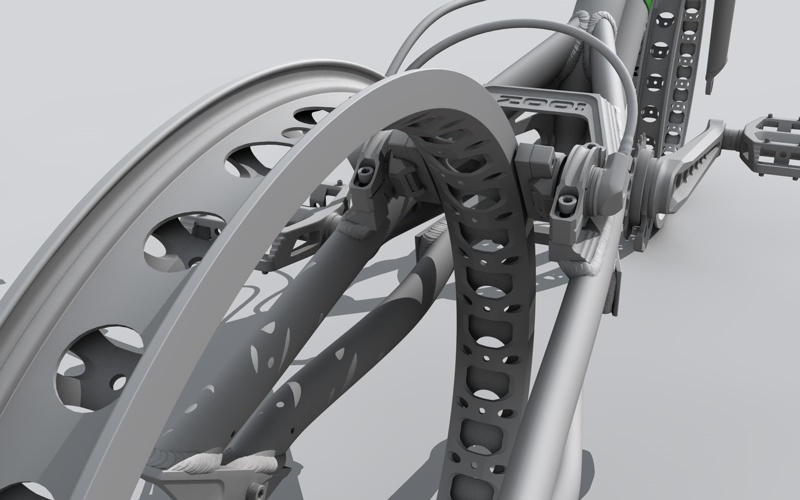
Yea my frame weld is a little tidier than those pics I think. My frame is the 2009 Python.. Got a little update for you. Well, I say little, it was bloody hard to model these pedals! Never again lol.