dann2707
-
Posts
15749 -
Joined
-
Last visited
-
Days Won
315
Content Type
Profiles
Forums
Gallery
Everything posted by dann2707
-
Cheers mate, yeah should be although I'm not sure about the angled notches
-
Got a huge update to add in here but... It's nearly there! Just ordered a load of cds tubing as I'm now committed to making a roll cage for it.
-
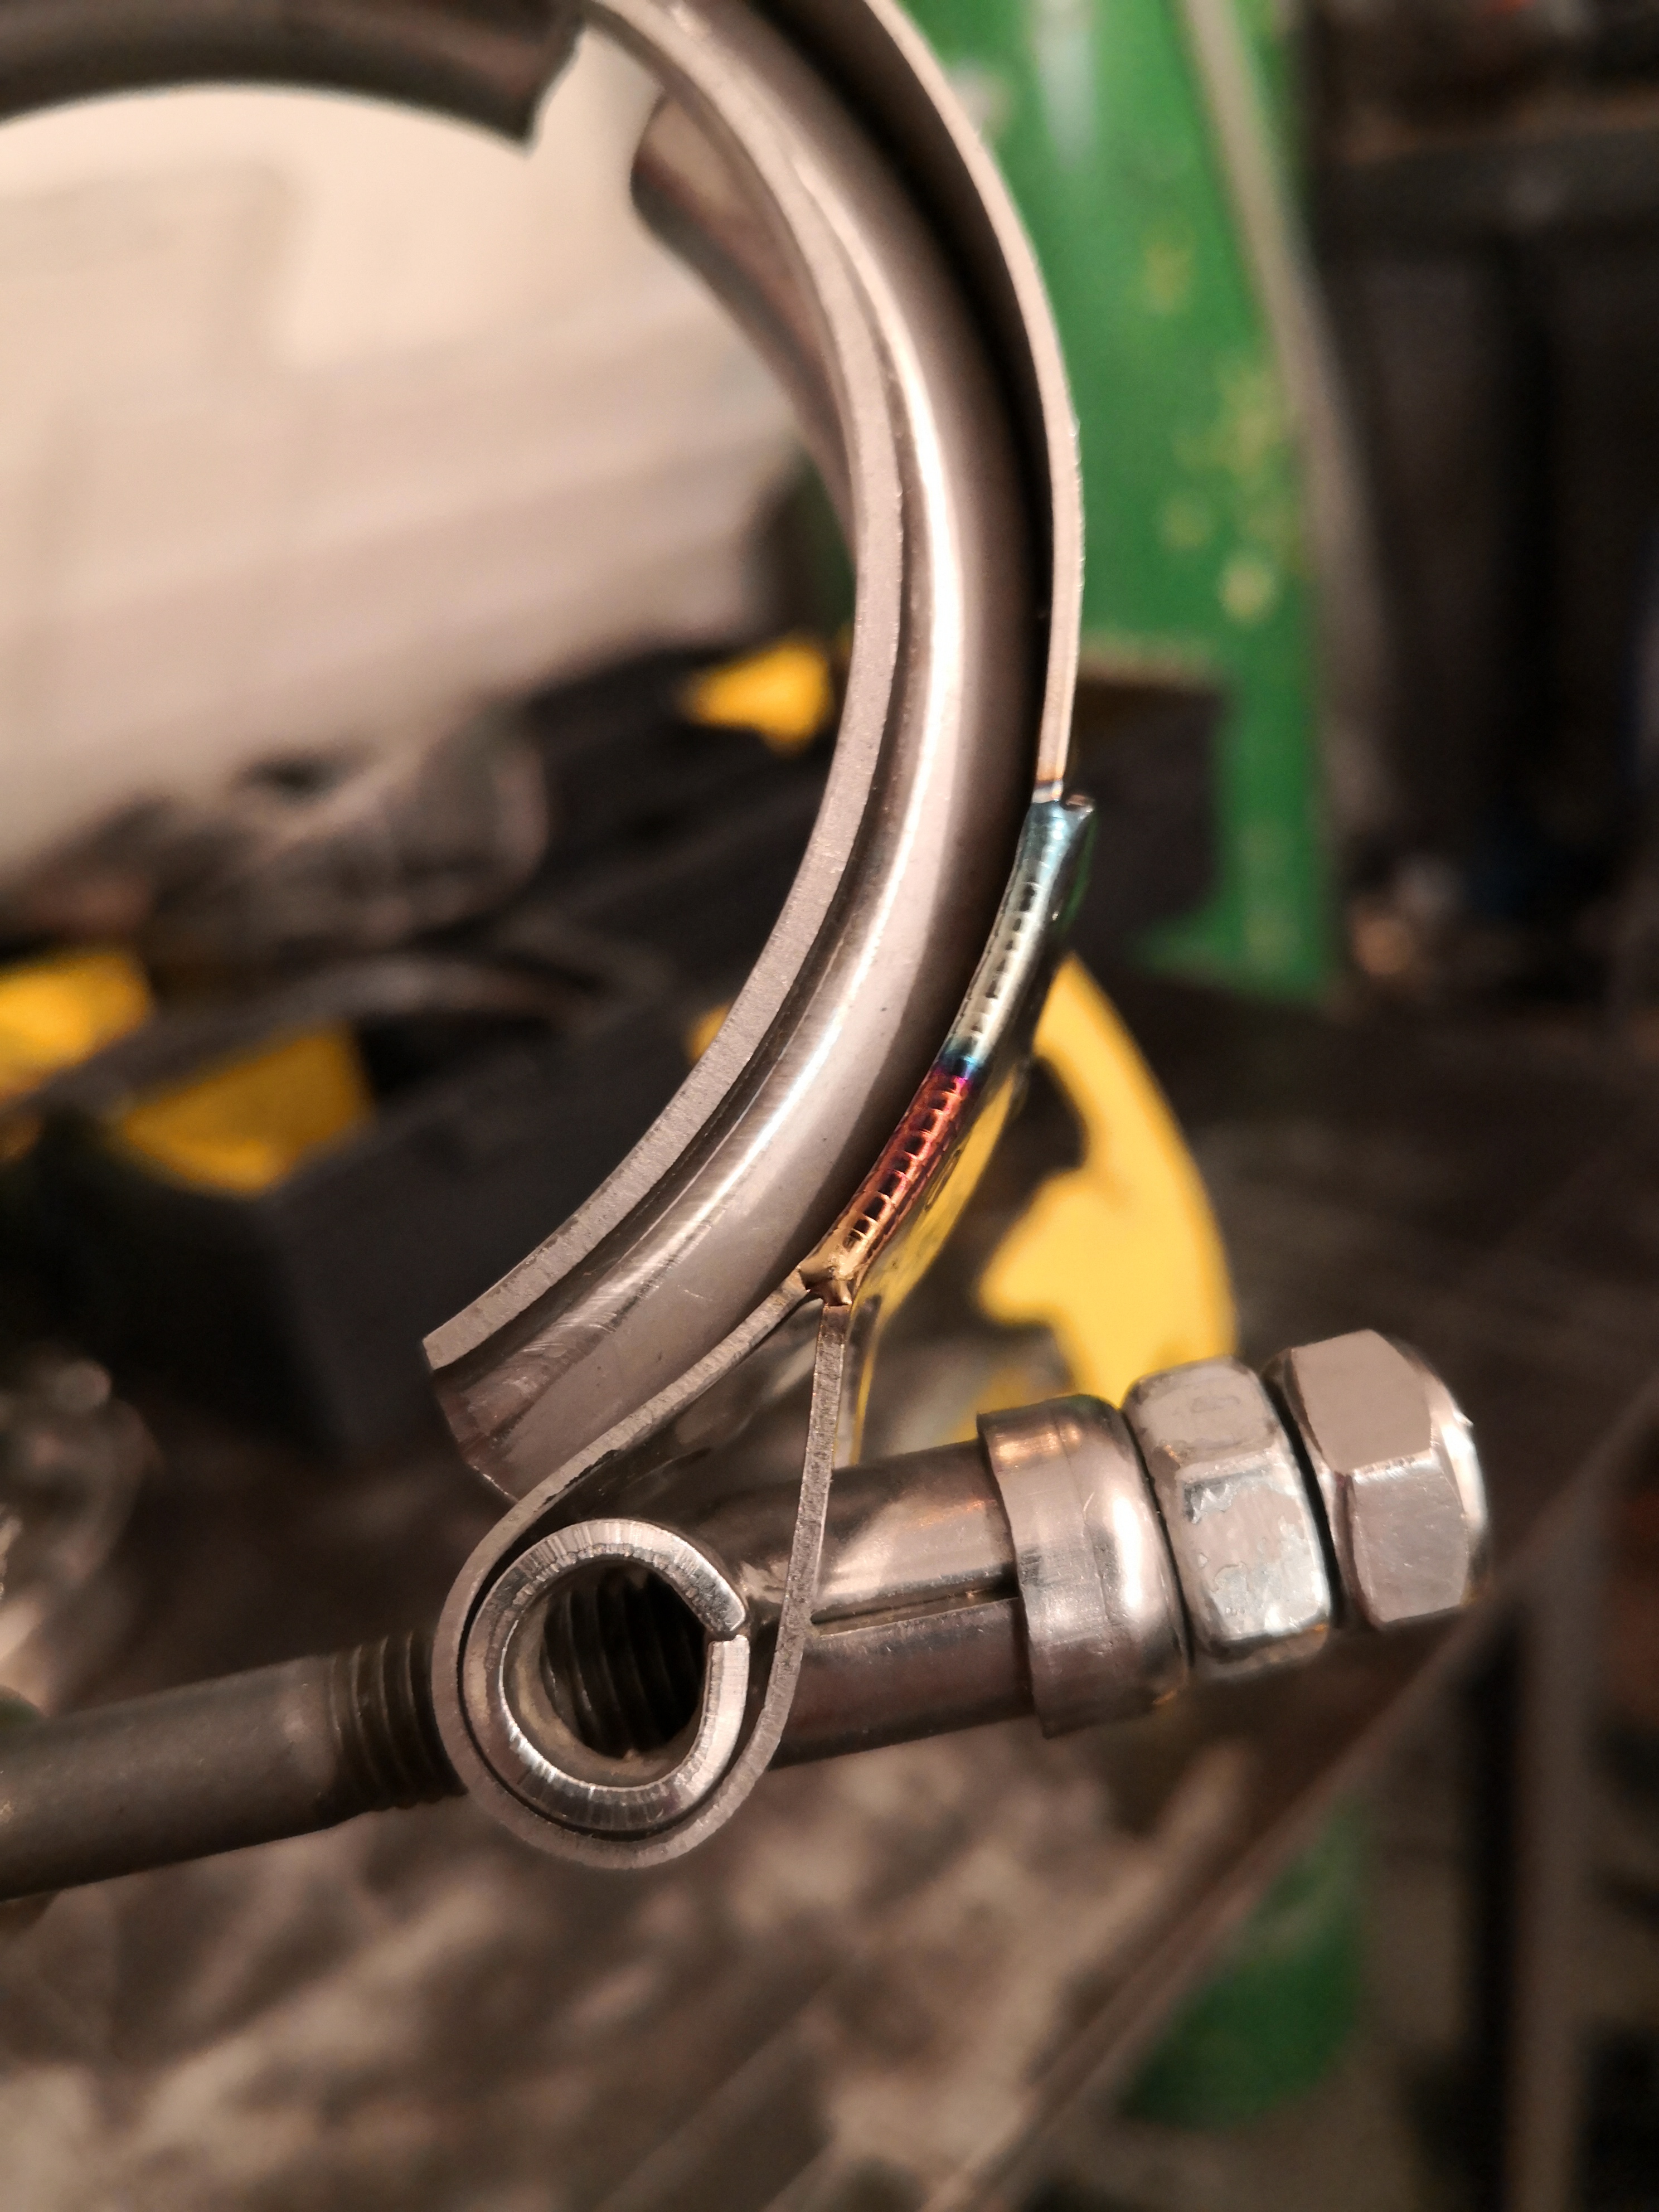
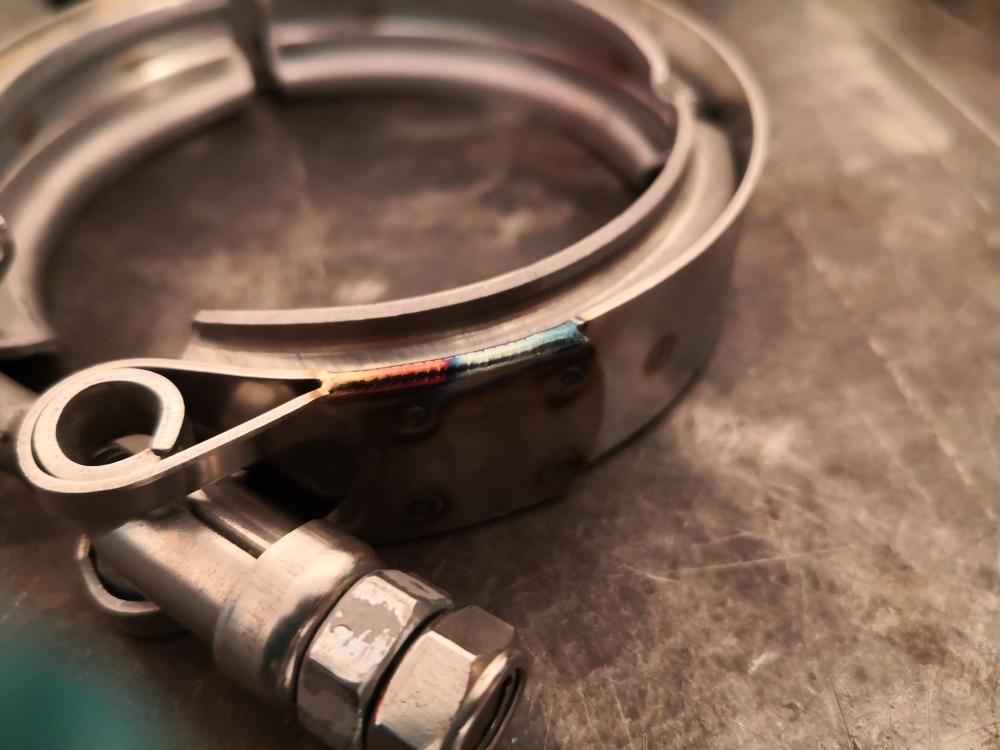
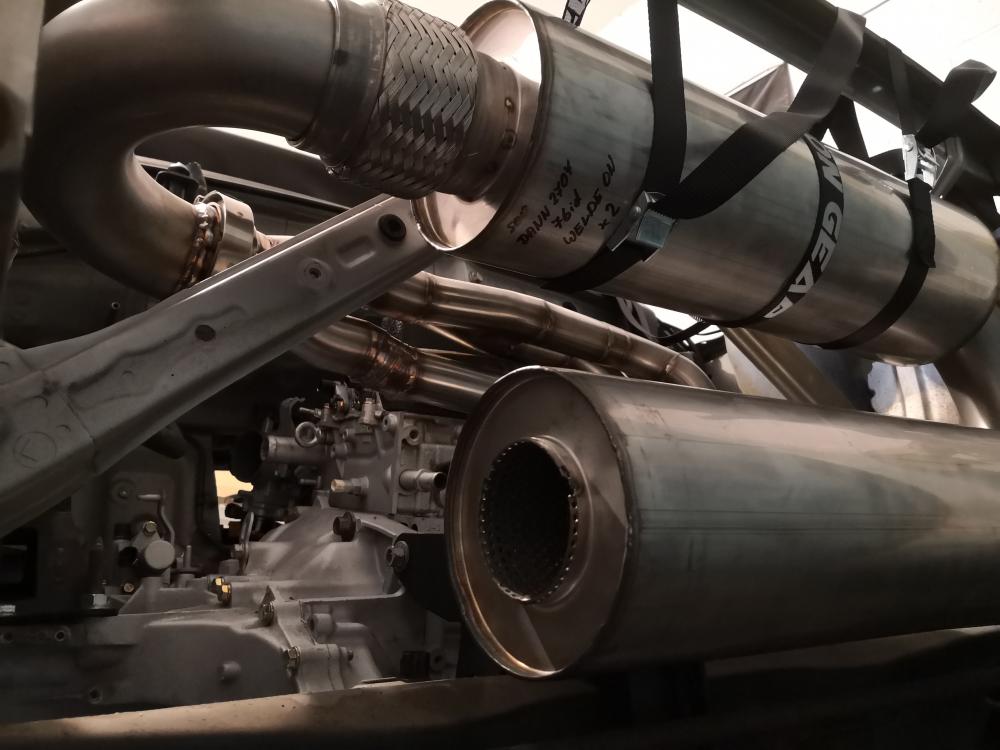
More from me from tonight. Strengthening some v band clamps because f**k a few spot welds

-
Got any pictures mate? Do you have the metal too? Incredibly happy to help but would like gas covered
-
Just finished my first lobster/pie welding. Went well


-
Sikh
-
@forteh is th is what you mean? I hope so.... Hahaha Done more hangers today, and made some additional supports to them. It now hangs nicely by itself on 4 hangers.
-
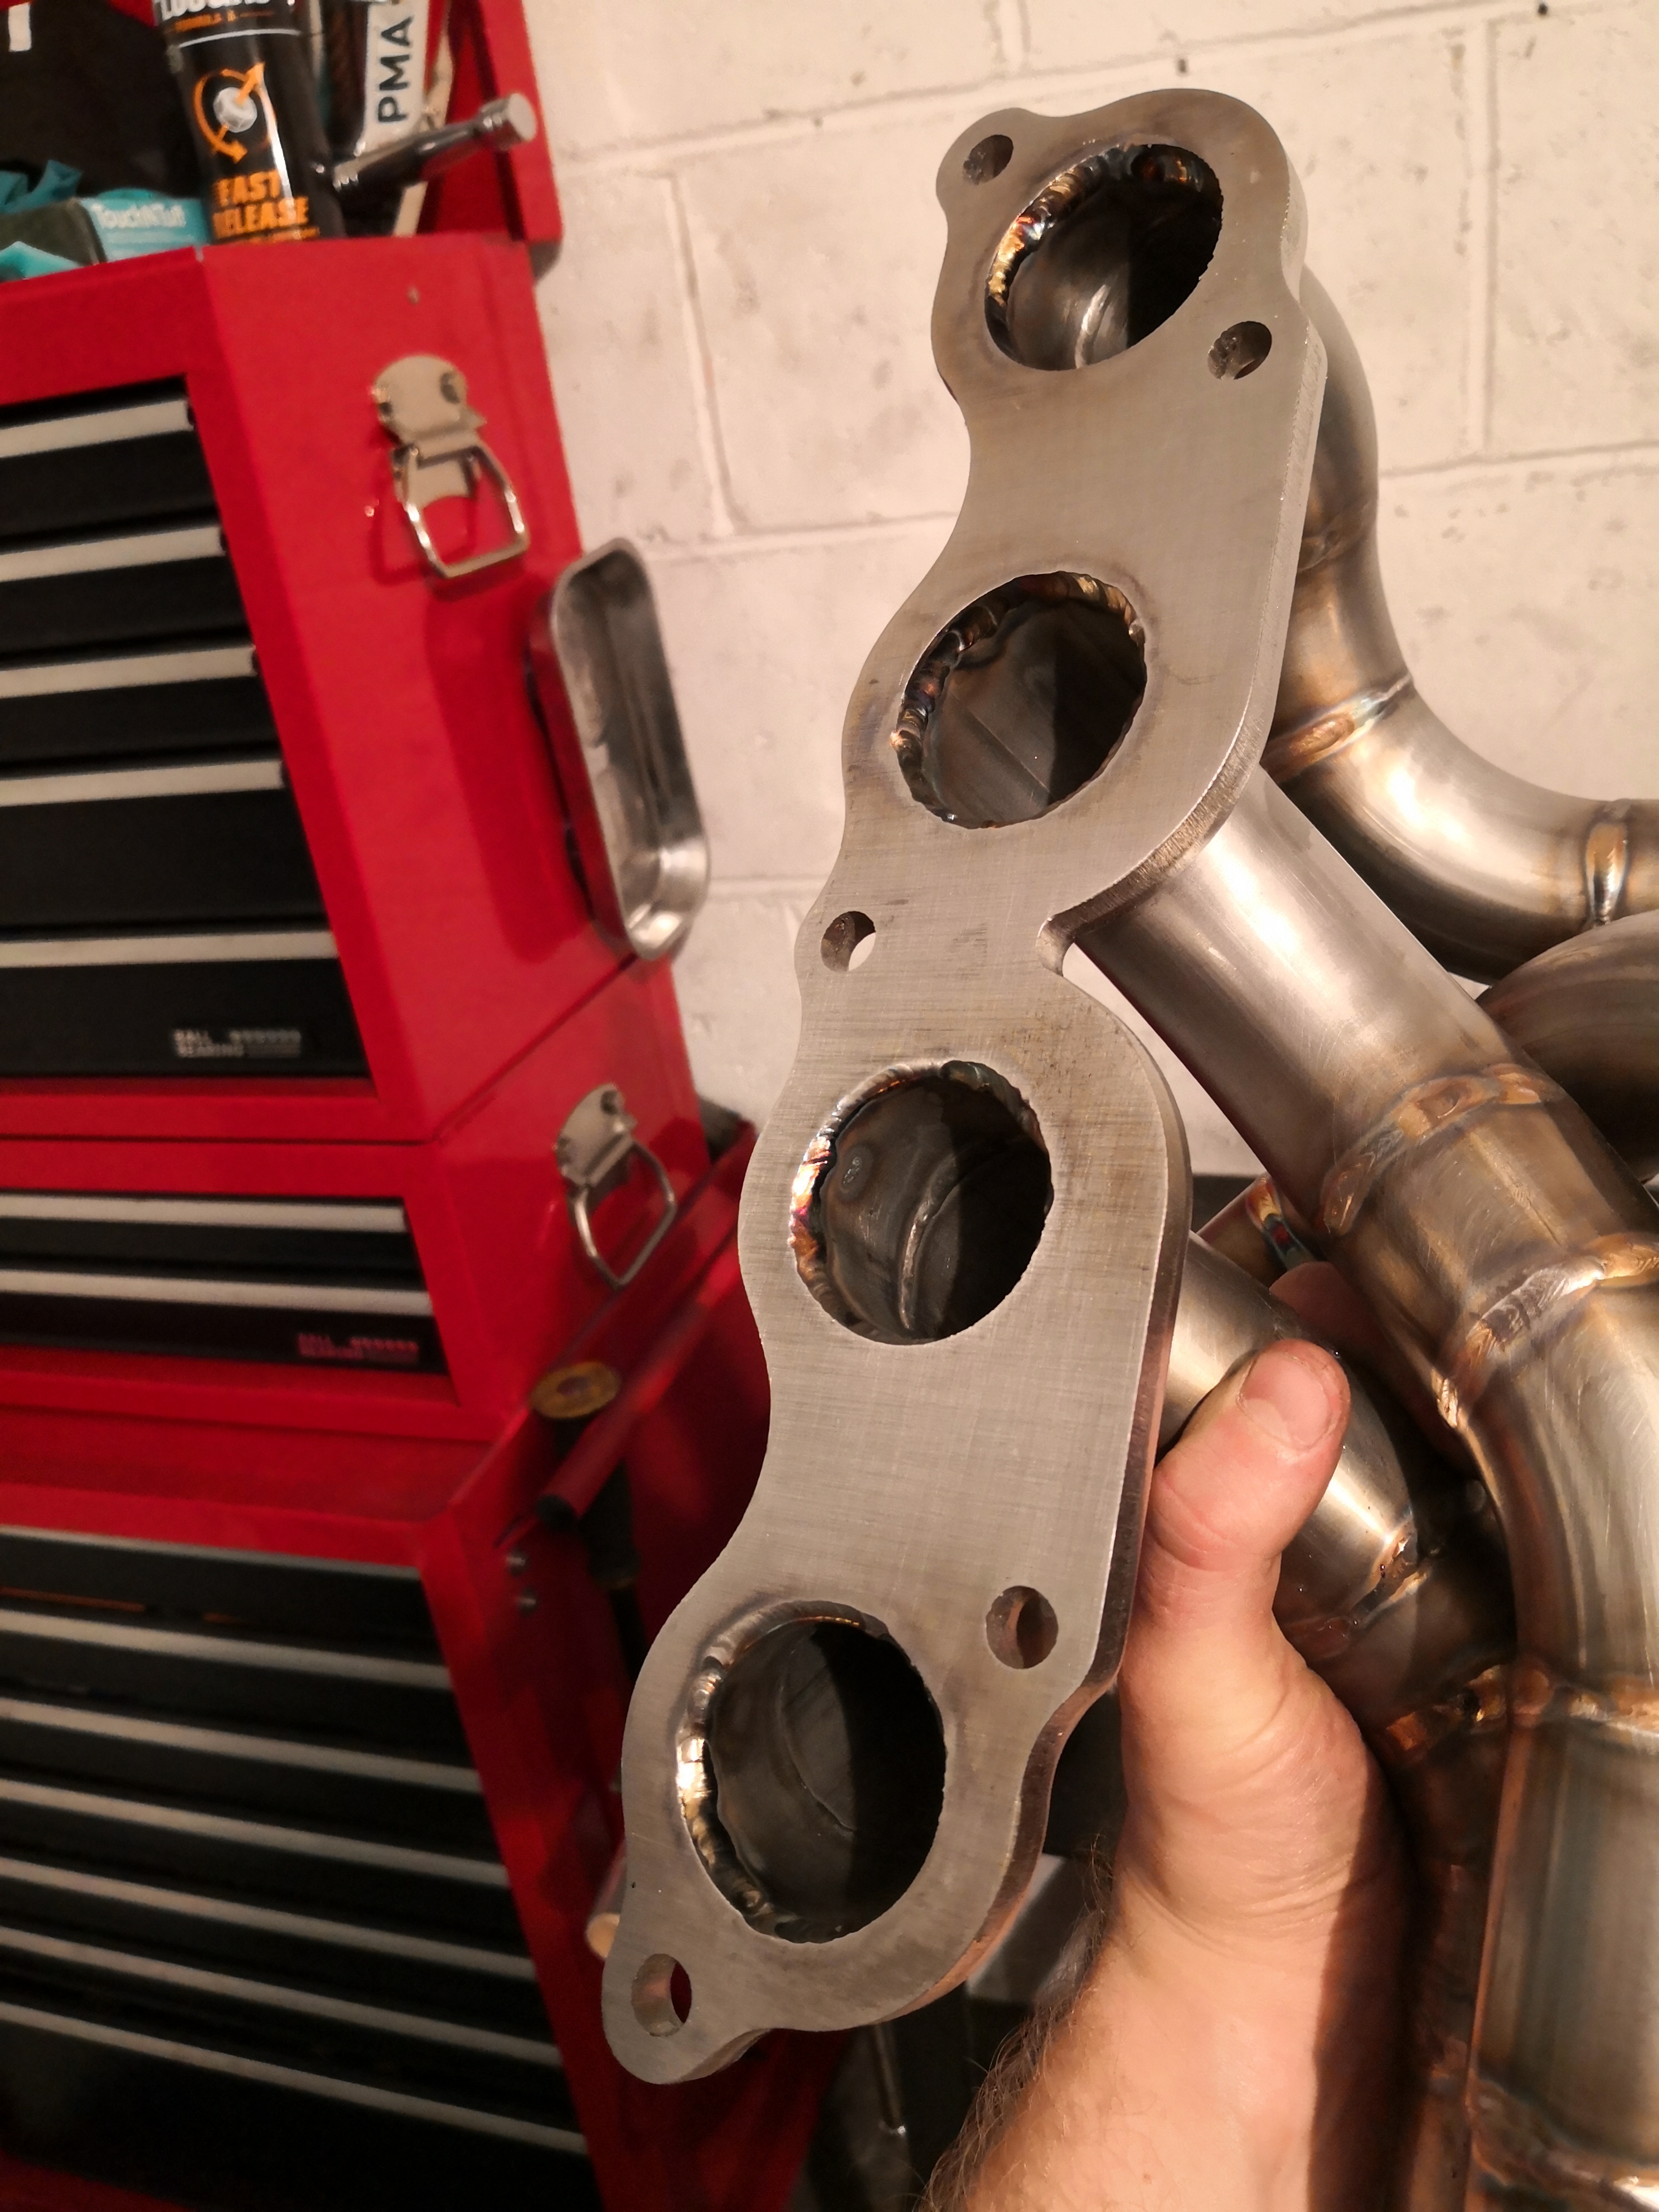
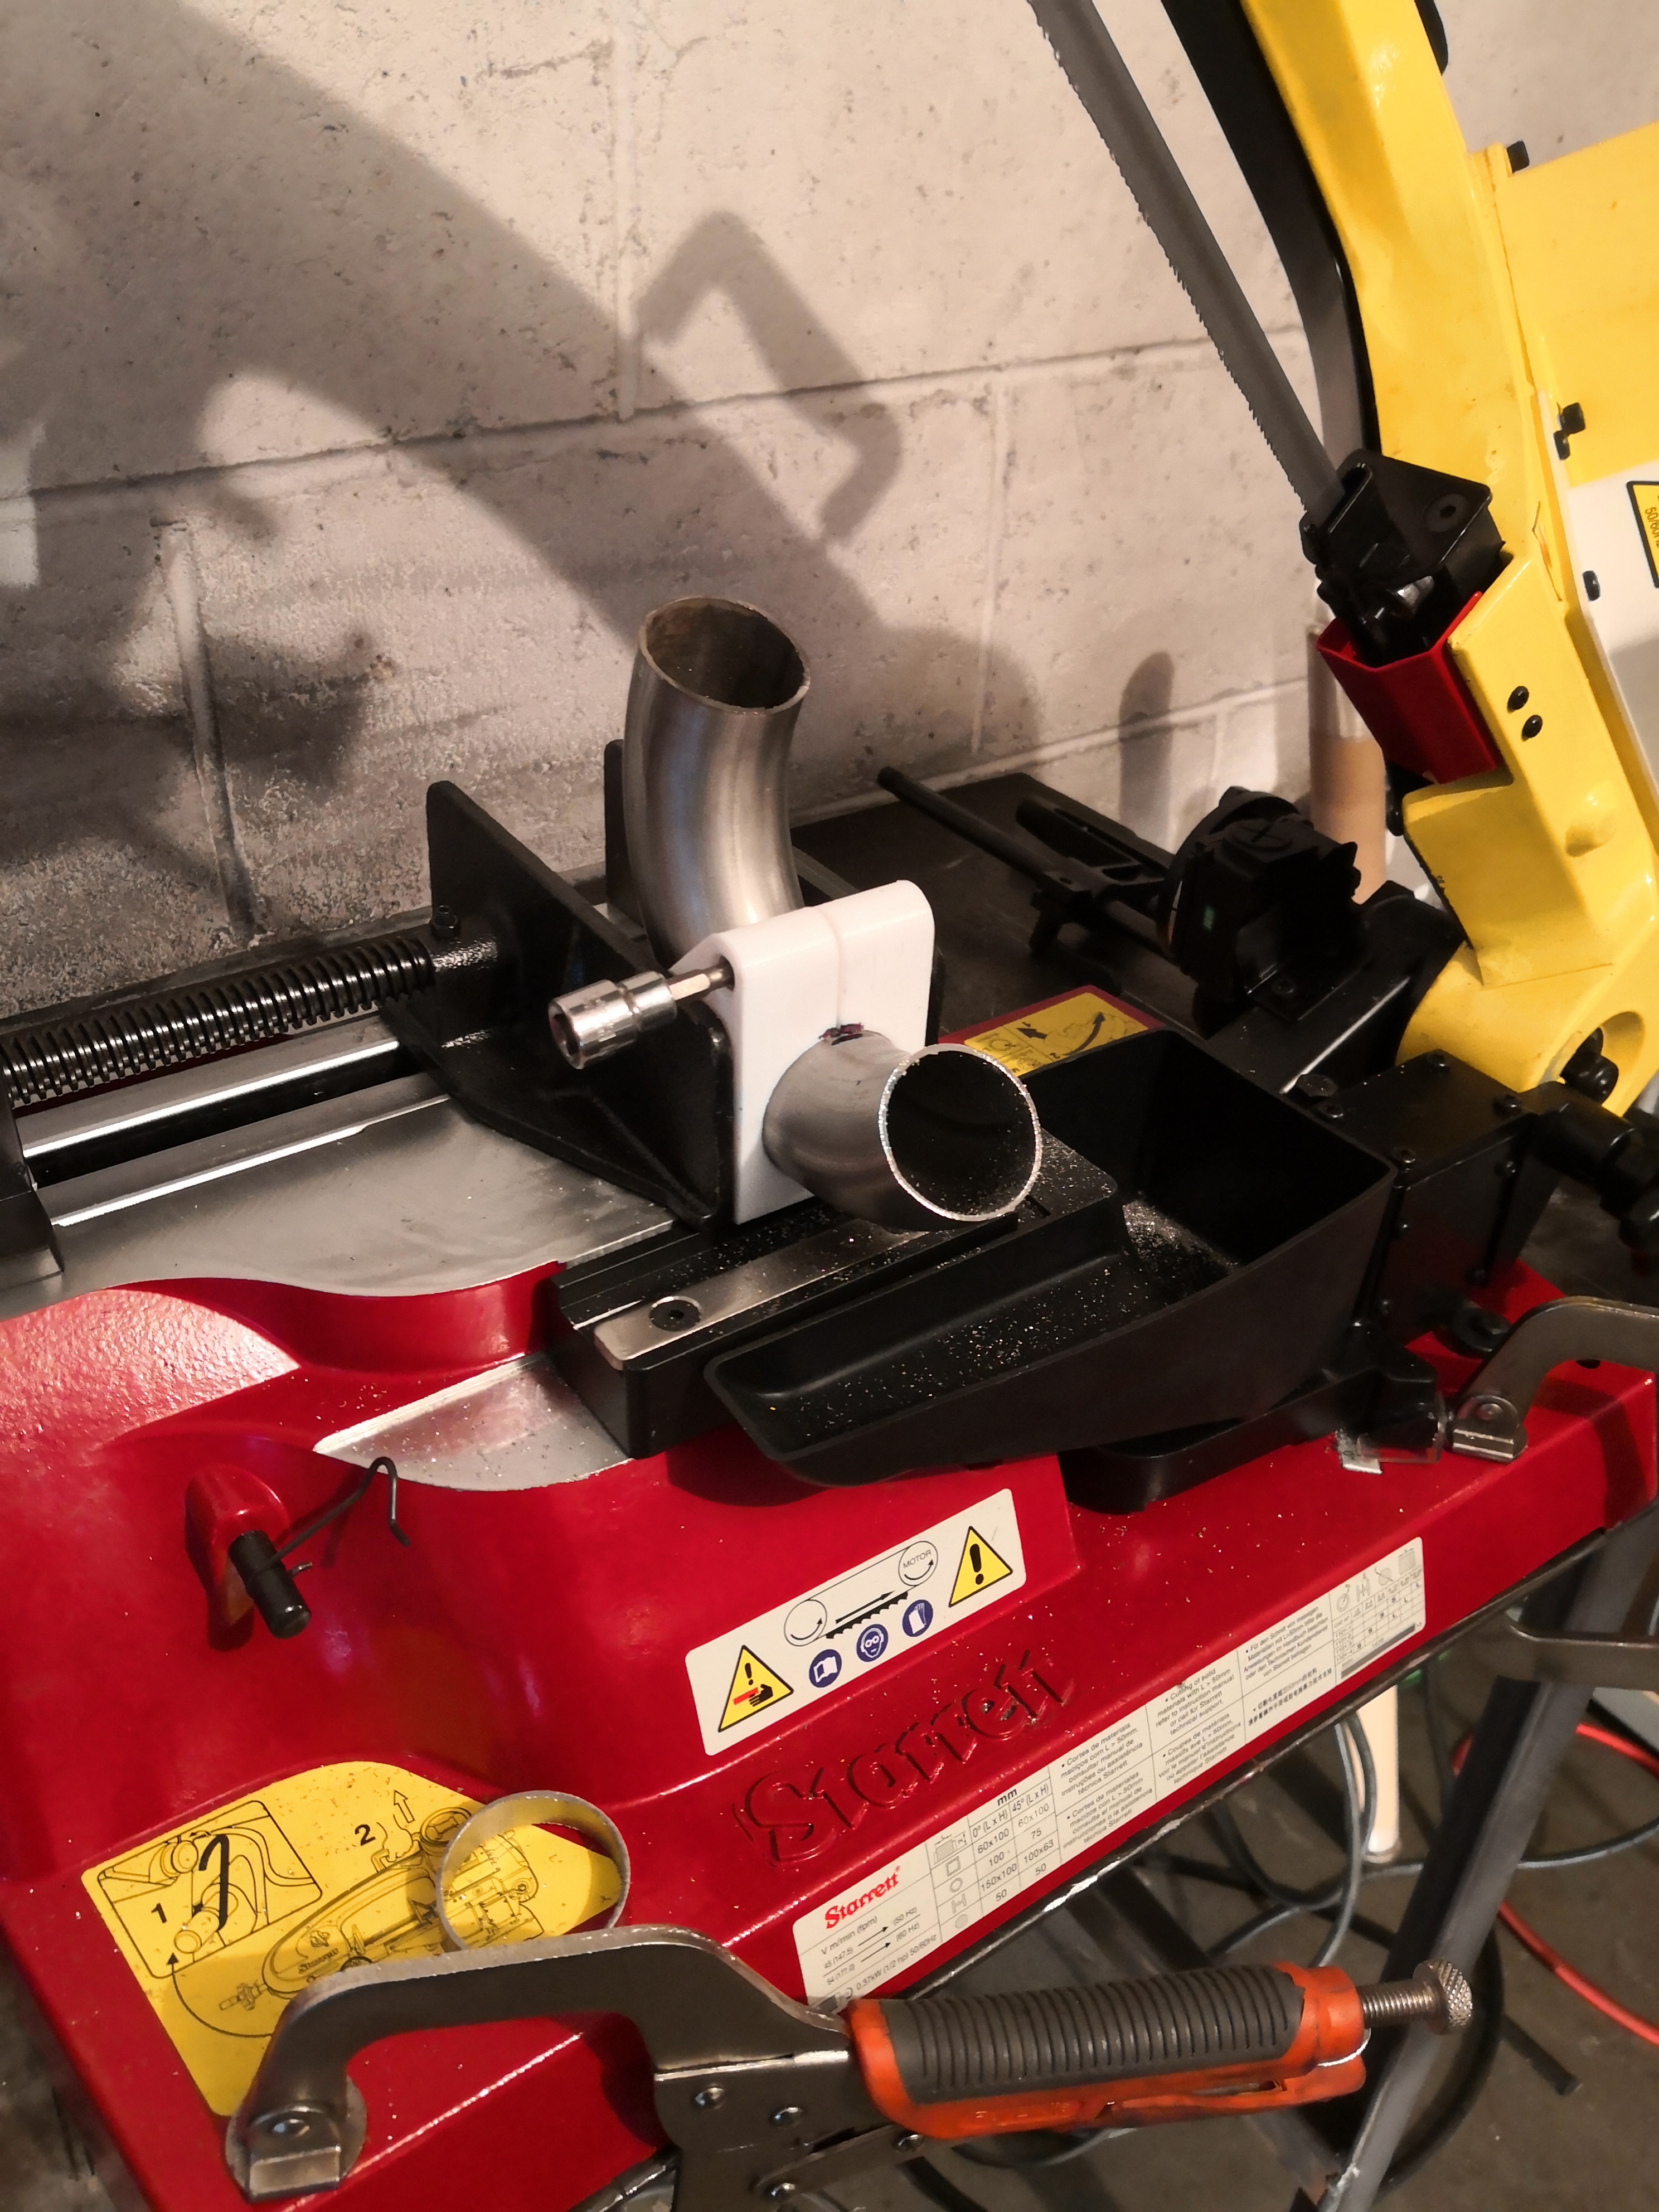
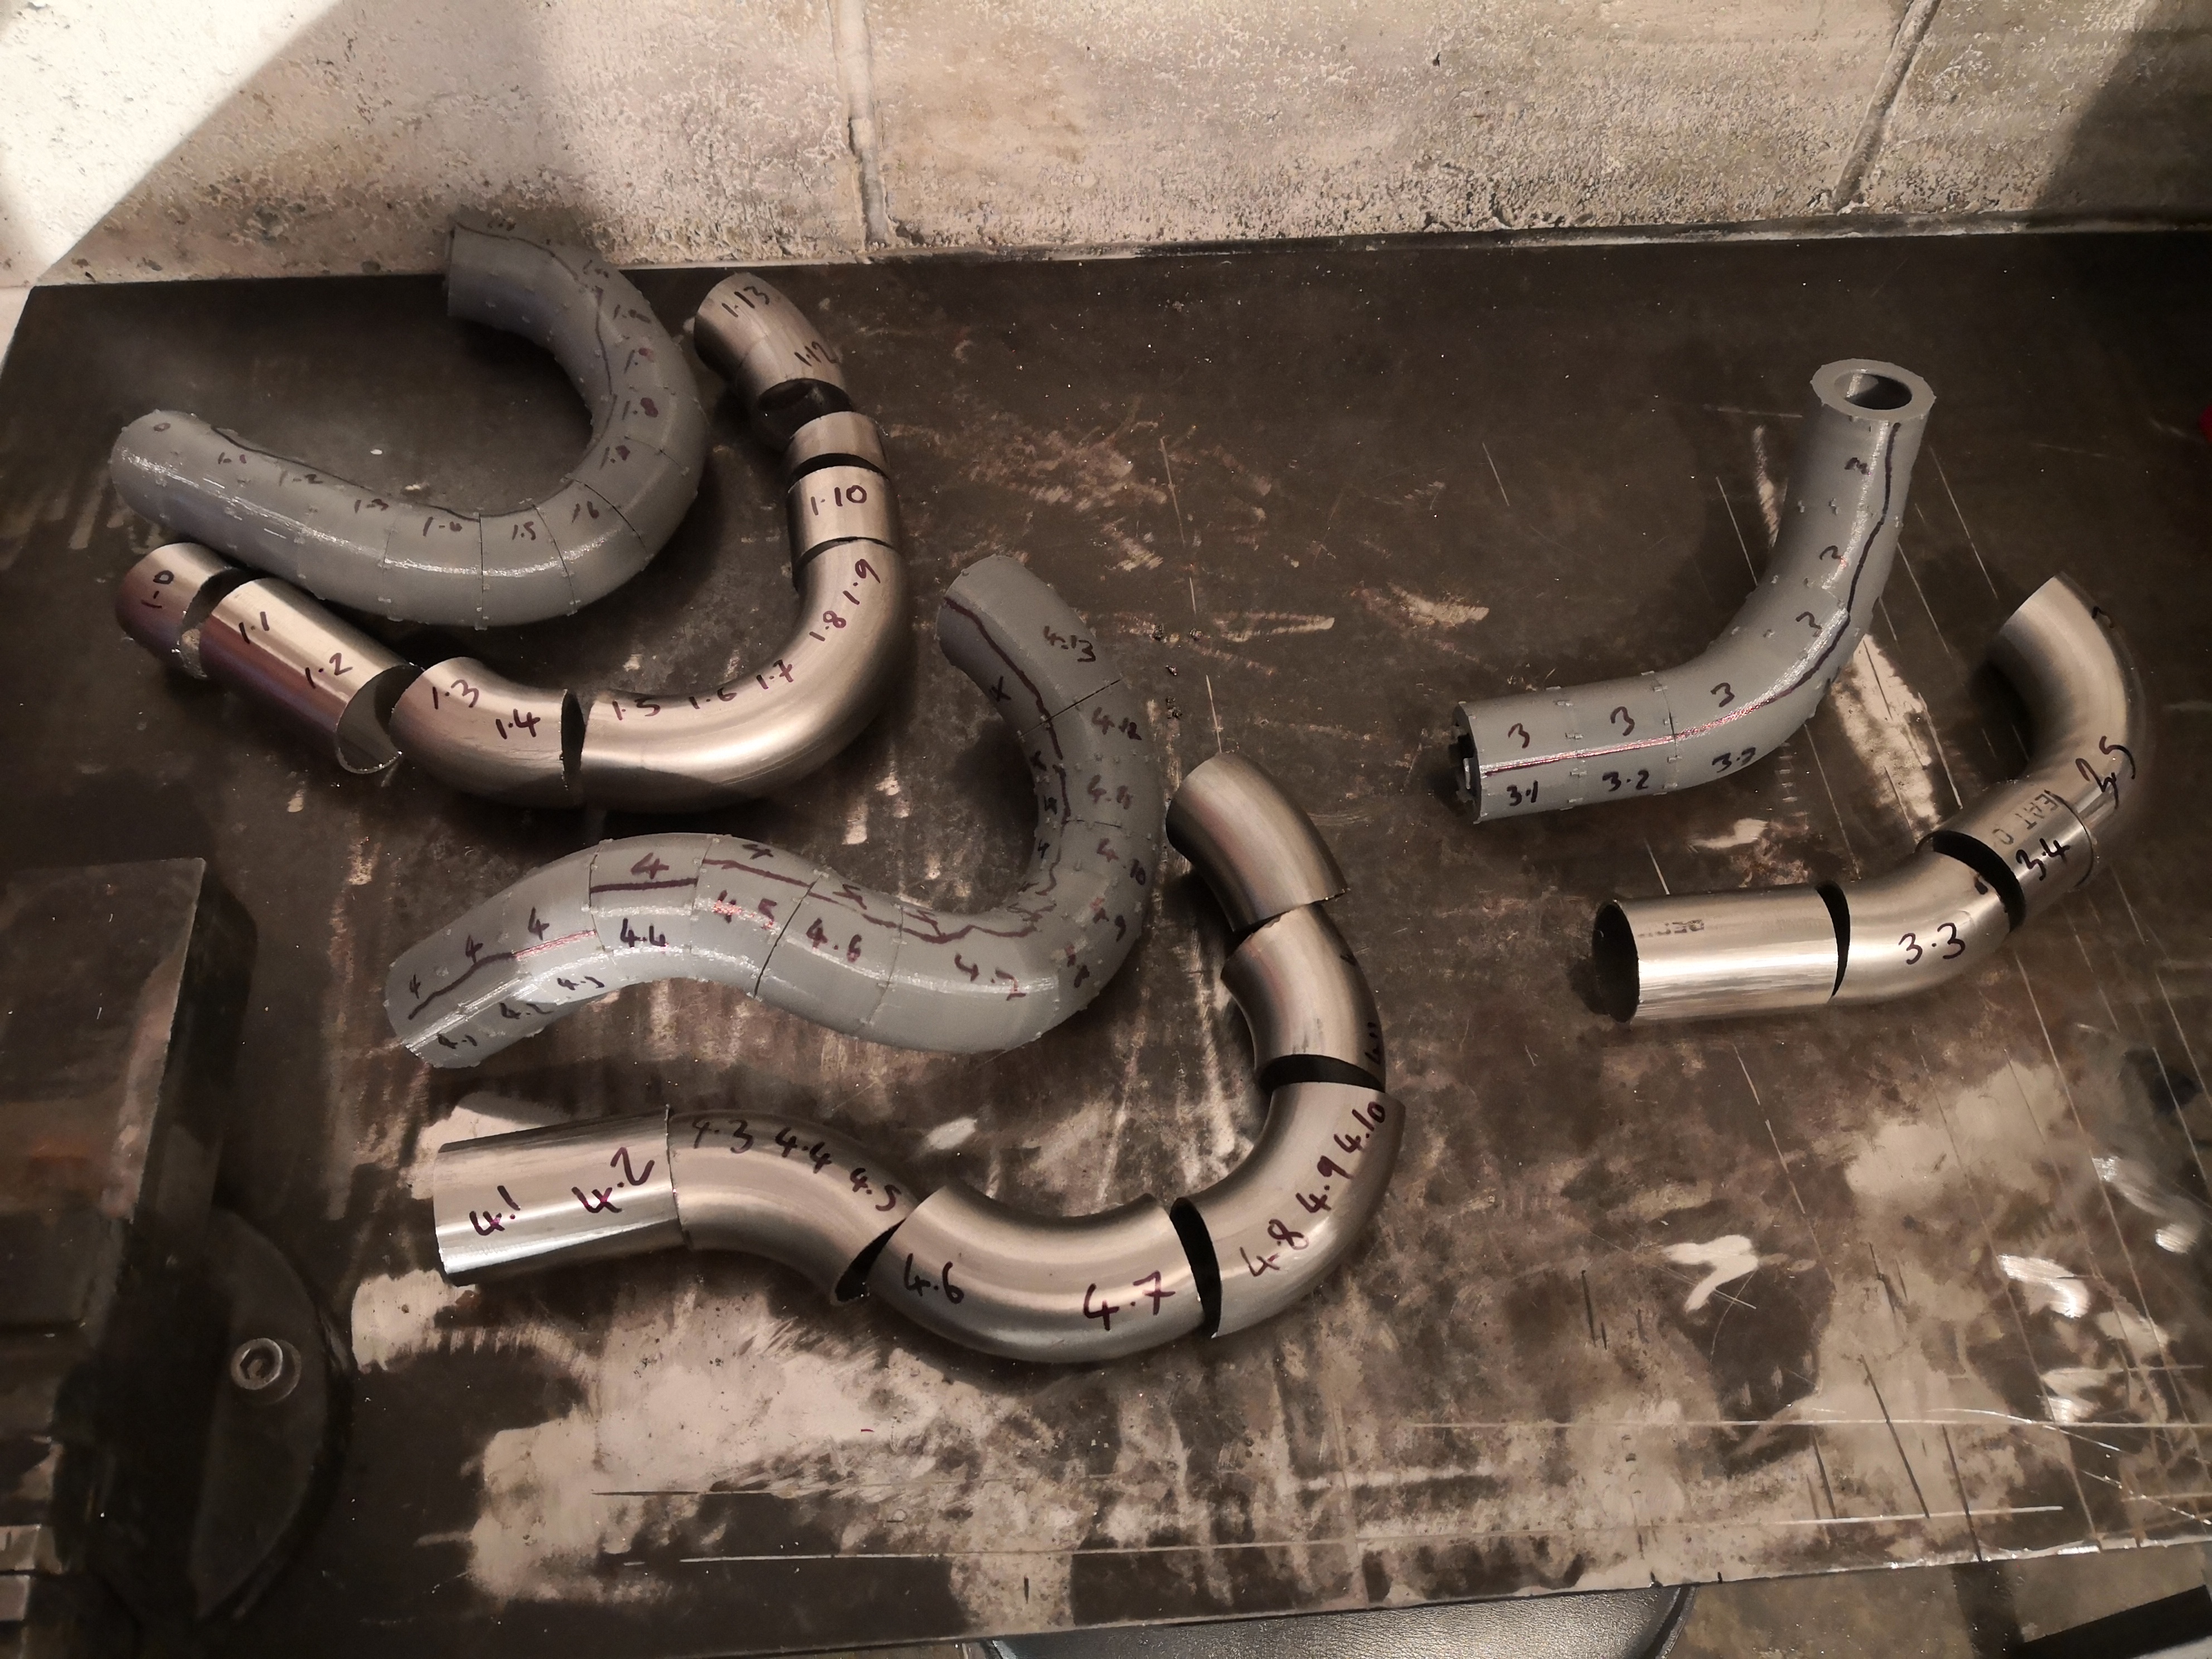
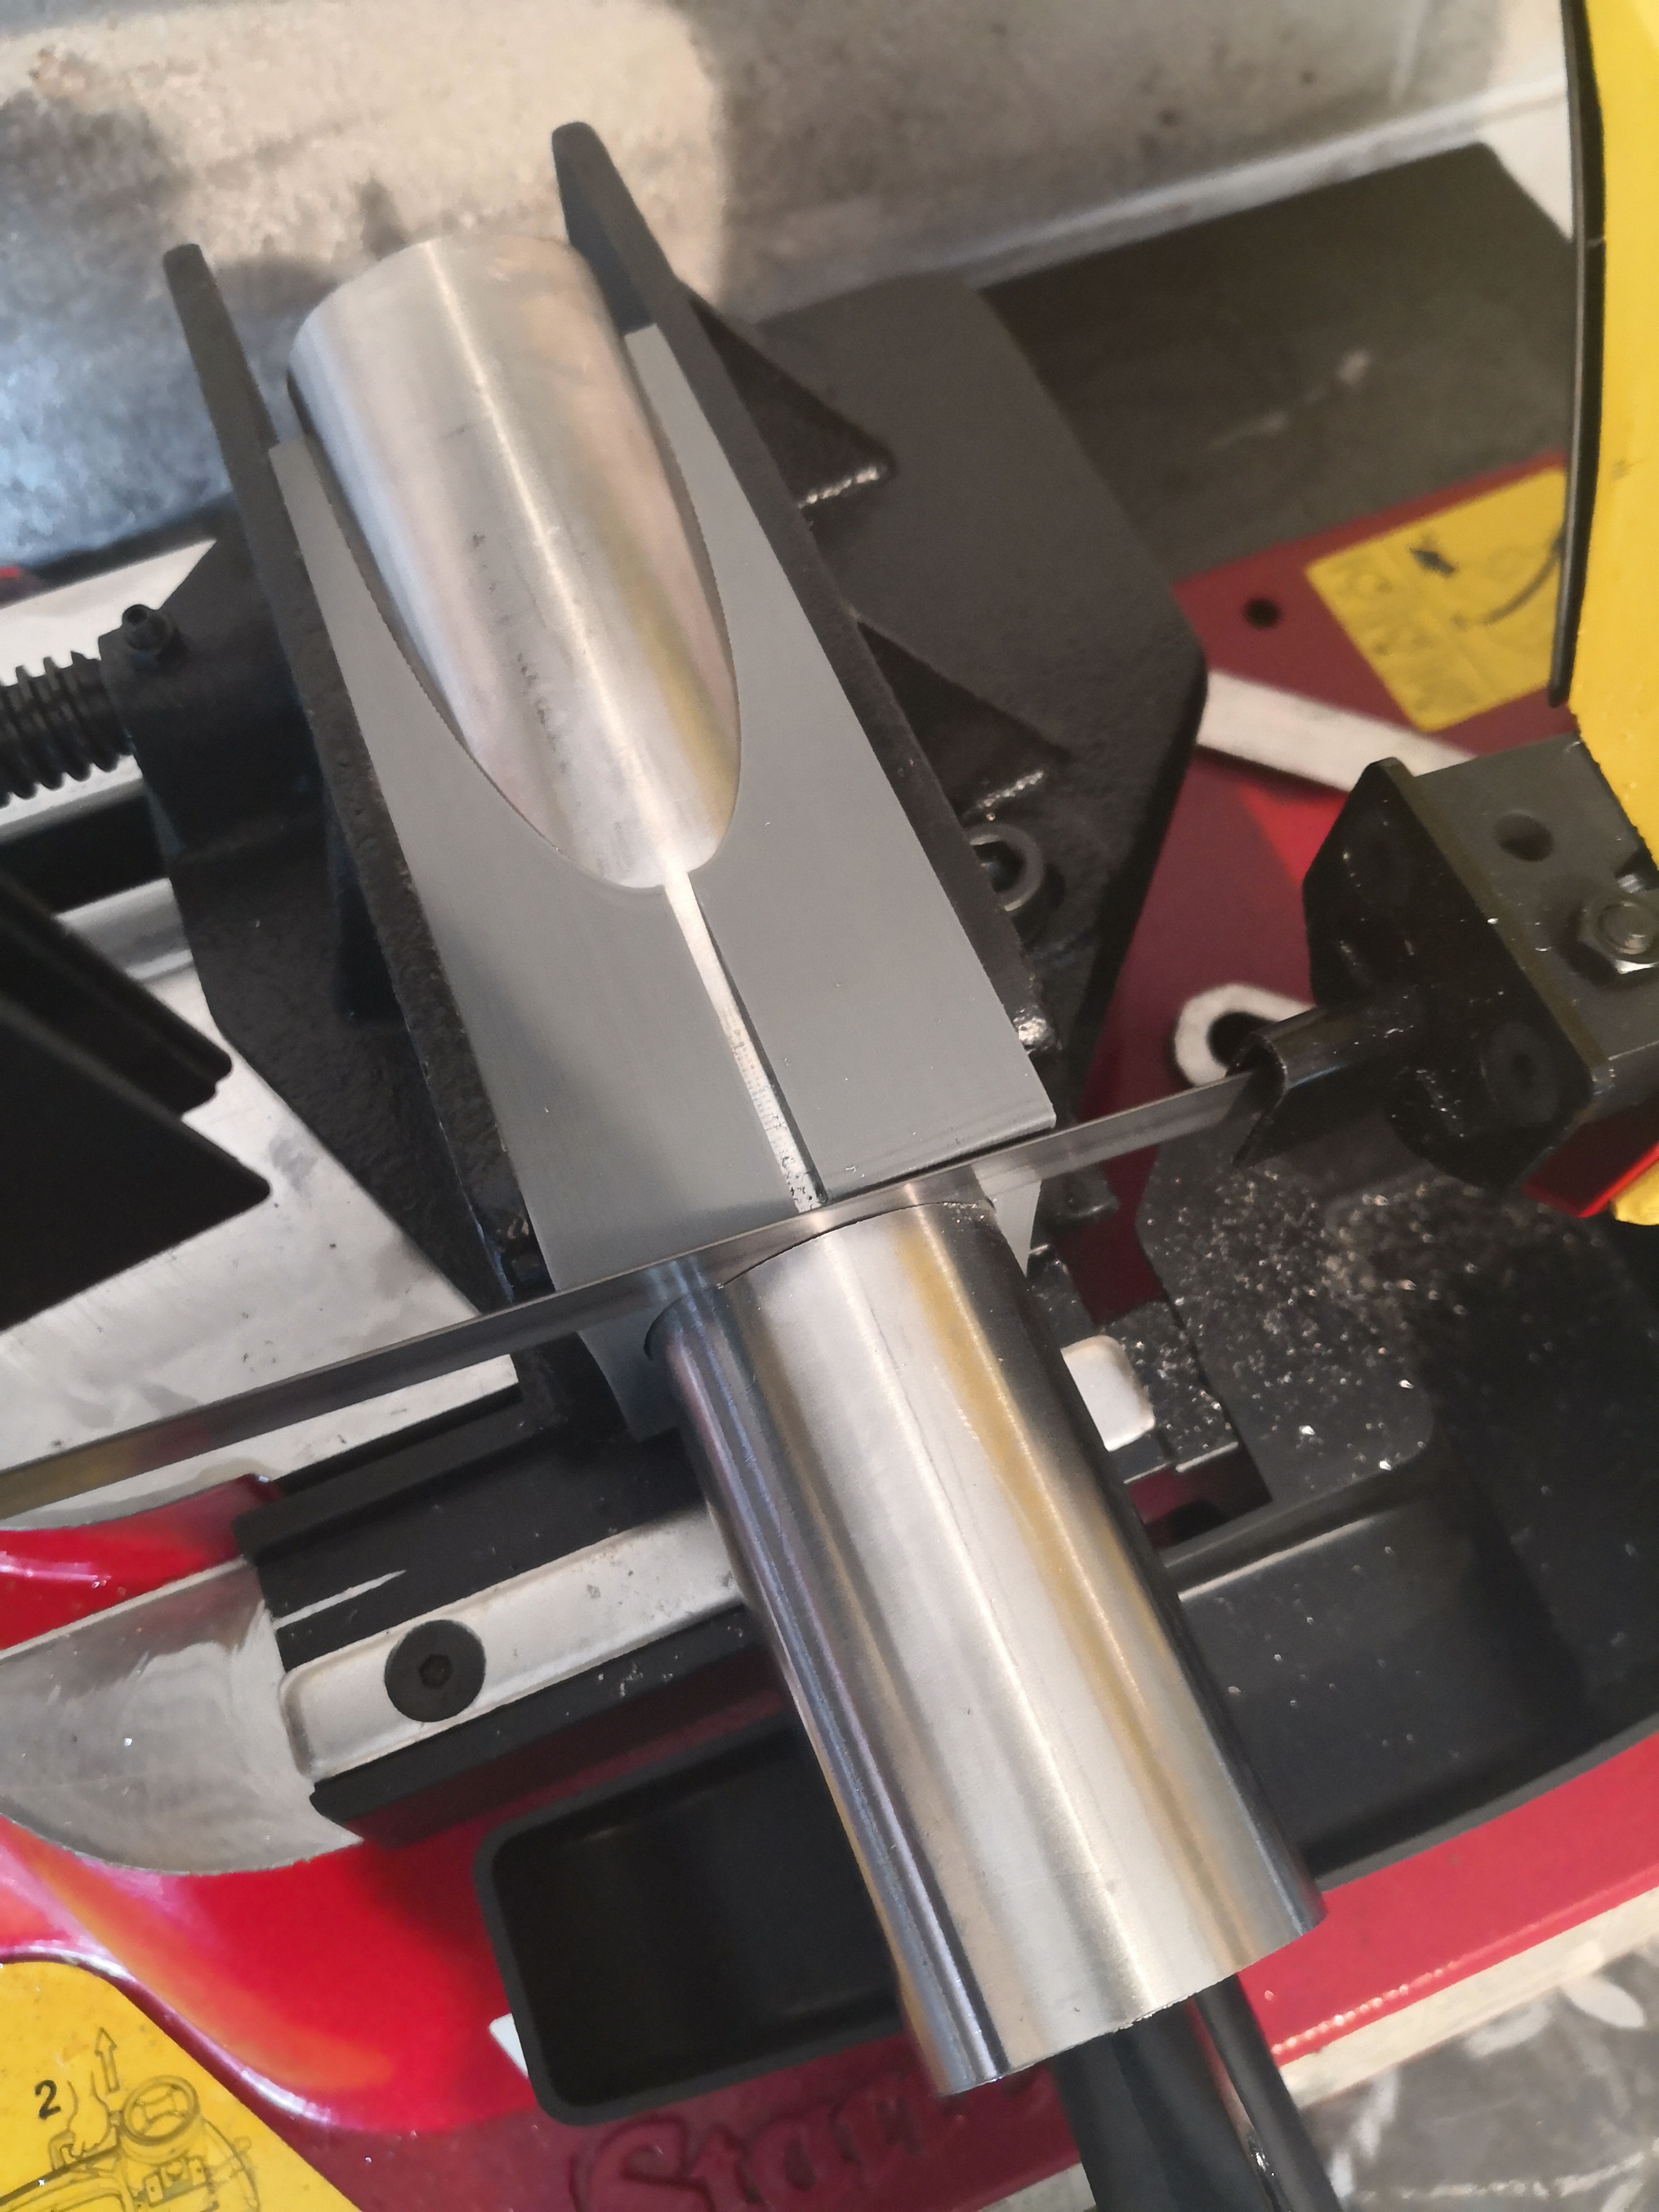
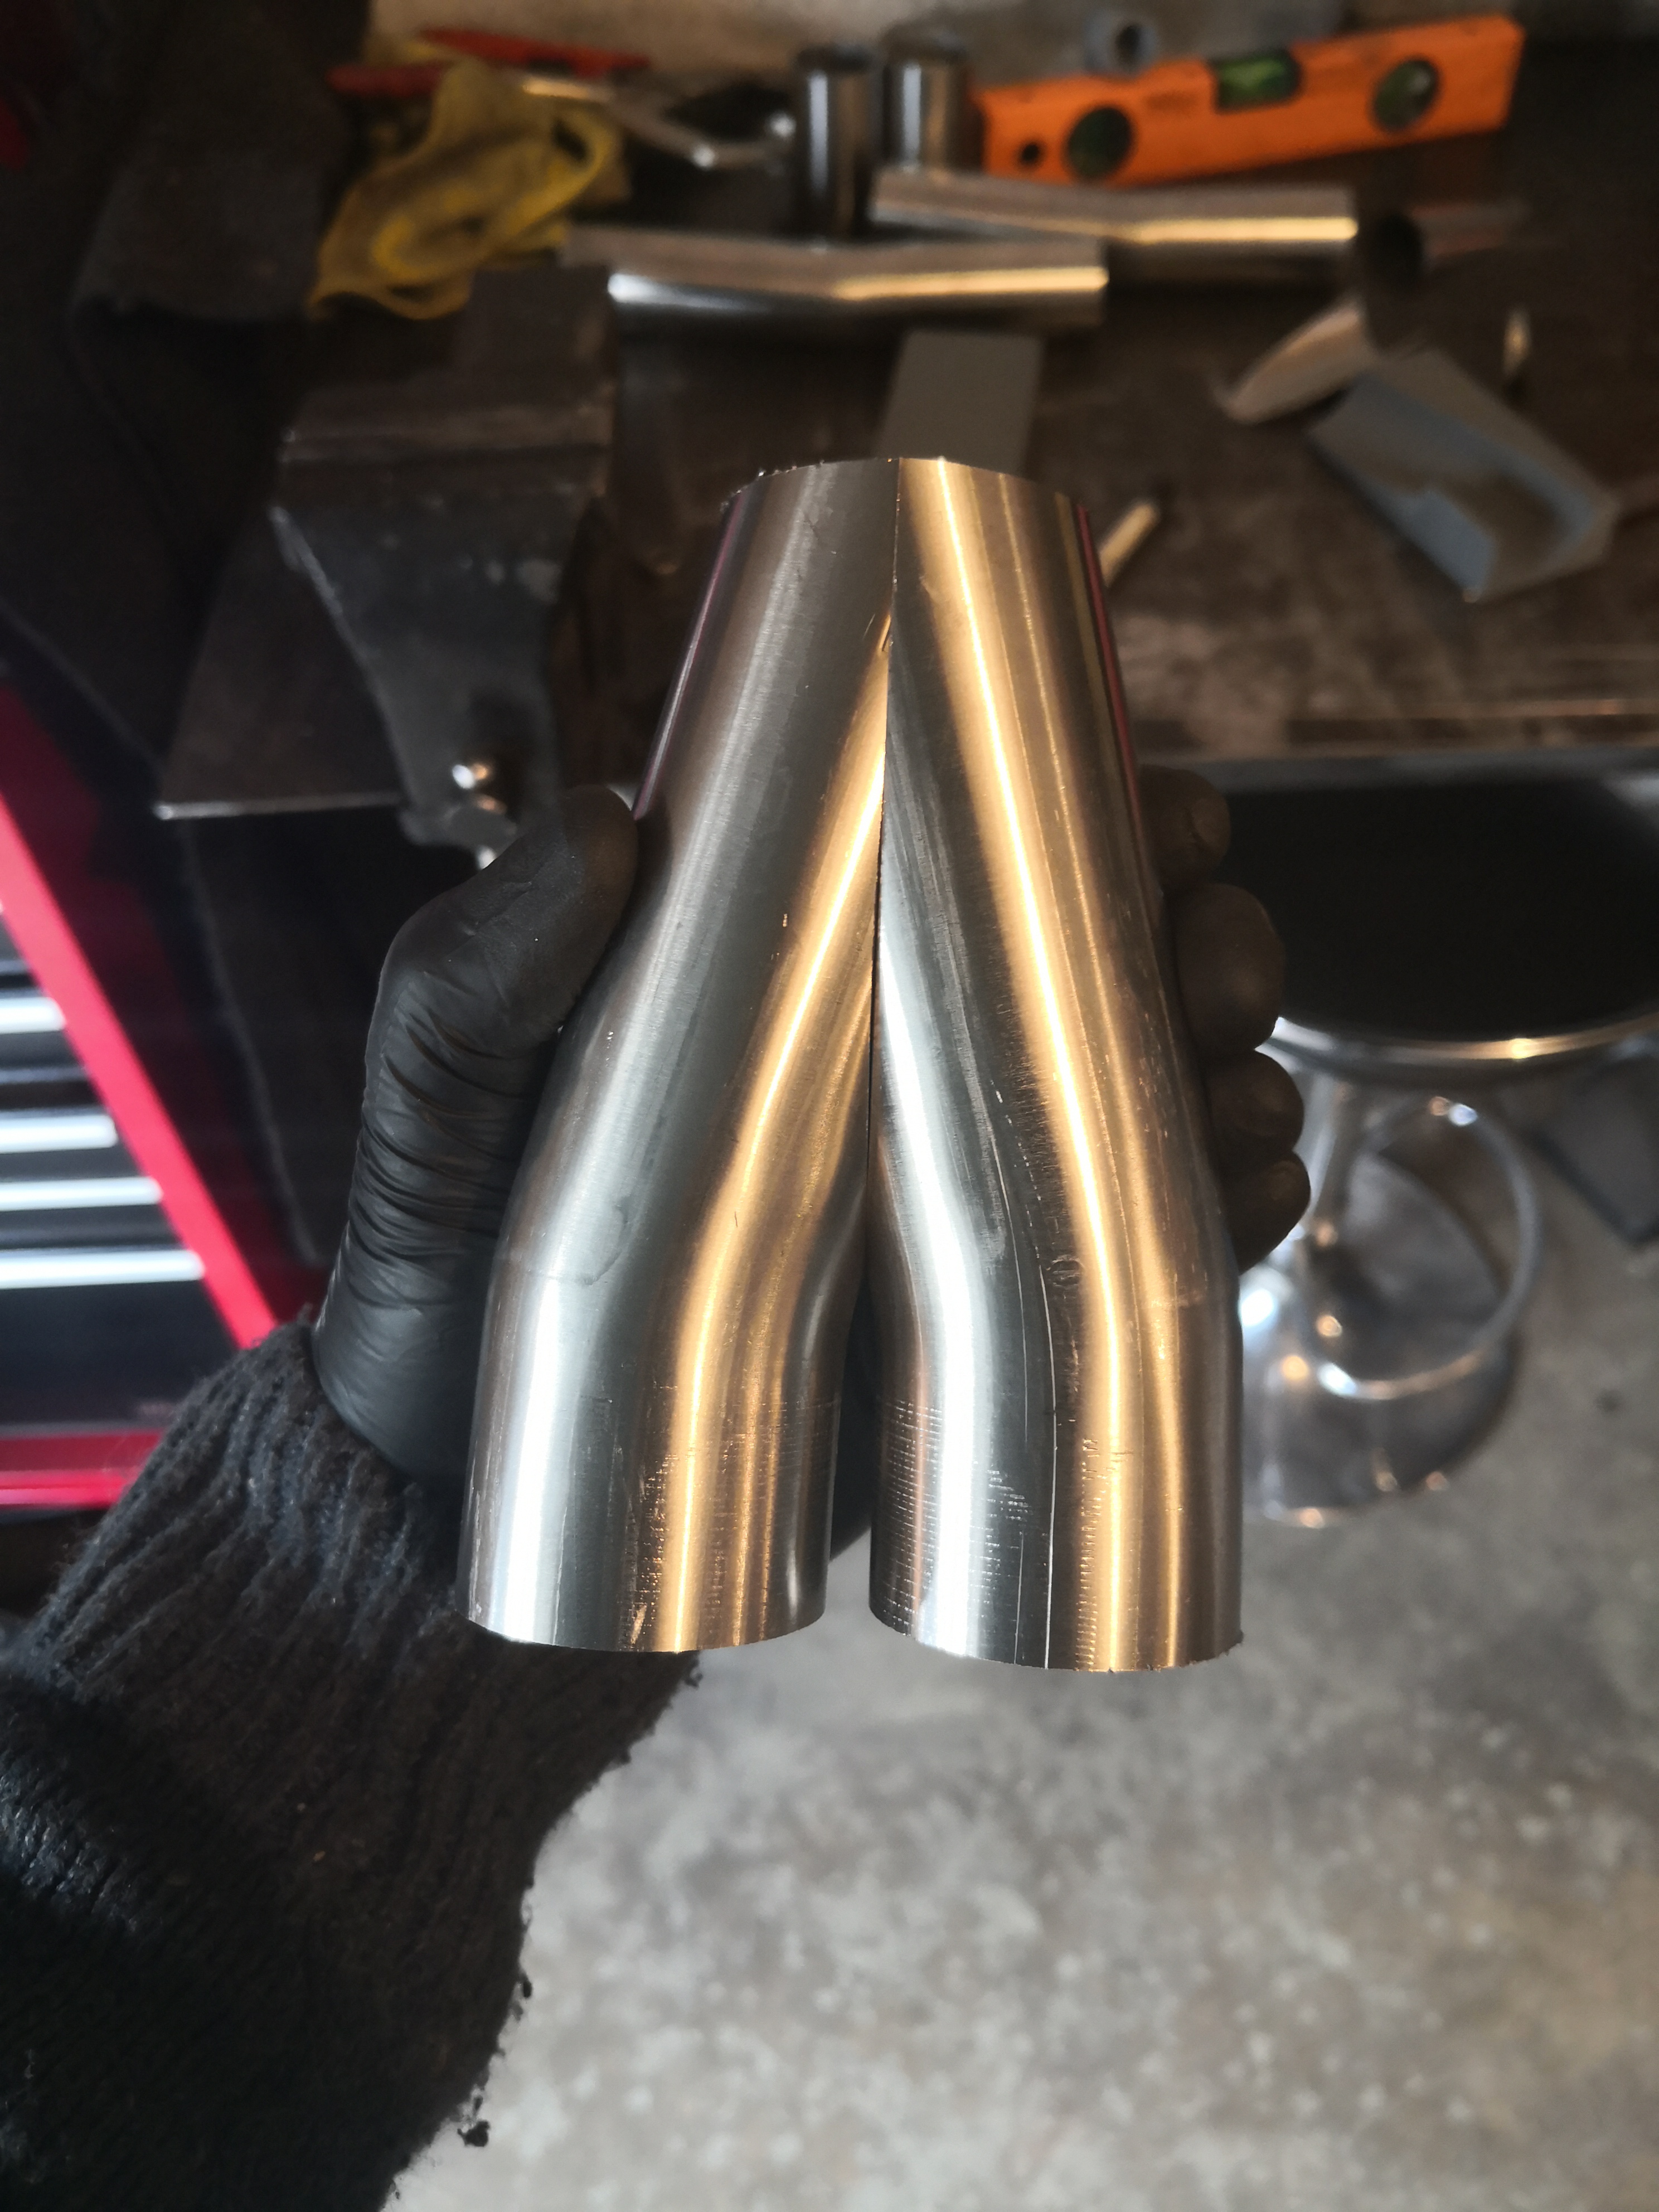
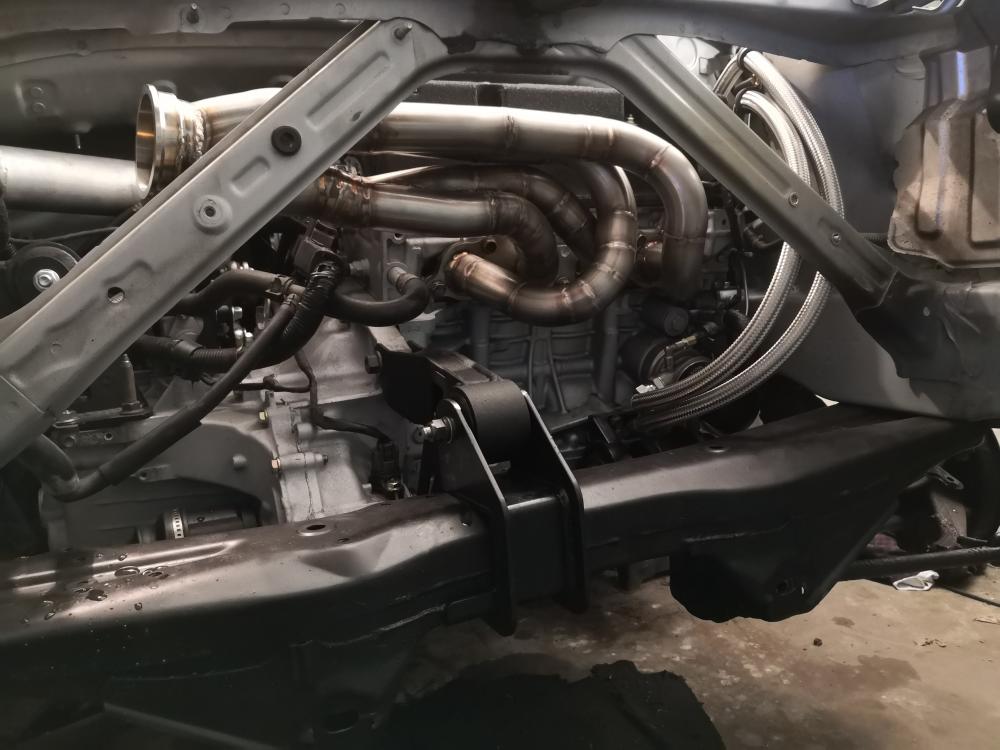
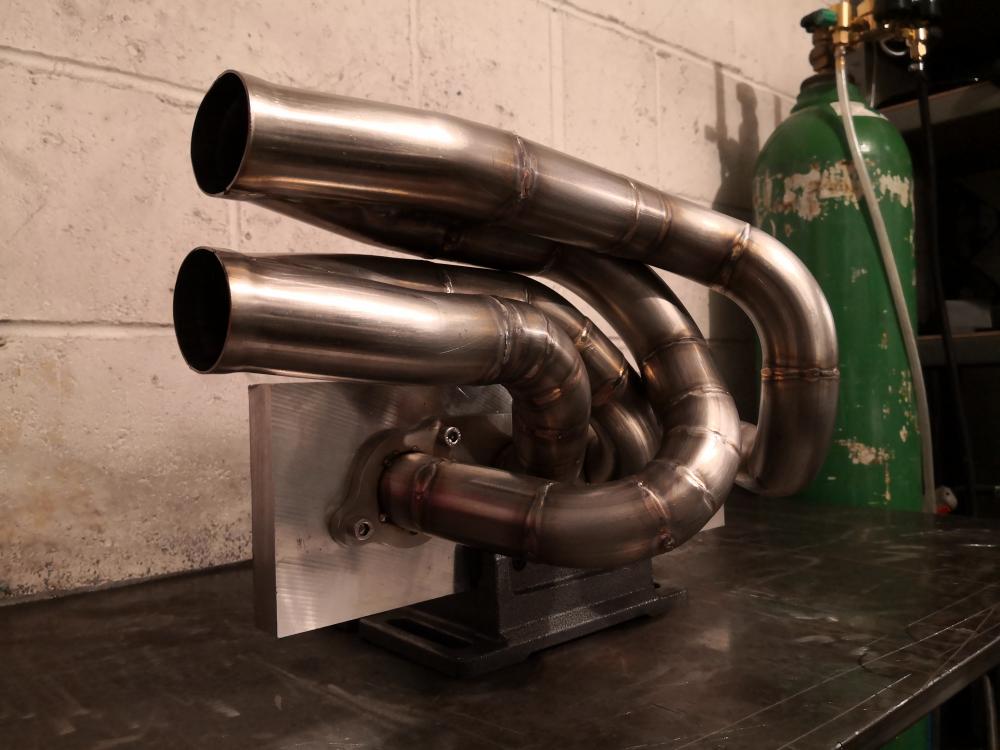
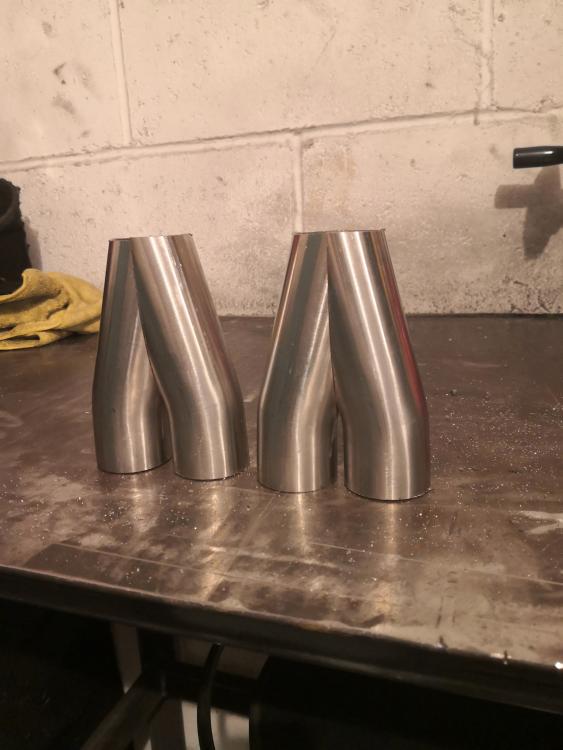
First and foremost let's get the important shit out of the way. Printed off a baby yoda last night look how f**king cute he is Boring stuff now, had my first crack at pie /lobster cuts for the tail pipe and I gotta say I'm impressed with the technique. Pretty much nailed it first go really. The main issue with pie cuts is getting each cut absolutely consistent so that they are the same for each piece of pie. My technique is draw a line straight down the pipe. This in itself is very hard to keep it straight and parallel with the pipe, used angle iron for that bit. Then I have to do another line exactly 180 deg from that line That involved me getting some tape and going around the pipe, folding it in half then that gives you your 180 to the first mark. Do that line. Next I put it in the band saw and made a reference mark for the line. I chose my angle of cut and did a cut. Moved the pipe 180 to the other line lining up with my reference point. That the gives you the same angle on each piece of pie. Does that make any sense? Another thing to factor is the stick out of the pipe each time to get the same length of pie. Used the fence on the band saw for that. That gave me all the pies I then tacked them in place and made a 180 and a 90 as I'm making this one a centre exit. It's hard to hold them in place for the photo but I'm sure you get the idea. Will be welding them up tomorrow and hopefully finishing the exhaust.
-
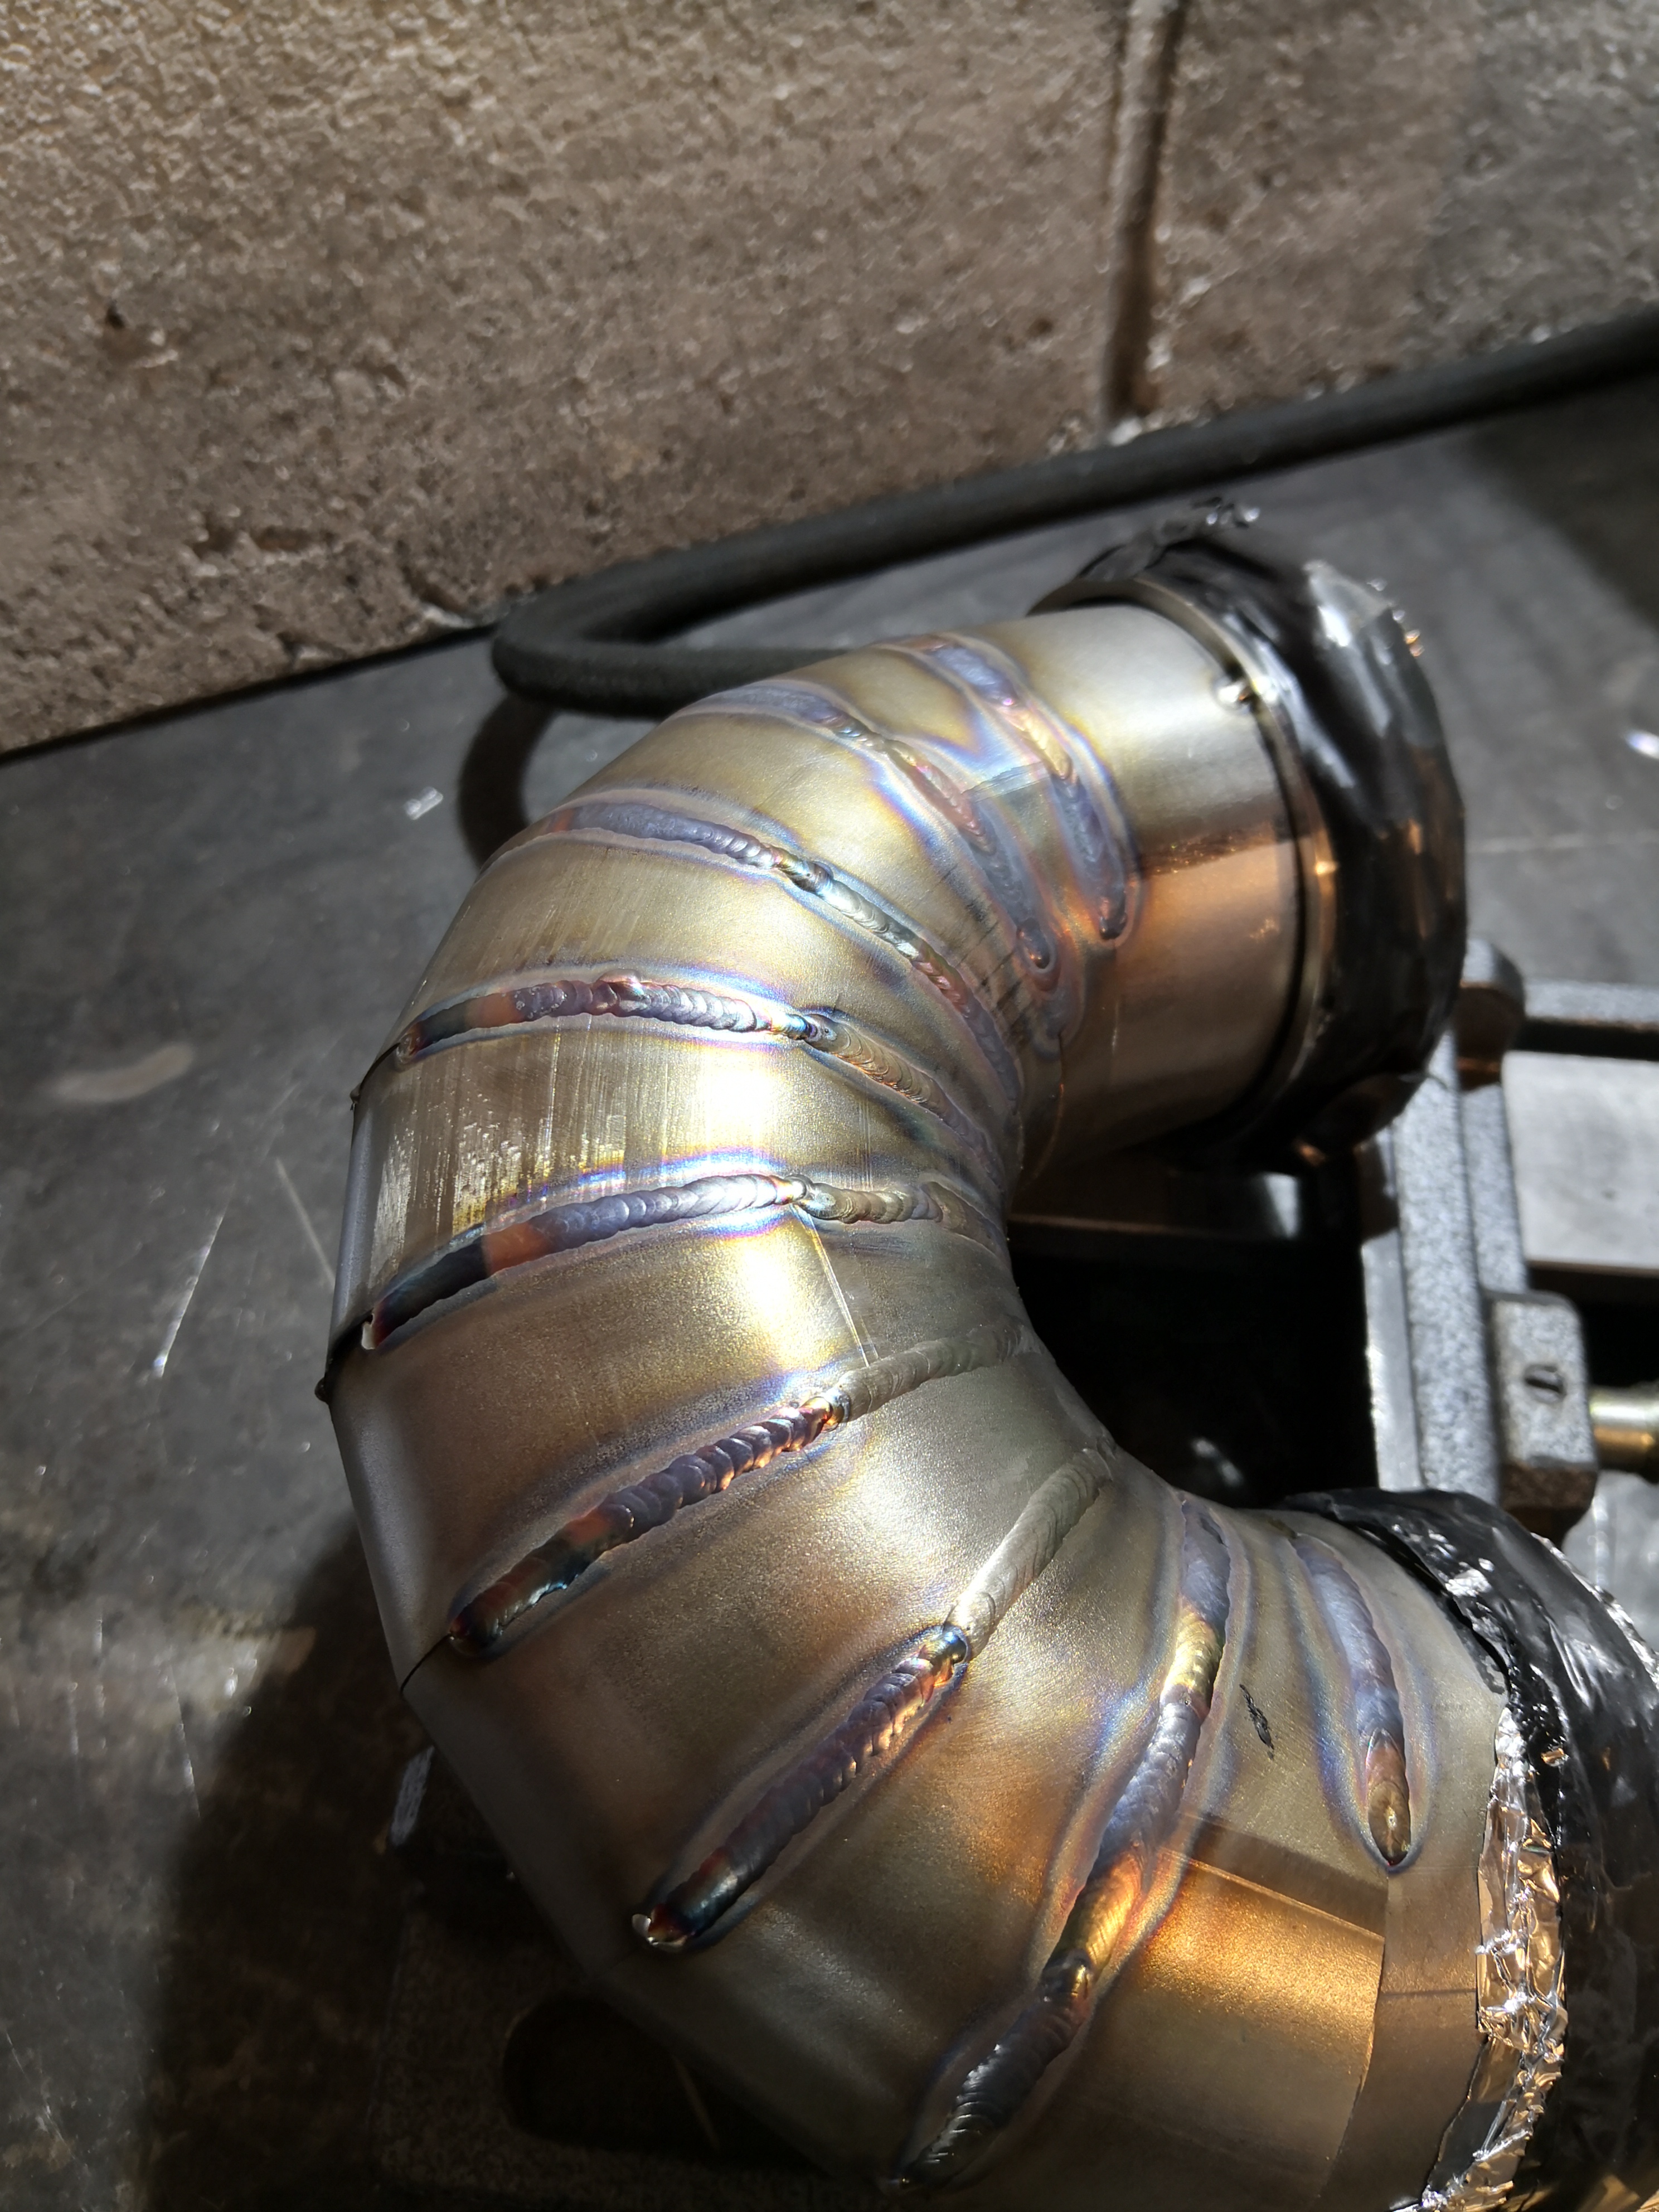
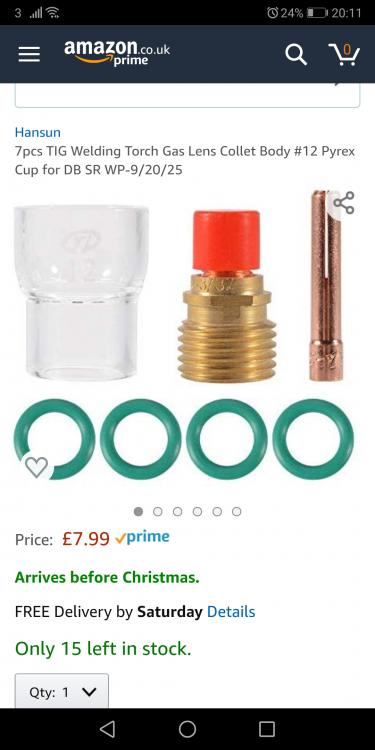
I only use these gas lense kits now. 900% cheaper than the fupa ones and give really awesome coverage of gas. Downside is I smashed two in one day as I was being clumsy. Really are worth it though, especially as you can have your stick out a ridiculous length for tight places. Helped with thr exhaust massively.
-
Thanks for that dude, appreciate it! It's a really good point, I'll add some more. There's another cheeky one at the top of that pic you drew, where the wall is. My intention was to do another one there also (mount is on the way)
-
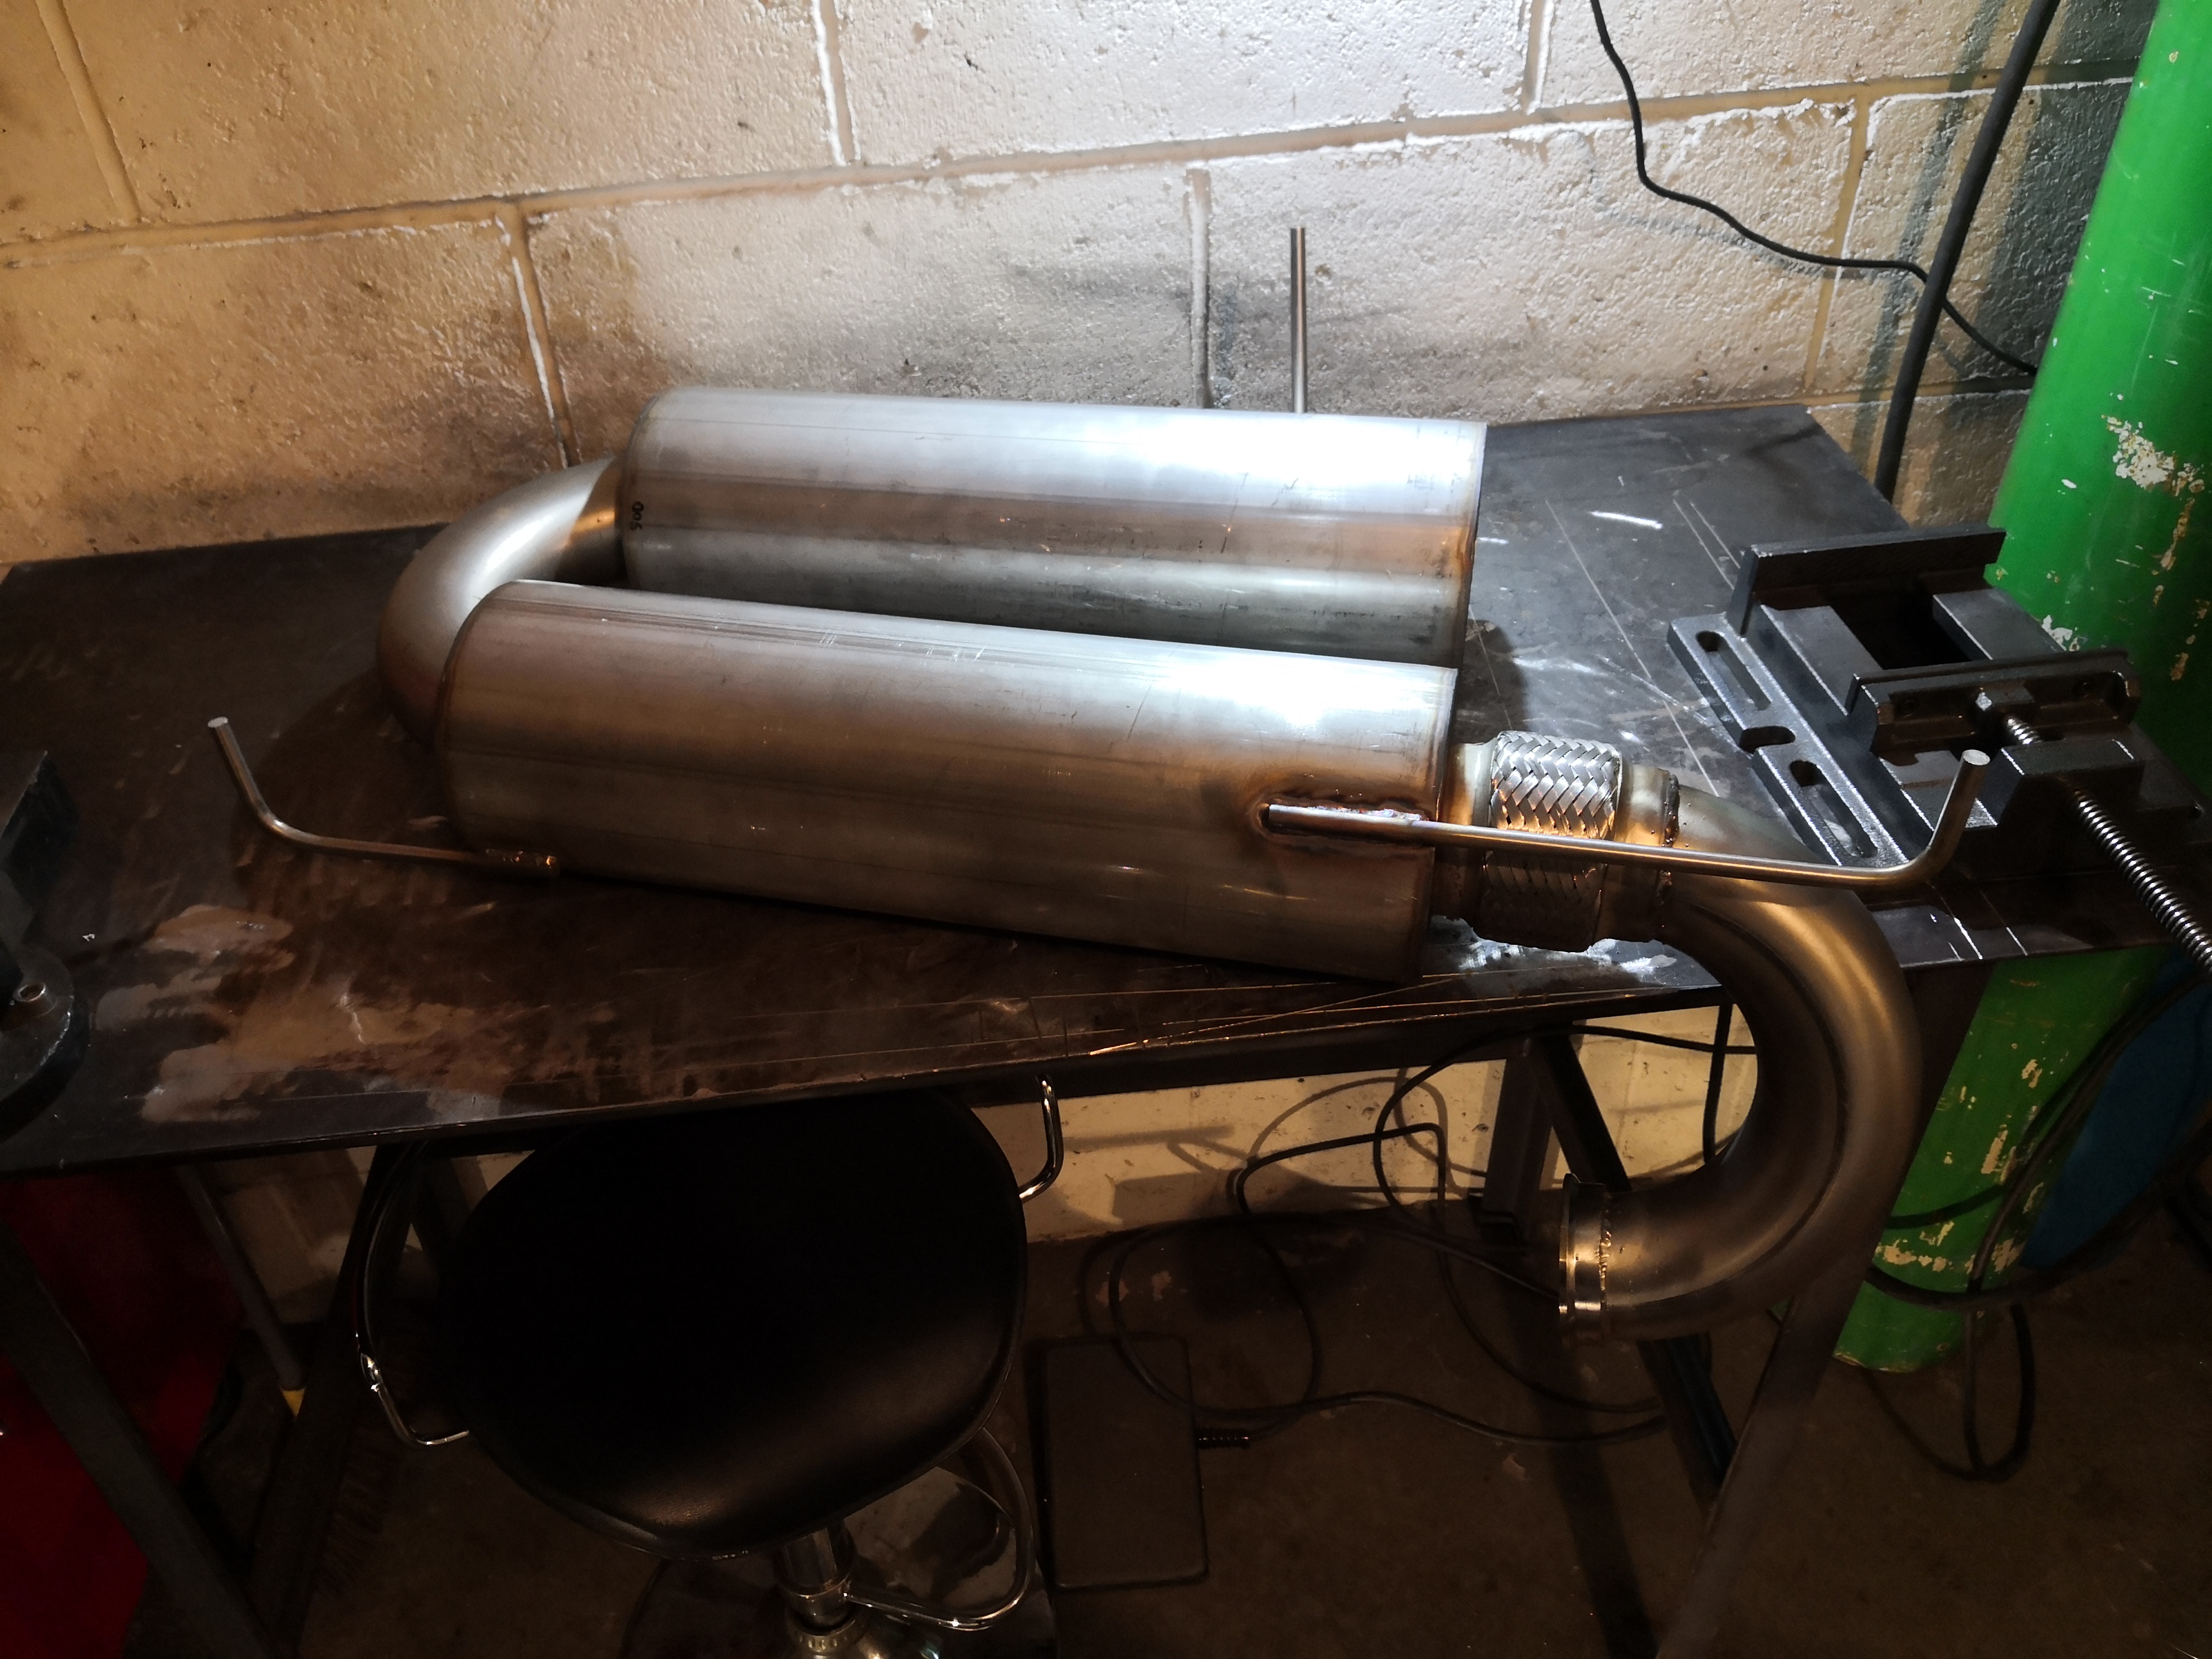
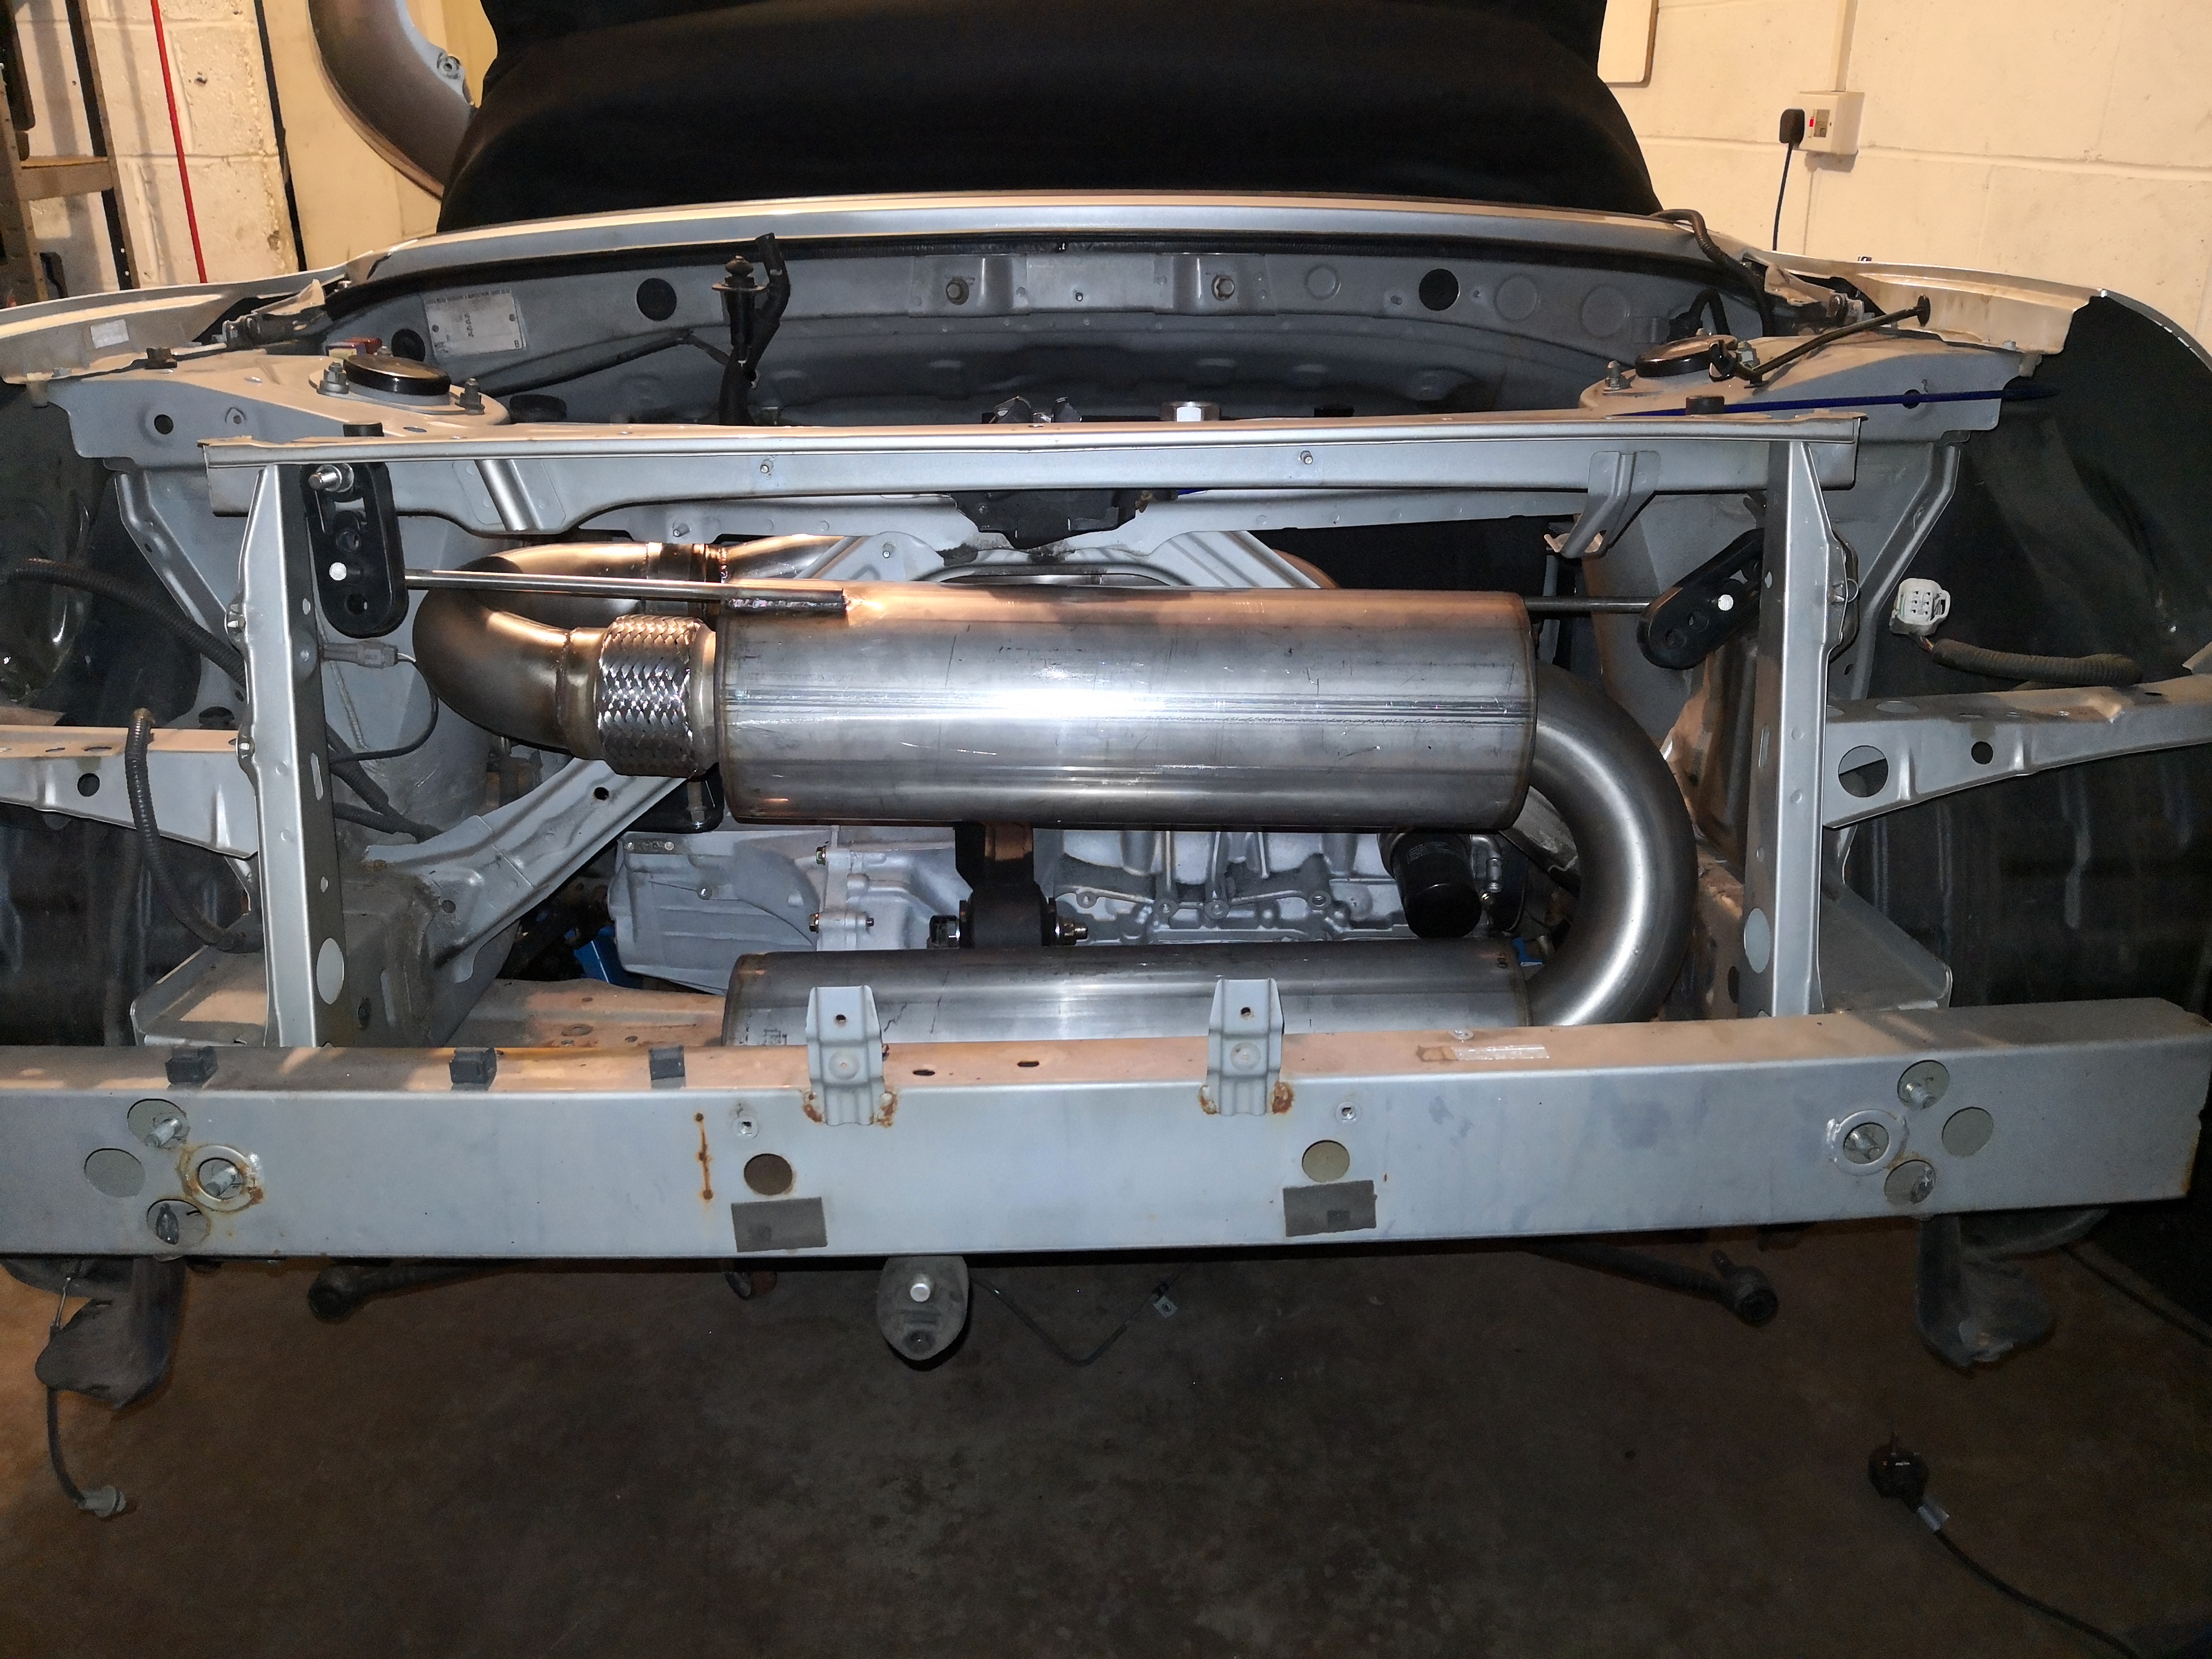
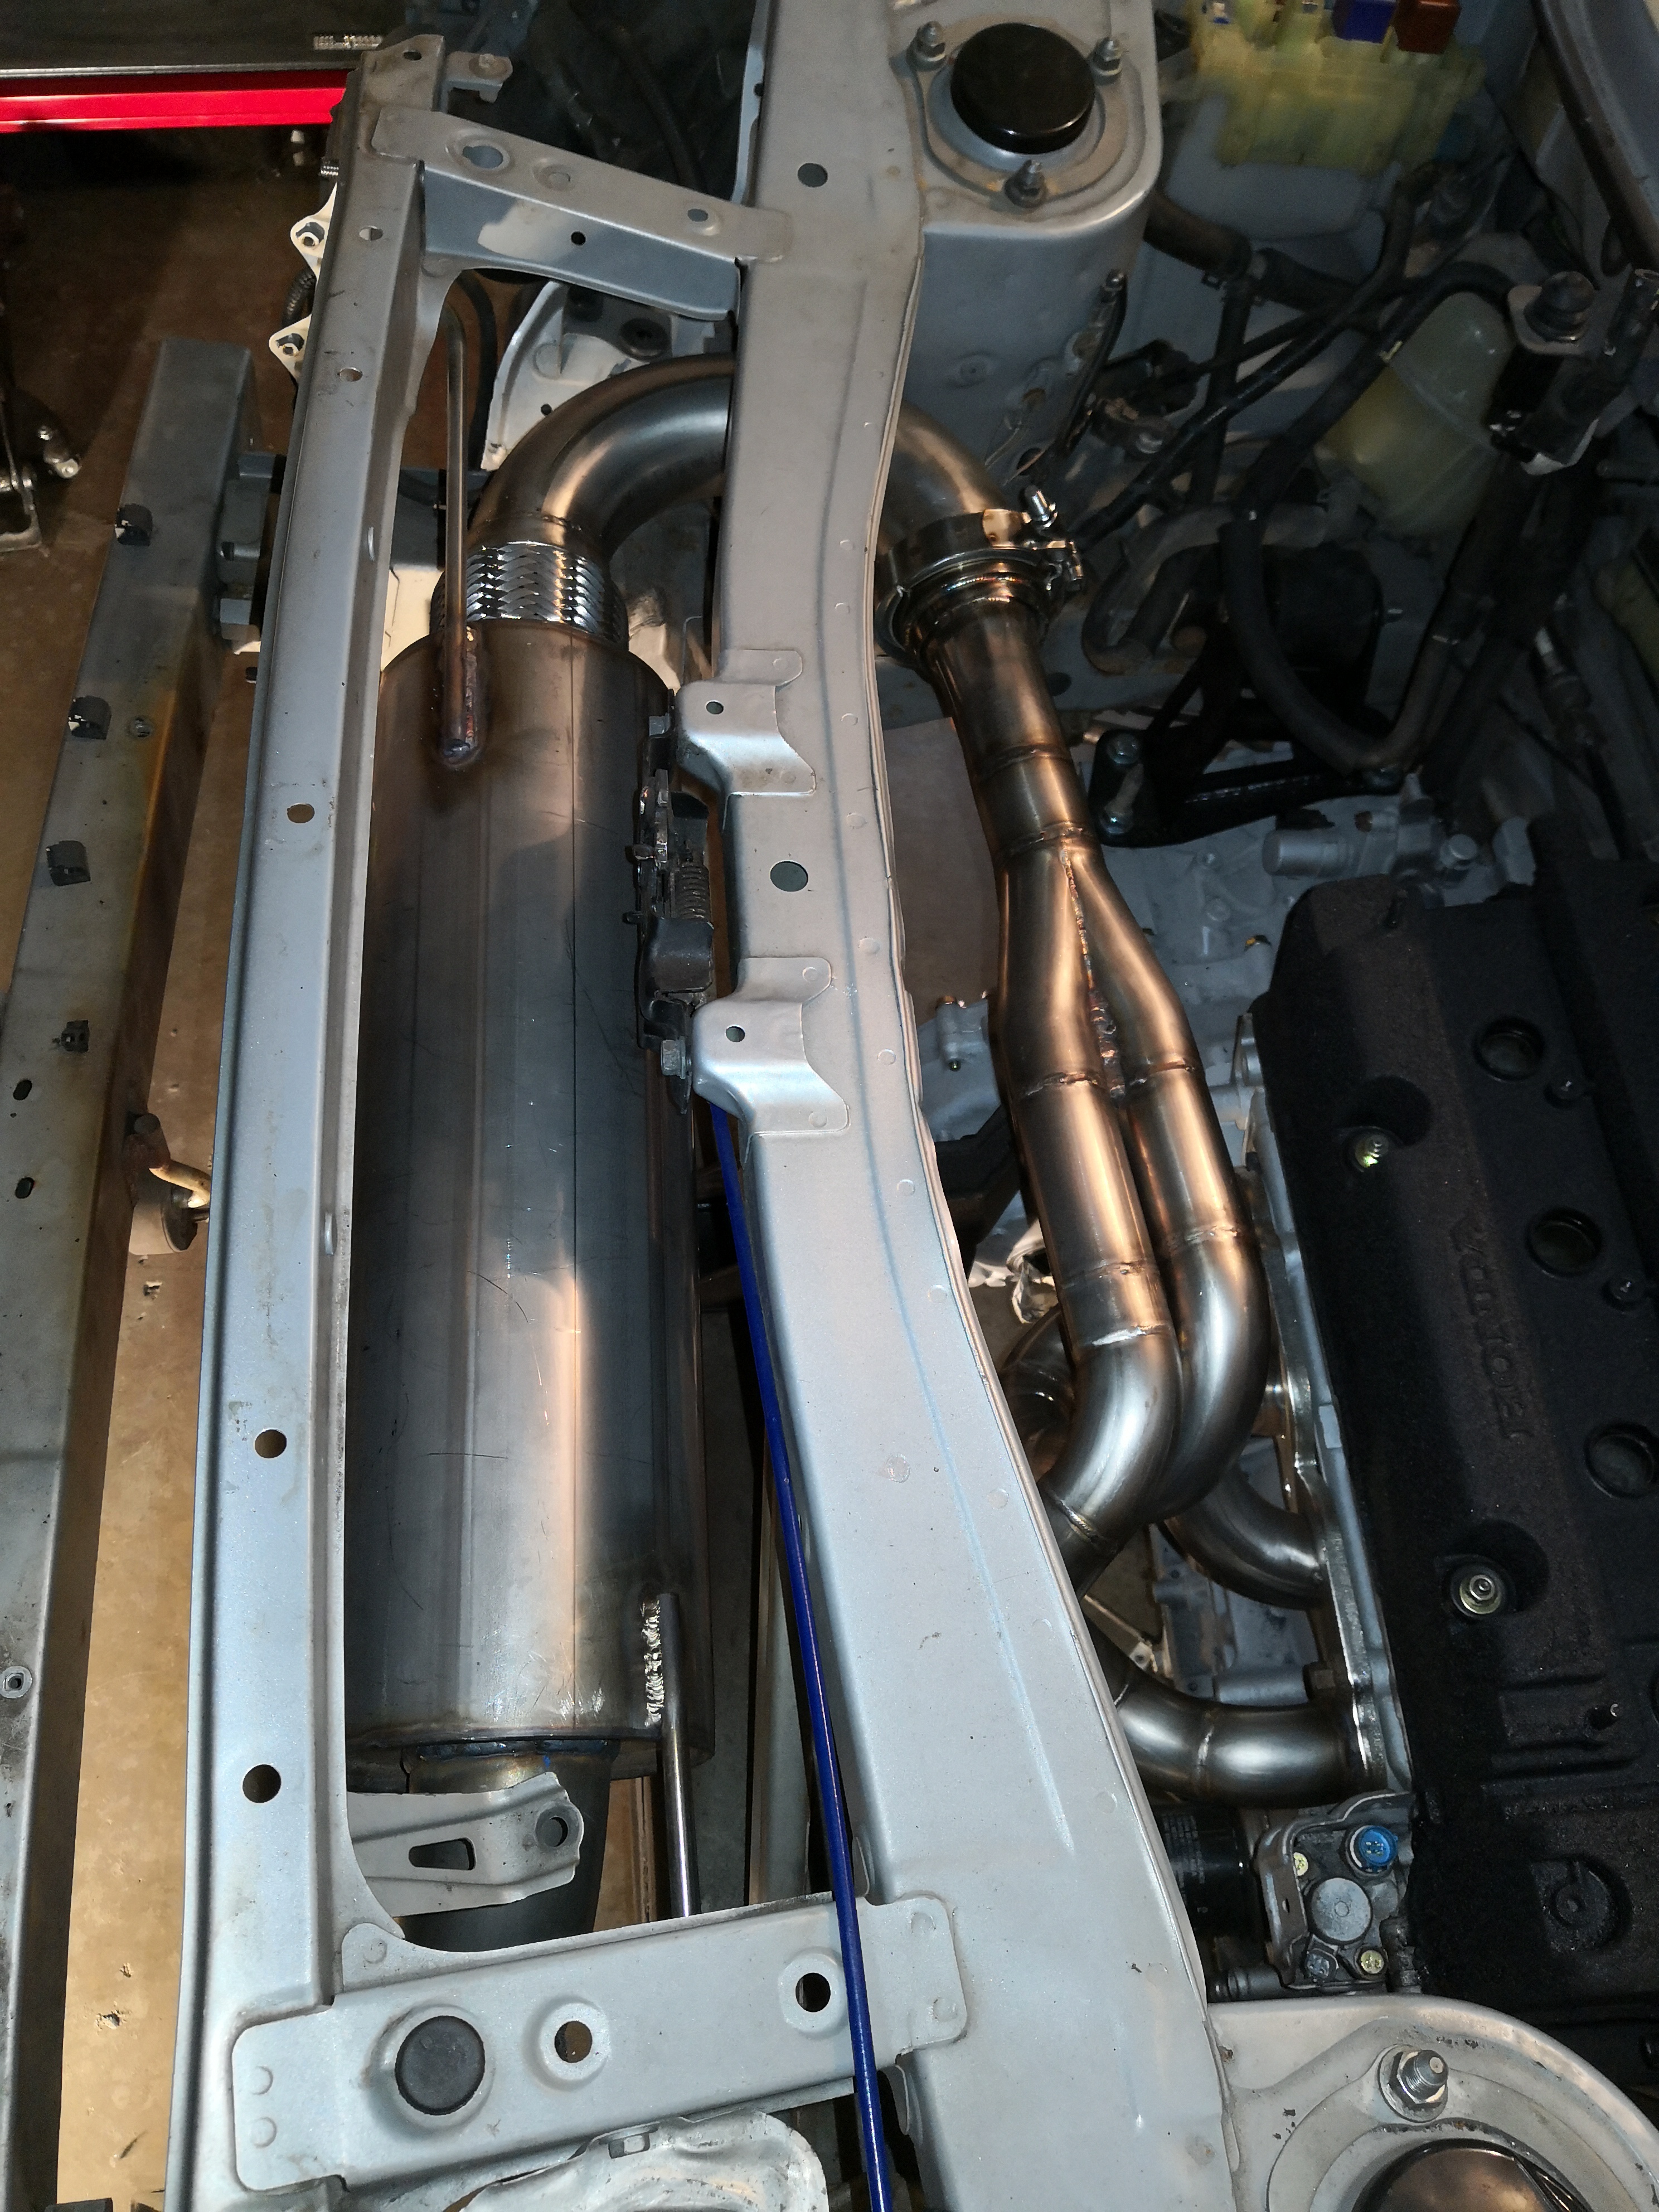
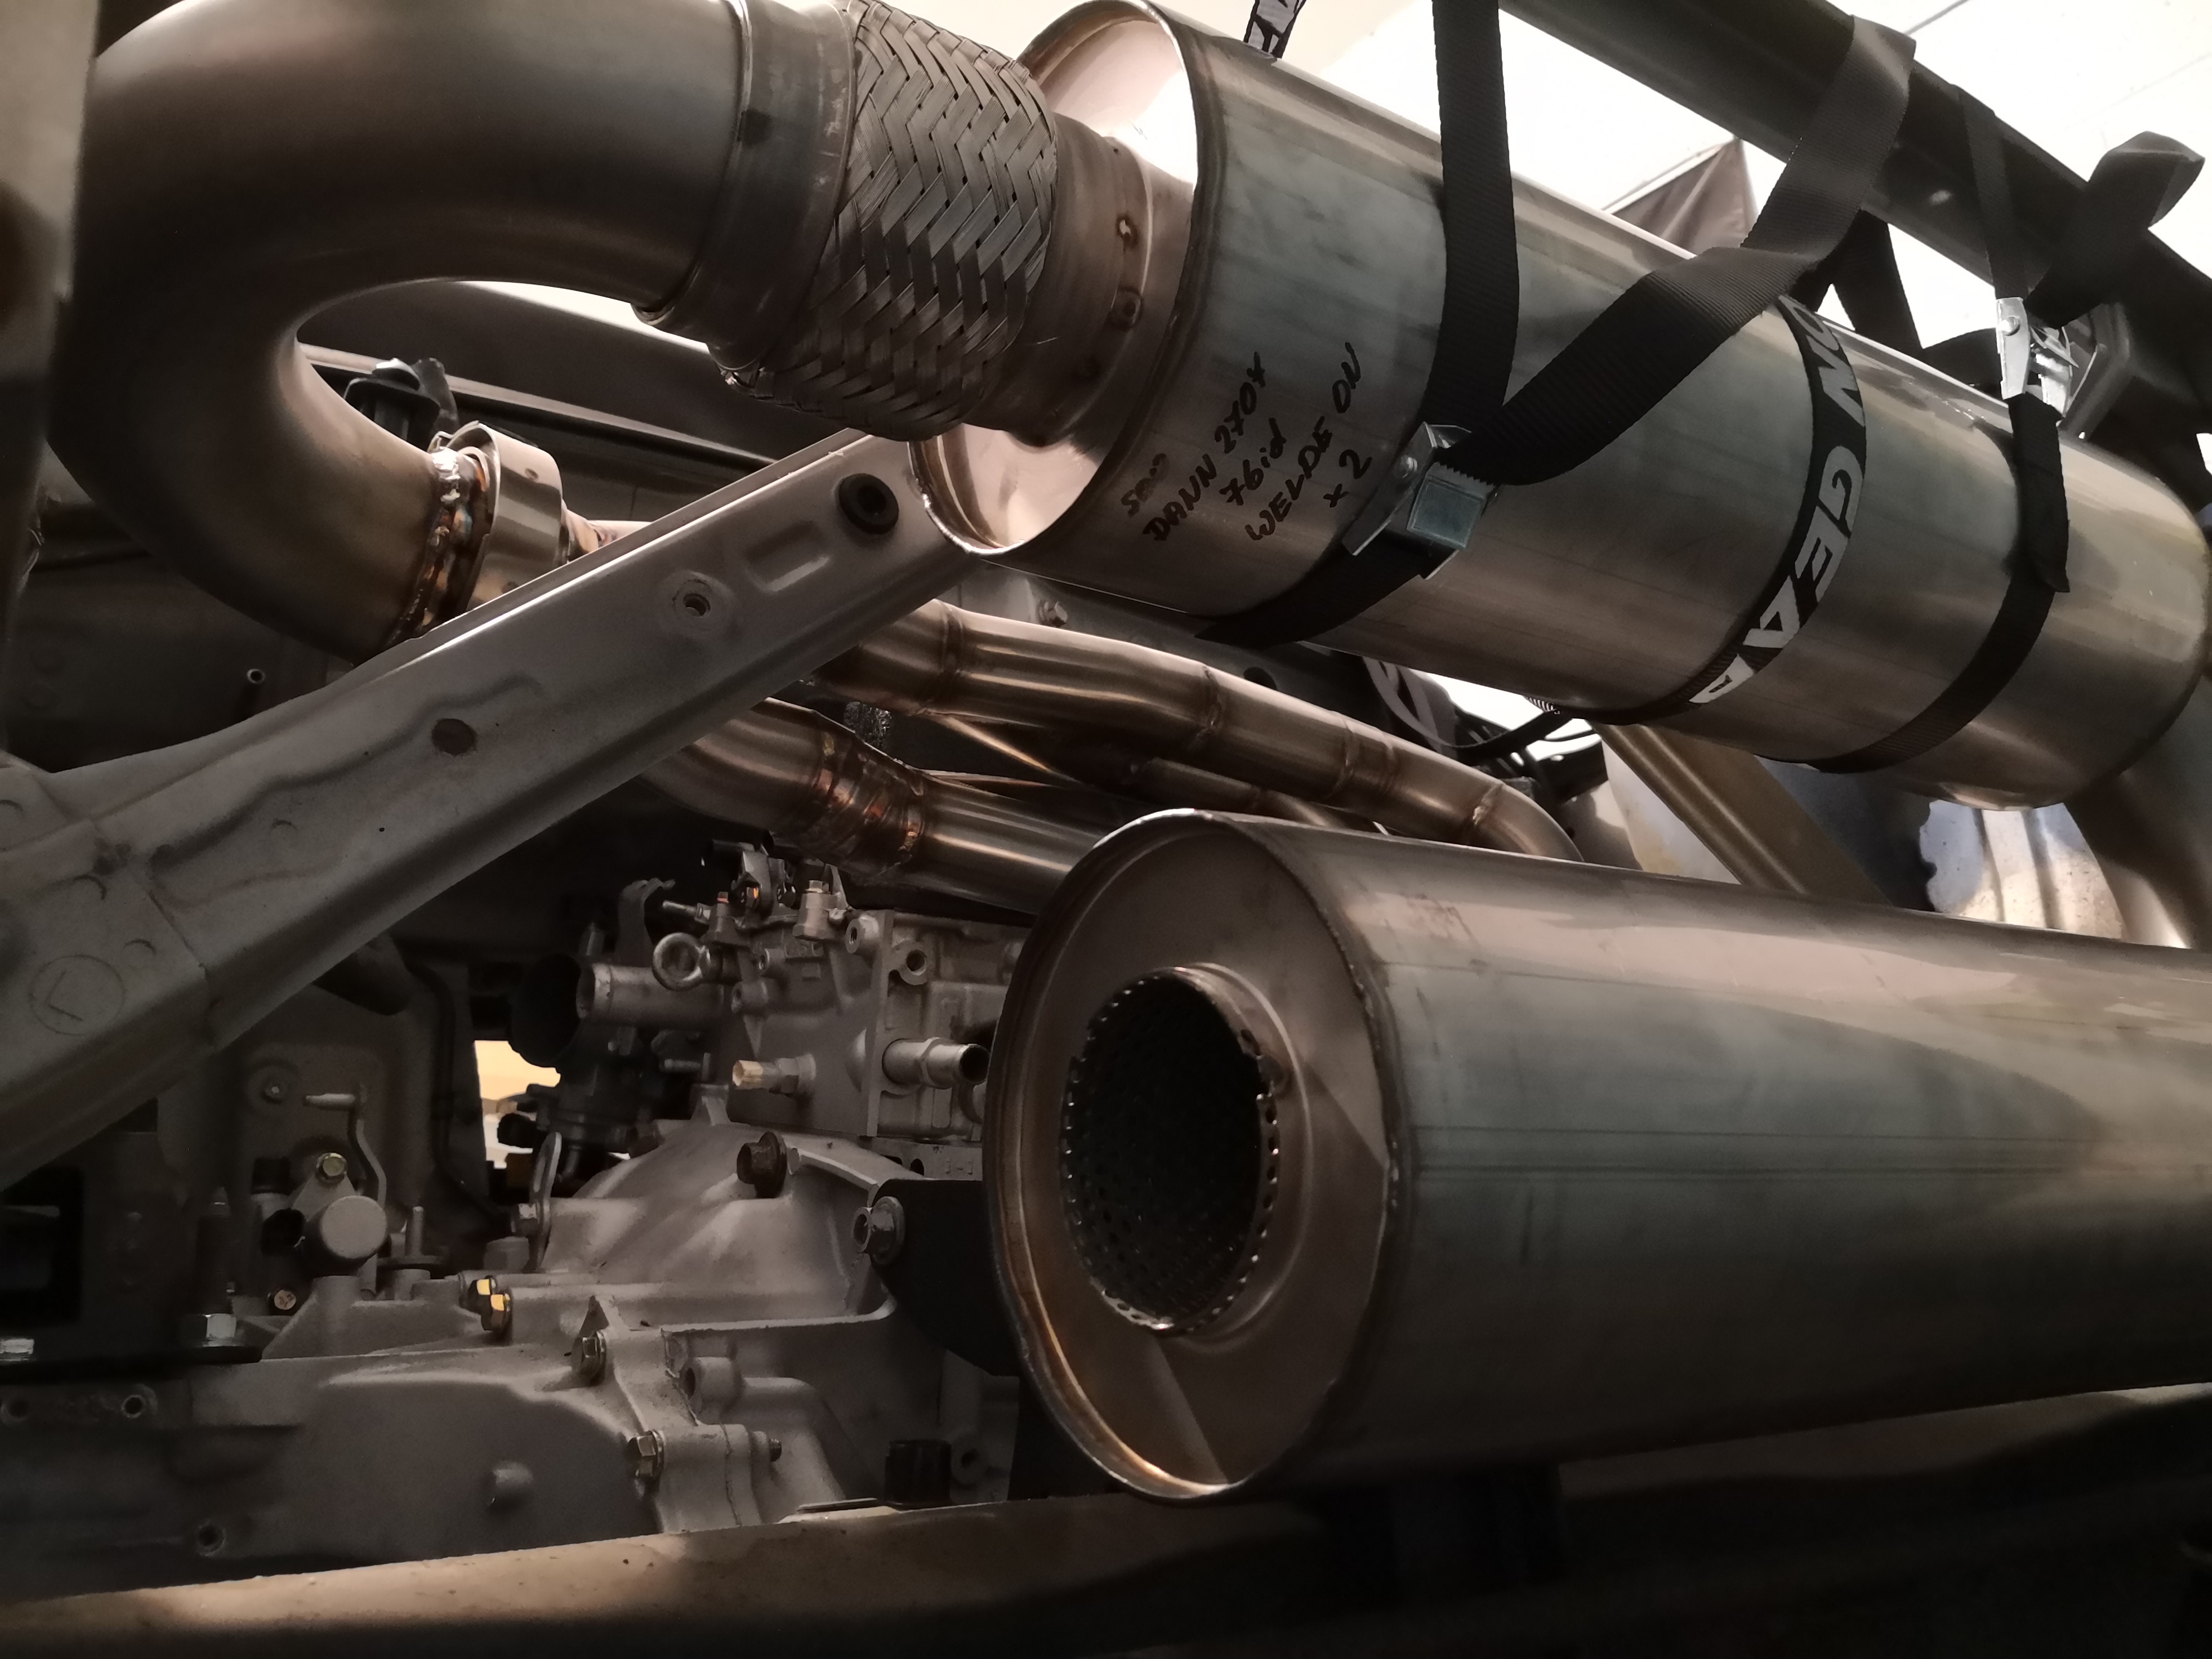
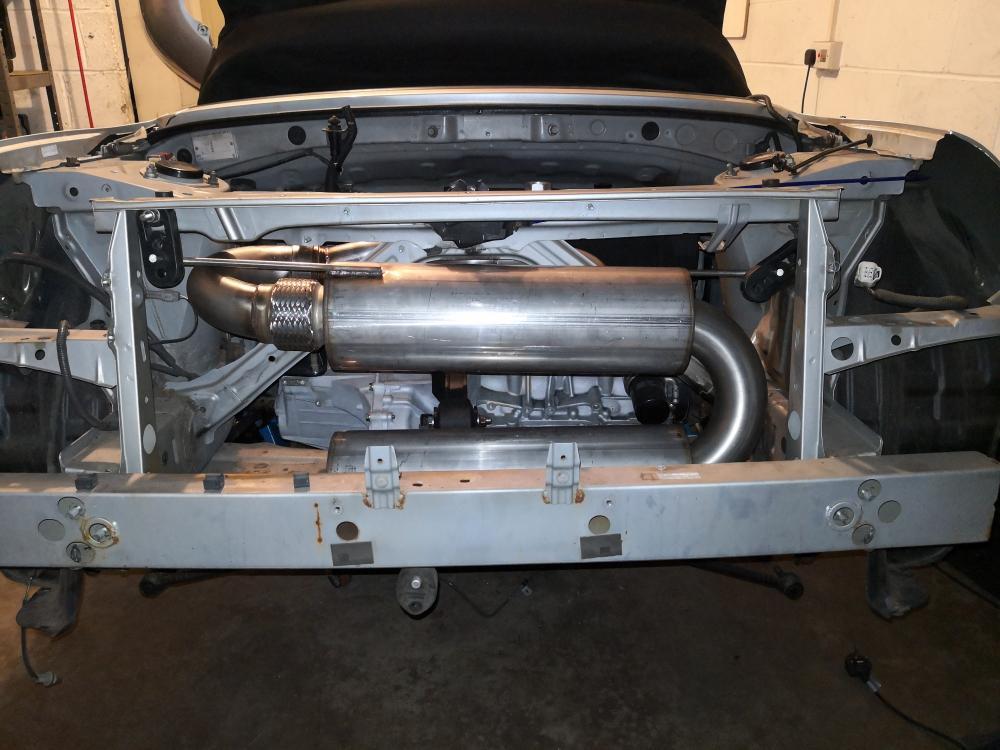
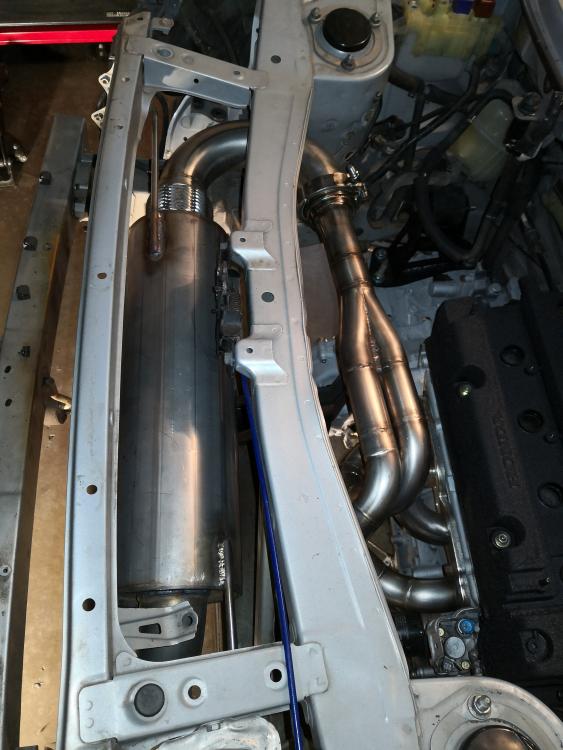
Done the hangers today on the exhaust The next part is the tailpipe which I'm going to have as a v banded piece so I can add another small resonator or silencer if it's too loud as it is. Very happy!

-
Seriously cool stuff adz!
-
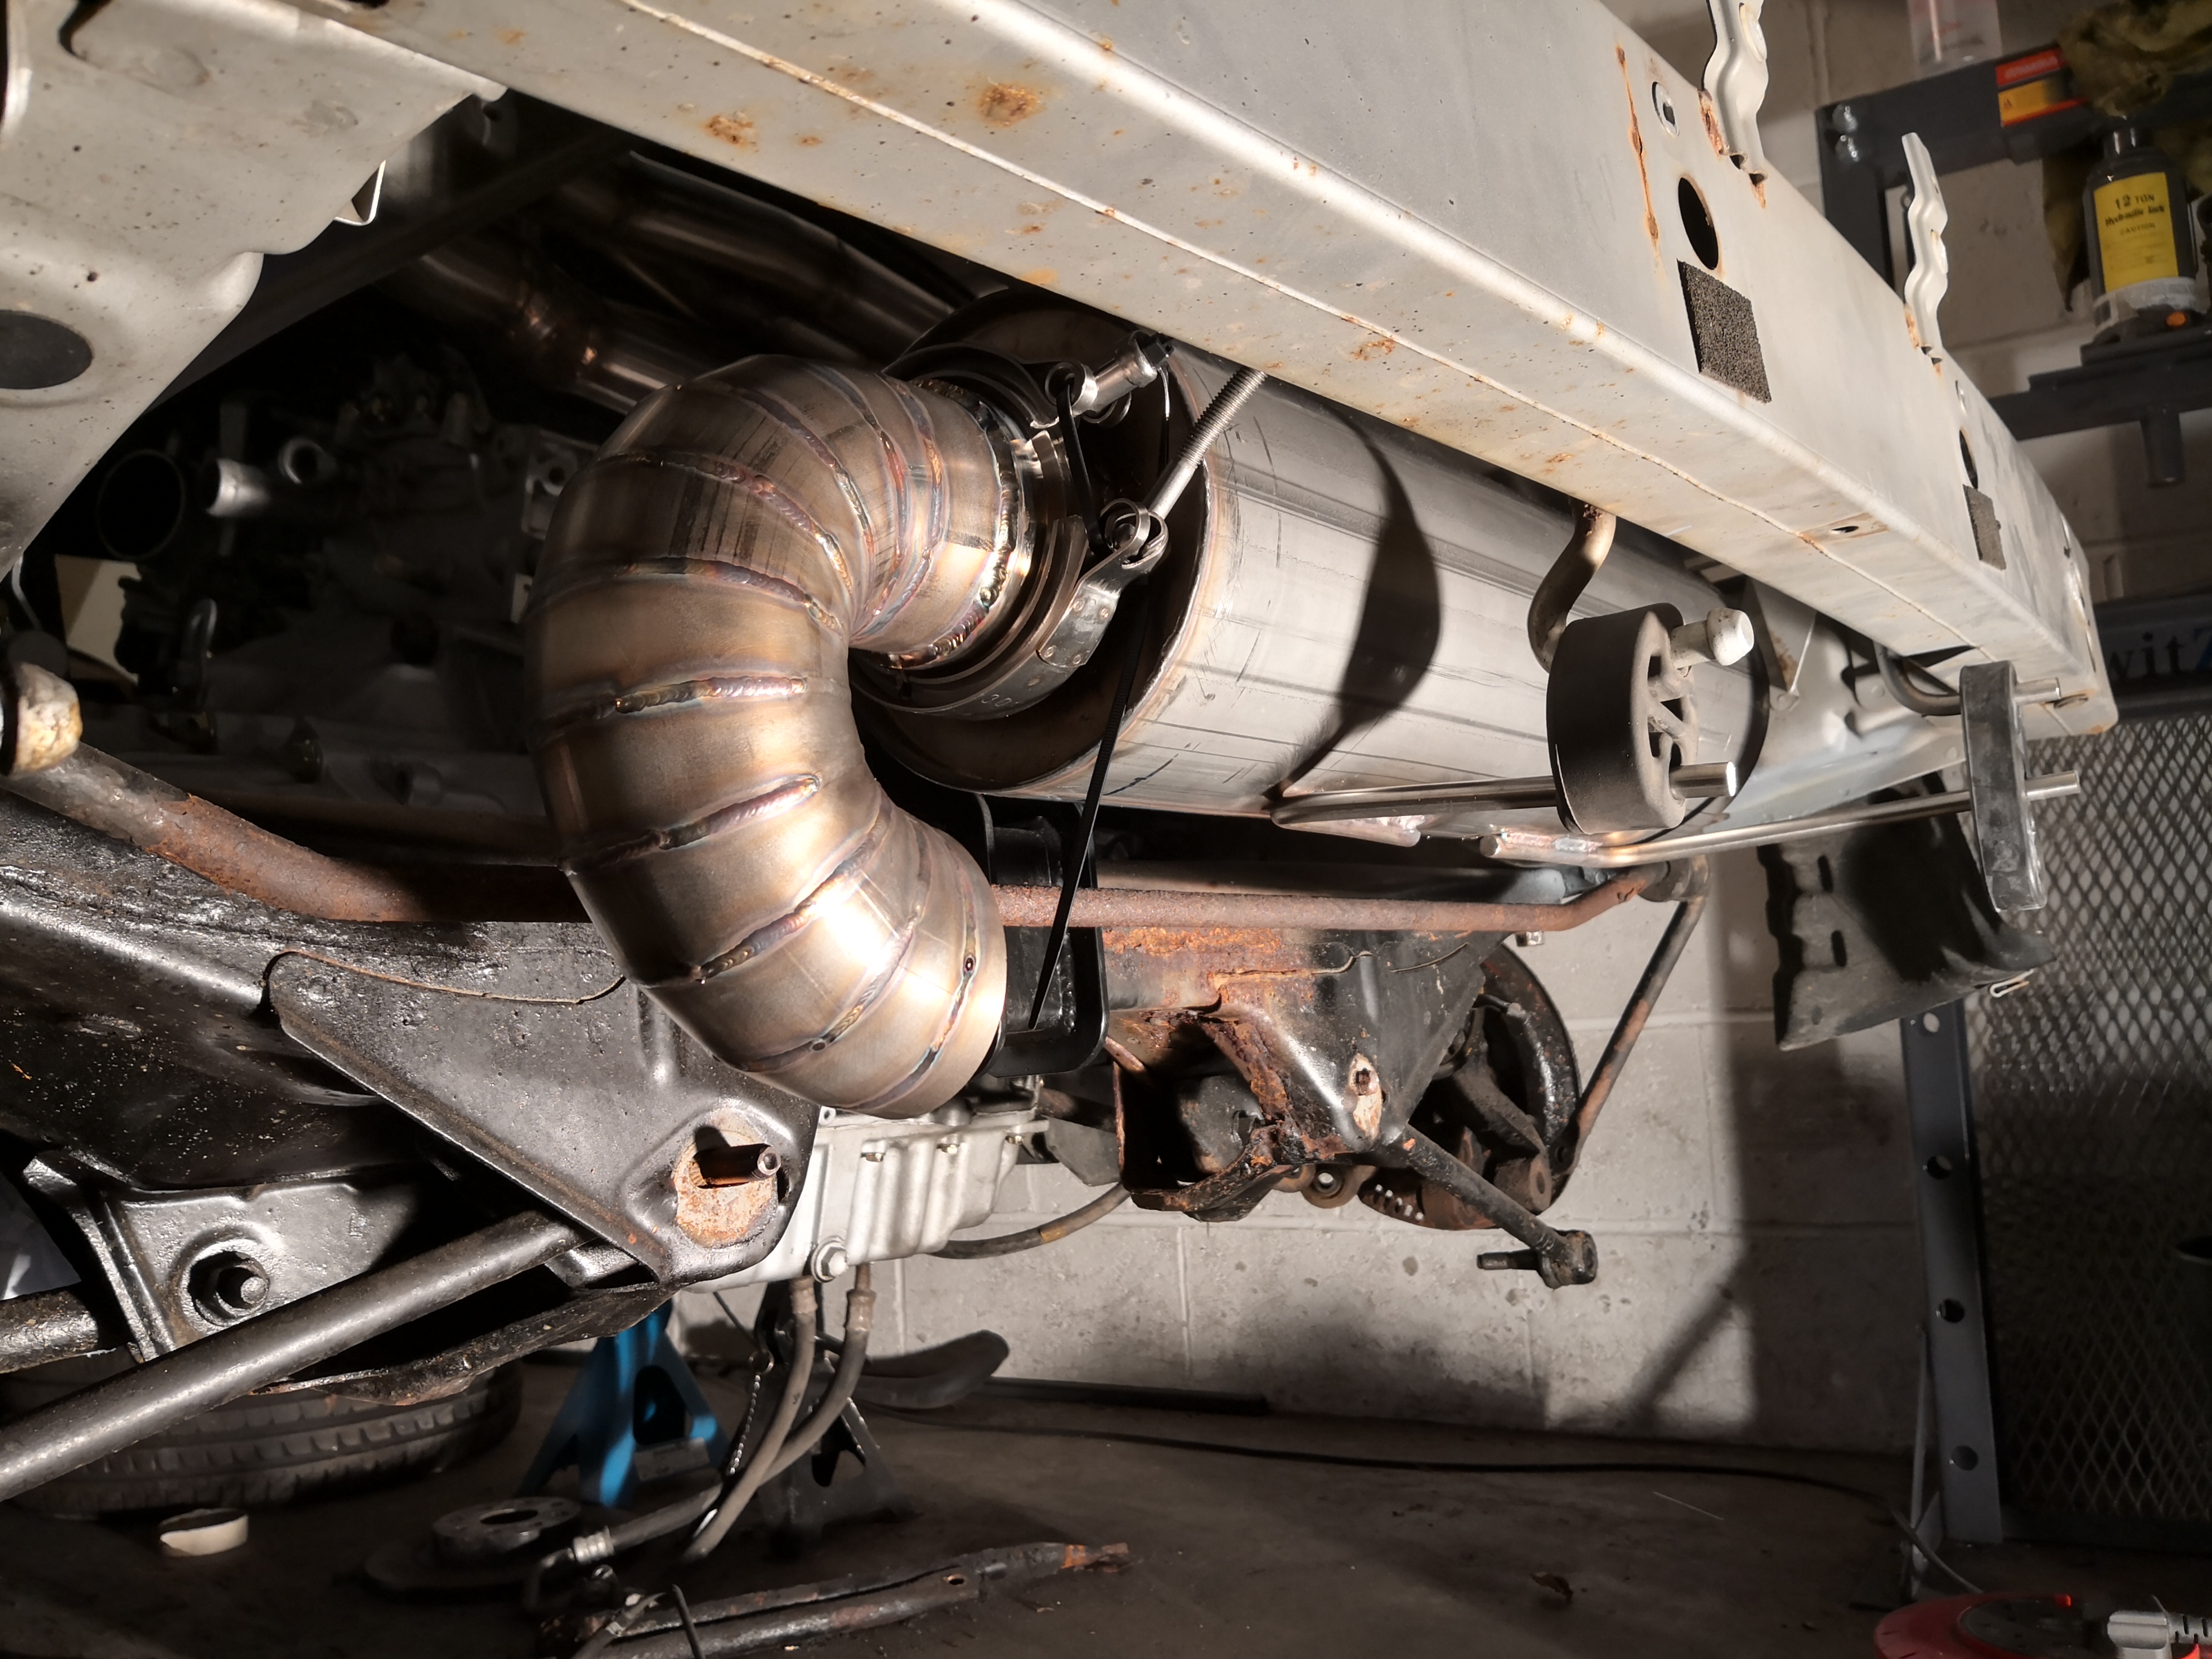
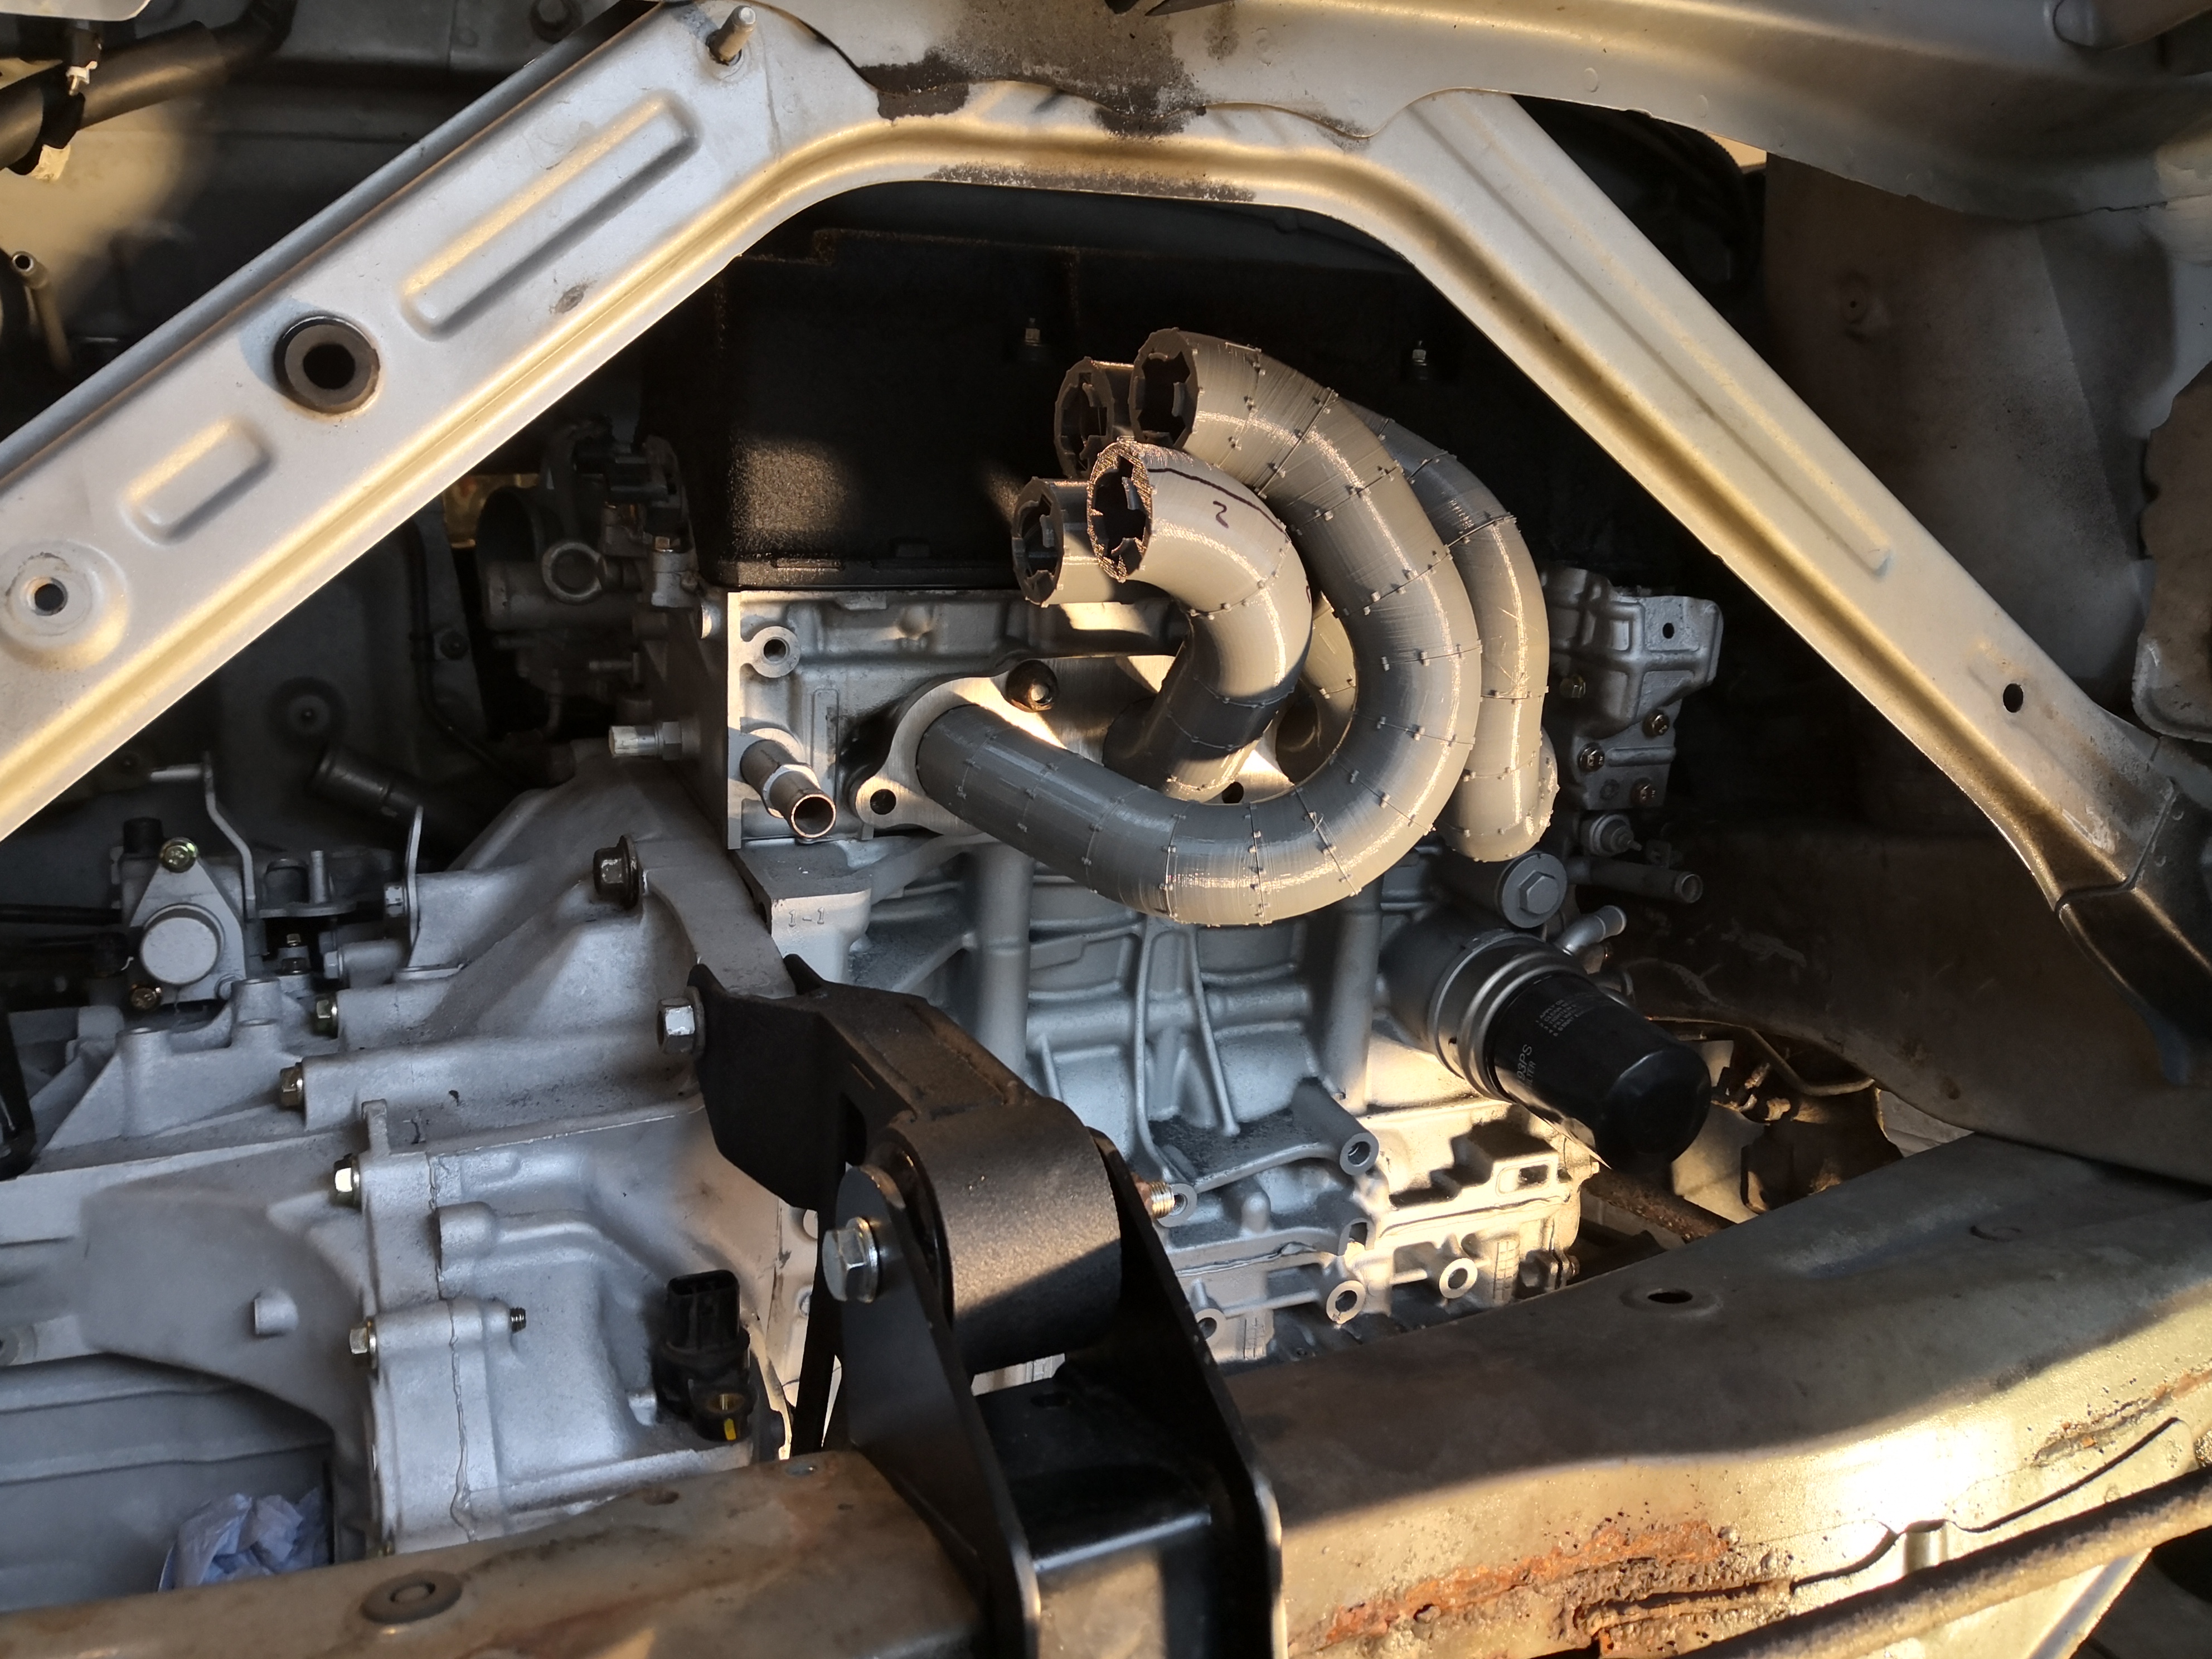
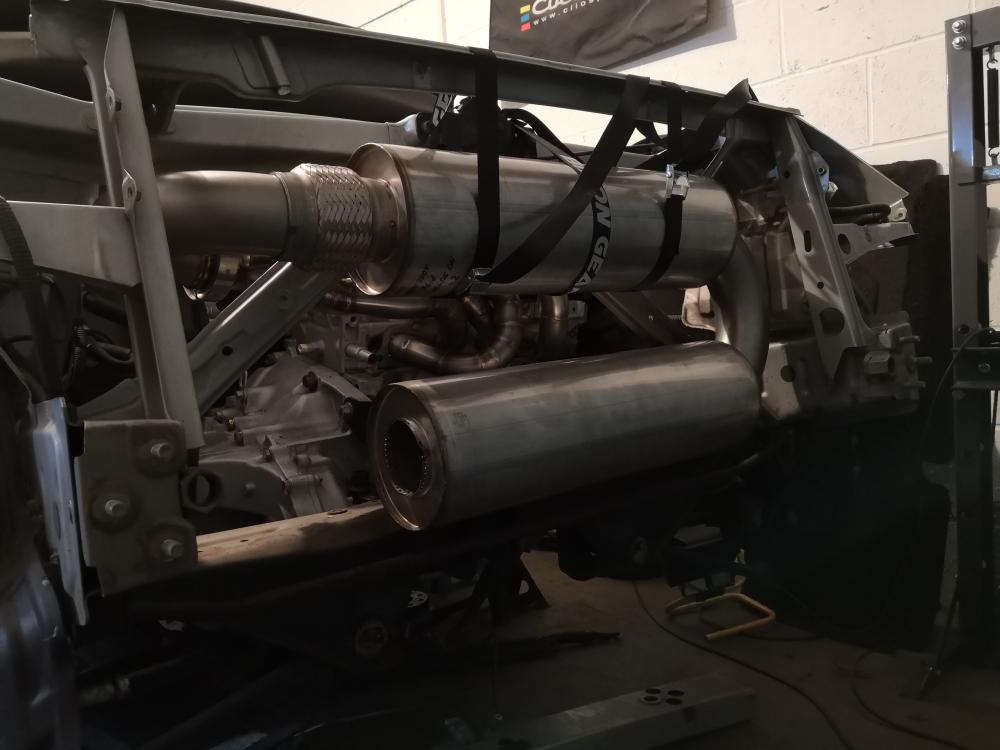
More progress on the exhaust, happy days! Still got a bit of welding to do, hangers, and tips to make
-
I am yeah that's right, no complaints at all though, unfortunately as its a high amp unit it does get quite loud as there's a big fan on it. Sounds a bit like a hoover haha which is annoying as the welder I had before was dead quiet which meant I could hear music as I am welding which is helpful for tig
-
All done for now. Treated myself to a new bigger bottle of argon seeing as though I'm nailing through it lately. So happy with the outcome


-
Thanks guys, appreciate the kind comments. Definitely Adz, it's mental how much prep I've done but it looks to have paid off in the end.
-
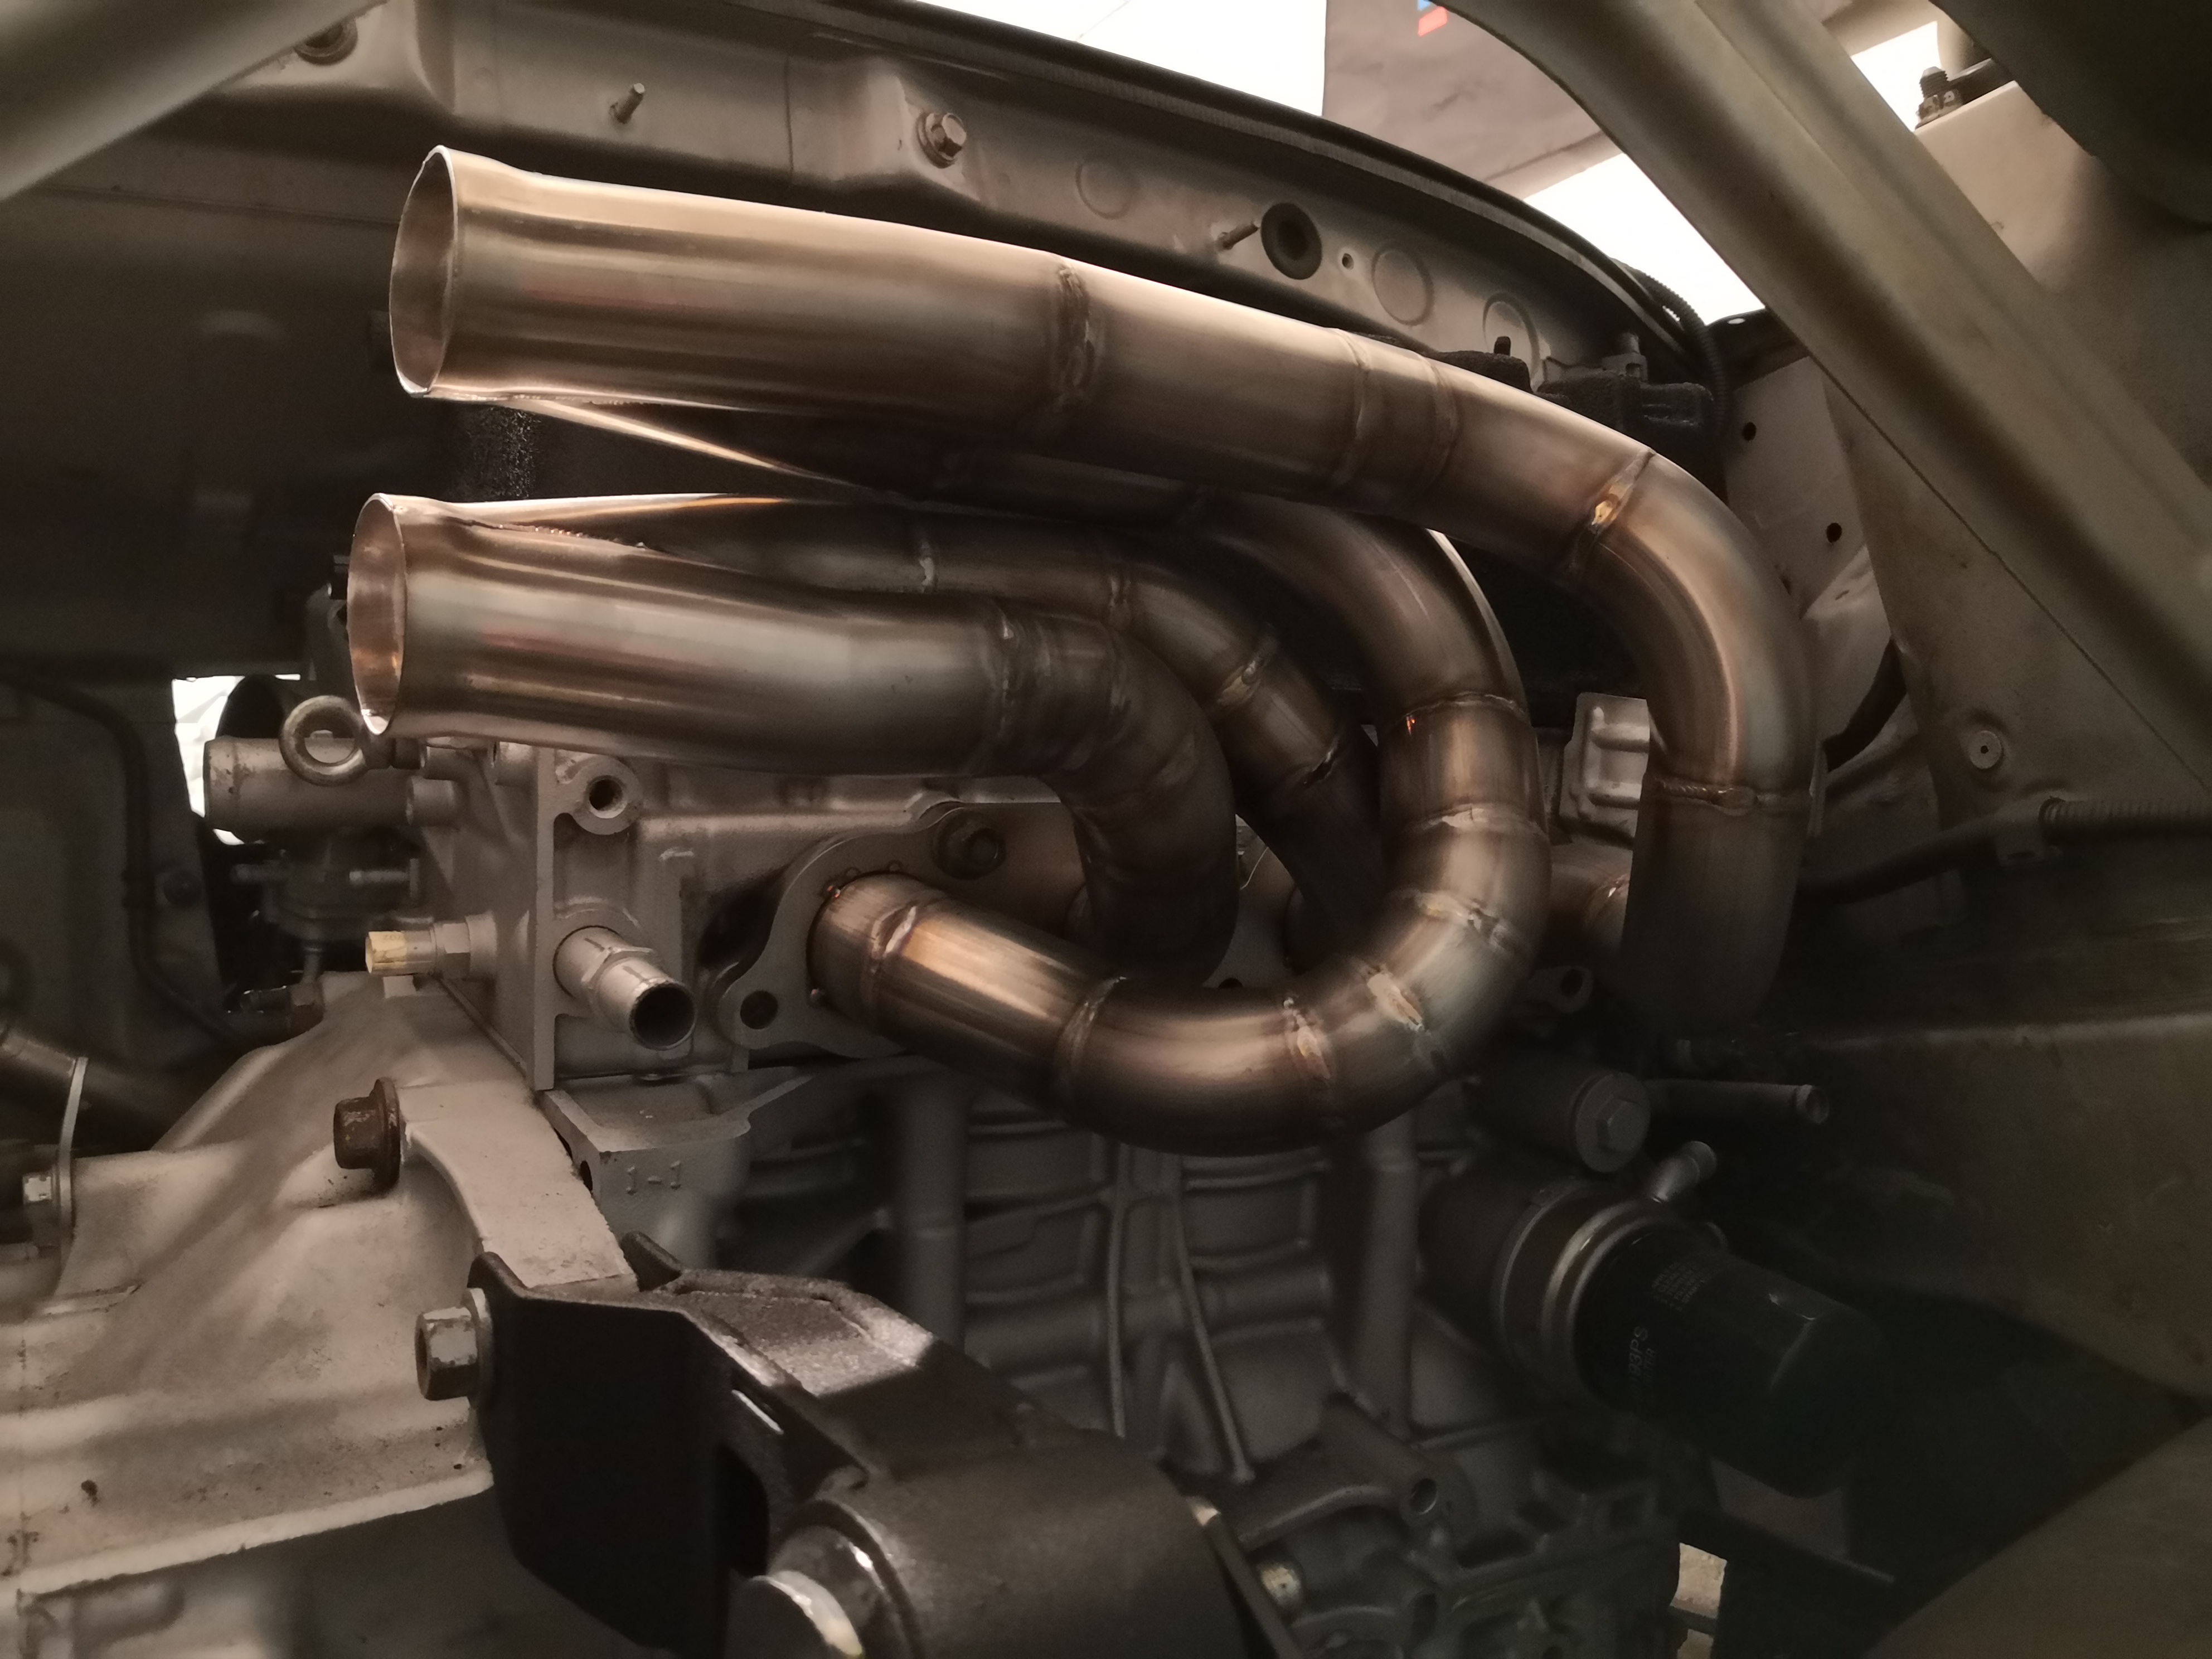
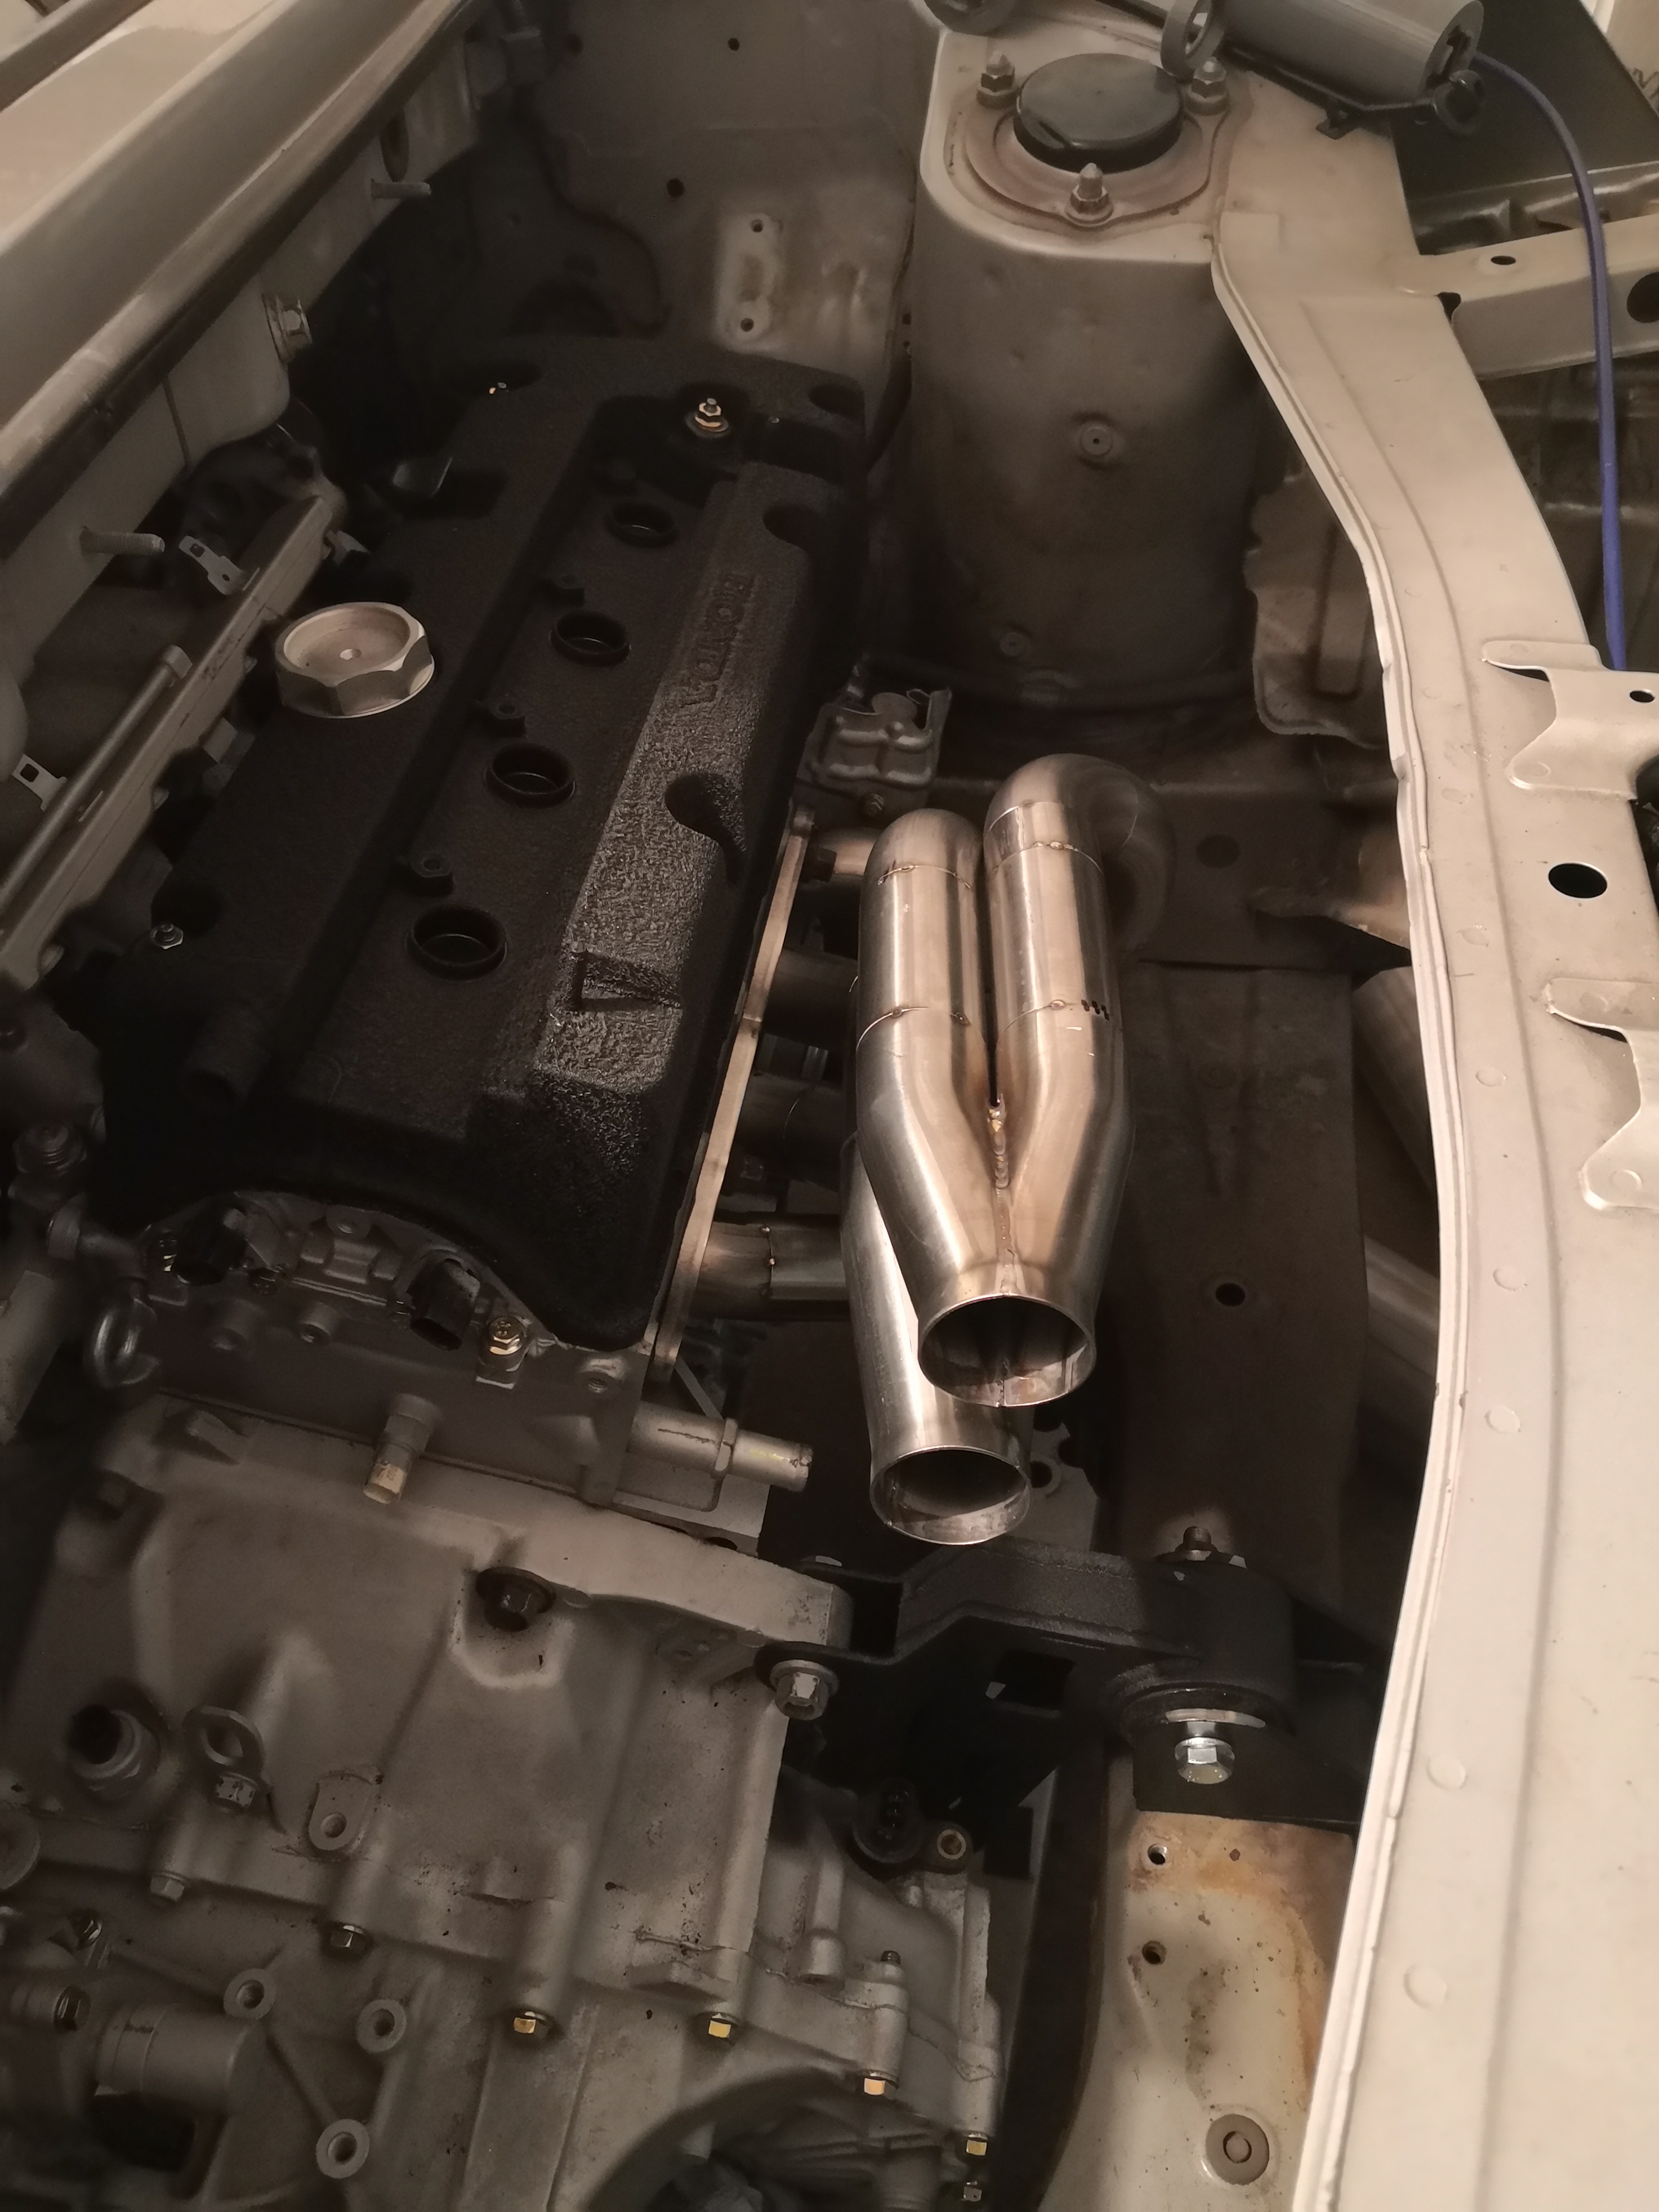
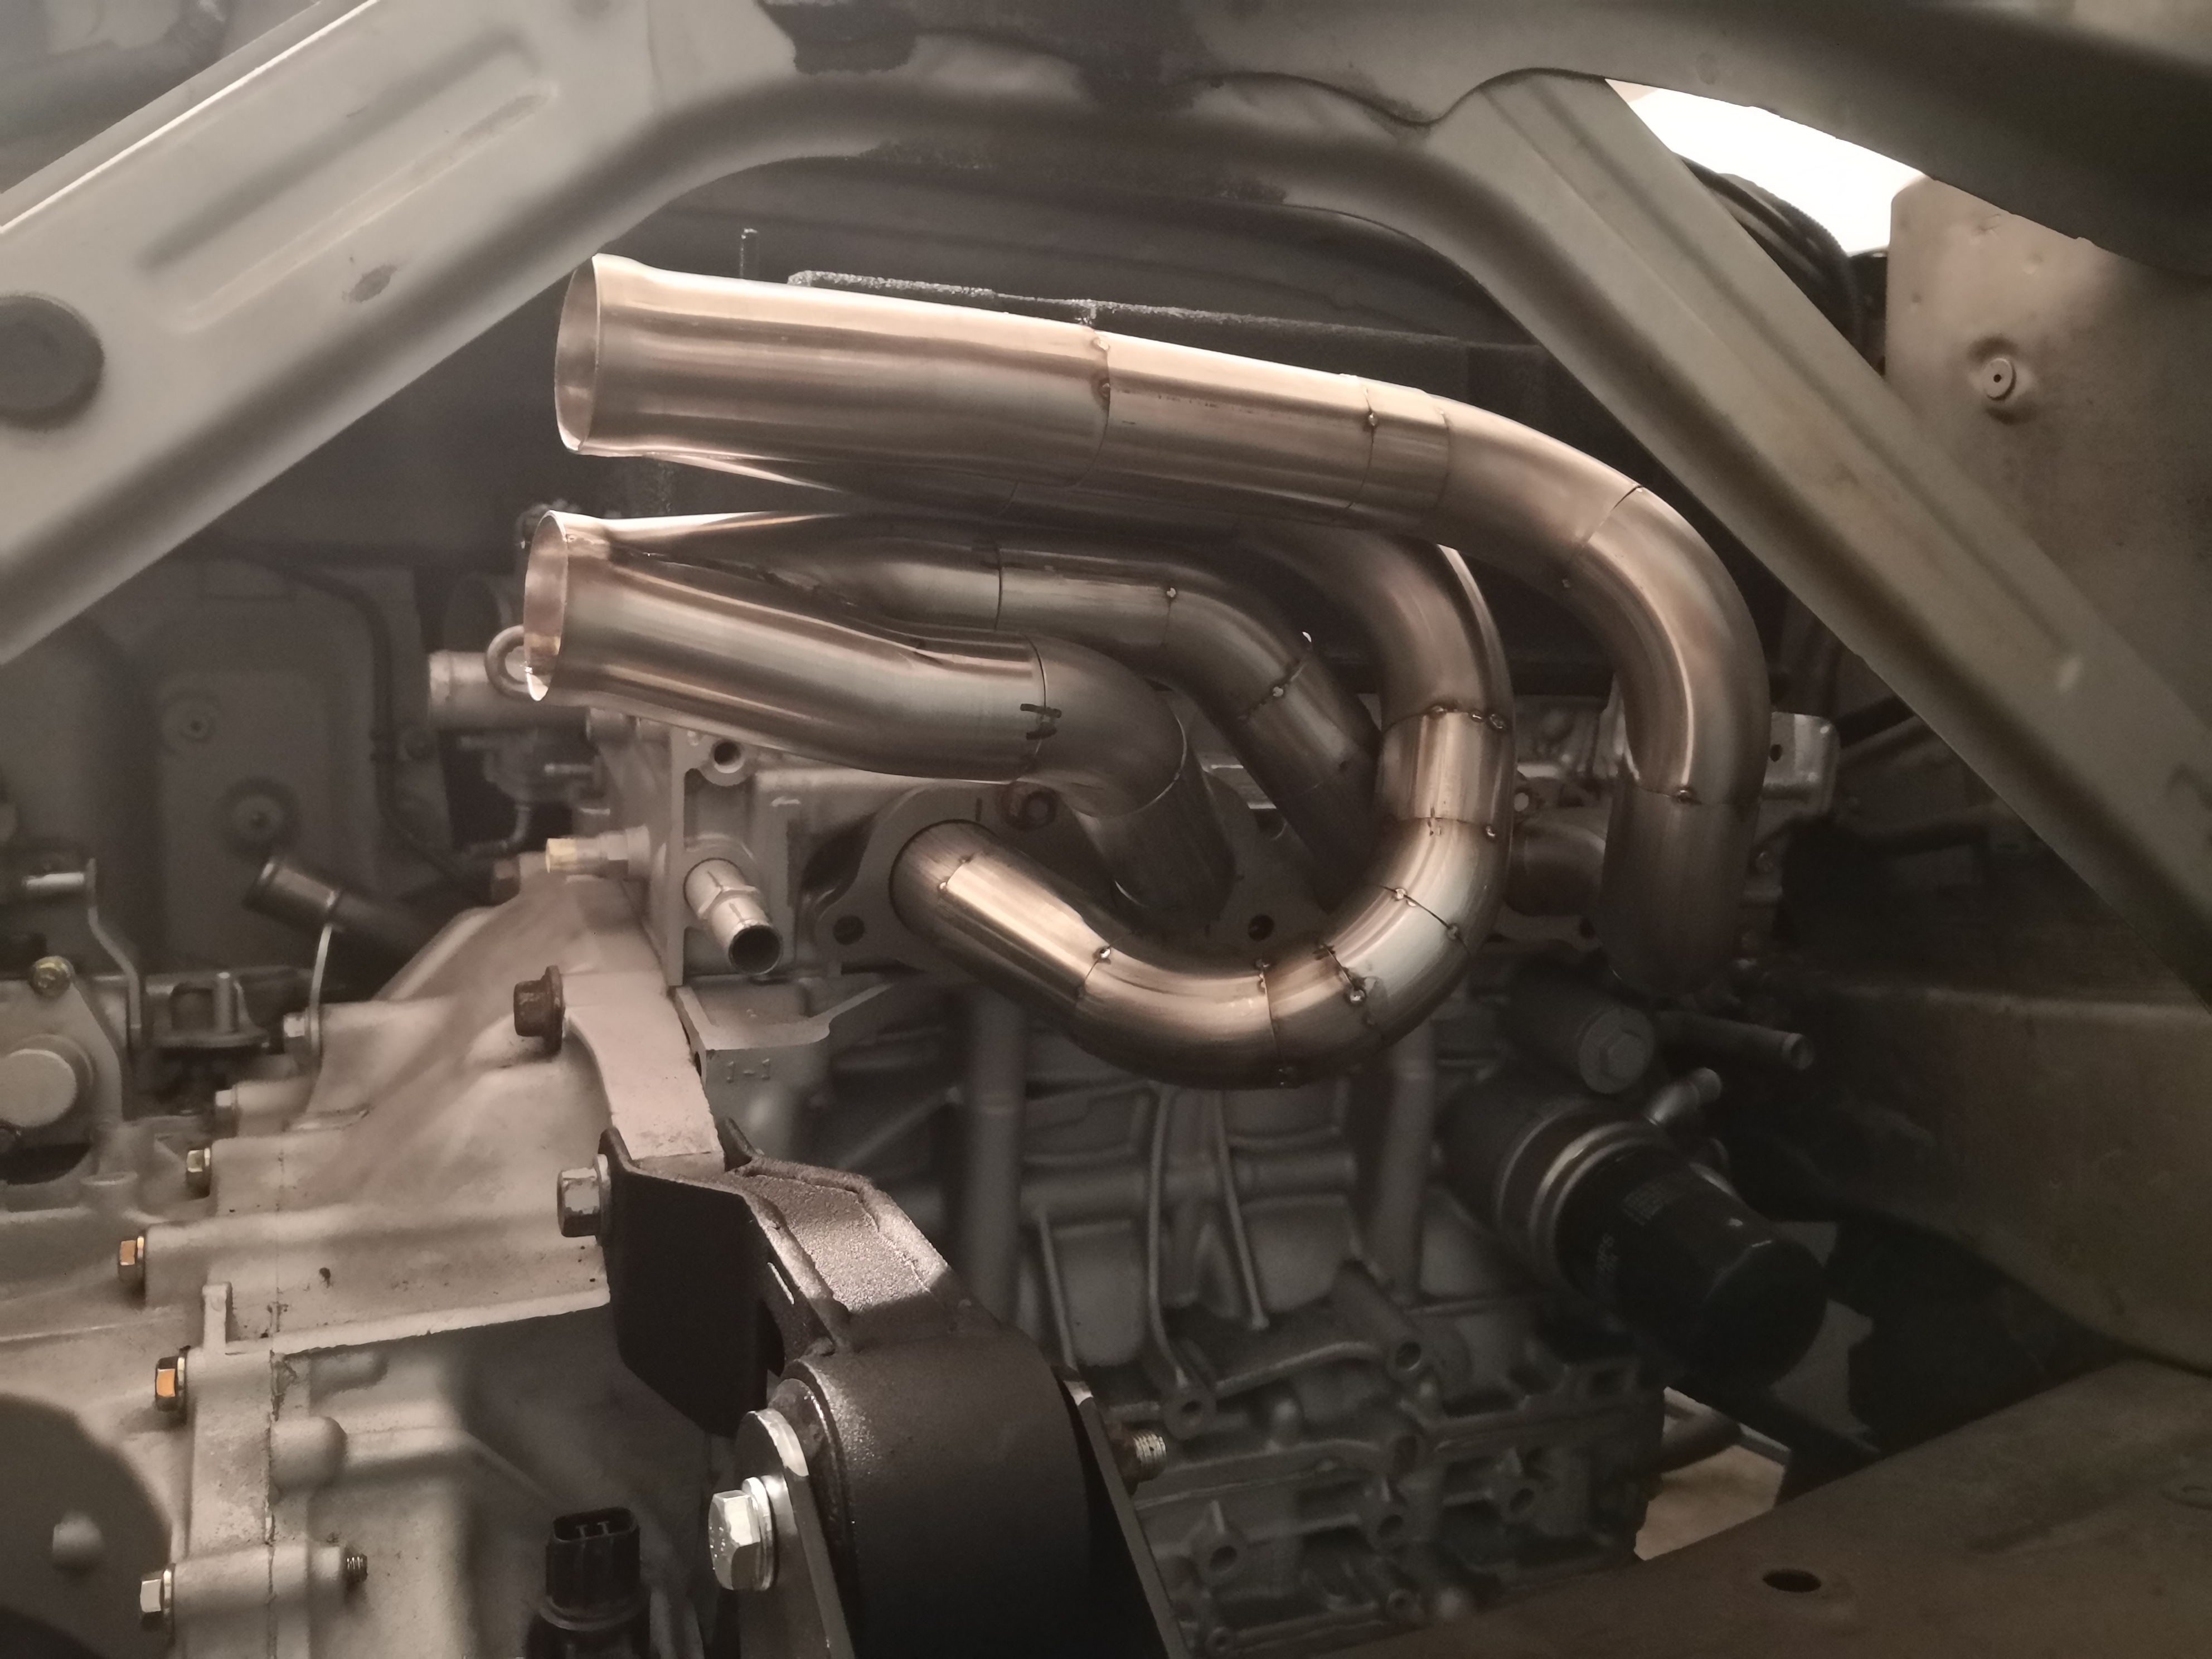
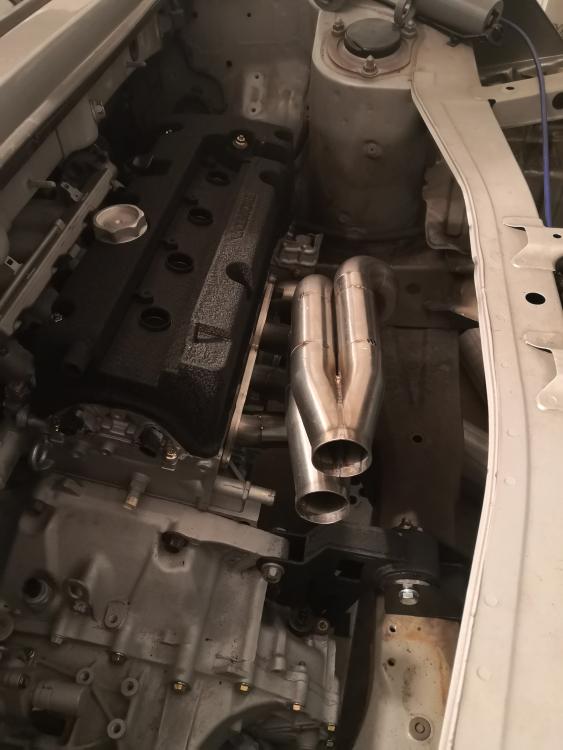
Exhaust tacked up. So happy for my first go
-
Exhaust tacked up. So happy for my first go

-
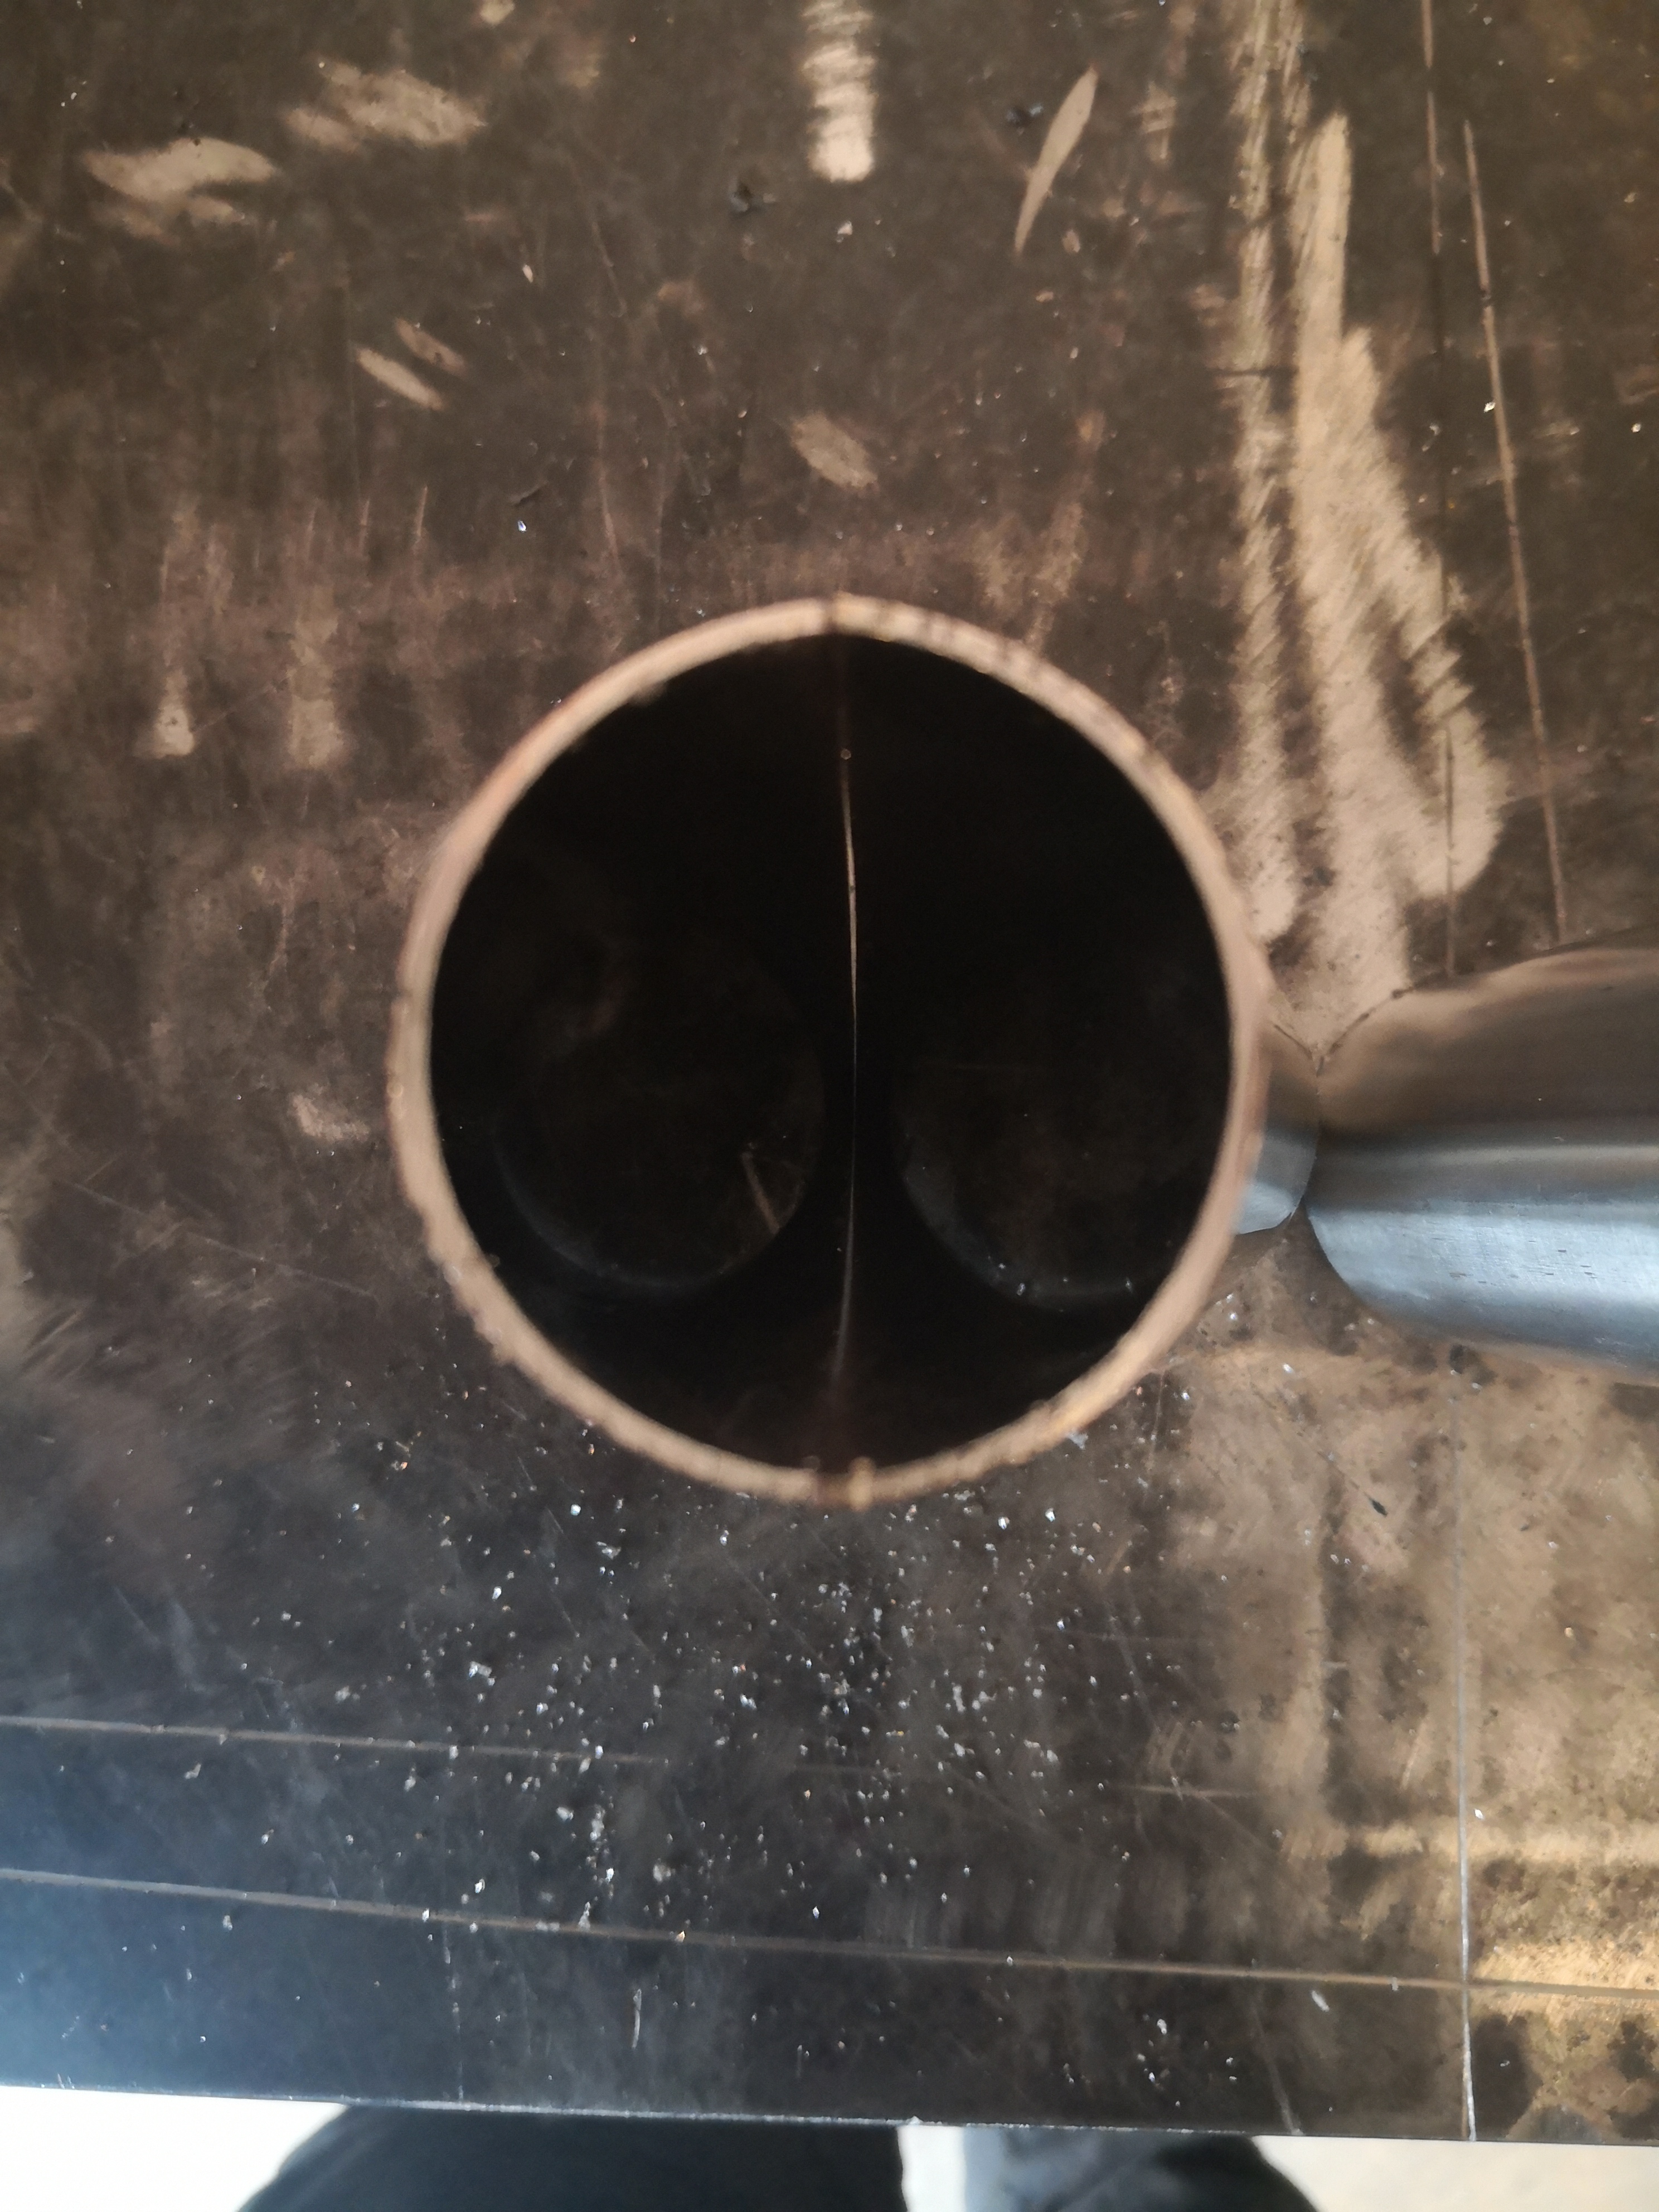
And 3/4 tubes cut up. This was fun to do


-
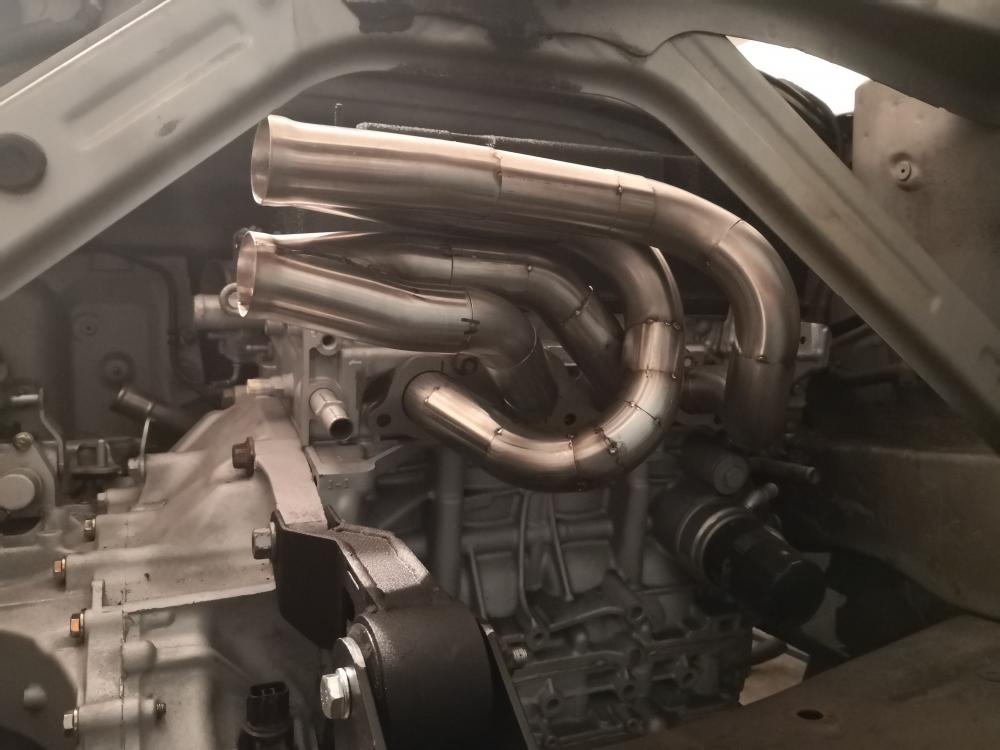
Cheers dude. All welded now

-
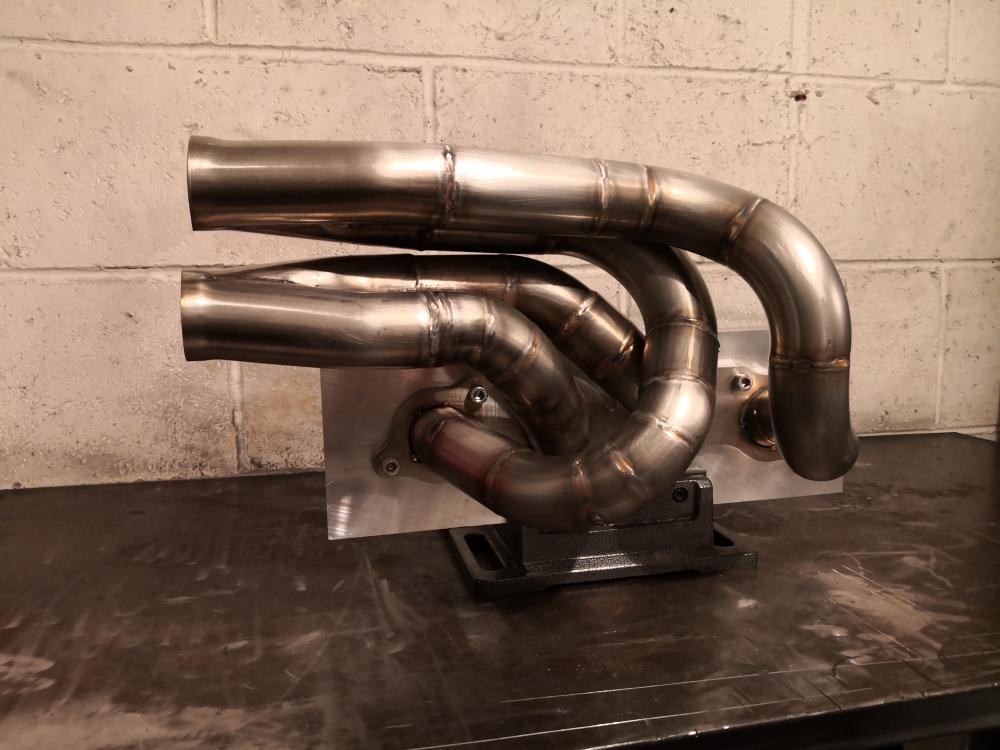
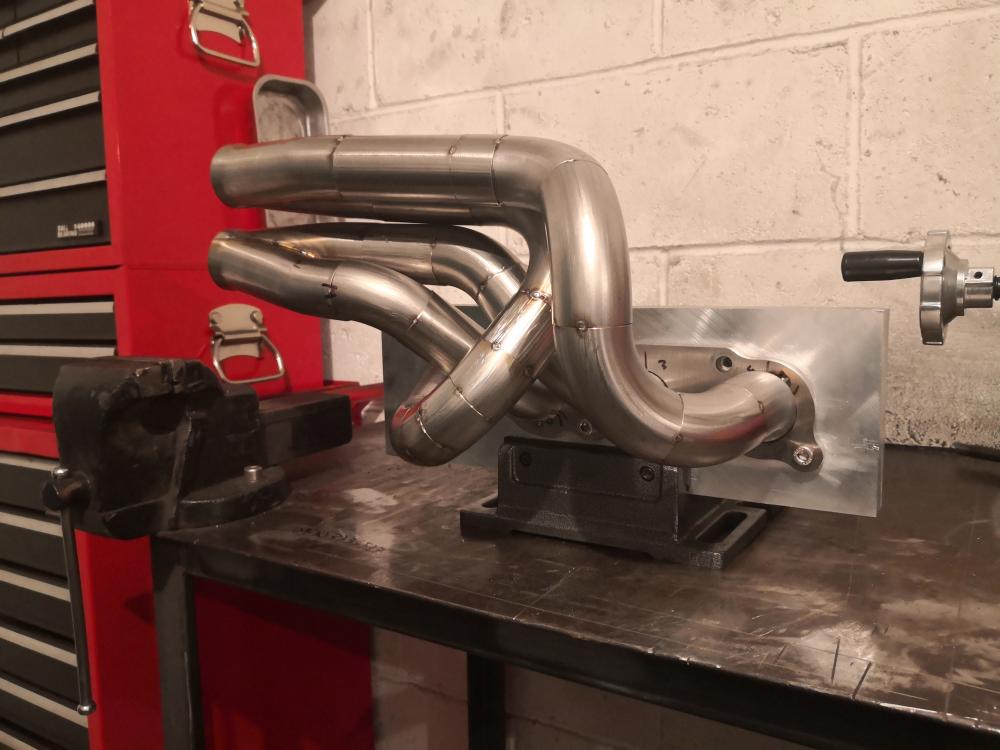
Changed my jig for the collectors slightly, changed my process of cutting too and now I am fully happy with the fit. Nice and repeatable too. Incredibly happy for my second go at them.


-
Thanks mate, you know me that's pretty much my way of thinking, just gotta get stuck in and learn to do it yourself!
-
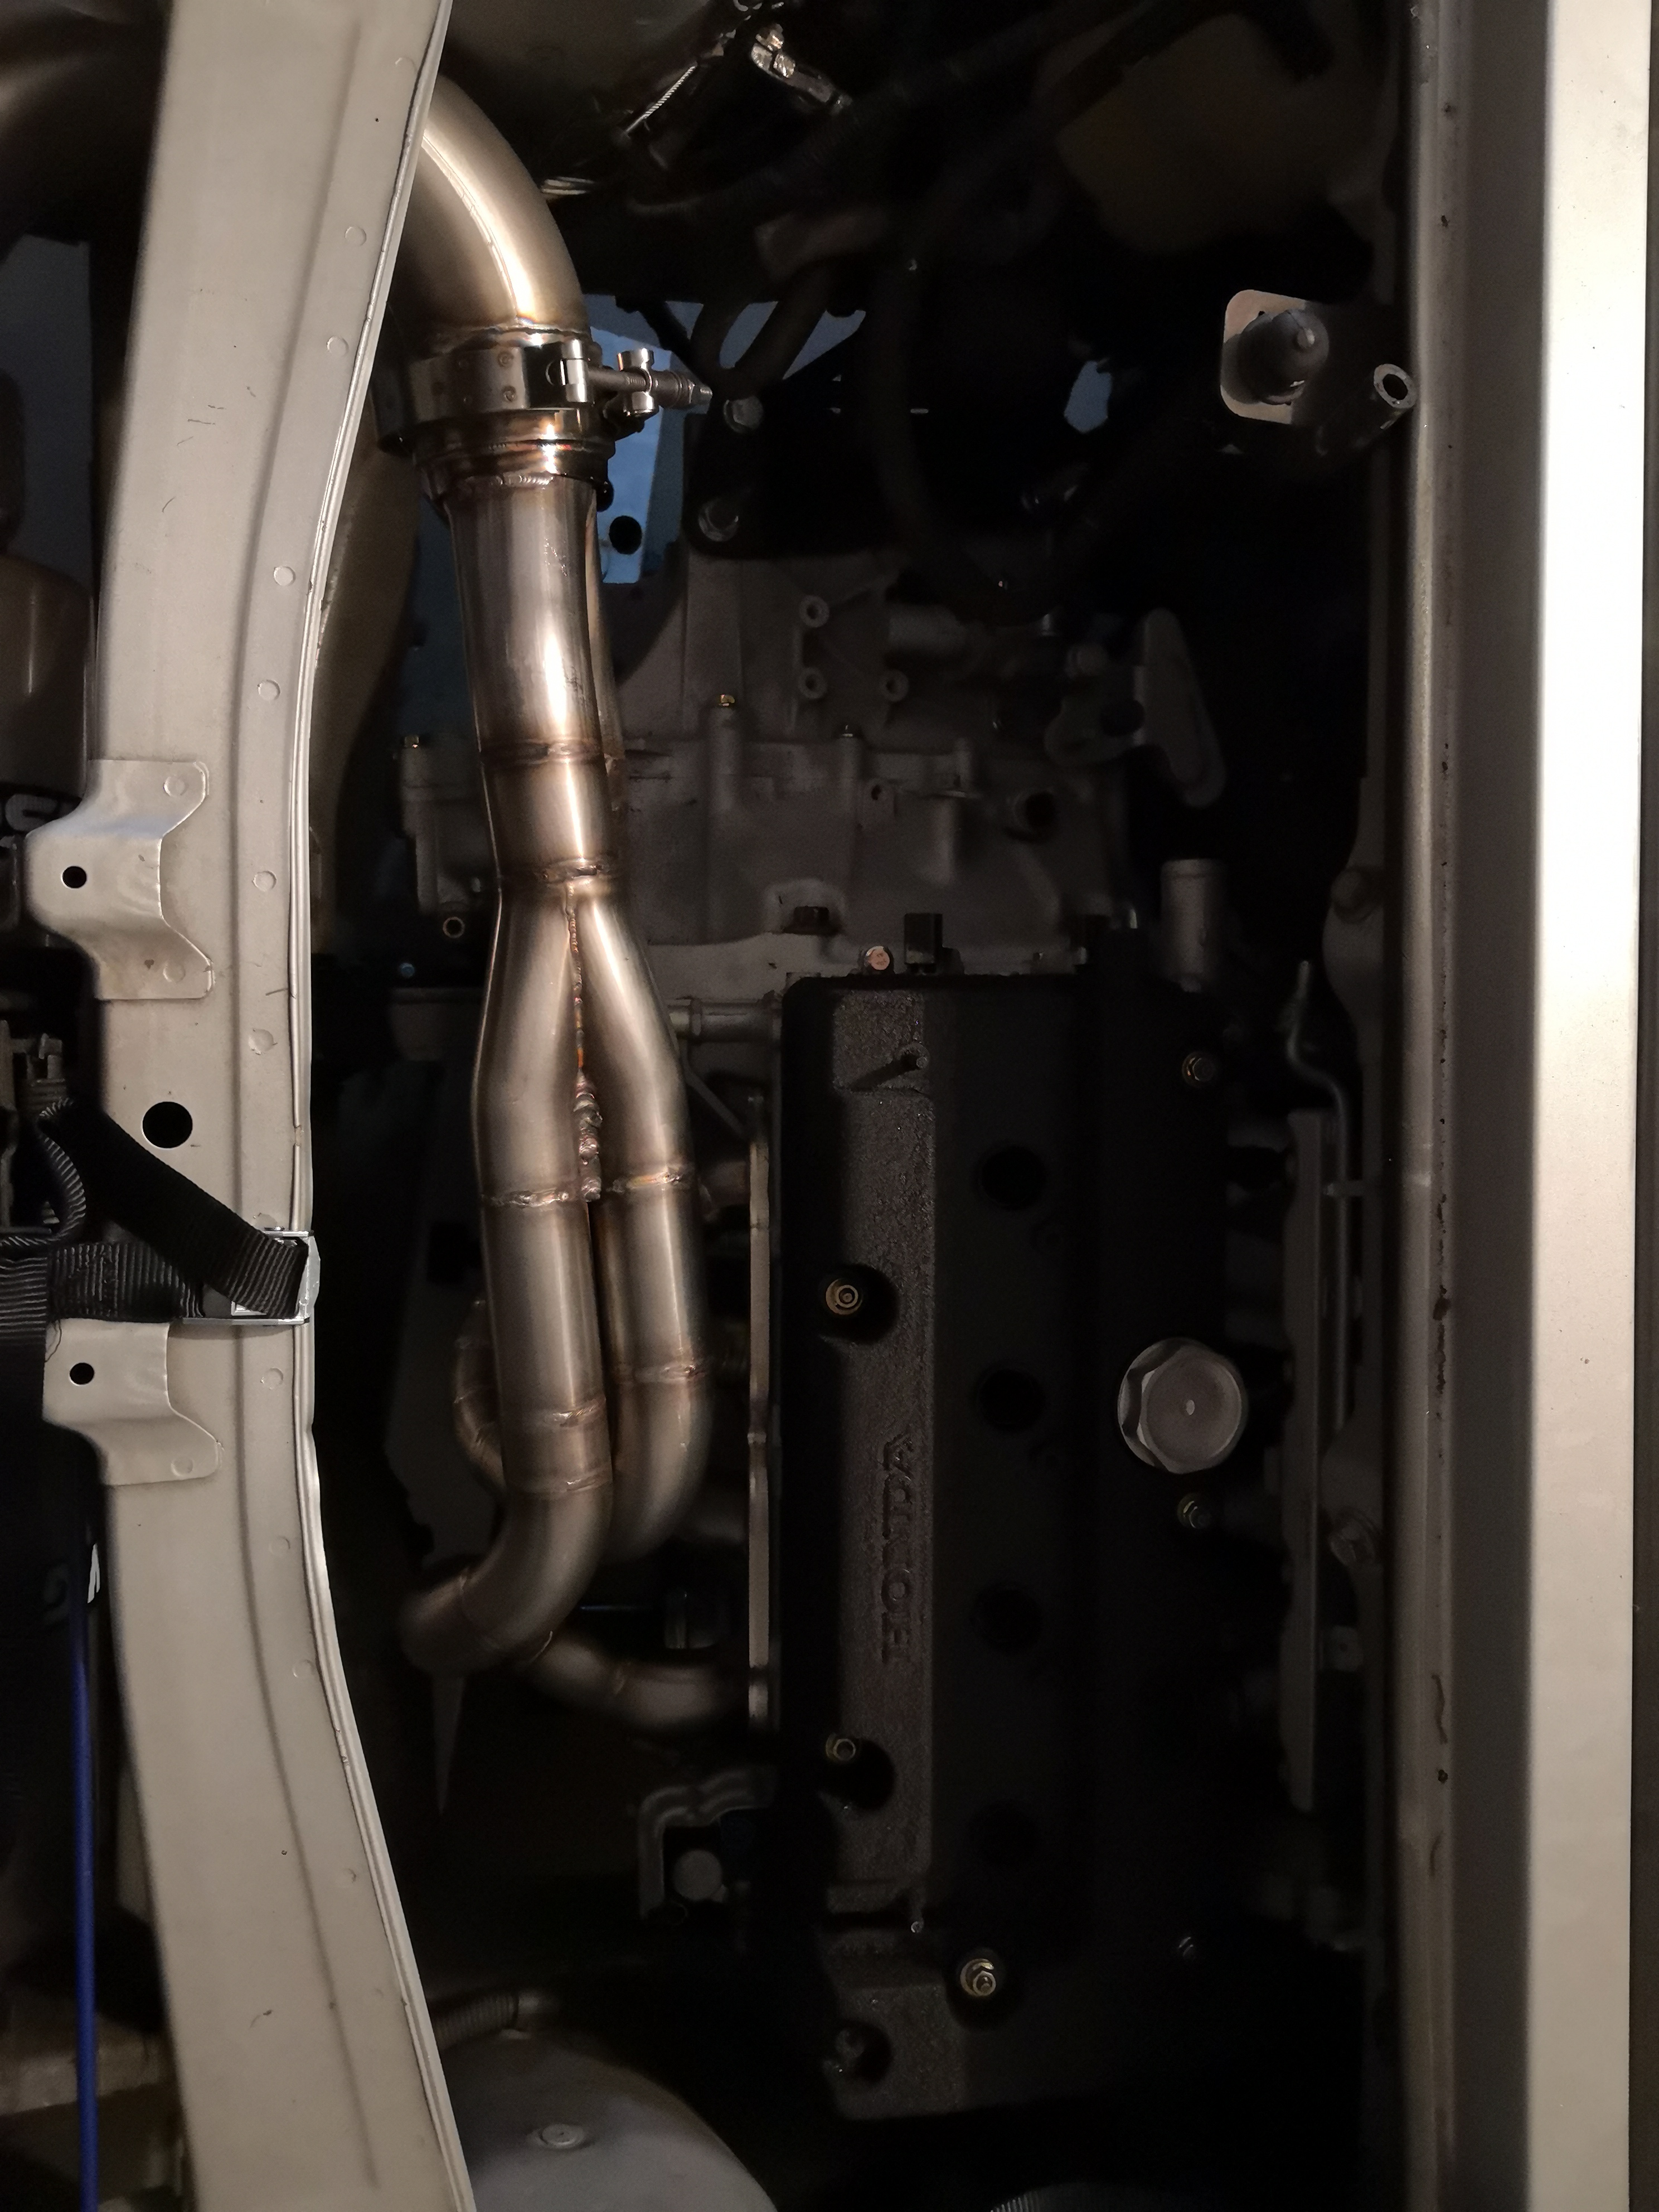
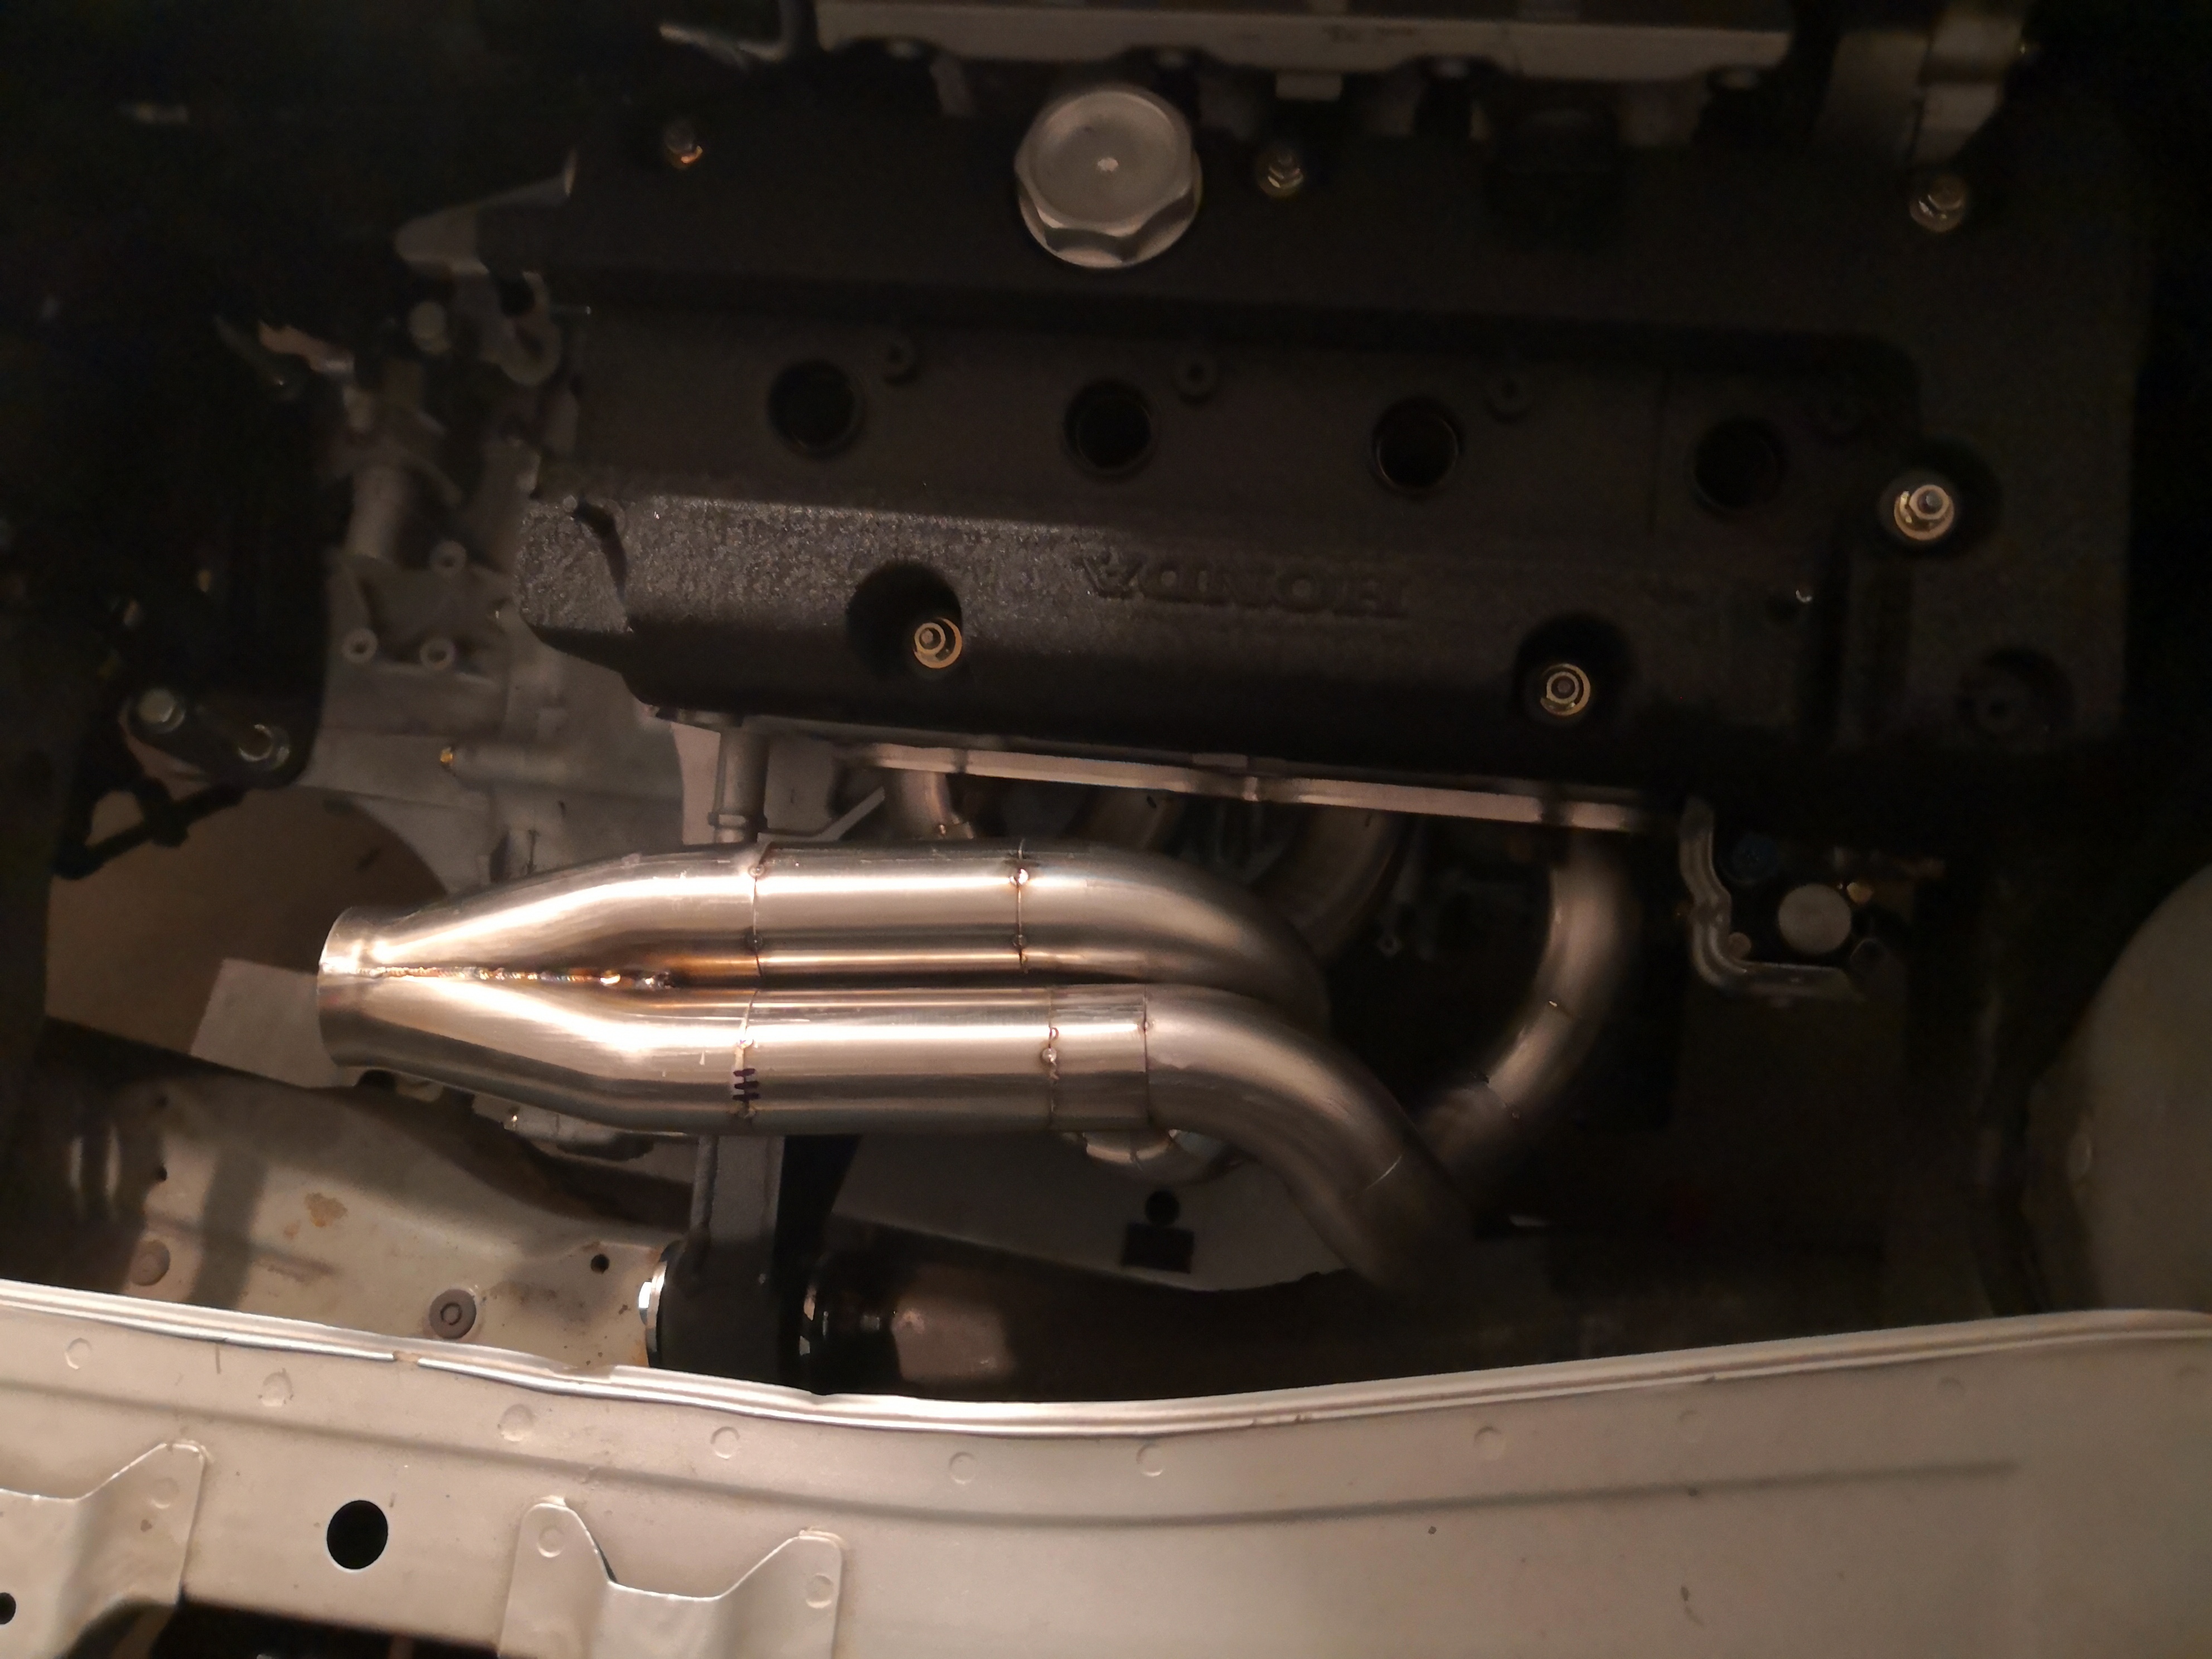
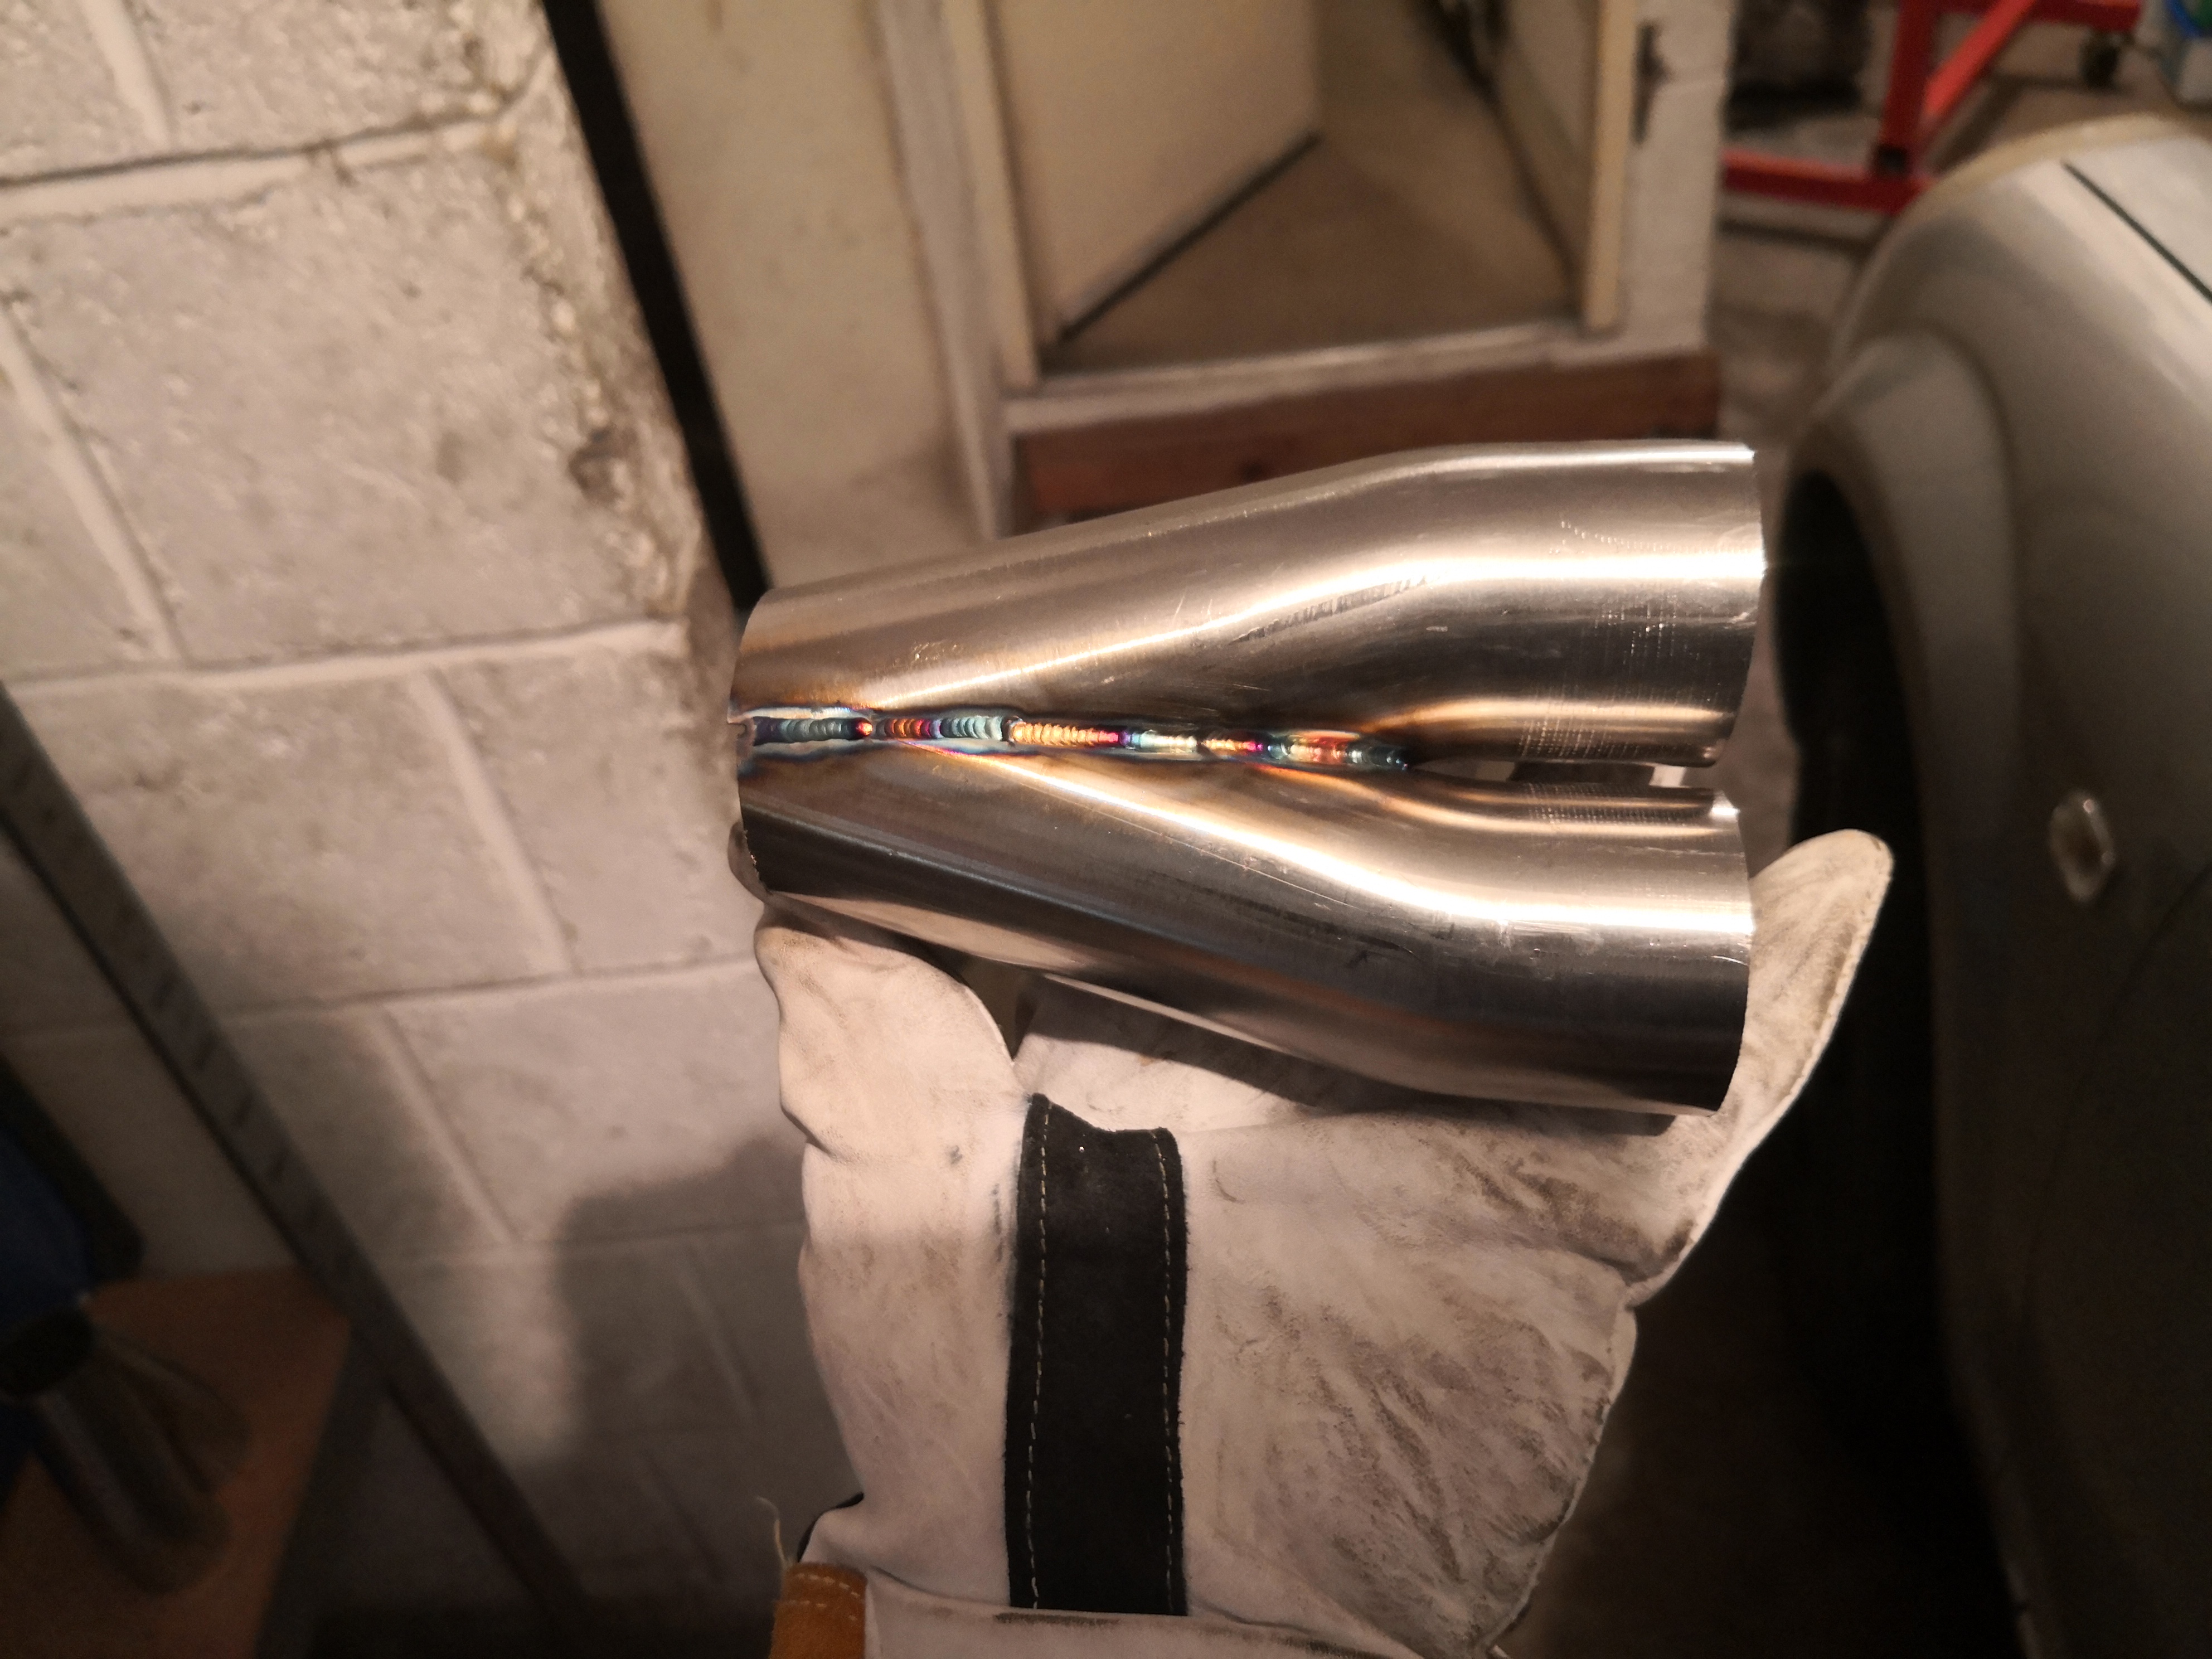
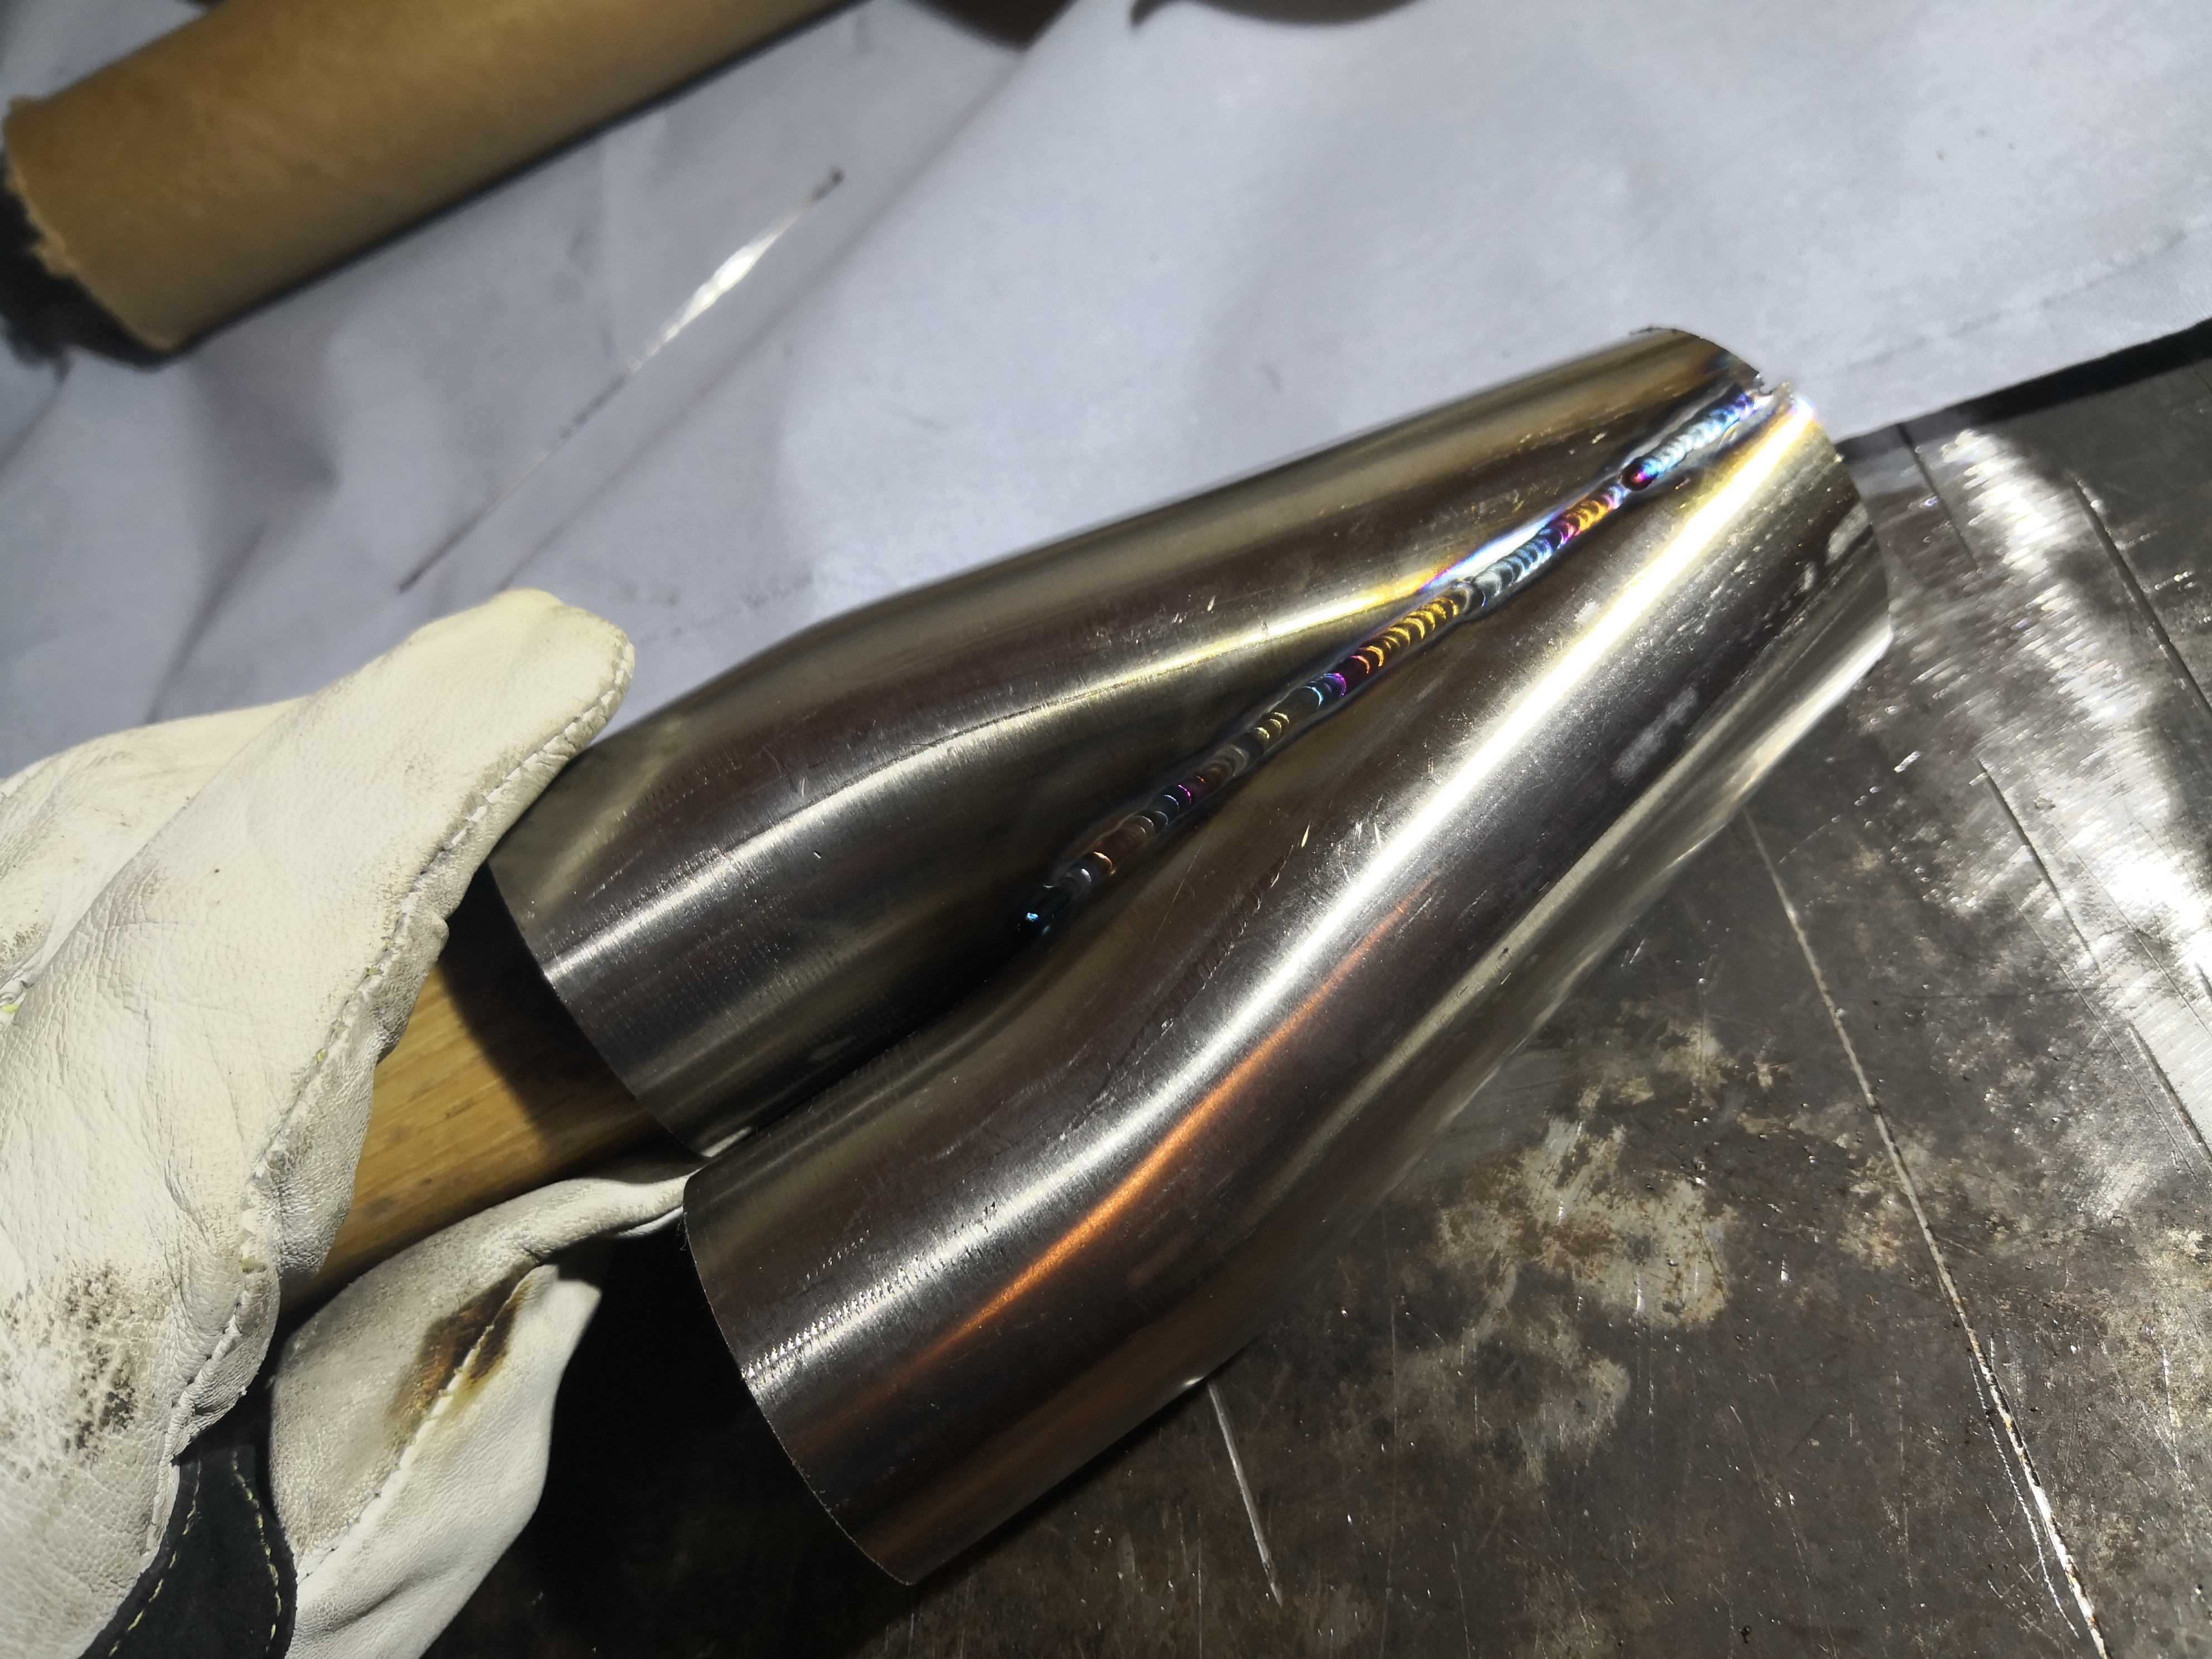
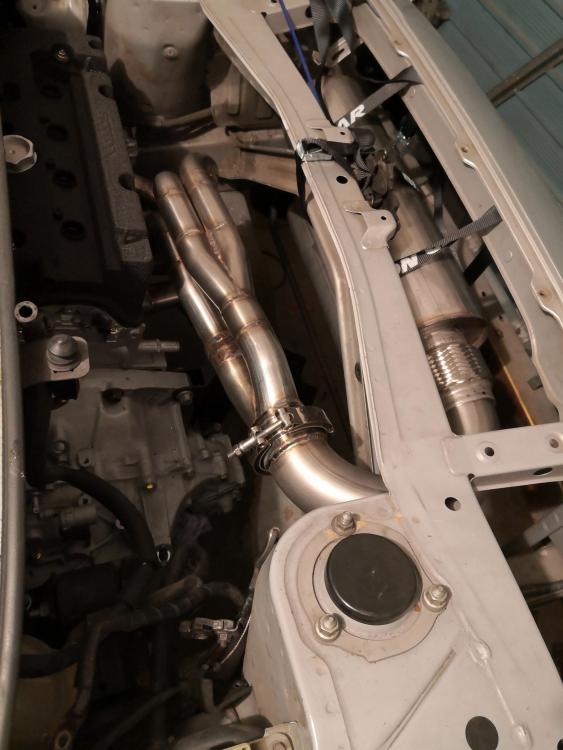
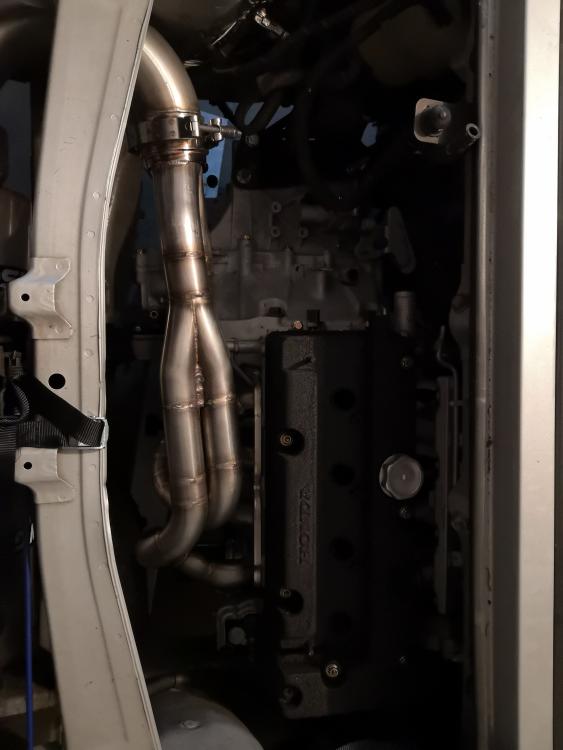
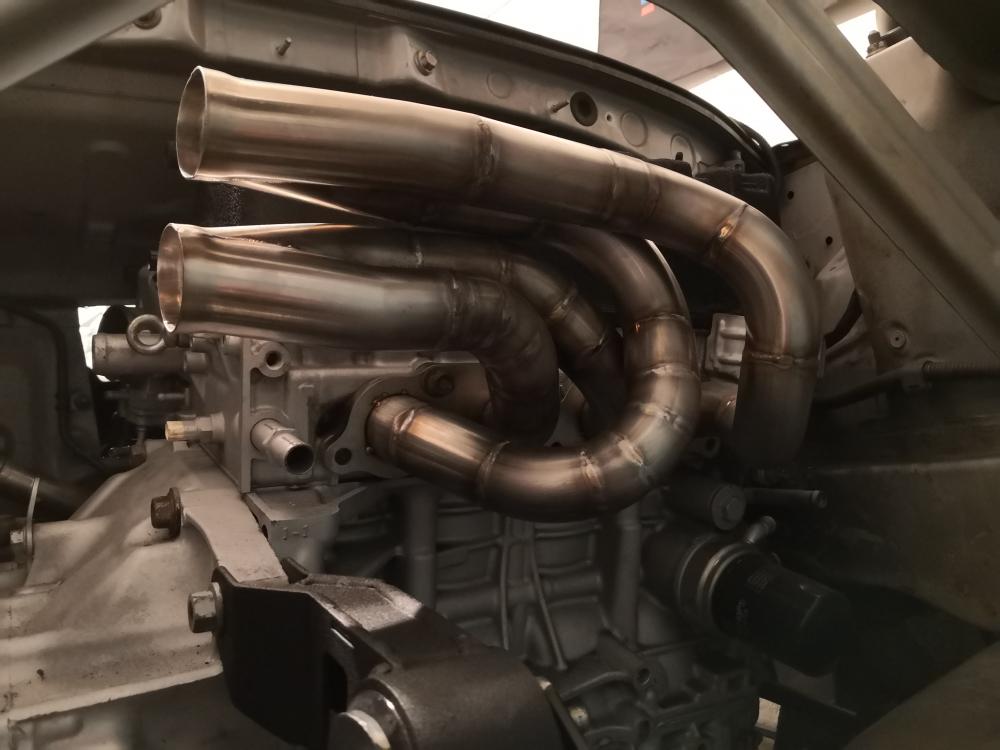
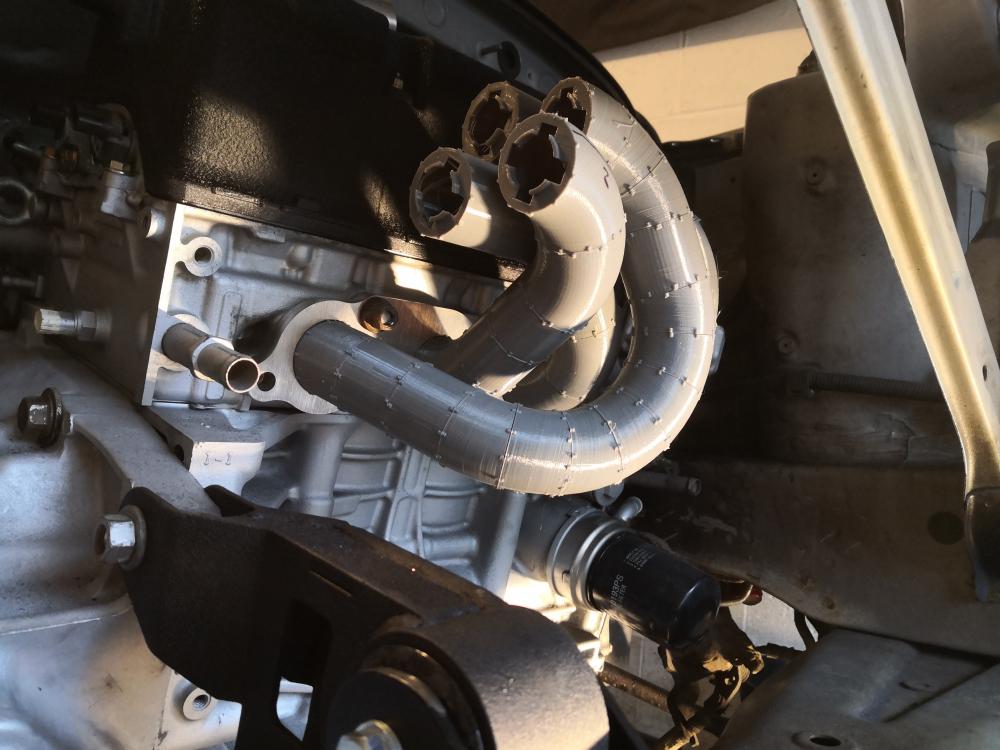
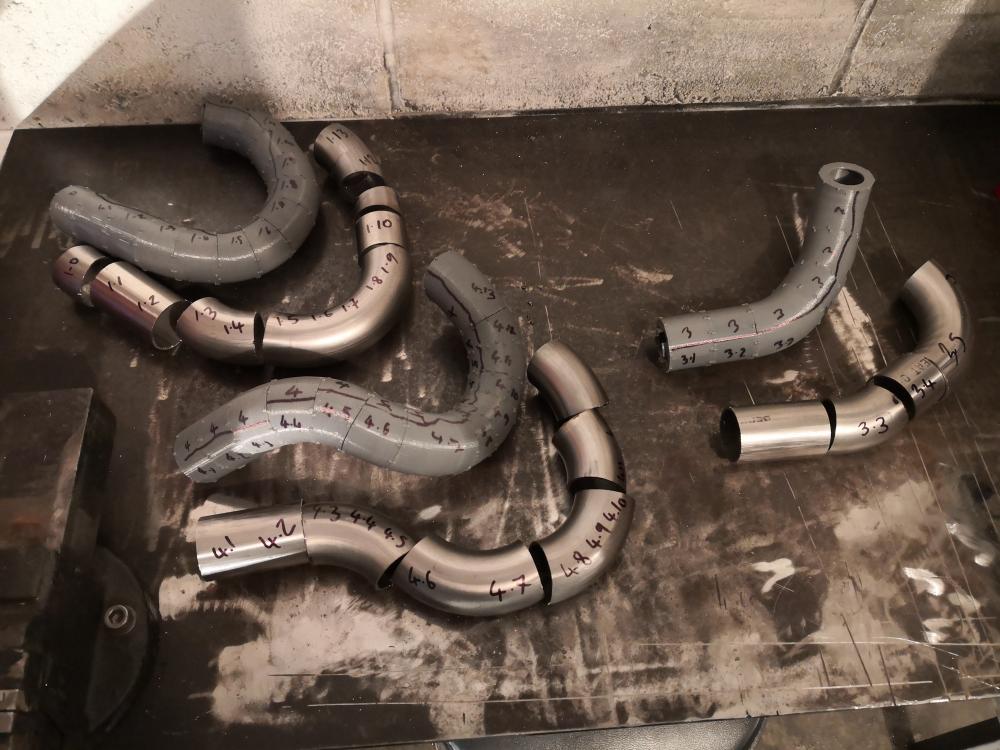
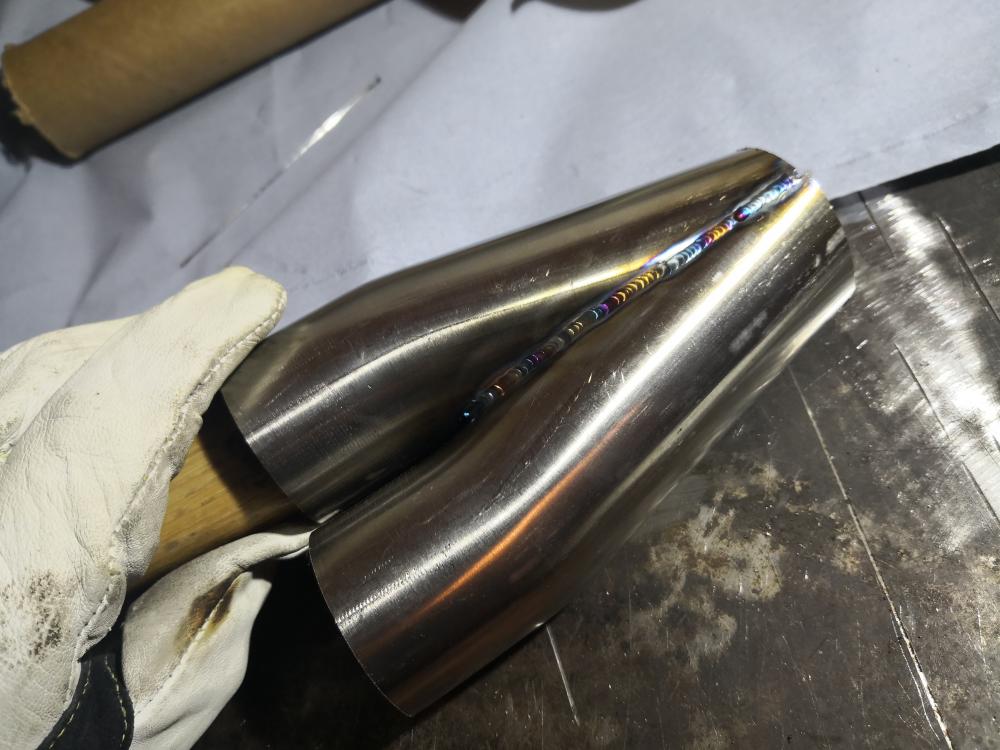
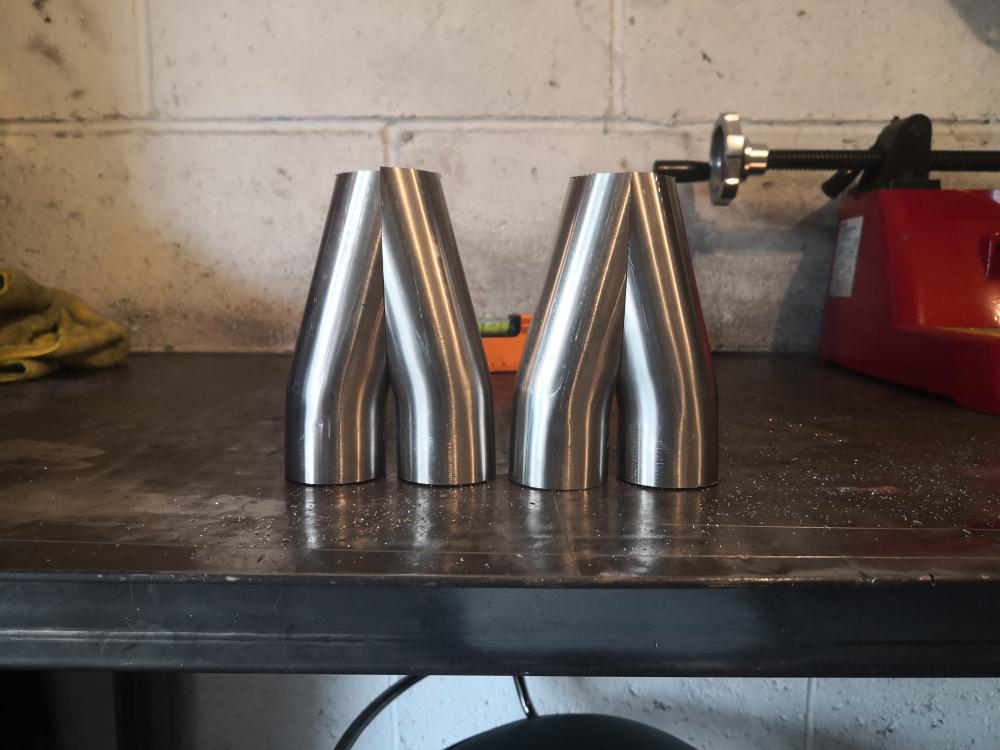
Did some more bits on the engine then bought an upgraded manifold then fitted it #82 then the interesting bit... So basically, I will be making my own exhaust manifold and exhaust for this project as I want to give it a shot myself.I was going to be buying an exhaust modelling kit from America called icengineworks however its very expensive, it comes to £450 for the kit I'd need delivered including tax. The kit allows you to pre make the manifold to the correct length and do all your routes before f**king it up 30000 times if you didn't have the kit. The blocks click together like lego and you then, with the use of an additional plate, allows you to cut exactly where the mould was to mimic your exhaust in stainless.I have my mandrel bends and flange ready The huge downside to the pre made kit is the fact that it comes in thr wrong centre line radius bends. It comes as 2 inch, 3, 5 and 6 which is not what is readily available in the UK (we get 1D and 1.5D bends very easy)So even if I'd mocked it up the radius would be wrong anywaySo... What should I do? Print and build my own kit bought the printer on Sunday and have made some good progress already. Its cheap as hell for the plastic so works out significantly cheaper and I get a 3d printer at the end of it all.Ice already seen you can print off a 3d clutch alignment tool for the K20. Mint Few trial runs This means I can also print the larger models when I do the bigger exhaust bore. C/P: Well chuffed with the machine and I'm enjoying the design and editing side of it so much Last night I printed off inserts that go into the flange. The bit behind the flange is wider so it holds it against the engine securely whilst I mock it up. I've ordered all the y pieces I need, I'll be making it a 4 2 1 design based on a model that gives good power for the type r's Overnight I printed the work piece that will hold the mandrel bend in whilst I cut it. I included captive nut holes and shaped it so m6 cap head bolts nicely sit in flush.Grips it perfectly and will help to get nice clean and precise cuts on the horizontal band saw. t The peen is finally in the garage. I've started removing bits and bobs such as the rear bumper, lights, airbox, battery and some trim/bracing. I've also started welding some of the exhaust where I can, started on the V band to the 2.5 to 3" adapter. This is my first go at welding stainless and I gotta say i'm impressed with how it's turned out Did not expect it to go so well to be honest I then wanted to make a purge block for the exhaust flange And these are the 15 degree bends I printed last night to have a go on the new saw. I then made an enclosure for the 3d printer so I can now print abs, badly done as I hate plastic but still it works wonders and the quality of parts are much better I then wanted to make my own merge collector on the exhaust Used the 3d print to print off a fixture that holds the pipe at 12 angle for better flow I then pulled the engine out and got the new one in today. Things are going well.
-
Figured i'd do an update on my current project as I haven't barely updated it in here. So the idea is to get a bog standard 1.8 140bhp toyota MR2 and fit the honda K20 engine. 9k revs, rearwheel drive and rear engines is gonna be a laugh right... So I bought the car for a good price Then ordered the mounts from USA, ordered a diff whilst I was at it too I then got the engine and gear box And started cleaning it up Ordered a shed load of zinc plated bolts too fitted the diff Bafffled sump fitted and bolts redone. Also did valve clearances and timing chain
-
Yeah it's all I use, amazon twin packs work out to be the best value for money