


Private Repress
-
Posts
395 -
Joined
-
Last visited
-
Days Won
54
Content Type
Profiles
Forums
Gallery
Posts posted by Private Repress
-
-
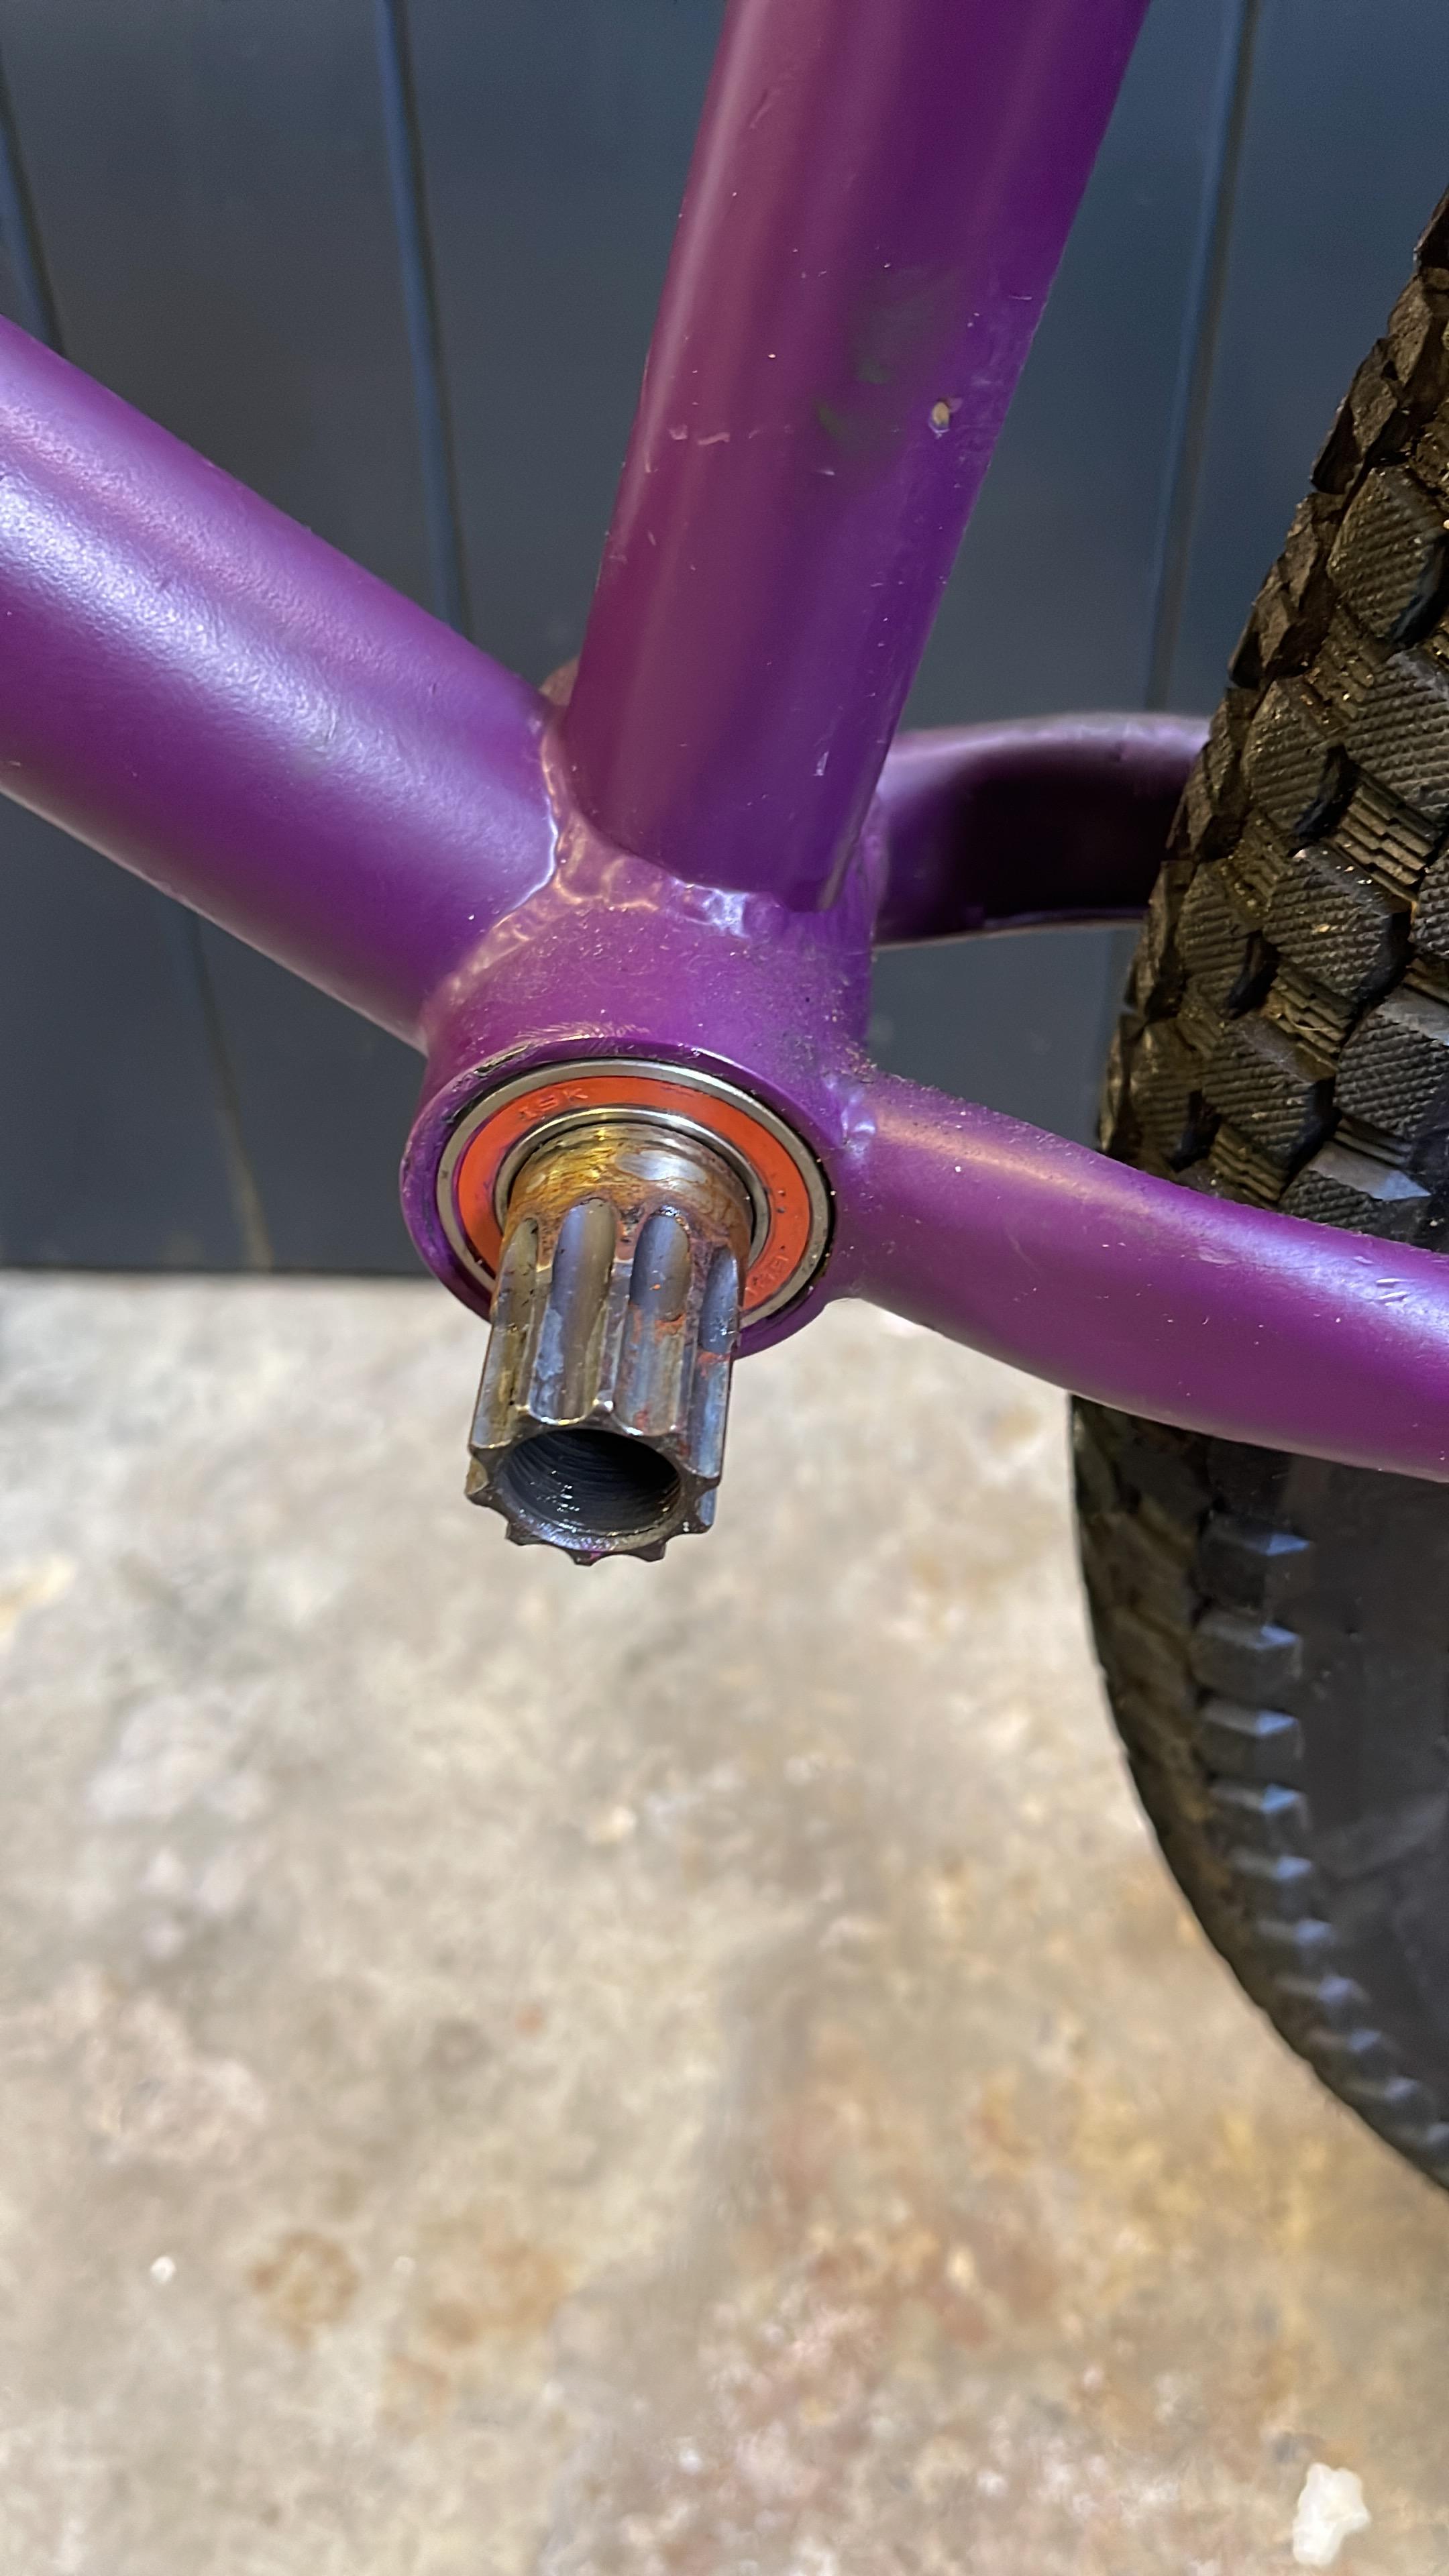
Ah thanks @Mark W that makes perfect sense. I was thinking a press fit with the thread sitting outside of the frame, making it a 73mm shell. That said there’s only room for 2.5mm on each side to do that - bummer!
looks like I’ll be sticking with a splined axel.
unless there’s any decent trials alternative that fits a Spanish bb…
-
Hi all,
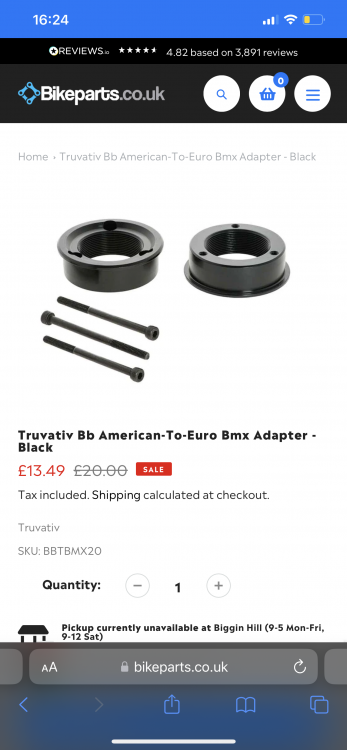
embarking on a new project and have hit a barrier. I’ve got a frame with a Spanish bb (37mm shell)

I want to run Sram GX cranks with minimal fuss, these ones:

Is there any adapter that exists so that I could simply run the external threaded sram gxp bb on the Spanish bb shell?
I’ve seen @Swoofty YouTube guide, but that seems to be a case of replacing the bearings to a suitable size to fit the axel, then working out what spacers would need to be ran either side of the crank. Not sure the parts are easily available to achieve this in the uk.
I spoke to Charlie at Tarty bikes that suggested this truvativ adapter, but it seems this is for the larger American bb?
any help would be much appreciated
")
-
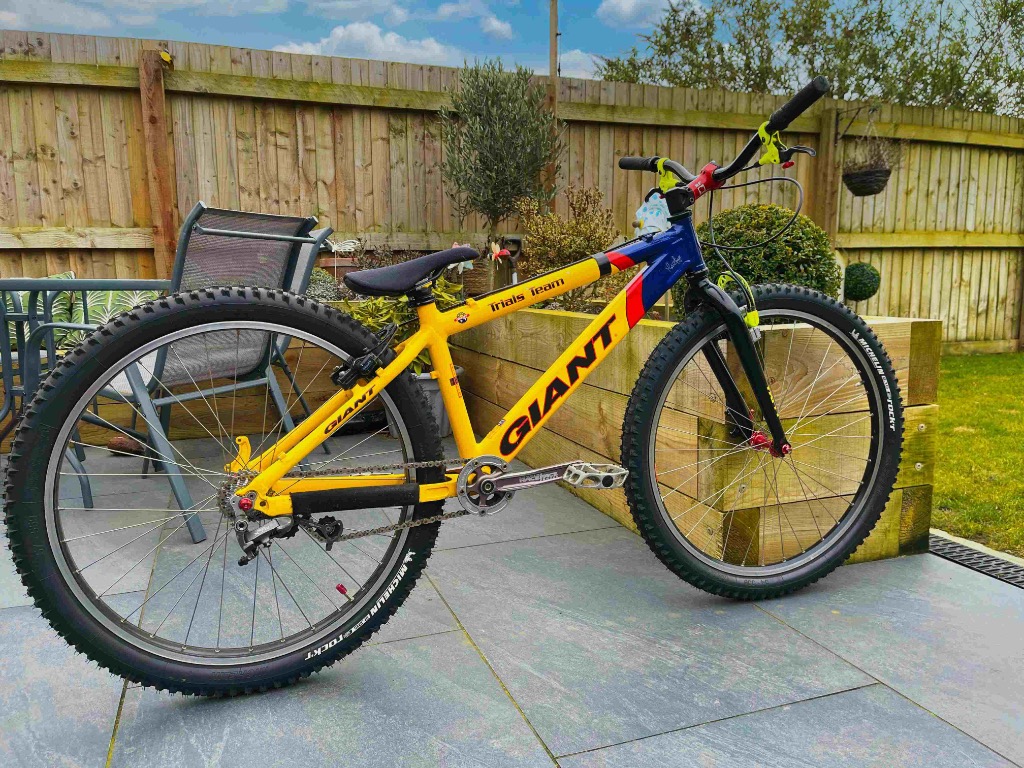
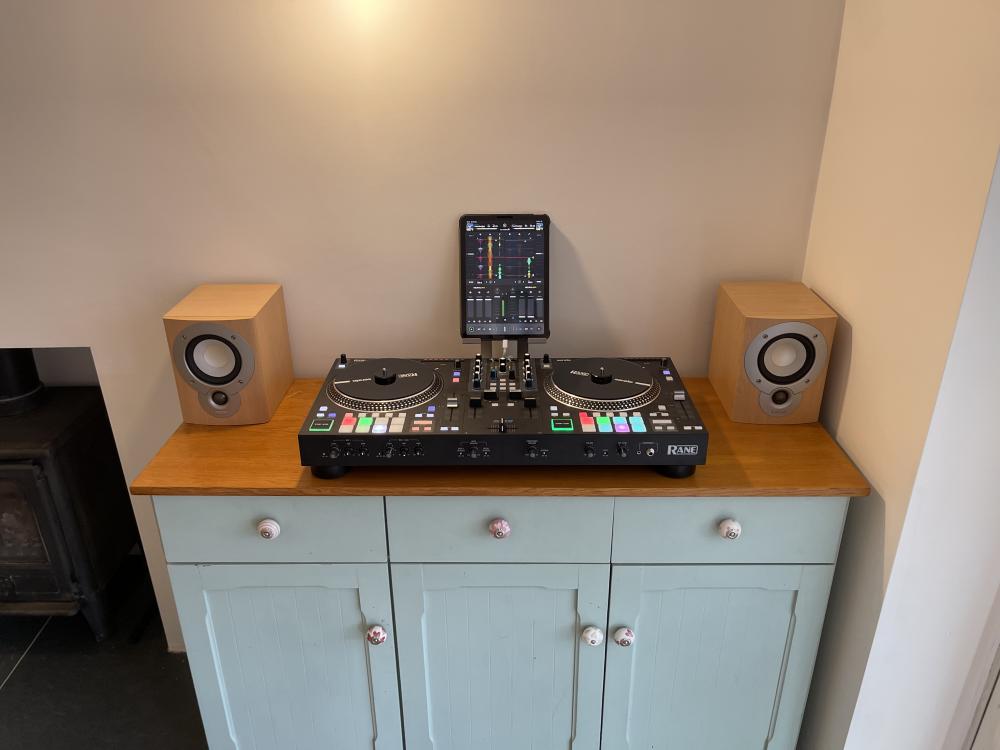
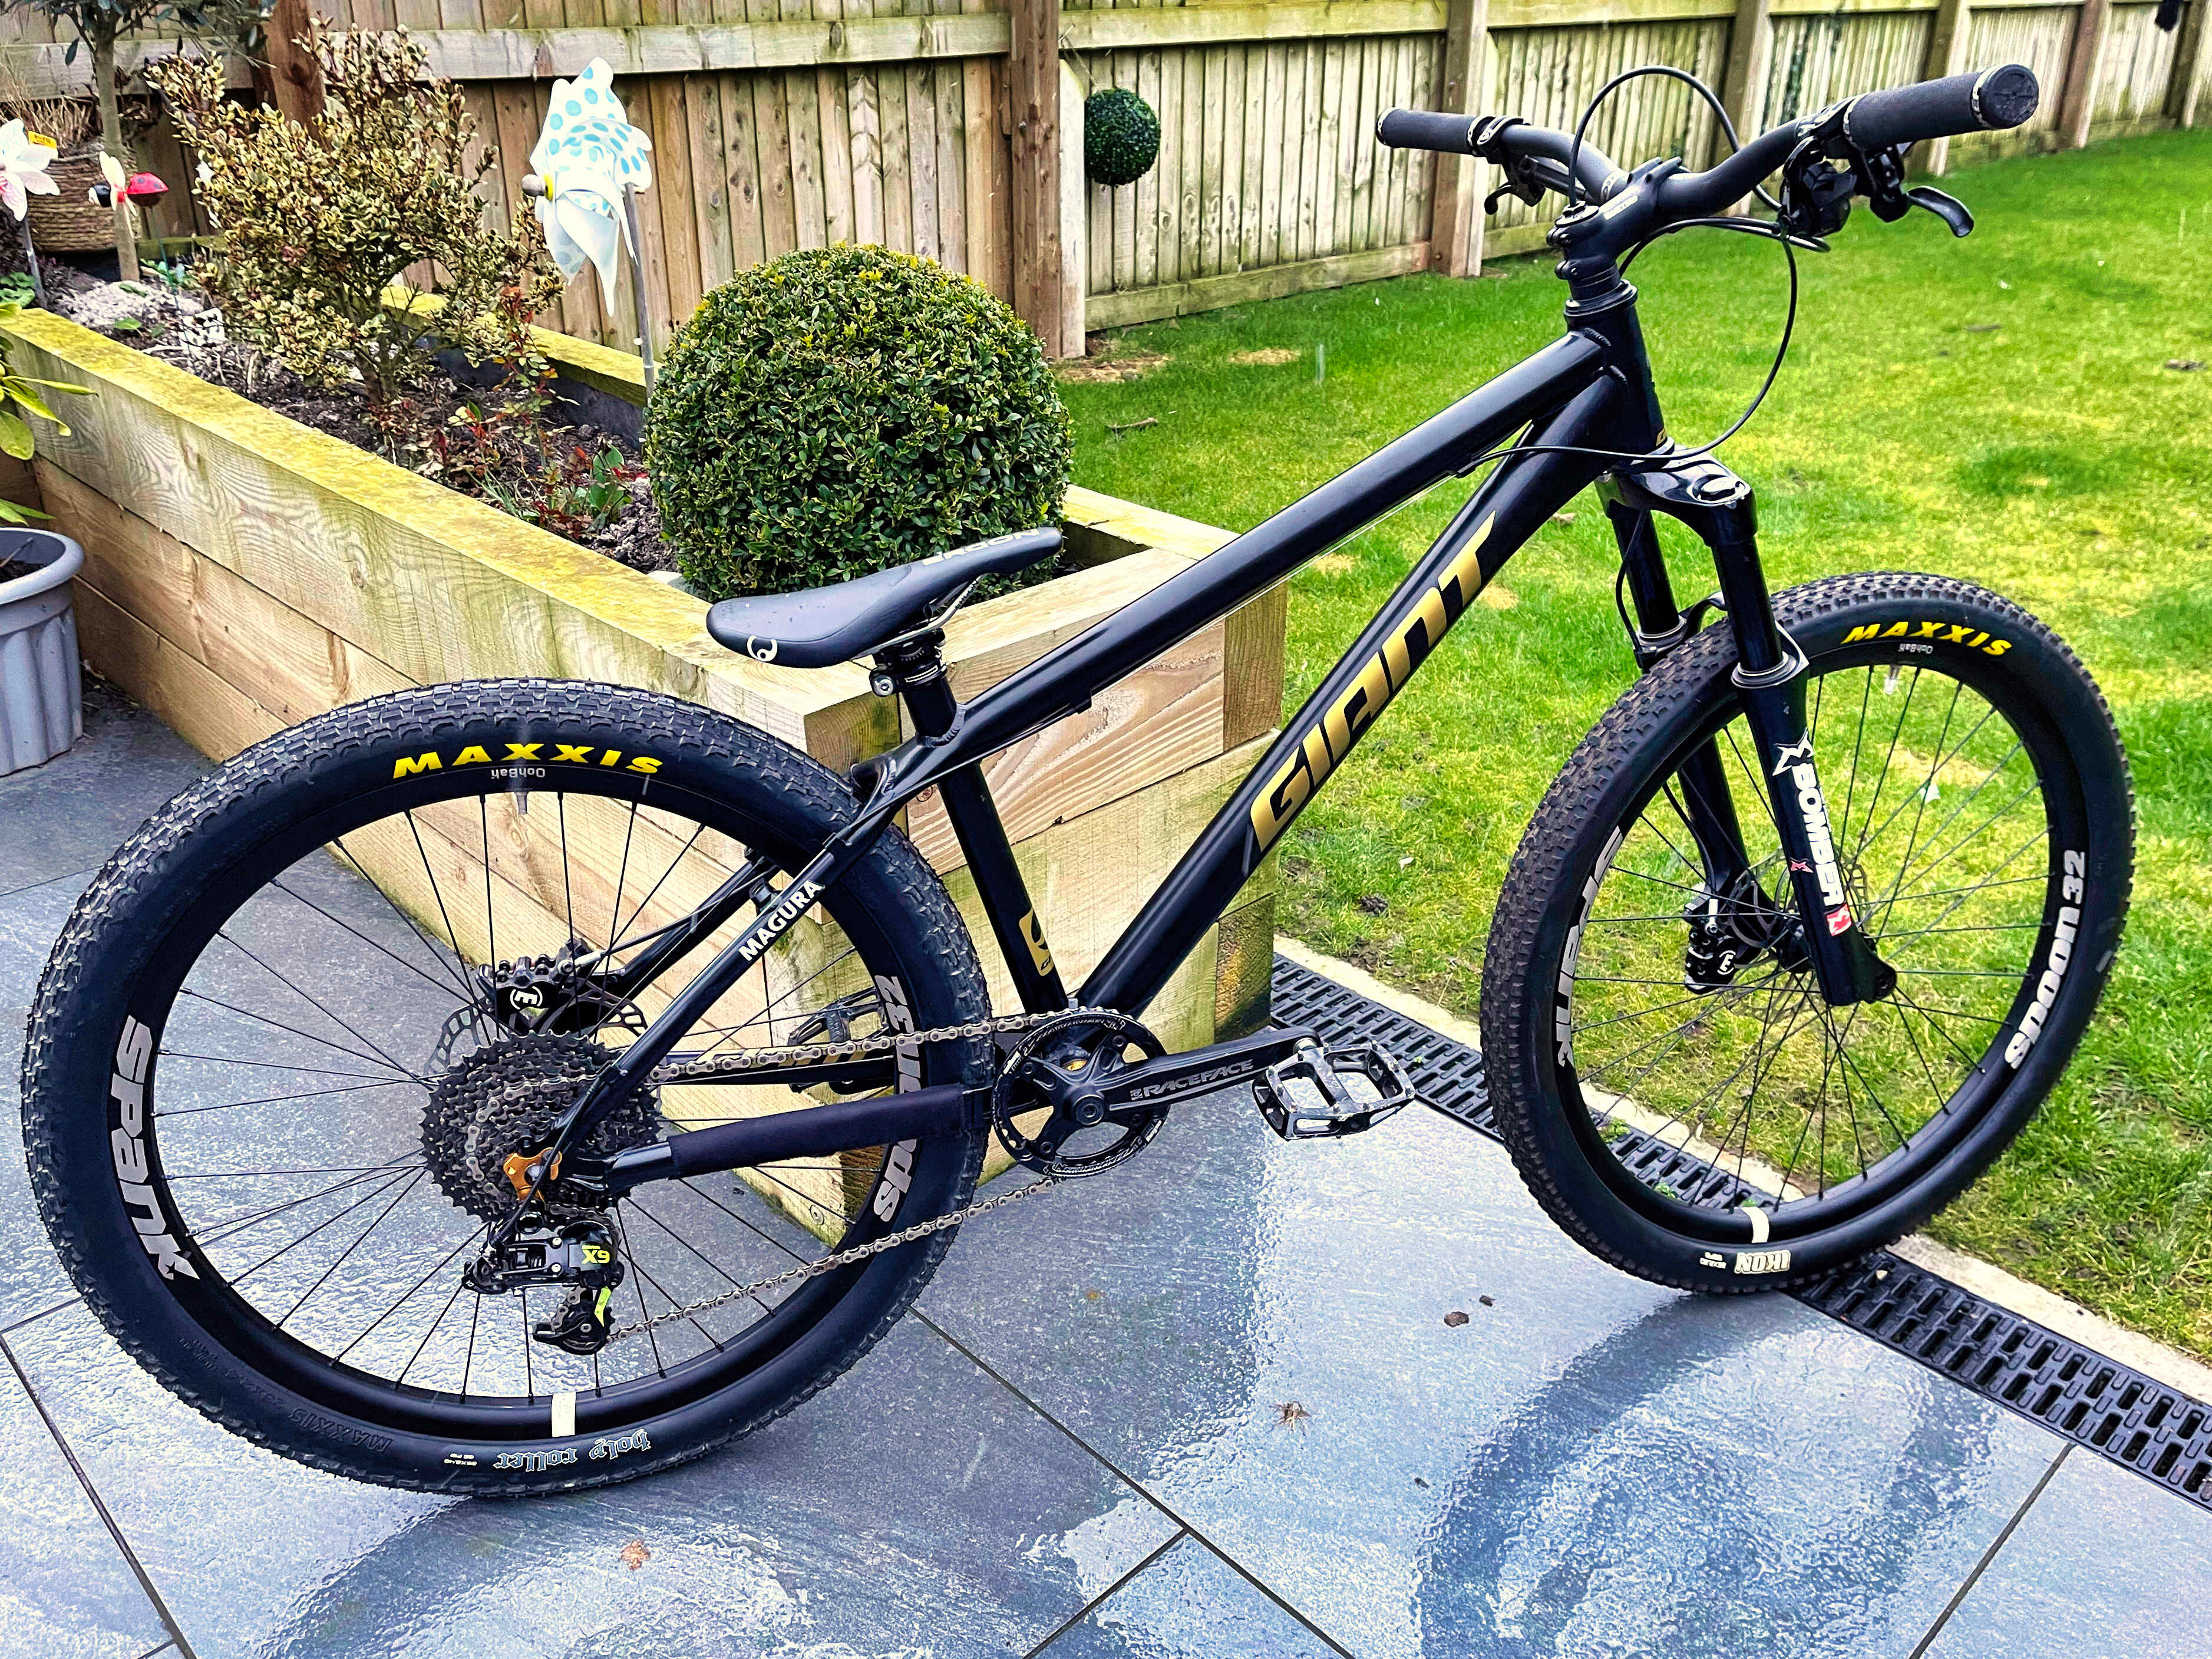
Updated fork decals, rebuilt back wheel around a standard hope pro 2 to accommodate a wide range cassette (10spd ranging from 42t to 11t), sram x9 shifter and mech, hope 34t integrated bash. Can do bike rides on it too now

-
 1
1
-
-
2 hours ago, Ross McArthur said:
Looking good and happy to have helped!
No clutch in the rear mech I take it?
Yes this one has a clutch, I’ll have to see how it handles off road!
-
1
-
-
I can feel the pain the from the XO cranks just by looking at them!
The XX ones with the bash look lovely though. Nice to see ghastly drive chains finally getting cleaned up (which I also thought when Shimano started the shadow range).
-
Better late than never!
After finding myself riding this bike more than any recently and arriving back at the problem of limited gears, I got talking to @Ross McArthur who happened to have some wheels, 12spd cassette along with an accompanying mech and shifter. So the enduro bike got the 12spd gear upgrade (50t to 11t). the old Sram 10spd set up became a hand down to the Giant. I rebuilt the standard Hope Pro 2 hub onto the spank rim so I could run the 10 speed cassette (I contemplated chopping it up to run on the trials hub with 6 gears, but the aluminium spider body on which the cogs attach to where in blocks of three, and the alignment for the trials gear I use would have been a pain). So it now has a range of 42t to 11t.
A quick eBay search and a lengthy series of gear ratio calculations later and I found a hope 34t sprocket with integrated bash ring - keeping things nice and simple at the front.
The gears work flawlessly, and the trials gear lines up nice and straight. That said, I do think if I put it through its paces off road the chain will likely jump off the front sprocket, if it starts to happen I'll look into a clean minimalistic chain guide. But for a casual cruiser with solid trials capability I'm super happy!
Sadly I had to tilt the seat forwards so that the Crown Jewels remained intact, its doesn't look as good, but at least my pronouns are safe.
I also changed the fork decals too (these ones take me back to an era when front sus on a 'trials bike' wasn't unusual)
Which reminds me, if this sort of bike is up your street and you haven't seen Andrei Operas recent Giant STP build and his silky riding you should check it out! His insta handle is @andreitrial
Looking forward to some summer evening rides on this hitting up some good old trials spots en-route
-
1
-
-
On 5/13/2022 at 11:19 AM, Maintenance Justice said:
Cue Flight of the Valkyries music....
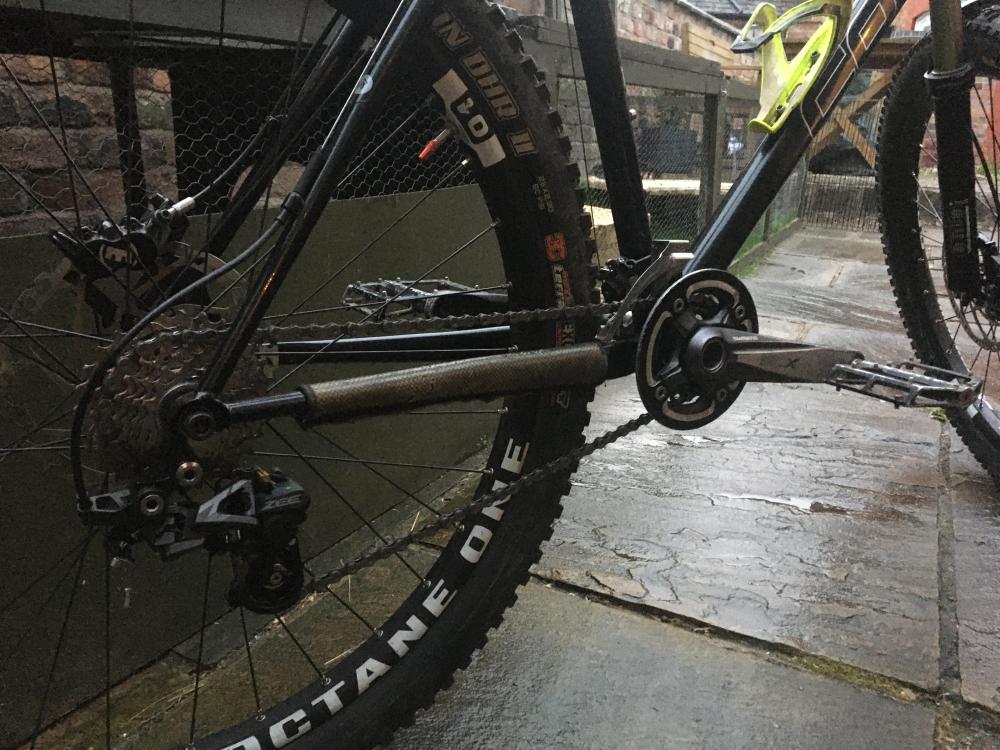
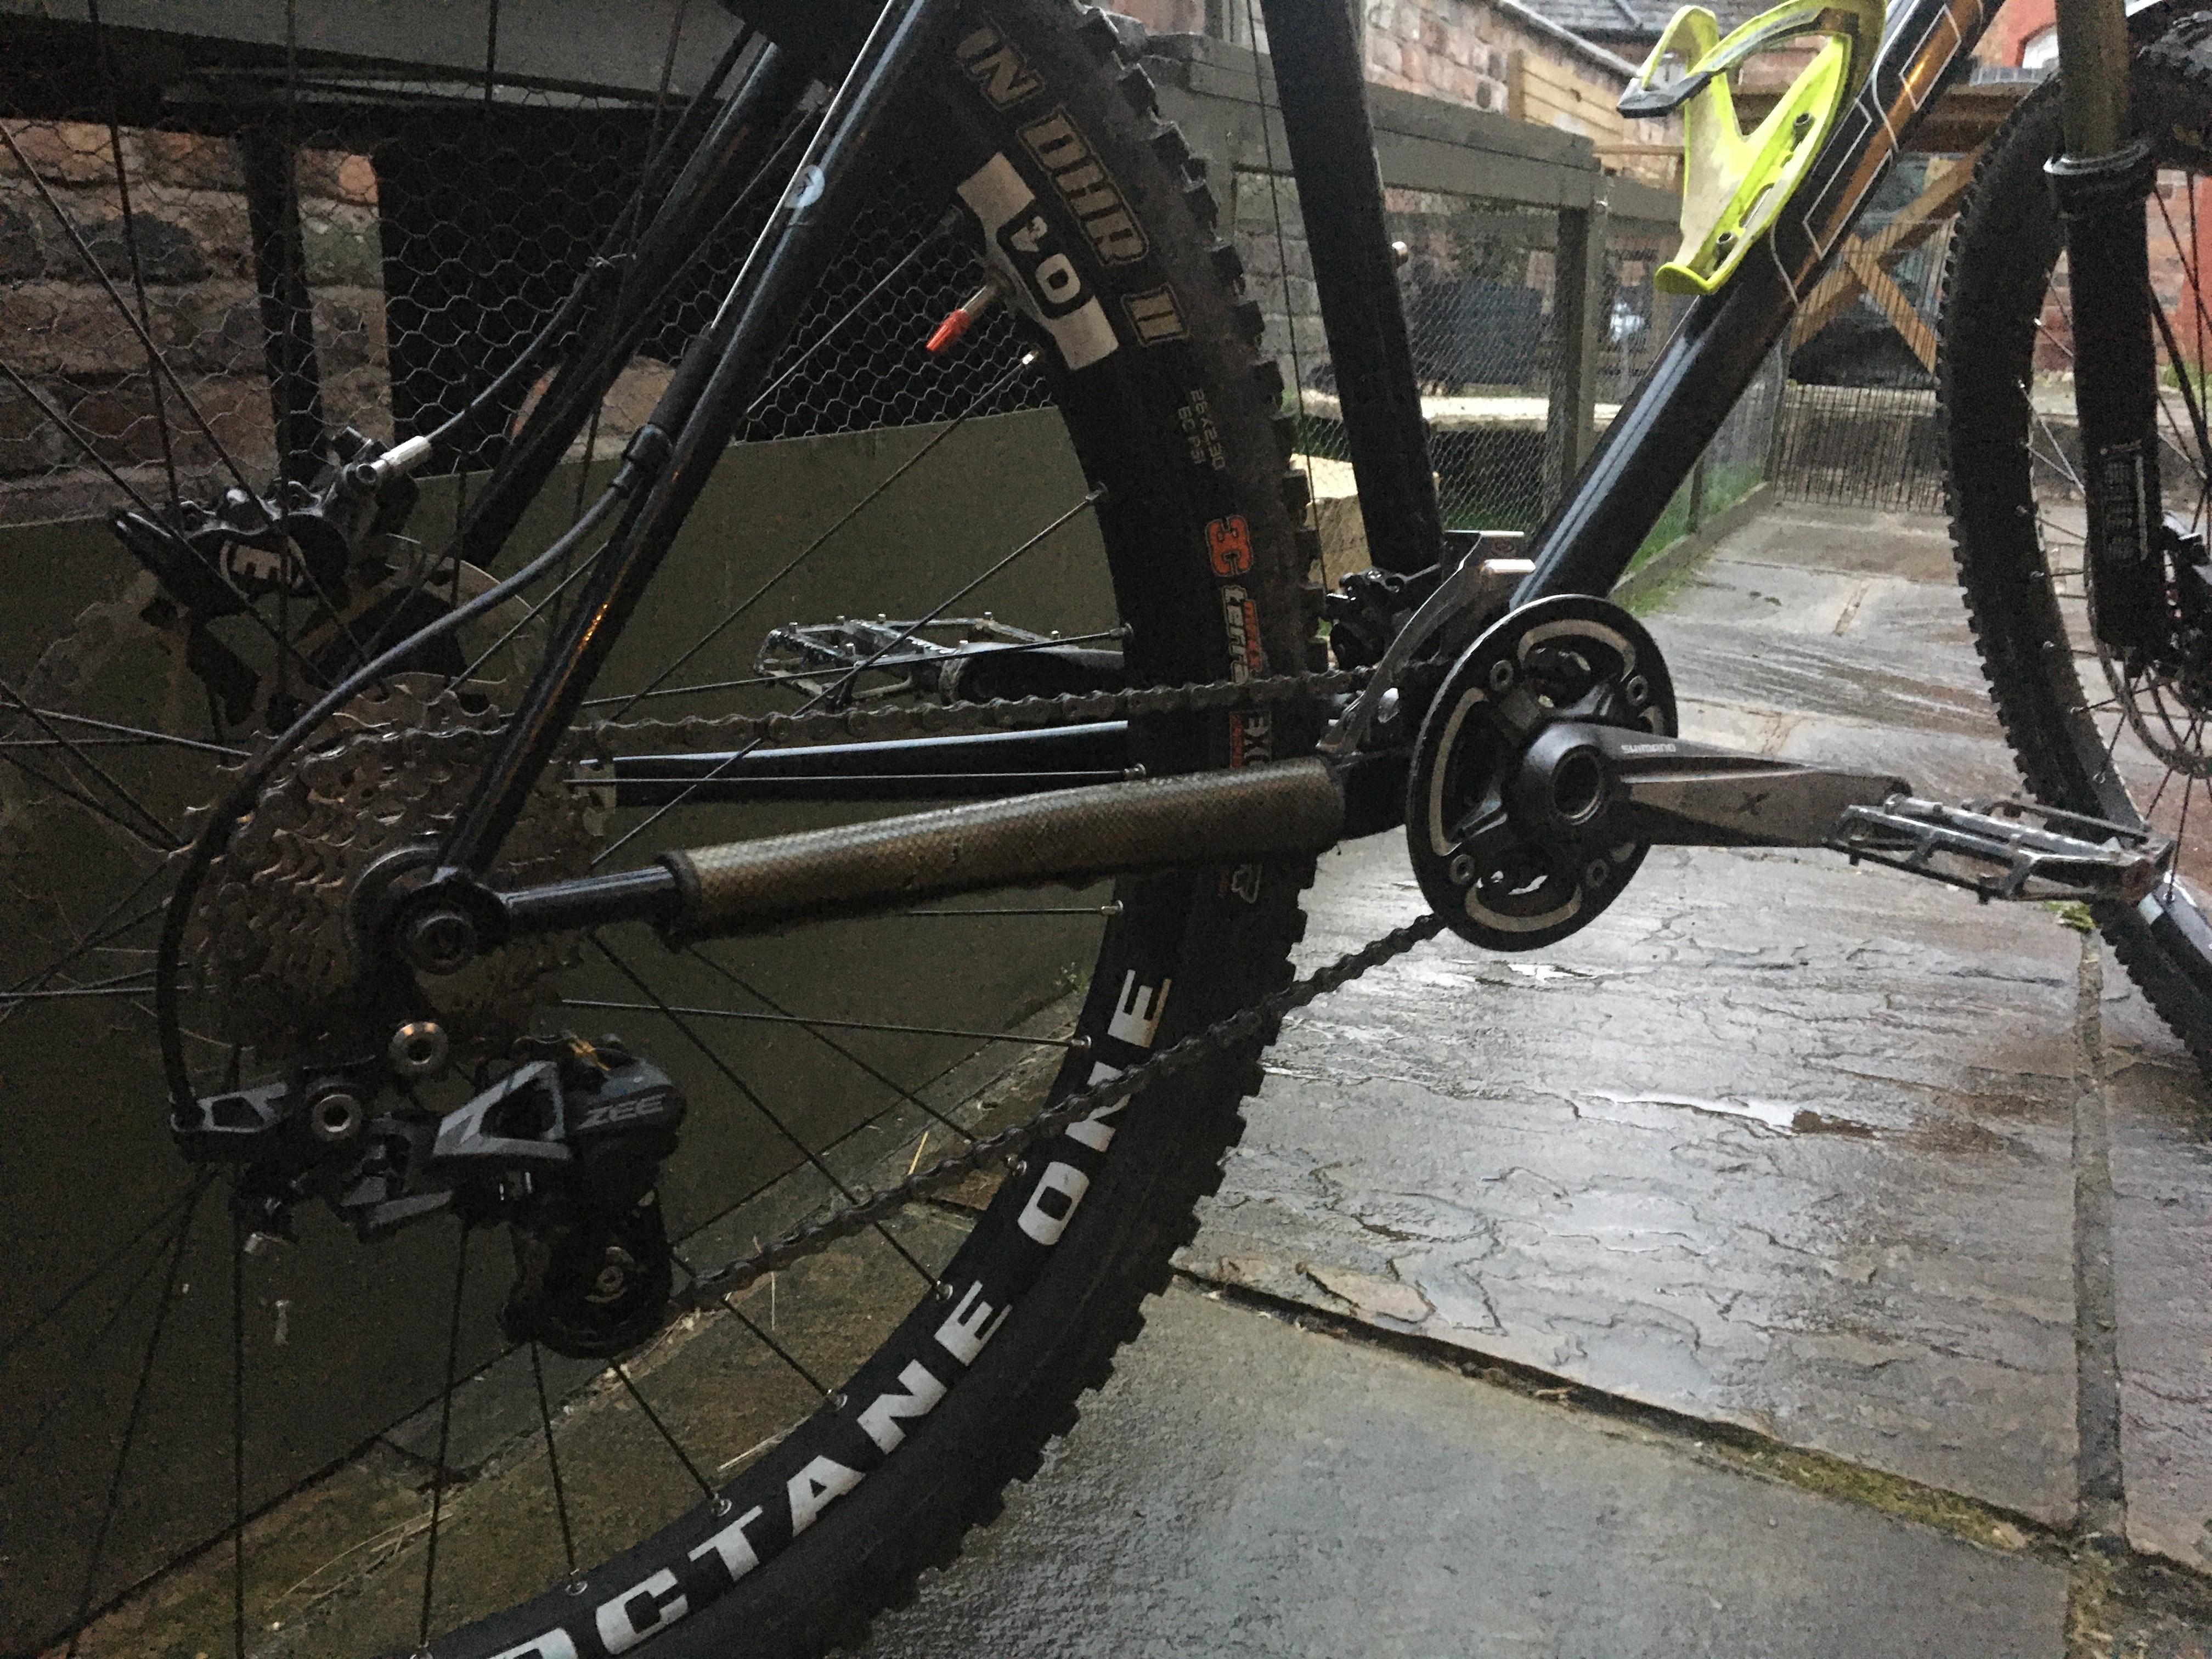
So I have chopped down cassettes and it does work well with a few caveats.
1 - You're going to struggle here with the range you are proposing. The jumps between sprockets will be enormous removing every other sprocket, so shifting won't be ideal. It'll probably work, but be a bit lumpy. As a rule for bikes with derailleurs up front a 16t gap is generally the maximum between chain rings, however chain rings are ramped, pinned and shaped specifically to allow shifting across this range. Cassette sprockets are not, they're suited to shifting with about a 5 tooth difference at best going into the lowest gear (the biggest sprocket) and about 2-3 tooth difference between the mid to high range (smaller sprockets). Also, the lockring of the cassette is a limiting factor, it doesn't get a great purchase on sprockets any bigger than 13t. I've had the best results by ditching the bottom two sprockets and or top cluster, so there are even jumps in the mid-range and the high gear sprocket is small enough for the lockring to get purchase. On my example, it's a Deore 10 CS-HG50 speed 11-36 cassette with the top two low and bottom 11t high sprockets removed (7spd!!). You'll notice that the bottom two high gear sprockets on most of these type of cassettes have their own in built spacer - not using these means trying to space the cassette out with only the plastic spacers they are supplied with, and in my experience it never quite works to get the overlap of the free hub body required to tighten the cassette.
As Adam says you can split a cassette that is pinned, but my preference is a higher end cassette such as XT, SLX or any of the better SRAM cassettes as they contain more individual sprockets / clusters but it's getting hold them that's the issue!
2 - I used a Shimano Zee M640 10 Spd Clutch rear mech with the 'DH' hanger meaning it's rated up to 28T (they are available with a 'Freeride hanger rated up to 36t, but there are like hens teeth to find) which is ideal as that is the size of the lowest gear. These mechs work really well for this as they're designed for DH style cassette spacing, which is essentially what this conversion / bodge is in relation to chain line when using a single speed hub. An VERY important note here:
Because the cassette is sitting closer to the mech, there is less clearance between the chain and derailleur. I found trying to fit the cassette with the two big sprockets meant that as the derailleur swung across, it actually trapped the chain. I therefore opted for a smaller climbing gear and tighter ratio, which worked without issue. I suspect you'll come across the same problem using a wide range cassette. Derailleur hanger extensions are available from companies like Wolftooth which will give more clearance, but your mech will sit lower to the ground and be more susceptible to misalignment
3 - 10 Speed is the way to go in my opinion, the cassettes give enough range and are about right in terms of sprocket spacing to butcher. I've not tried this with 11 or 12 speed.
4 - Lastly, running a single chain ring on the front with an already limited range on the rear means a sacrifice in terms of gearing. 32t is a nice middle ground on a 26" MTB at least. On mine the 28t rear gives a 'good' enough climbing gear and the 13t high gear is enough for trail riding if you don't mind cruising a bit when speed takes over. This ratio of 13-28 / 32 gives some useable trials gears too. I do run a front mech because I want the range and I prefer the ratios that a 22t sprocket gives you for general MTB use but I also have lots of leg bruises from shifters whilst trialing the thing!
.
Wow thanks for the detailed feedback! This confirms some of my concerns and also gives me a bit more to think about. I was adamant I only wanted a single ring up front. Although… what I may consider doing is keeping the 22t for trials, having a 32t narrow wide ring as well but not running a front shifter. I could also them gift for a more conservative cassette range of say 36t to 11t.
Zee derailleurs are kicking around on eBay but as you say seem to be just the DH configuration. I’ll see what I can source and report back on progress.
Thanks again! It’s super helpful
-
On 5/13/2022 at 10:53 AM, monkeyseemonkeydo said:
You might also need to use longer limit screws on the mech to keep things in range but no reason it won't work. Can you stick a mahusive dropper post in there too to give you the option to be able to sit and pedal?
In terms of speeds if you're only going to use 6 I'd find something that uses the chunkiest chain you can while still having a clutch...
I have been considering a dropper post, I run a 170mm dropper on my enduro bike, even at that length though (which is long) it wouldn’t be enough to get up to optimum riding height if at the lowest point in the clamp. It’s does have a lovely Thompson seat post mind
-
On 5/13/2022 at 8:30 AM, AdamR28 said:
Yeah, you can chop a cassette apart. Usually involves grinding the heads off the 3 pins that hole them together.
Shifting won't be great if you have huge jumps, but it will work.
Definitely go clutch, each of the mechs should have a range value listed.
I'd buy whatever you can find at the moment!
@Maintenance Justice to the forum please.....
Thanks Adam, figured I could split a cassette down as the mats what I’ve done with what’s currently on the bike. Clutch is definitely on the cards the cards then!
-
On 3/12/2022 at 5:42 PM, CurtisRider said:
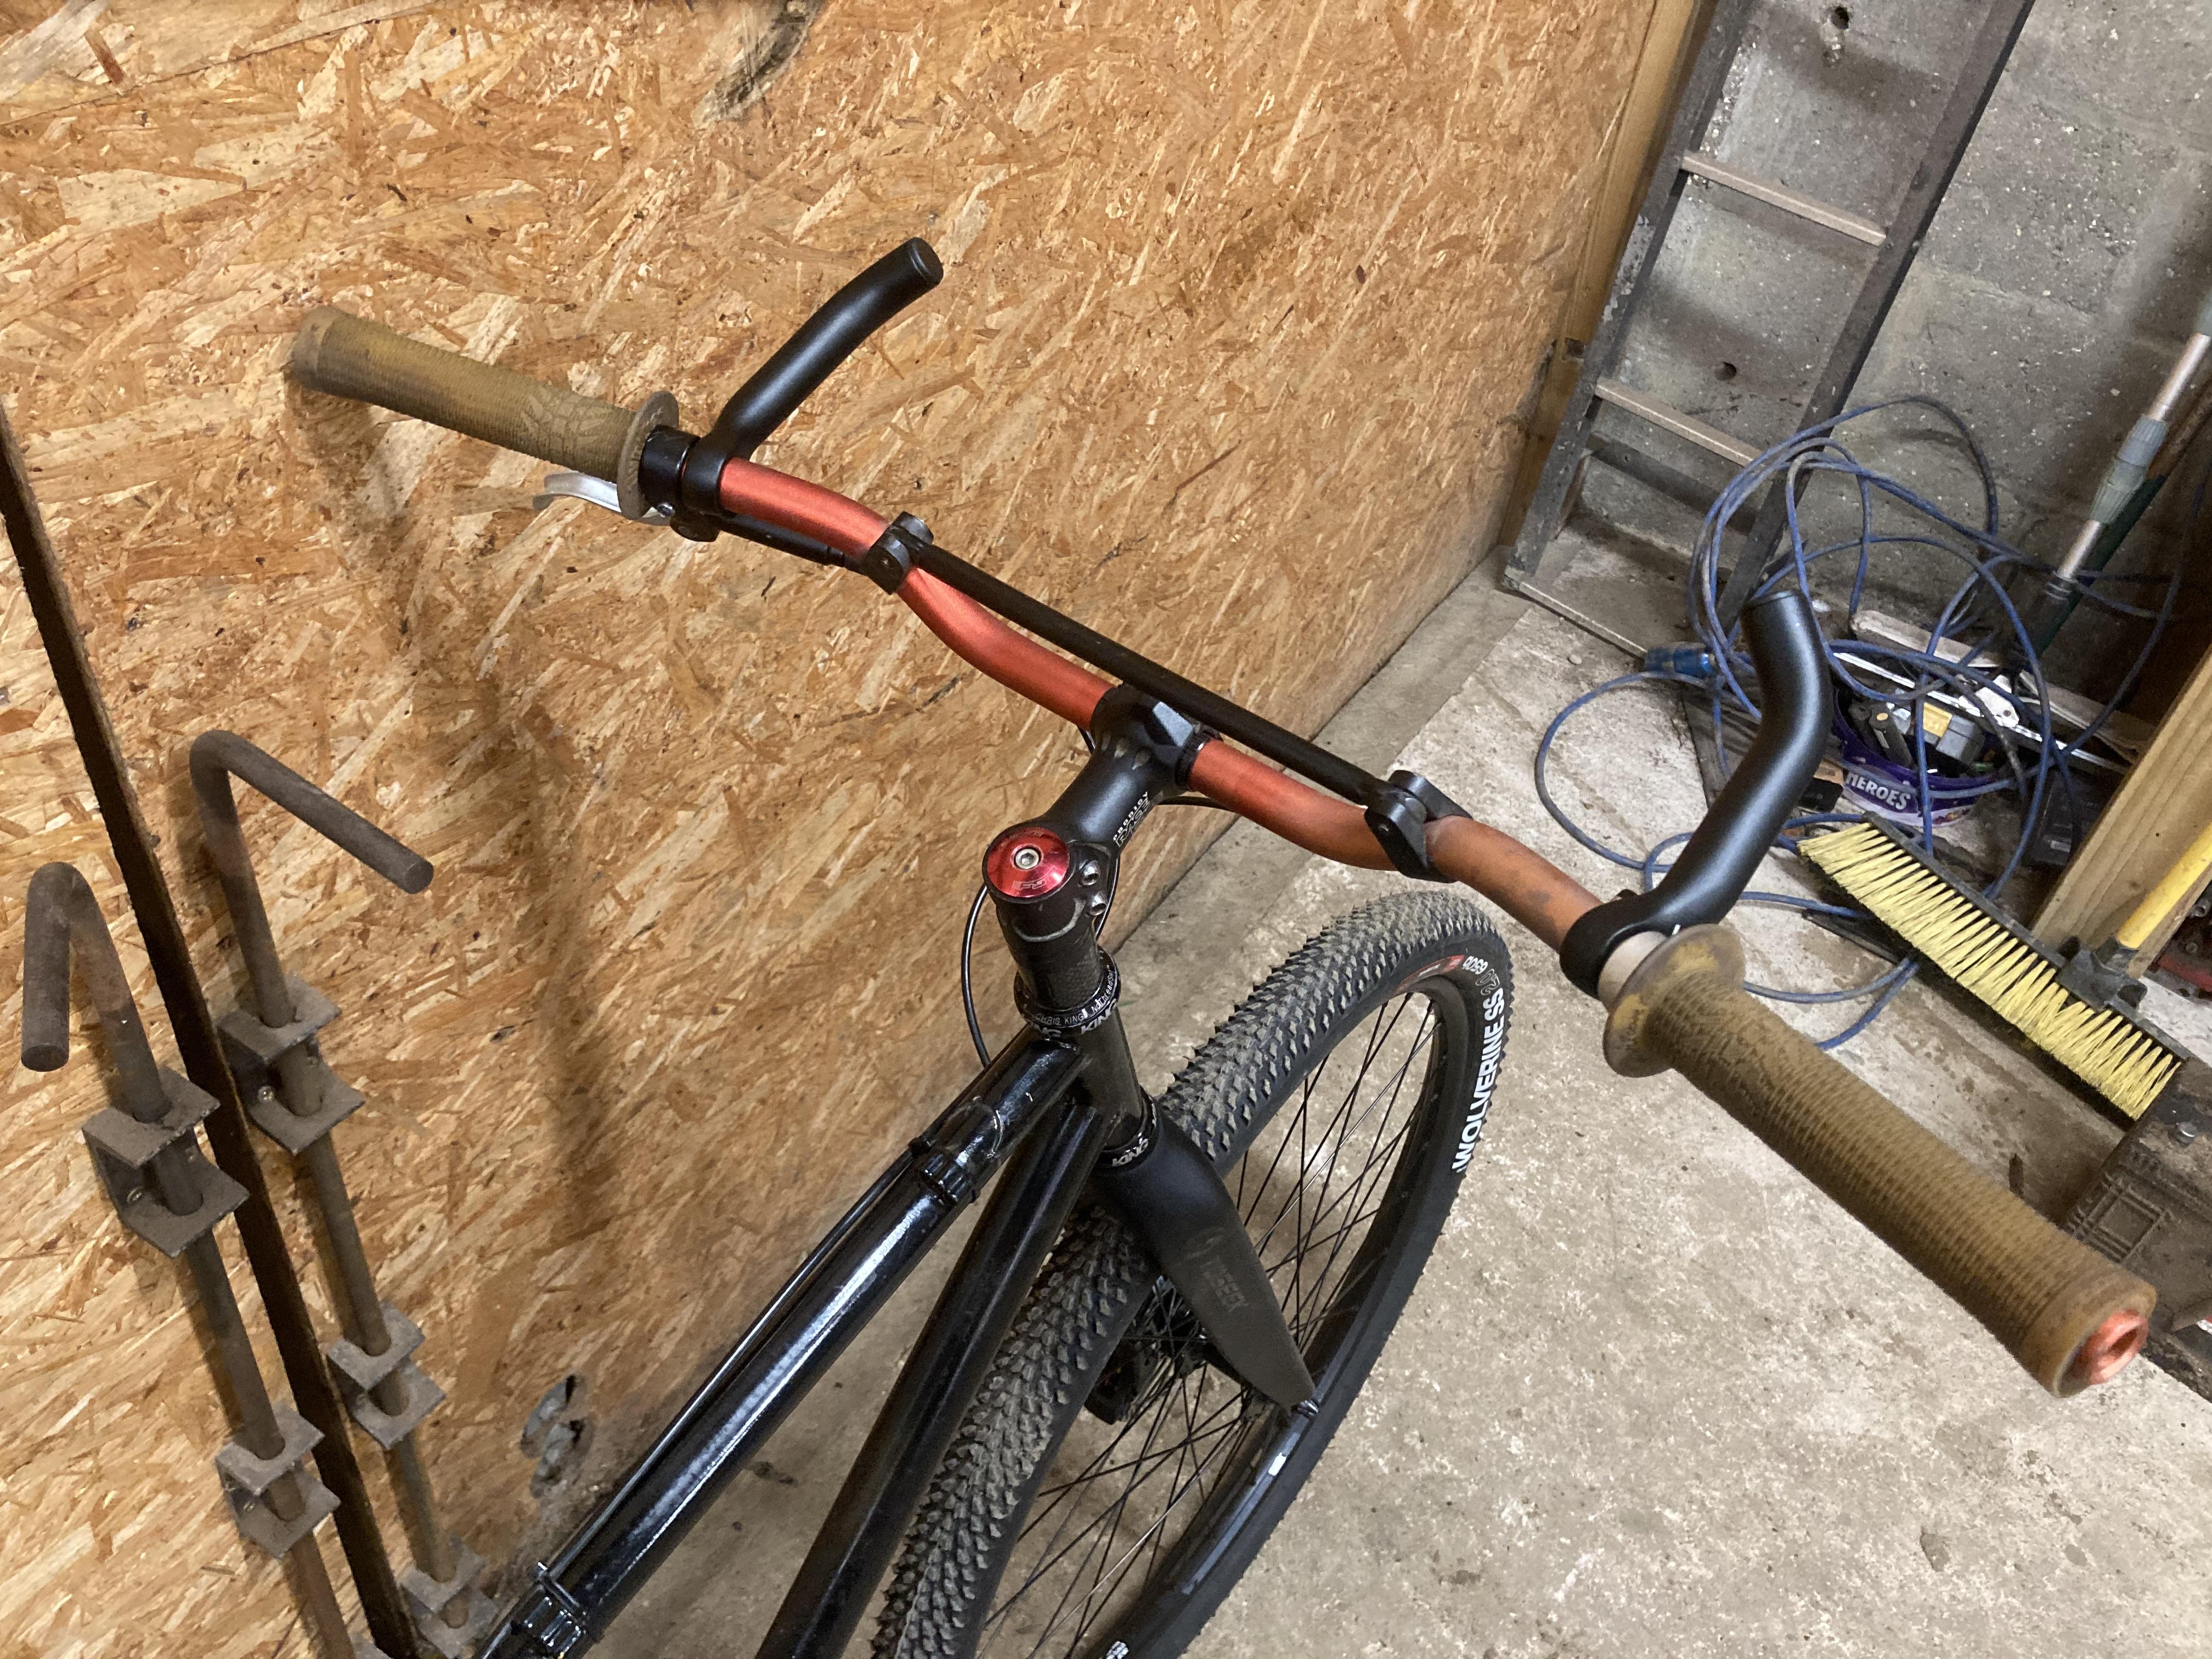
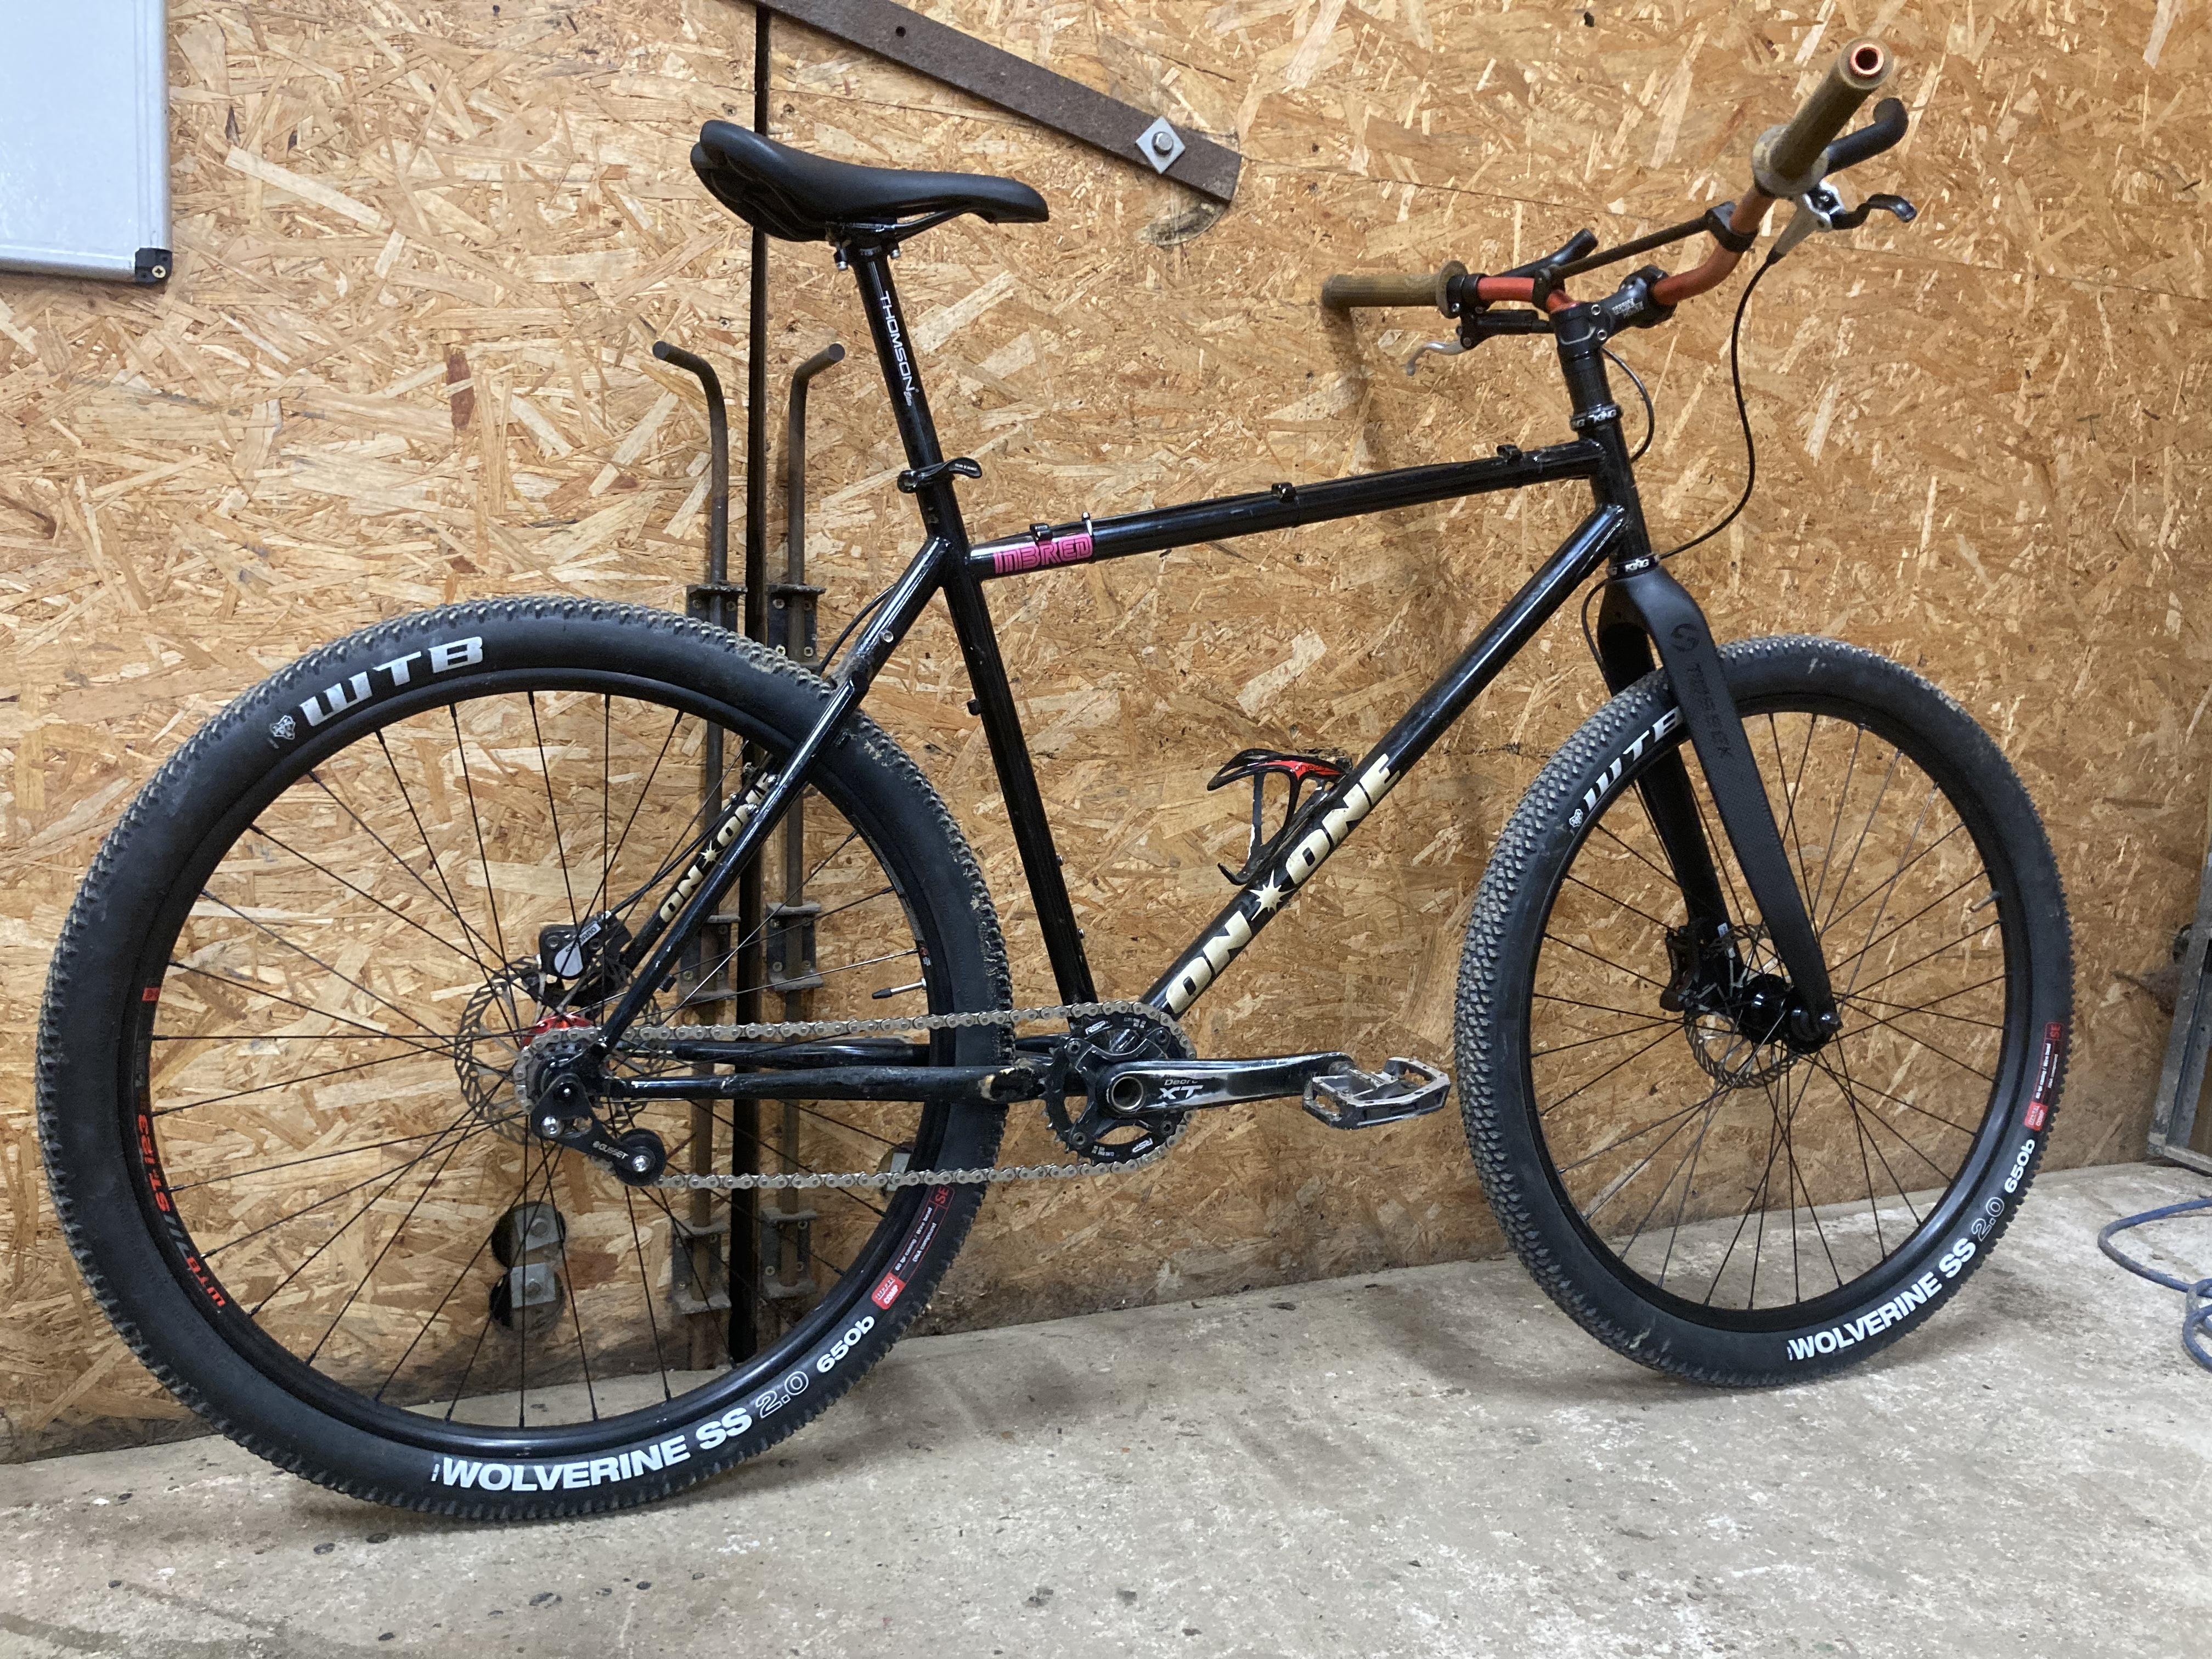
After picking up a 'proper' gravel frameset, my Inbred frame was spare again so I chucked some parts at it. Bars are off a motocross bike I had and they have a decent amount of backsweep, inboard bar ends feel like riding in the hoods on my road/gravel bikes and the 650b wheels feel pretty good in a 26" frame. The carbon Toseek forks are like wet spaghetti, super comfy but I'm a bit worried they are just going to snap so I'll probably ditch them in favour of my kinesis aluminium fork. I took it out for a gentle spin with my father inlaw and it feels really good, I'm looking forward to taking it out on some of the local trails and seeing how it performs then, it feels like a big bmx and very playful

This thing looks a hoot to ride. It’s the kind of rig that doesn’t look out of place anywhere… city streets, a muddy trail or even a bit of a rip at a skate park. Love it.
-
Hi all,
I’m contemplating adding some much needed gear range to my giant ‘do it all’ STP.

I’ve been riding it a fair bit recently and it’s a surprising capable trials bike, but I’d like to get it to a true all rounder (maybe hitting some trails or the odd easy going bike ride here and there, but with the ability to still be a trials bike). The gear range simply doesn’t allow for that!So up front I’m thinking of dropping the 22t chain ring and replacing with 32t narrow wide chain ring and bash guard.
Here’s where it gets interesting… At the back I’m currently running a Frankenstein cassette consisting of 6 gears, which sit on a Hope Pro2 trials hub which only allows for said 6 gears. I’d like to run a wide range cassette, largest cog at 42t, down to the smallest which is 11.
The shifter is shot, so that needs replacing - so here are my questions
1. Does anyone know of any wide range cassettes that can be split down to individual rings?
2. I appreciate the shifting ramps on the cassette are not designed to make large jumps between cogs, but let’s say I buy a 10spd cassette and remove a few mid range cogs, could it work (?) albeit not as smooth as intended.
3. To prevent the chain dropping I think a derailleur with a clutch will be the cleanest way, but is a long cage variant necessary to handle the larger cogs?
4. As mentioned, the shifter is dead and I think a clutch derailleur is needed, so if I’m replacing the shifter and derailleur, would there be any benefit of going 9, 10 or even 11 speed? I think 10 personally as I can’t seem to find a cassette with a 42t cog (let alone one that can be split!).
Keen to get some views on this (ironic I’m asking for advice on gears on a forum where almost every bike is single speed!).
-
On 4/22/2022 at 7:46 AM, Revolver said:
That looks great! Is that 24 or 26?
Dang, that was a year ago... lol
It’s now a 26 - when I bought it, it came with trashed 24 inch wheels. They did have hope bulb hubs, so I sold those to get some money back towards project.
the frame was designed to be a 26. It’s great fun to ride, seems to handle anything I try throw at it.
I am considering running a larger front ring so I can use it for the occasional XC ride too. I’ll still have a bash guard though.
-
1
-
-
10 hours ago, laurent said:
So no clue to solve my problem ? Anyone had this issue and solves it ?
To remove excess air in the system try the following. (This assumes you’ve already gone through the process of flushing the system through with fresh brake fluid)
1. Dismantle a bleed syringe, use the section that holds brake fluid and sit it firmly in the lever having removed the grub screw. You want to ensure that the lever is positioned so that the grub screw hole sits level. The syringe should therefore hold itself upright. At this stage I also tend to use a spanner head to repeatedly tap the brake hose starting at the calliper end working all the way up to the lever, this helps any trapped air work it’s way up through the brake line towards the lever.
2. Add some fresh brake fluid to the syringe, I tend to fill it about a quarter full.
3. Begin to pull and release the lever fully, slowly to begin with - hopefully you will see clusters of micro bubbles releasing into the fluid. Keep doing this for around 30-40 pulls.
4. After this, for the same amount, pull the brake lever fully closed rapidly, then allow release it so that it flicks back into the released position. After this I tend to then to repeat step 3, returning to slow pulls and releases.
5. Remove the syringe - be sure to have a container immediately below to catch the fluid that will leak out of the syringe.
6. Ensure the oil level is brimming at the top before replacing the grub screw. You can add a few drops of fluid if needed.
If all is well, you should have removed all/most air from the brake system. A good way to test this is use the brake and get it warmed up. If the bite point starts to fluctuate, then you still have air in the system. If so, repeat the steps above. If after two or three cycles this isn’t solving the issue, It suggests air is getting in some how, which would be an indication that the piston seals are defective or there’s a problem with the hose/connections.
I hope this helps
-
2
-
-
On 11/26/2021 at 4:24 PM, Szymon said:
Which brake disc to choose for the front: HC or SL.2?Why is HC so popular?It would seem to me that the hc has more surface area to grab, great for on off breaking, where the storm has less which is better for heat management. I run both and the difference for trials has been hardly noticeable
-
1
-
-
2 hours ago, Adam@TartyBikes said:
What a mess. Massi is a moron. FIA a disgrace.
Could not agree more. Massi needs to be sacked. Complete bull pap. Making up rules on the fly - feel like the viewers and Lewis have been robbed. So so annoyed by this. For the record I’m not a huge Hamilton fan, but this was so unfair
-
1
-
-
On 09/11/2021 at 9:14 PM, forteh said:
Yeah, we've got red and black throughout, a fuse board and no consumer unit, well there is one but it's not connected to anything and the fuse board looks older...
We're starting in the house extension in the next month or so and have earmarked a couple of grand from the budget to get the wiring checked over and renewed if needed. God knows how much needs doing or how much it's going to cost though!
If it’s any use as a point of reference, my place is a 3 bed detached. I had about 35 sockets fitted, all new wiring, an earth rod installed, a new consumer unit and all the lights centred. Additionally I had a couple of outside lights installed, a 6 way consumer unit put in the garage and had a room fully skimmed. That cost £5,800 and was the cheapest I could find from a reputable company
-
Also means I’m back in business for another hobby of mine, I play on the decks every night so a few weeks without was horrible
-
2
-
-
I’ve just been through the processes of having my house rewired. What a ball ache. I knew it needed doing when I moved in but put it off until I could release some more funds at my first remortgage.
living between mine and the other half’s parents for just over two weeks with a 9month old baby was difficult!
The house was built in 1956, all the electrics were original. Brown baker light sockets and switches throughout… oh and it was a 2 wire set up, so no earth at all!
finally back in now, it was a mess to clear up, all the new plaster to sand and paint, also had the dining room completely skimmed. It’s been worth the pain though, no longer dealing with a single socket in each room!
-
With zee levers and the MT5 callipers mine lock, then continue to flex. I’ve ran maguras for a long time now across many bikes and feel I’m competent and bleeding them. It took a few bleeds to reduce the sponge feel somewhat, however some does remain. My take is that you can’t completely get rid of it.
-
1
-
-
On 13/09/2021 at 10:18 AM, Lomani said:
which one ?
A standard magura pad that’s well bedded in is great for street. I have jitsie pads on my Marino and Giant STP - these are super granny but the power fades immediately after you feather the brake, I.e doing a manual. I’d say try the standard pads and if you feel you want more bite then consider jitsie/trial tech pads (which are the same)
-
1
-
-
Shimano zee levers work well for me
-
1
-
-
I think you’ll be fine for street riding on an MT4 then
-
2
-
-
1 minute ago, Swoofty said:
I could do a build thread, but way too soon to start one now! I've asked for 'silver;' we'll see what color that comes out to. I asked if i could have it raw, but he advised against that due to unknowns in shipping times. Fair enough. Depending on the 'silver,' I might strip it and go for a see-through cyan like they do on the TMS Silex bikes. Looks like a Jolly Rancher candy with steel inside it. We'll see.
I'm leaning toward this color. It's the color the first BMW M4s came in.
Yeah I asked for a raw finish and a clear coat, they advised against it because it’s not as well protected against corrosion.
silver would look great, but I’m a sucker for that BMW blue!


Spanish BB - Sram GX cranks
in Trials Chat
Posted
@La Bourde @Swoofty thanks guys, really appreciate the advice, which has put an end to hopeful internet searching!
I’ve decided to run the bb with the axel already installed with some middleburns. It’s the cleanest looking set up in my opinion without being able to run the gx’s.
The cranks will need cleaning up, and I’ll likely powder coat them black to match the theme I’m going for with the bike. Build thread to follow!