TomR
-
Posts
2508 -
Joined
-
Last visited
Content Type
Profiles
Forums
Gallery
Everything posted by TomR
-
Since i got my ashton i built my old base back into my DMR Trailstar, for general messing about on really. Just need to decide on bar height then chop the forks and get rid of the nasty spacers. Its running 22-13 which might be a bit easy, but ill soon find out when i start riding it.

-
Jammy b*****d, if i added up what i'd spent on my DMR i could have bought that and loads more goodies! Doh.
-
Ah good stuff, how much did it set you back?
-
Dude thats low. It even made me go 'eurgh'. Nice bike Dave, looks smart!
-
Looks lovely. Bumming anyone at Funn by any chance?
-
Totaly agree, his originality is what interests me most fo' sho'.
-
Liking the escort and the bimmer alpina!
-
I'd been out riding with my old BMX mates and we were sitting by a verge having a drink, my back wheel hanging slightly over the path. Next thing i know i suddenly go flying, "WTF!?" i thought, as i turned round there was some real pissed old paddy guy rambling on about bikes on the path being in the way. Anyway we followed him home for a laugh, he was weaving all over the place, finally got home and his wife went MENTAL at him!
-
Usually- Debenhams TK Maxx H&M Next Interpunk.com Smartpunk.com Stifsports.co.uk The surfy shops in Xscape @ MK (quiksilver, oneill etc)
-
Jesus Christ Jenn!
-
I got votes, woohoo!
-
Tut tut, slacker!
-
Yeah you're right, Tarty just PM'd me and i'm about to edit. I wrote this thing ages after i did it and got them the wrong way round.
-
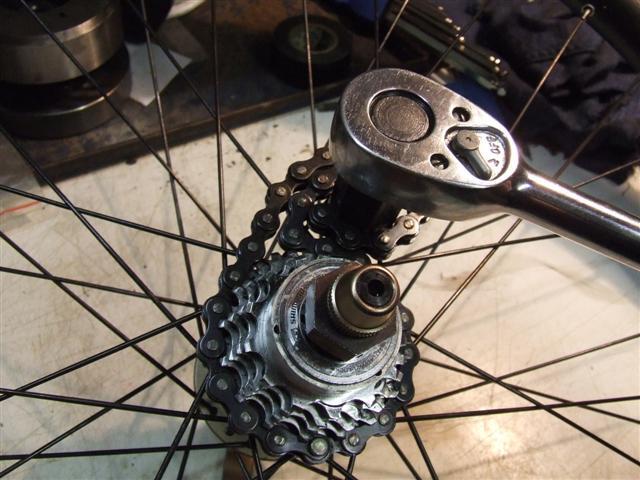
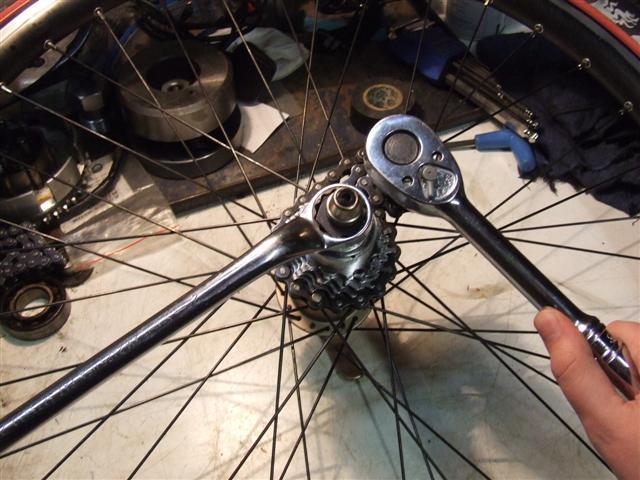
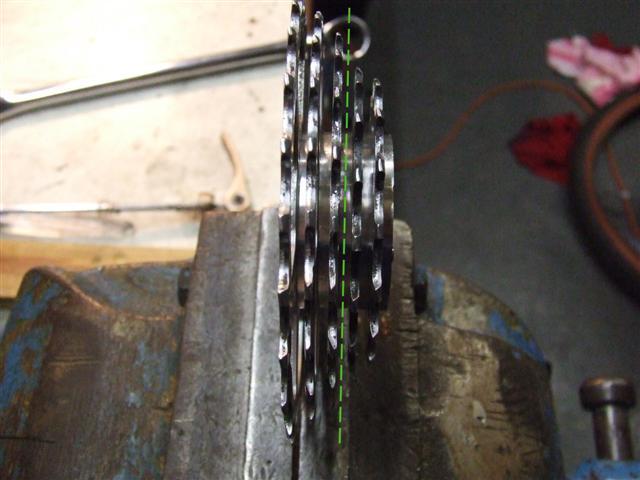
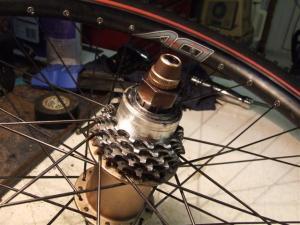
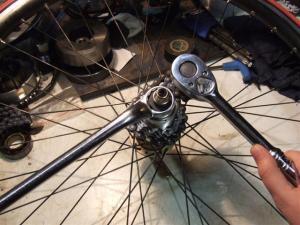
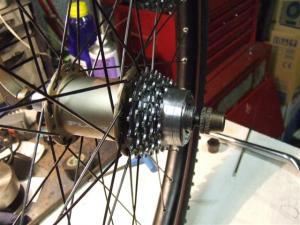
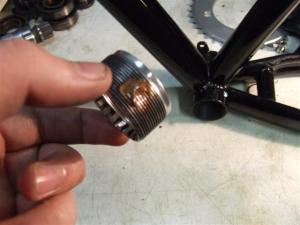
How to: Remove, refit and strip a cassette. What you’ll need: (for removal/refitting) Chain whip (or an oil filter tool assuming it has a chain) Cassette lockring tool Spanner that fits the cassette tool (mine was 24mm) Socket wrench (to strip it down) 1.5mm allen key – if your cassette has rivets through it either drill it out or hacksaw between the sprockets through one of the spacers Spare cassette spacers Method: Take the wheel off and remove the end of the QR skewer. Insert the cassette lockring tool into the lockring and refit your QR skewer to hold it in place (this helps a lot when you’re putting every last bit of effort into undoing the blasted thing). Put the chainwhip round the largest sprocket you’ve got (or only sprocket you’ve got if you run SS…) making sure it stops the freehub moving when you pull on it – bearing in mind you’re turning the spanner on the lockring tool anti-clockwise) Put the spanner over the lockring tool (ring spanners are easiest I find but anything will do) and if you do them up as tight as I normally do, heave like your life depends on it. You should now have removed your cassette. If you’re not lucky enough to have 1.5mm allen bolts holding your cassette together, drill the back of the pins/rivets out or hacksaw between 2 sprockets as below. You should now have a bunch of spacers and sprockets. Reassemble the cassette on the freehub body(or add your SS kit if you're adding one). Whichever sprocket you use most frequently, aim to have this dead inline with your chainring so the chainline’s nice and straight. Fill the space of whatever sprockets you removed with the spare spacers and replace the lockring. Et voila – you should now have something like this: If anyone spots any errors or has a better suggestion on how to do something, PM me and i'll edit.


-
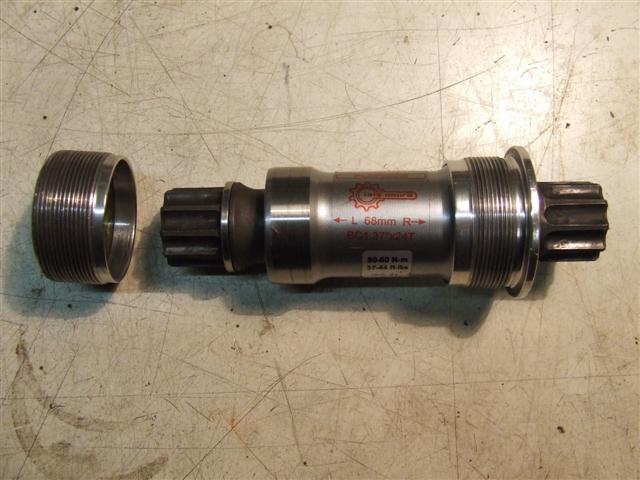
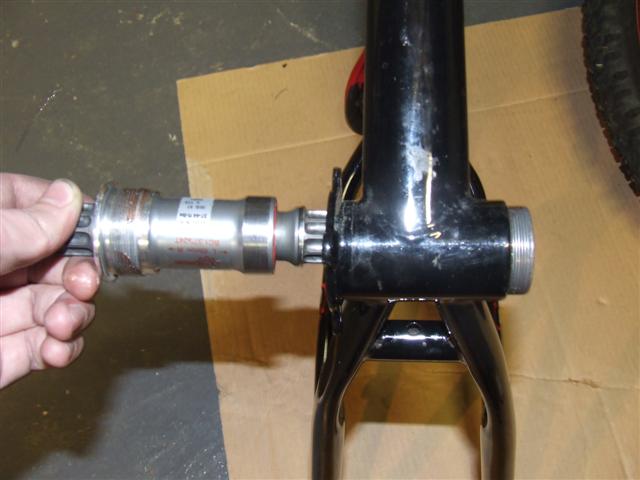
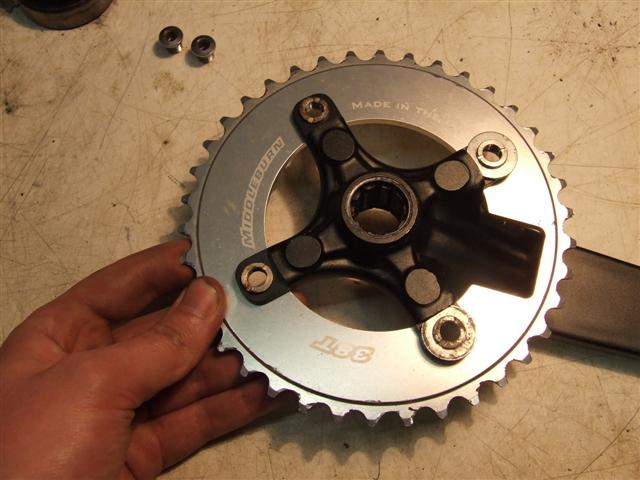
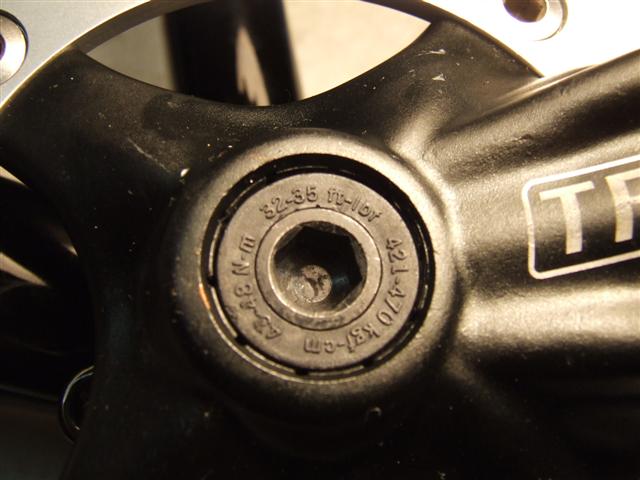
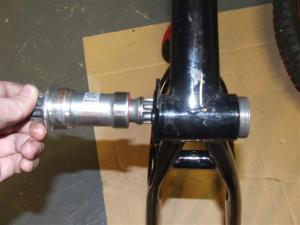
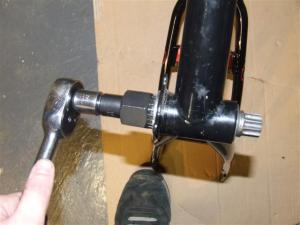
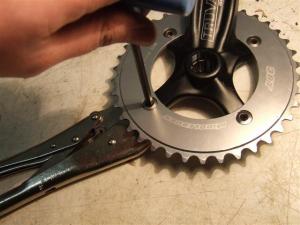
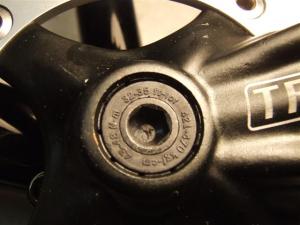
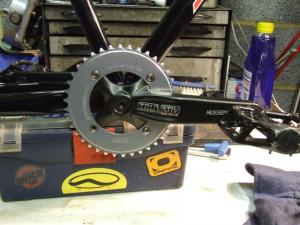
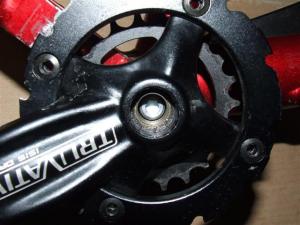
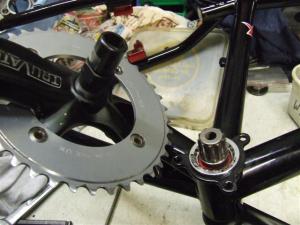
How to: Fit a bottom bracket, chainring, cranks & pedals. What you’ll need: Bottom bracket tool (Make sure it clears the washer on your BB if there is one, I had that problem) Socket Wrench/Torque wrench 8mm allen key/socket bit for the wrench 5mm allen key Mole grips/pliers Grease Method - BB: While it’s in pieces, clean the threads up best you can, and old toothbrush and some white spirit will do fine. Taking note of the L and the R indicating the orientation of the BB in the frame take the threaded collar and put a blob of grease either side of it, don’t bother working it into the threads, it’ll do that itself when you screw it in. The left hand (non-drive) side is a regular thread, meaning you turn it clockwise to do it up. Screw it in half-way by hand. Note: When screwing things in, especialy into anything remotely expensive, turn the bolt/nut/collar/cup as if to undo it until you hear the start of the threads drop into place with a small 'click' before you proceed, this'll help prevent crossthreading it. Take the remainder of the BB unit and grease the threads, screw this in fully and tighten with the wrench and BB tool, Drive-side is a left hand thread, turn it anti-clockwise to do it up. If it starts getting stiff, wind it back several turns and repeat. If you know the recommended torque settings, torque it up, if not then do it as tight as you can with the socket wrench by hand (note: by hand doesn’t meaning leaning all of your weight into it or jumping up and down on the end of it). Now this is in, tighten the other (non-drive) side. Method – Chainring: Put the chainring over the spider and push the back of the chainring bolts through. If theyre too long, do as I have and find some washers, grinding/filing a flat on one side so they don’t foul the step on the spider. Note: Be careful if you use a grinder, it’s very easy to let go of a washer and get it jammed down the front of the wheel, and trust me, you don’t want however many thousand RPM of grinding wheel hurtling towards your gonads. That’s before you even consider slipping and grinding your fingertips – best use some mole grips/pliers. Grease the threads and screw the bolts in. You should be able to tighten them all the way up without trouble, but if they start spinning in the back, get the mole grips/pliers. Method – Cranks: Get a blob of grease on your finger and smear it on the splines of the BB axle (this will stop it creaking/seizing up) then put the crank arm on the axle. Grease the threads on the bolt and screw it up. Repeat for the opposite side making sure they’re in line with each other. Now they’re both on you can tighten them up. These had the torque settings on the bolt seals: 32-35 ft/lb 43-48 n-m 421-470 kgf-cm If you don’t have a torque wrench, do them as tight as you can with an 8mm allen key. Note: Don’t forget when you’ve finished with the torque wrench to wind it back to zero else you’ll constantly be keeping tension on the spring and it will become inaccurate with time. Method – Pedals: Again, these have an L and an R on the ends of the axles as they have different threads for each side. Non-drive side is a left hand thread. Put a blob of grease on the threads (as with just about everything in this how-to) and tighten the correct way. Do them nice and tight, you don’t want them falling off – and honestly, how often do you actually check your pedals aren’t coming loose? All 3 piece cranks (crank arms being a piece each, axle being the third) the threads are 9/16”, 1 (and I think 2 piece) cranks as found on cheap BMX’s generally have ½” threads, Just in case you’re reading this and about to put your old MTB pedals on your cheap BMX run around. Et voila! Cheers to Adam@TartyBikes.co.uk and Trials_punk182 for the corrections and additional info . If anyone spots any errors or has a better suggestion on how to do something, PM me and i'll edit.


-
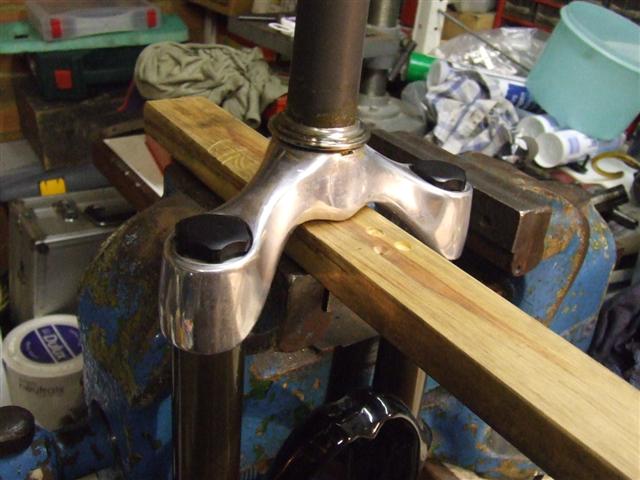
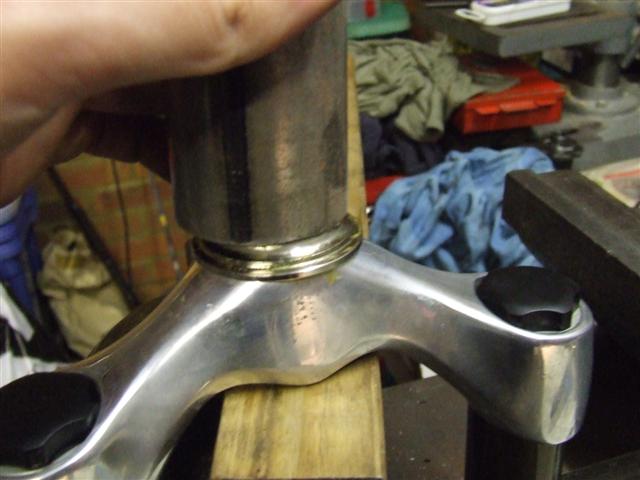
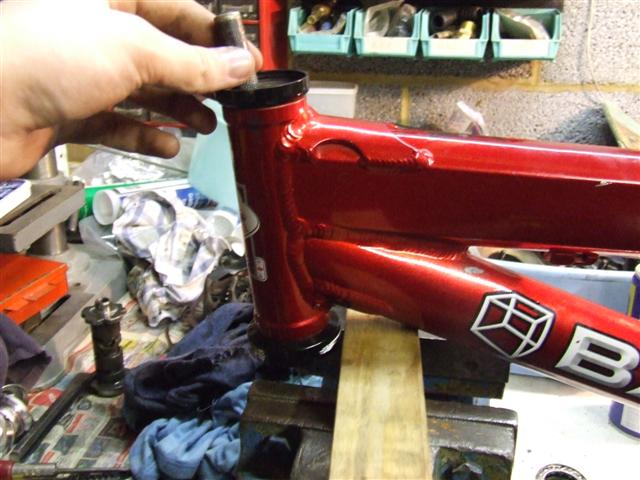
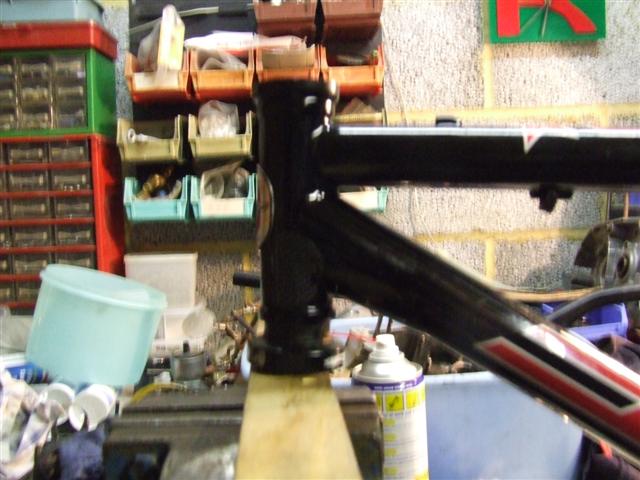
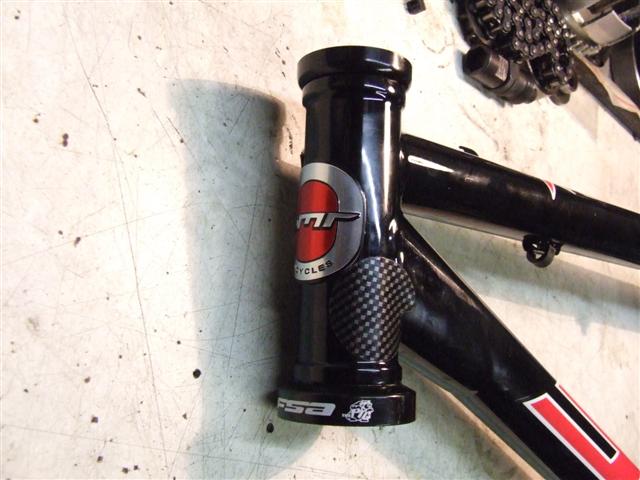
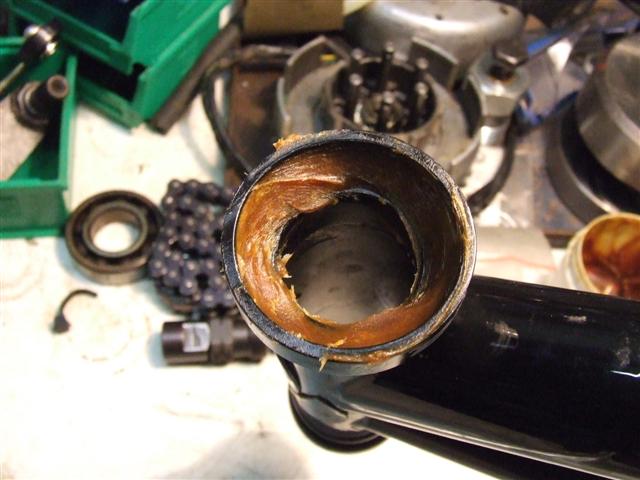
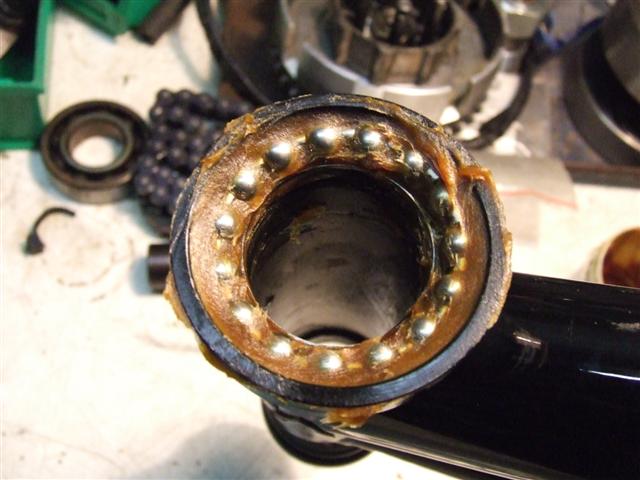
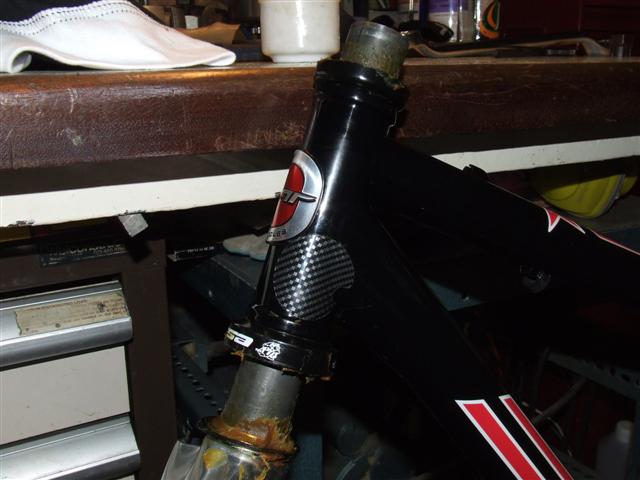
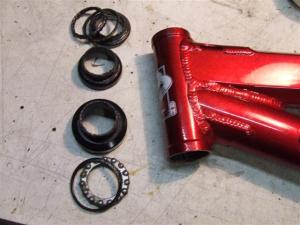
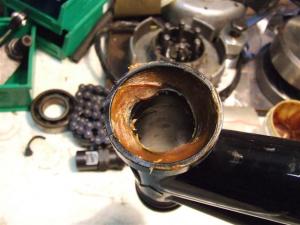
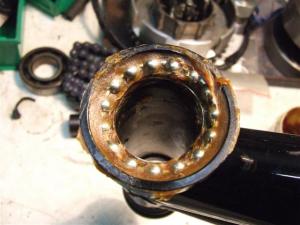
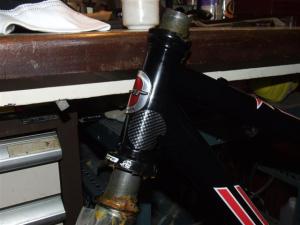
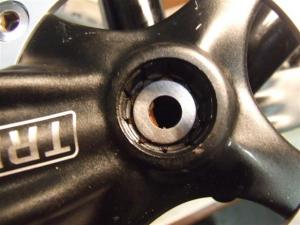
How to: Remove & Fit a headset (frame and forks). What you’ll need: 5mm allen key (and a 6mm if you run a headlock gadget) Large punch Hammer Nylon/rubber mallet A couple of bits of wood Nice thick grease Preferably someone to help Method - Forks: Remove your bars and stem, and with the mallet give your steerer tube sharp but not too hard taps in various directions, this should make removing the wedge stopper thingymabob in your headset a lot easier, as opposed to just trying to pull on it or get it out with a screwdriver. Remove your forks and whatever bearings/seals are in the headset, remember which order they go in and which way the bearings face! If you’re changing the forks or installing a complete new headset, read this part. If not just skip it. Remove your front brake and wheel. Clean the forks up and flip them upside down so the legs are pointing up. With the hammer and punch give some sharp taps round the edge of the bearing race (Ie left, right, front then back) to ensure it comes off straight. Get the new forks and existing bearing race (or vice versa) and clean it all up. Put the forks over a piece of wood on the vice or other solid object like below (get someone to hold them if possible). Put a smear of grease round the inside of the bearing race and place over the steerer tube. You can use a punch or a large flat bladed screwdriver for this bit, but I find it easier with a bit of metal tube. As with removal, give sharp taps round the bearing race to re-fit, when it’s done hold it up to the light to check its seated correctly. Method – Frame: With someone else holding the frame steady, place the frame over the piece of wood on the vice/solid object. Put the punch down the head tube, and give some hefty taps round the inside of the lip like before until the cup drops free. Flip the frame over and repeat. Health warning! If you can, use a nice heavy hammer and a bloody long punch, the punch I used was a bit short and slipped, resulting in me crushing my thumb between the headset cup and a 2lb ball-pane hammer – not nice! Take the lower cup and the frame you’re putting it into and smear a bit of grease round the edge. With your glamorous assistant holding the frame up (if you’re sad like me) line up the text/logo on the headset as you want it. Get the hammer/wood or a decent nylon/rubber mallet and smack like mad until it’s seated correctly in the frame. Repeat for the upper and hey presto, you’re done. When it comes to fitting bearings I think I’m pretty oldskool in the fact that I cocoon everything in sight with huge amounts of the thickest grease I can find. Get a big blob and smear it round the upper and lower cups, put the bearings back in the correct way round then smear even more grease over the top. Cake the bearing race on the forks with just as much and refit your forks. Slide whatever seals, races and covers you have back over and re-fit your stem and top-cap, then go forth and ride the thing. If anyone spots any errors or has a better suggestion on how to do something, PM me and i'll edit.


-
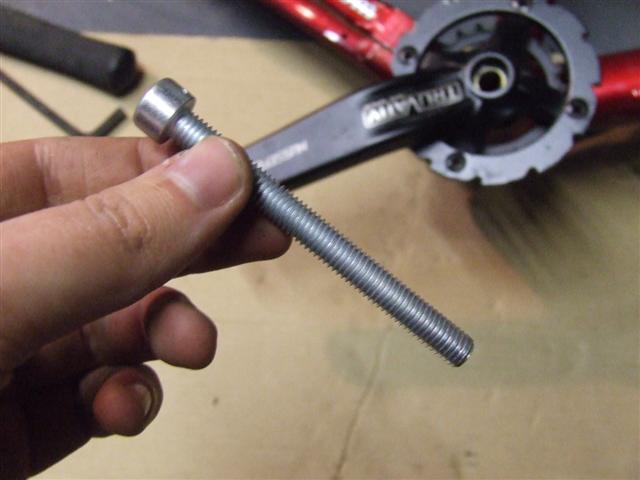
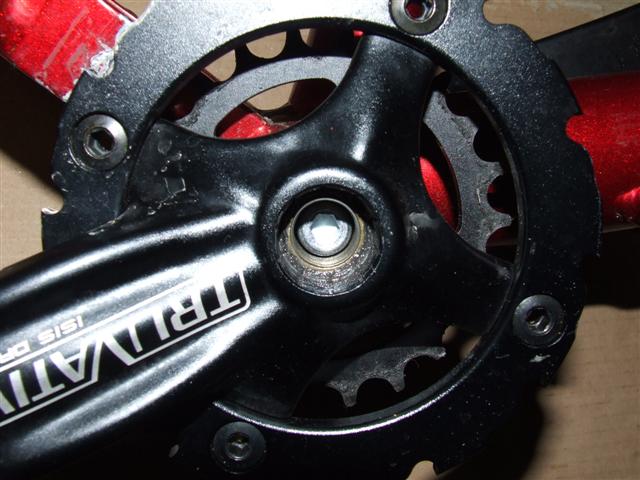
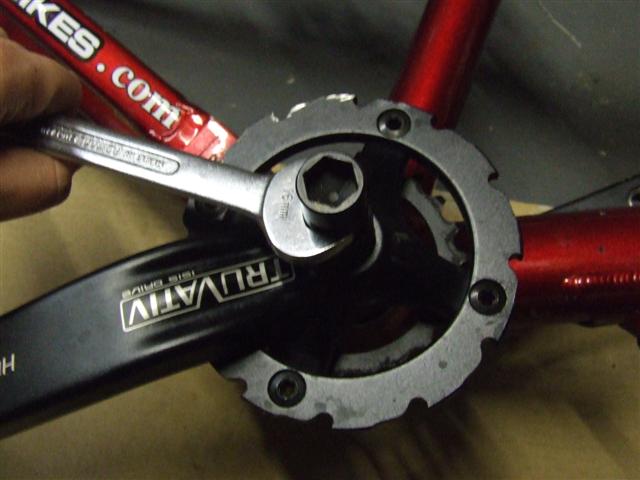
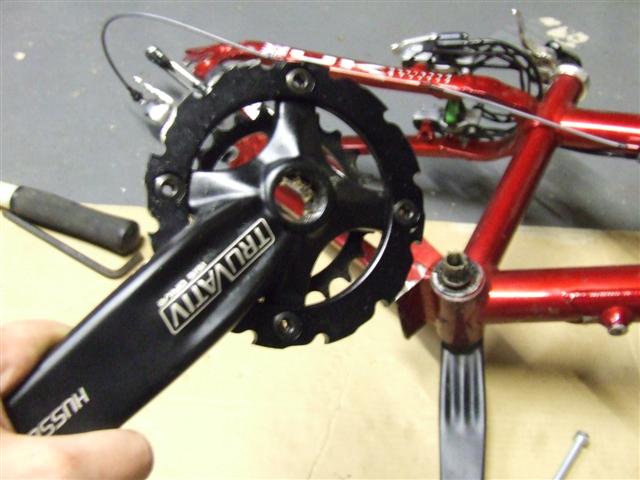
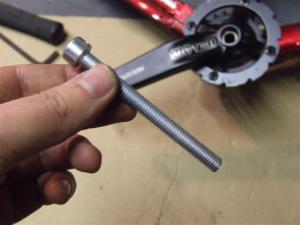
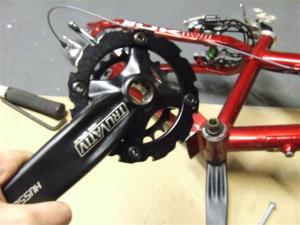
How to: Remove a pair of ISIS cranks using a crank puller designed for a square taper BB. What you’ll need: Crank Puller (Designed for use on Sq Taper cranks/BB’s) 8mm Allen key Bolt or washer – see below for info on size 16 & 18mm open ended spanners (or an adjustable) The problem you’ll encounter when removing ISIS cranks with a tool designed for square taper cranks is pretty simple, the diameter of the axle is much larger and the end of the tool goes straight through the hole in the axle as opposed to pushing against it, which in turn pulls your cranks off. Method 1: With the 8mm allen key, remove the crank bolt on the side you wish to remove (If you’re removing both, remove the side you’re doing first and make sure you leave the bolt in the other side. When it comes to doing the other side just replace the bolt on the opposite side). Find a long bolt, less than the Dia. of the hole in your axle & roughly the same length as your BB axle width (minus a few mm for the bolt that’s still in the other end). Put it down the hole, It should come to round about the same place as the end of the axle. Insert the tool as usual by screwing the lower part into the threads on the crank, then tighten the top part down, assuming you’ve used a wide/strong enough bolt, it should press against it and remove the crank arm like it’s supposed to. Method 2: Assuming you can’t find a long enough bolt or other suitable bit of metal to fill the hole for method 1, get a decent width washer which Dia. is less than that of the splines on the crank arm, but larger than that of the hole in the axle. Stick it down with a blob of grease, blu-tack or whatever else is to hand, then proceed as normal. You can all thank me for saving you £6 or so for another crank tool later.

-
Badum ching...!
-
I was reading through MBUK and saw an advert for a bike with a quote from Justin Loretz and though 'shit, is he back or something?' but appears not. Where did he get too?
-
It differs for different items. Check the Revenue & Customs website (http://www.hmce.gov.uk) and theres a downloadable Pdf that lists everything you need to know.
-
Some people do talk nonsense. And as for the changing lanes, it does work. Yes they can still check your speed across lanes, but due to the amount of funding they had to test these things, they weren't tested properly when measuring speeds across lanes, therefore you cannot be prosecuted.
-
It cost about double that IIRC, but thats including the cost of the van in the first place and the labour. it was brought by a guy on astra-sport for 12k + vat. The main cost was the tuning and bodywork, the handling side is relatively simple - A vauxhall zaf 'box and some astra coupe shocks.. not the most expensive collection of parts really.
-
Hold the praise and grattitude for now, i don't know how they're going to turn out yet, haha
-
Headset removal/installation, Cassette & removing ISIS cranks with a crank puller for sq taper cranks (2 ways) done last night. I could write the how-to's up and create them as Pdf's if you want or would it be easier as a normal post on the forum?
-
Someone said Lotus Carlton, All vauxhall carltons are. Vauxhall vx490 aswell, and omegas been said. OPC astra extreme