AdamR28
-
Posts
12377 -
Joined
-
Last visited
-
Days Won
202
Content Type
Profiles
Forums
Gallery
Everything posted by AdamR28
-
Ha. Thanks dude. Pretty chuffed with that one considering how f**ked the jig looks. I started at 210kg then just kept winding - it started to feel a bit weird almost immediately so I don't think it got much over this load. One of these spokes has a claimed max load of ~330kg. So I think there might be an issue due to excessive heat... I think I've been getting the spoke up to about 800-850 degrees based on the colour - the solder should start to flow around 650 apparently. So I'm wondering if doing it in the dark might allow me to control the heat input a touch better. I'm only using a basic B&Q blowtorch but those small sections heat up fast! Another factor might be how short that bit of steel spoke is. Any wind-up will be concentrated at the 'root' of the soldered join, whereas normally it would obviously have the whole length of the spoke to take up any twist. I was way over the tension I'll build the wheels though, and didn't use as high quality lube on the threads and under the spoke head as I normally do, so hoping it'll be ok. Perhaps I should do another and wind if back and forth to 'normal' spoke tension (about 100-120kg) a few times to see what happens. Oh, and... for weight weenies. A Sapim Race (2.0-1.8-2.0) is 5.8g, Sapim Laser (2.0-1.5-2.0, same base spoke as a CX Ray) is 4.4g. Makes weight savings of around 150g per bike over the Race spokes.
-
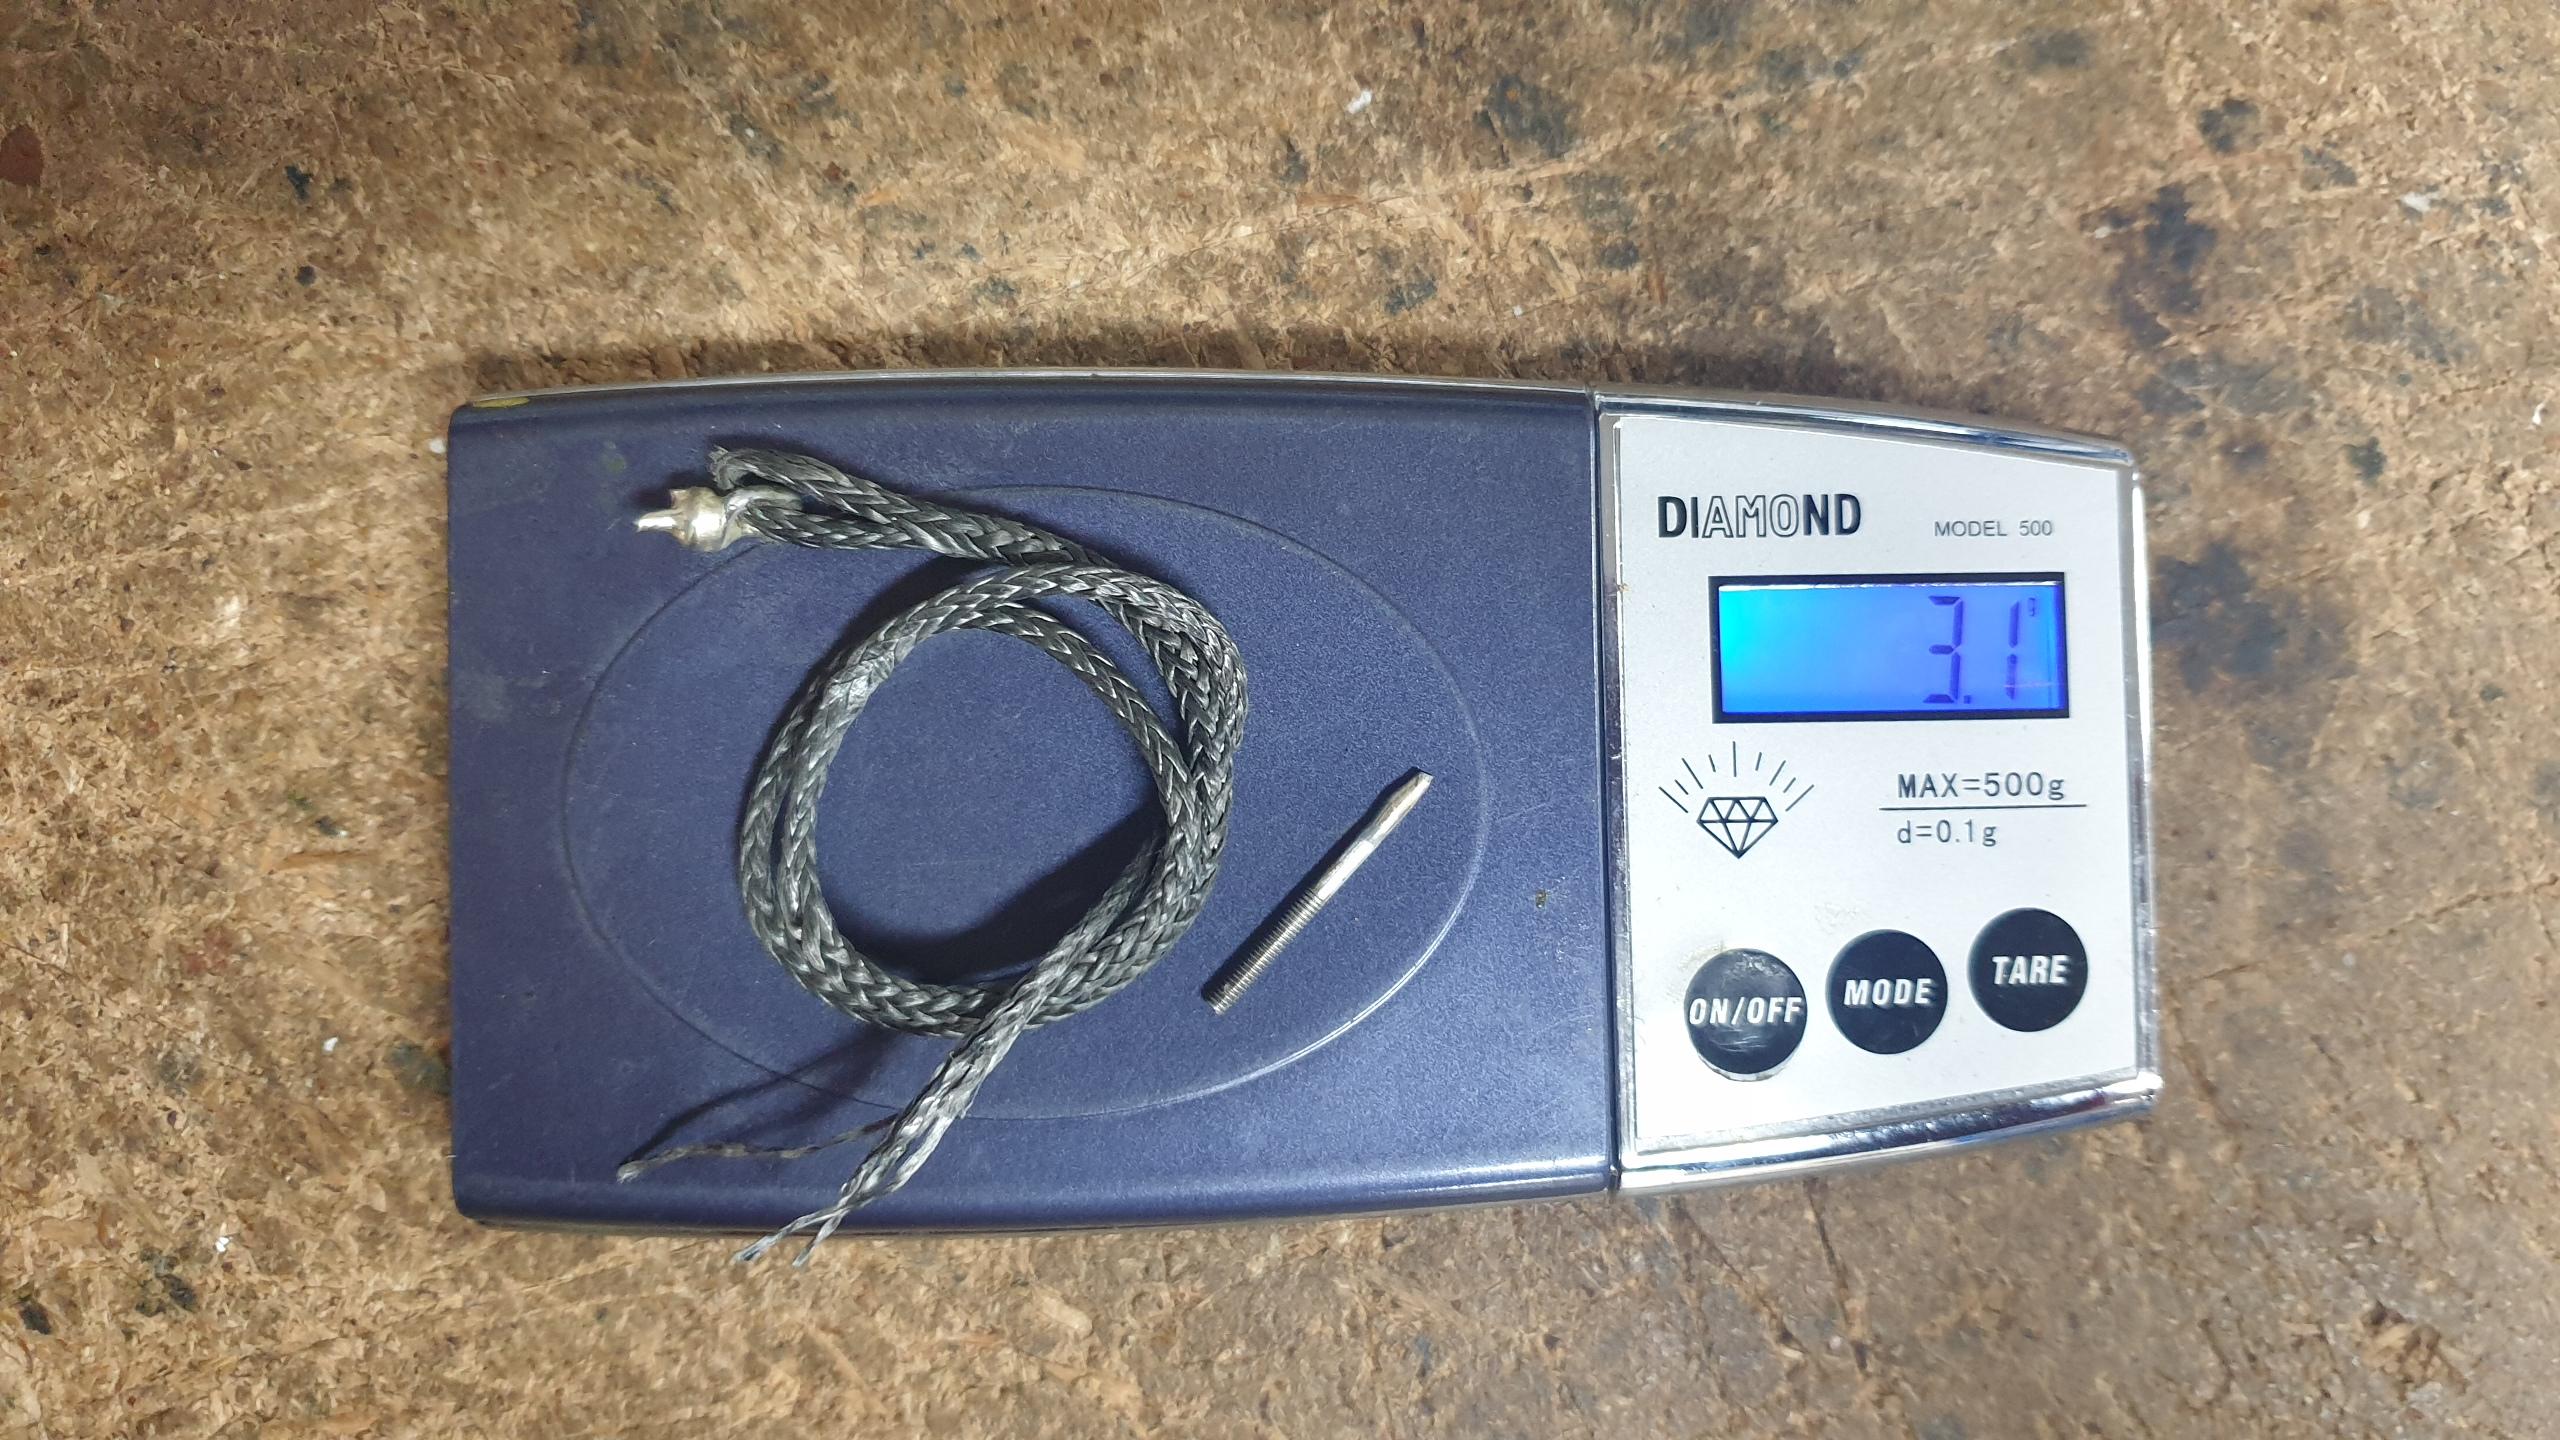
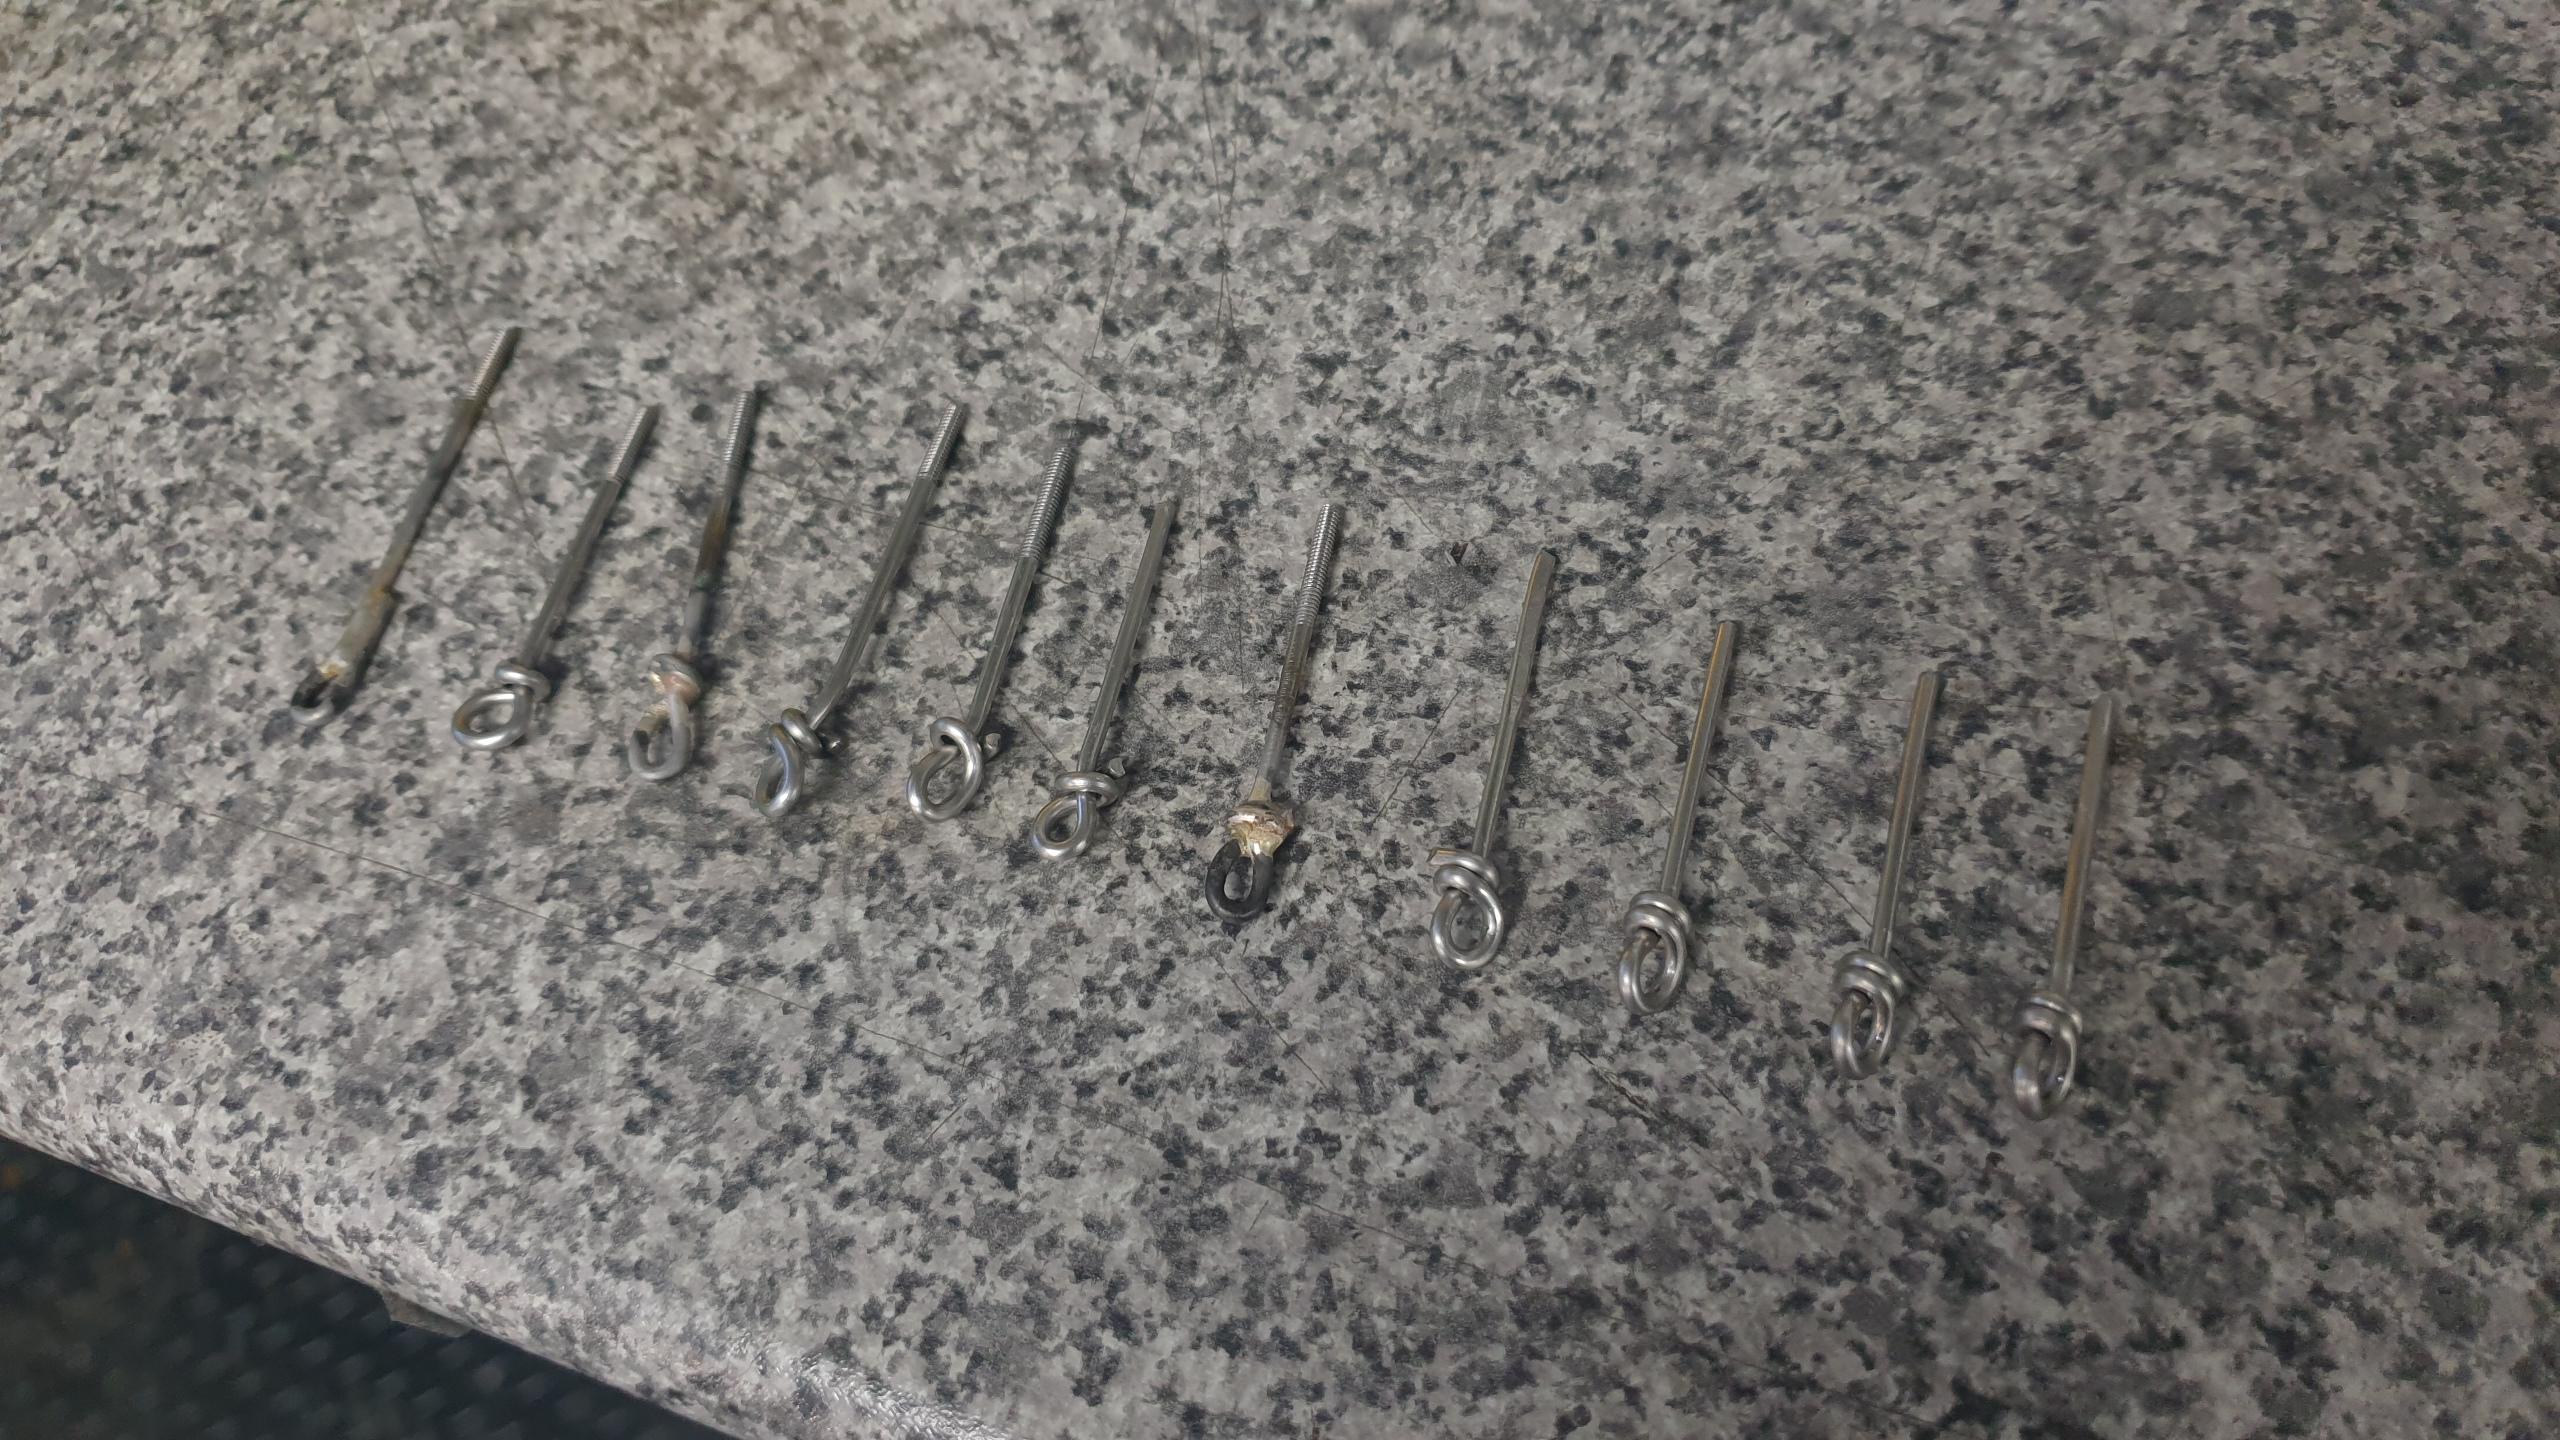
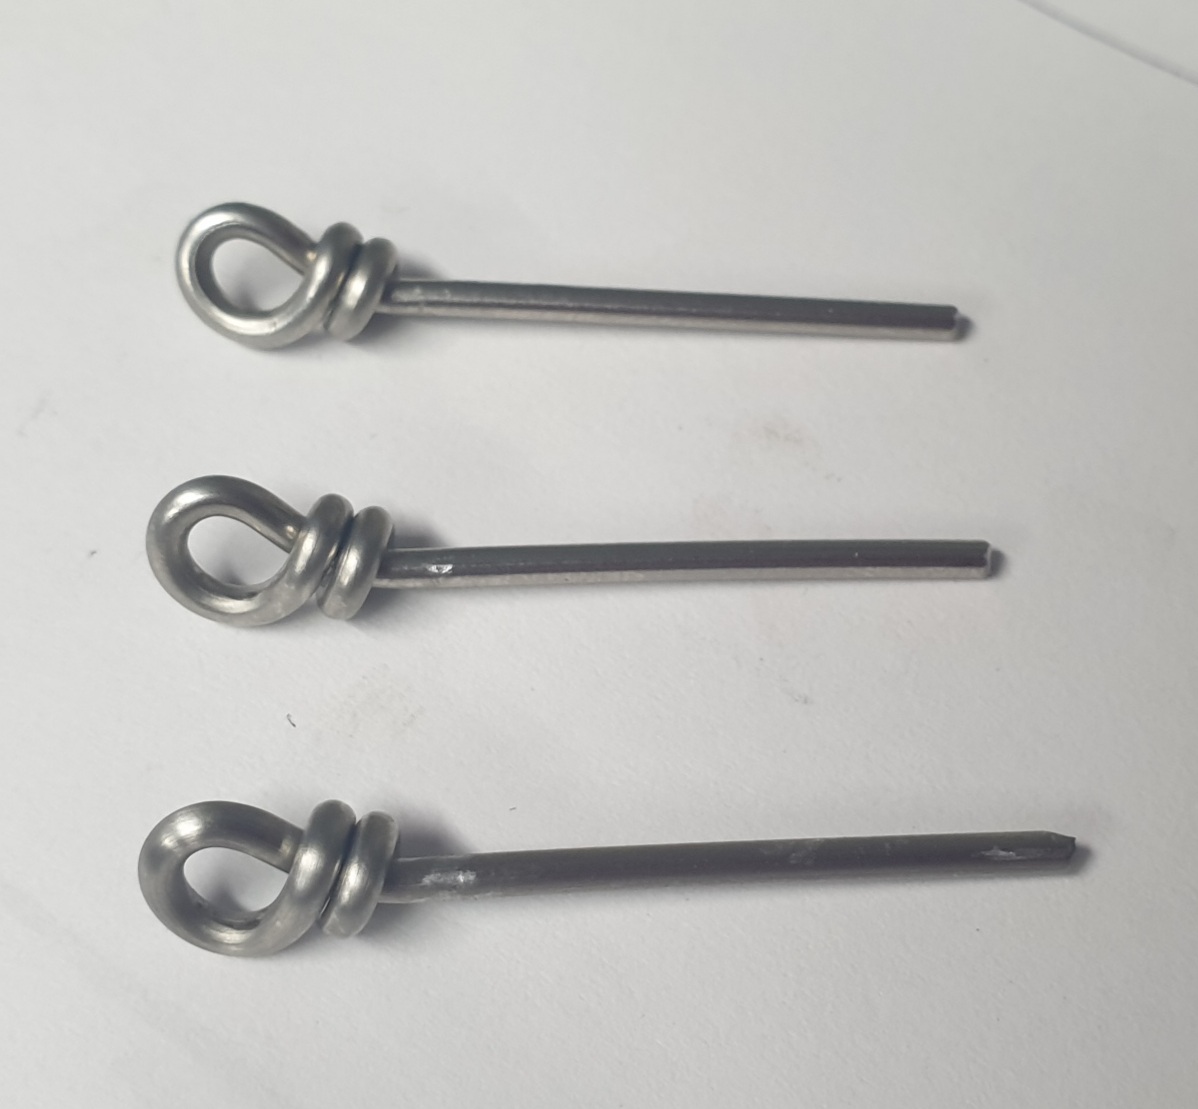
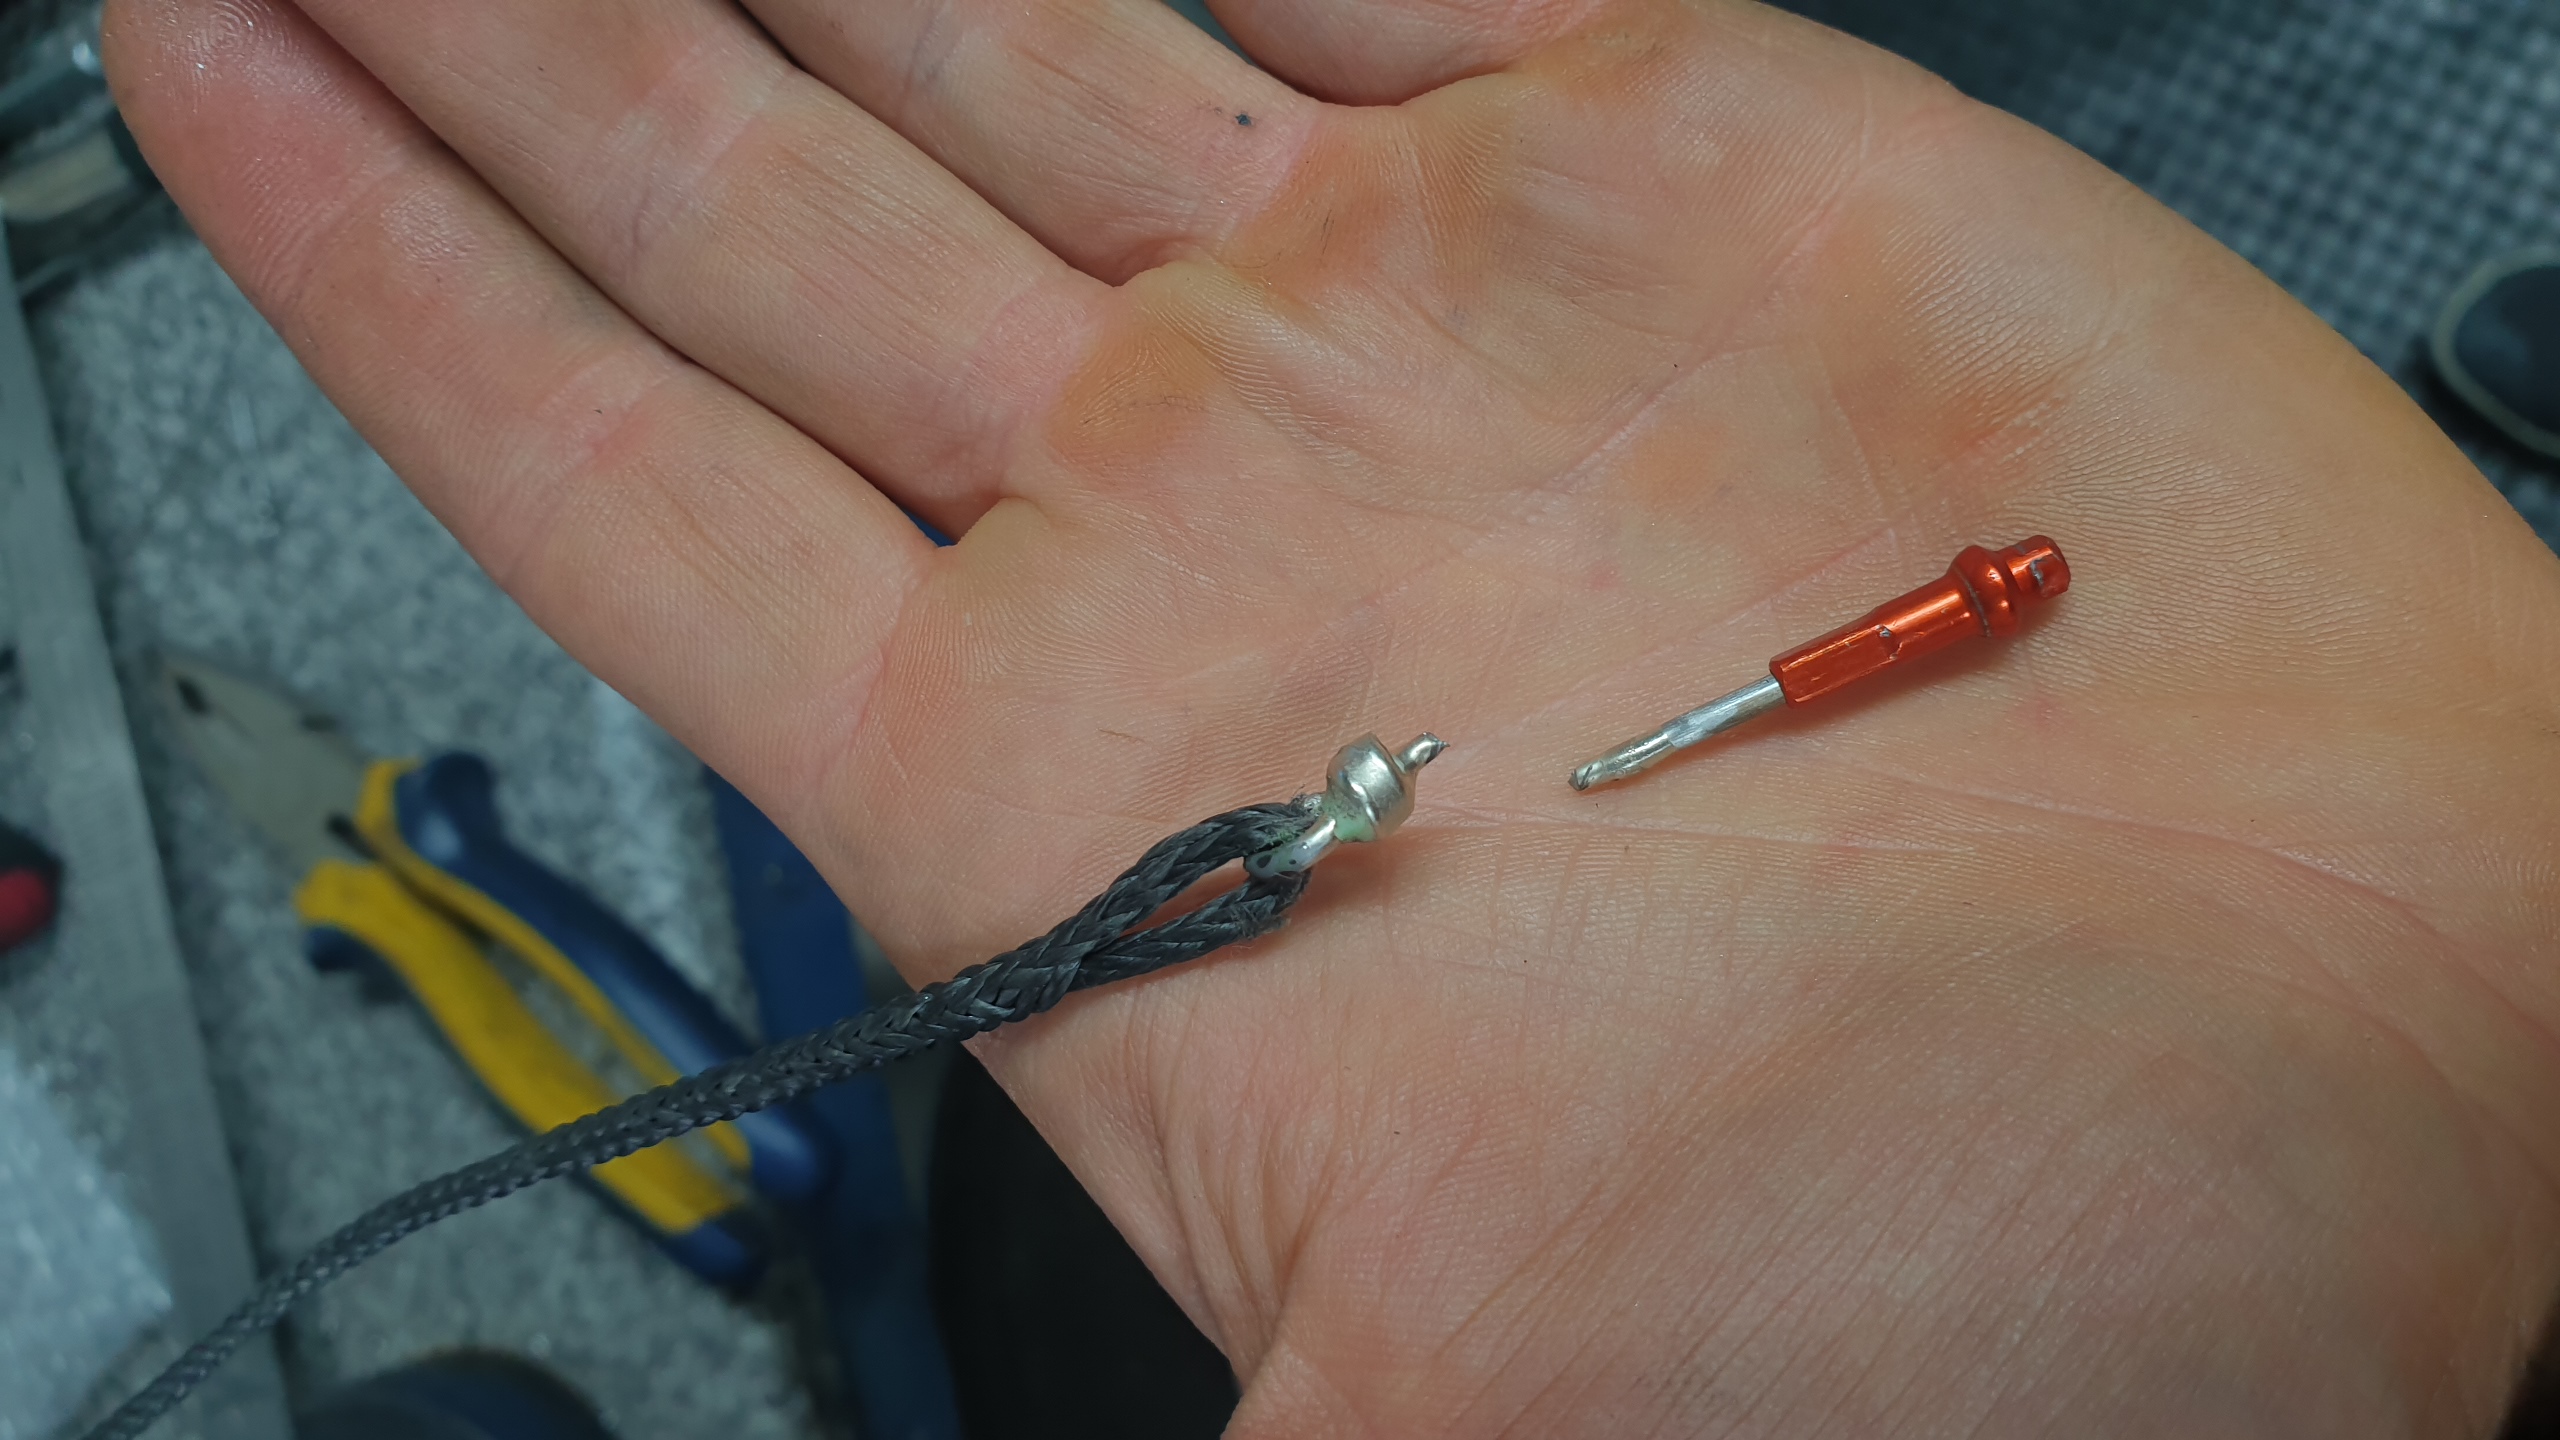
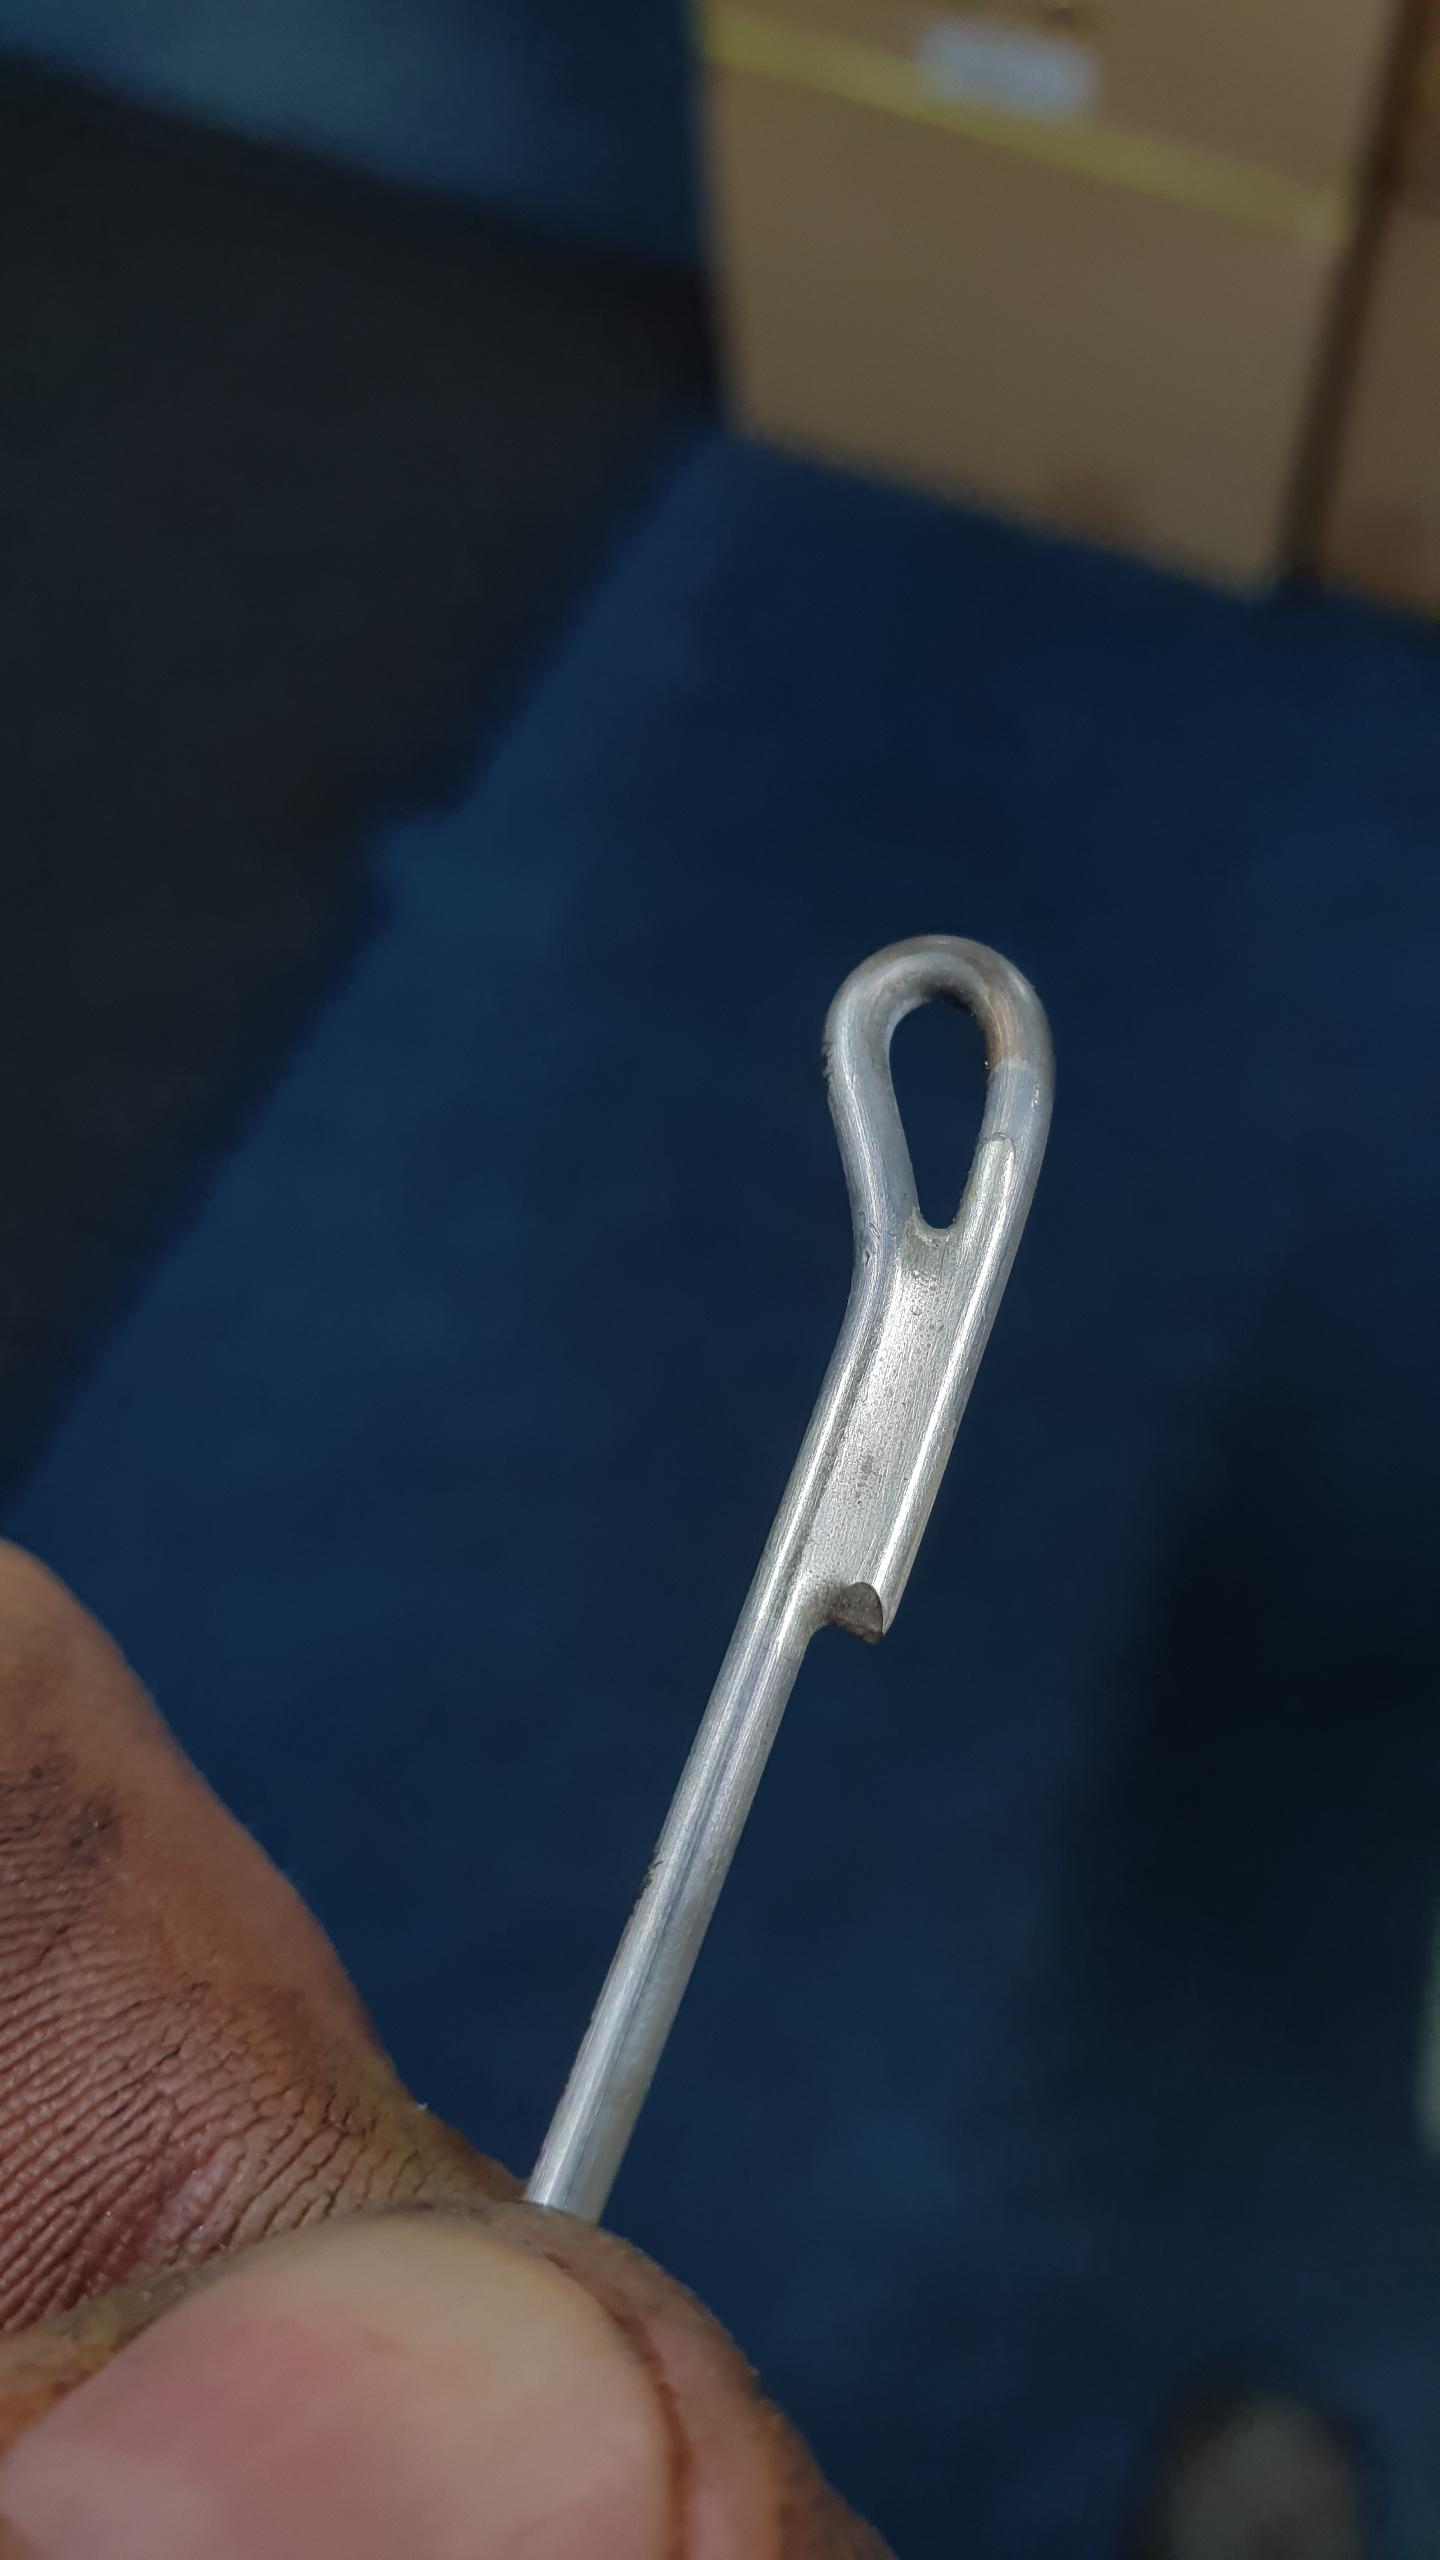
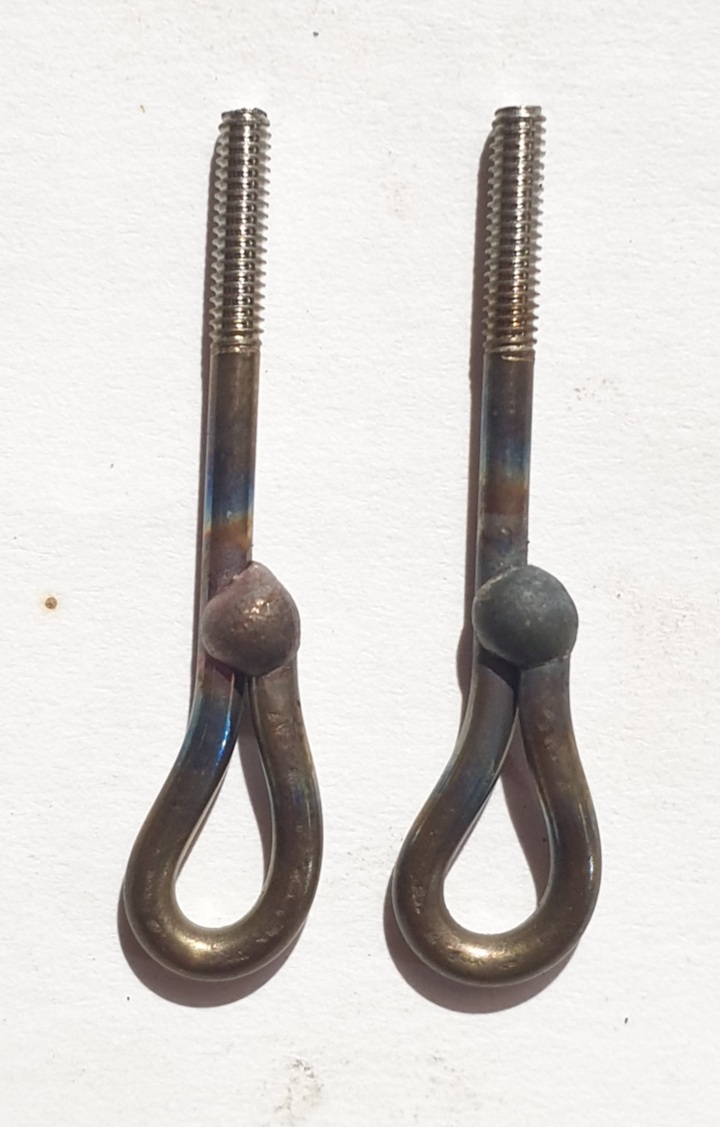
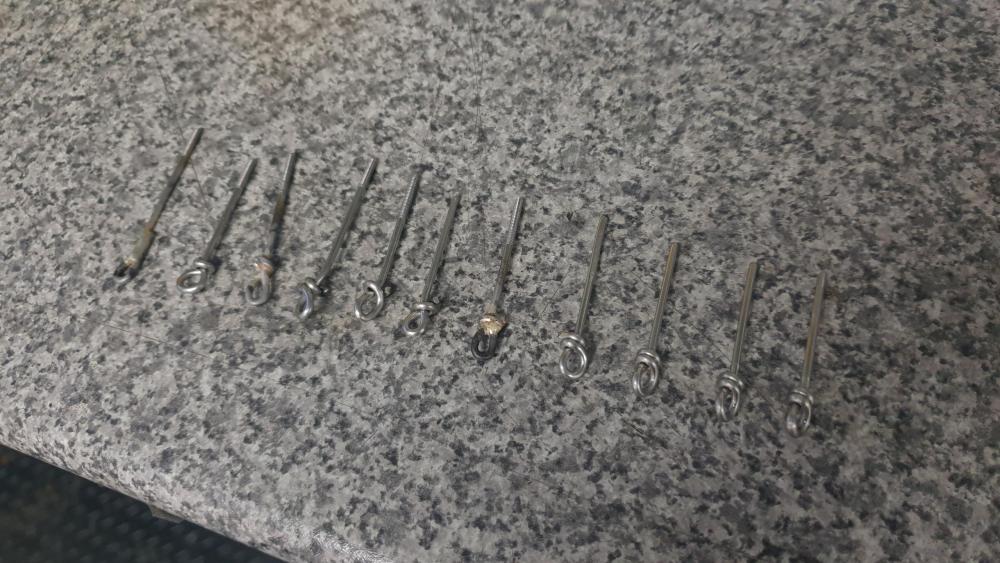
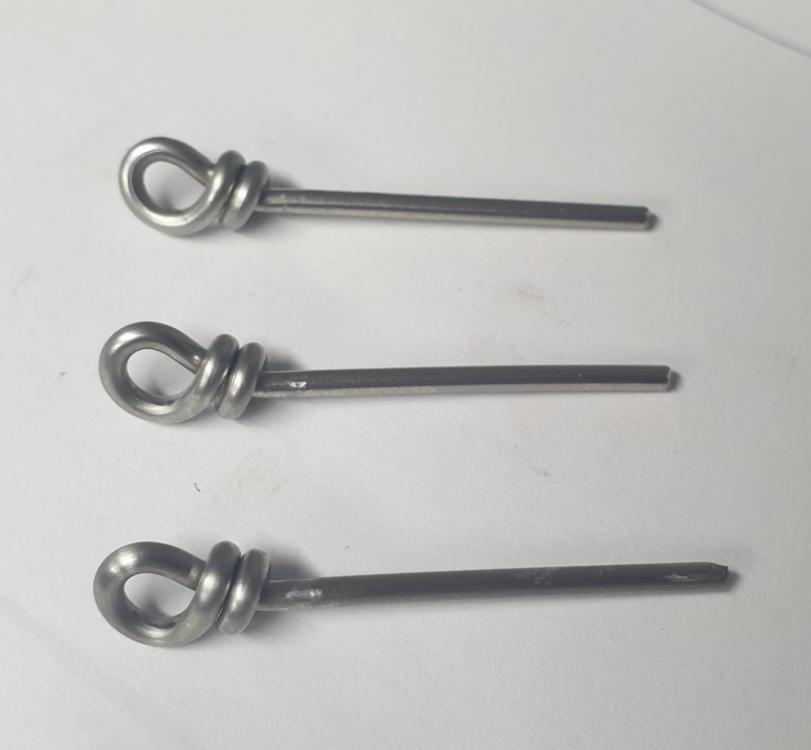
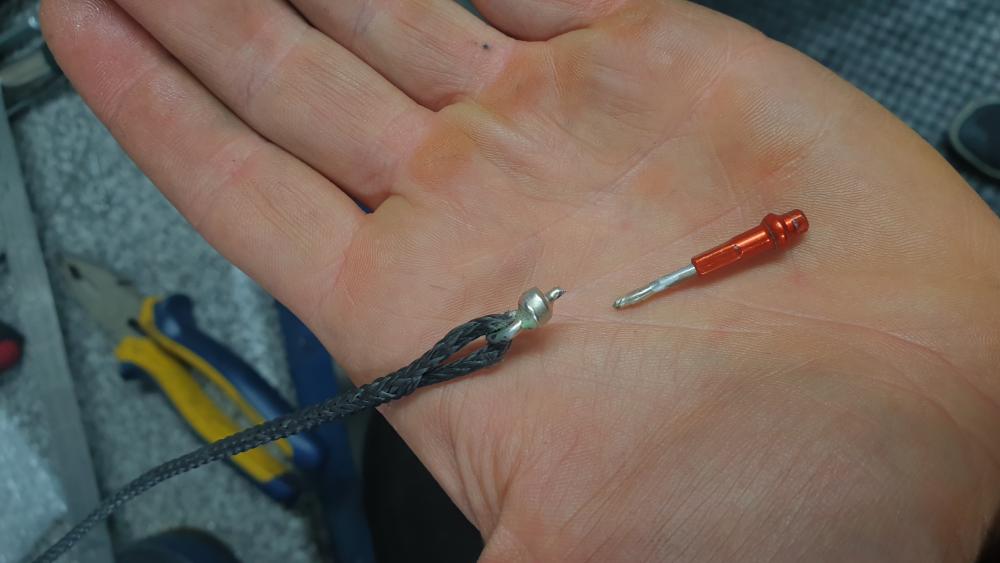
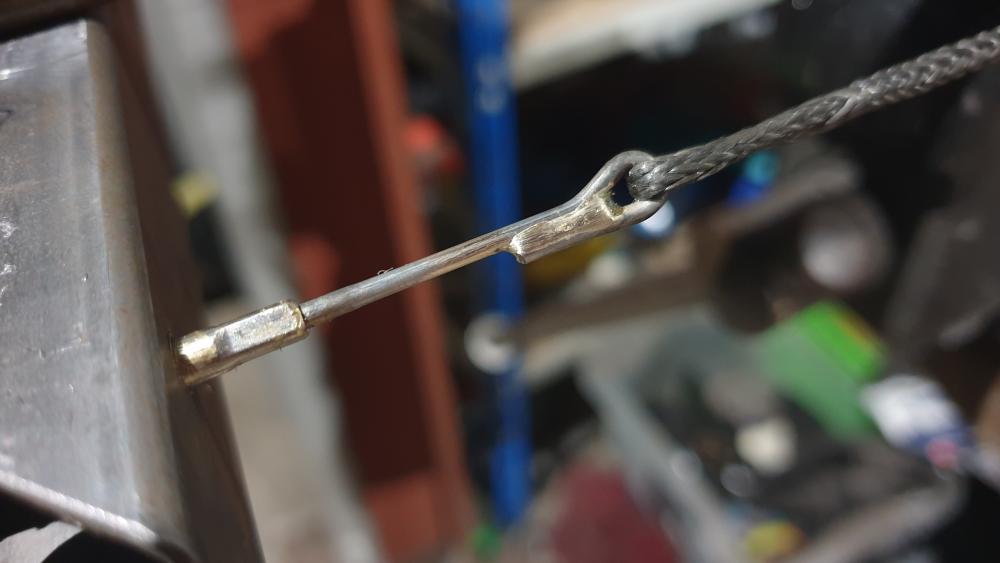
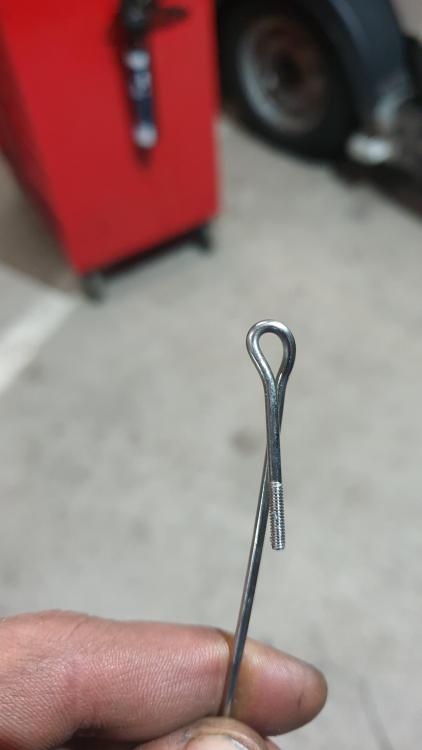
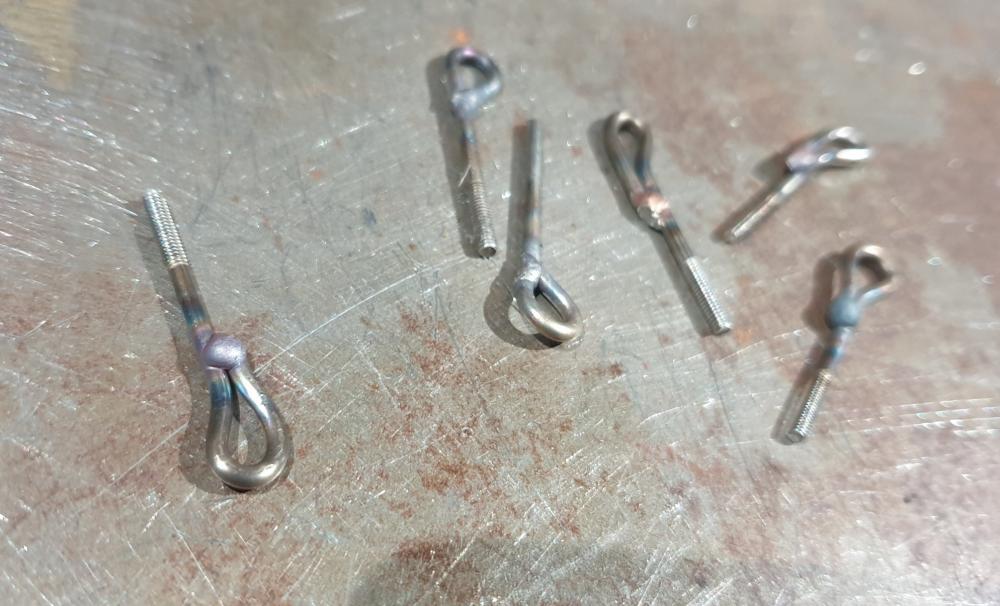
Changed tack a bit on the eyes... Turns a spoke into one of these in just over 30 seconds. Blob of solder, away we go! And a max load test, just for you @forteh... This was a really old and haggard section of rope too - a bit frayed from being re-used at least a dozen times, and the splice burying was way too short. Still, the spoke necked down to 1.6mm from 1.8 and snapped before the rope snapped or the splices slipped. Time to sort out a batch of eyes and get cracking on making spokes!


-
[HELP] How do I do these two moves? (Video clips included)
AdamR28 replied to Rip's topic in Trials Chat
1. Both. Pushing your arms away helps to lift the bike. 2. Maybe called a shunt? Depends on which riding group you're in, ha. Anyway the key is a short dab of pedal pressure. Basically just long enough to push off to jump, don't 'linger' on the pedal stroke. Again think about pushing arms away as well as lifting legs. Front wheel goes onto the obstacle as little as possible. When you get the timing it can be done off the corner instead of the top. -
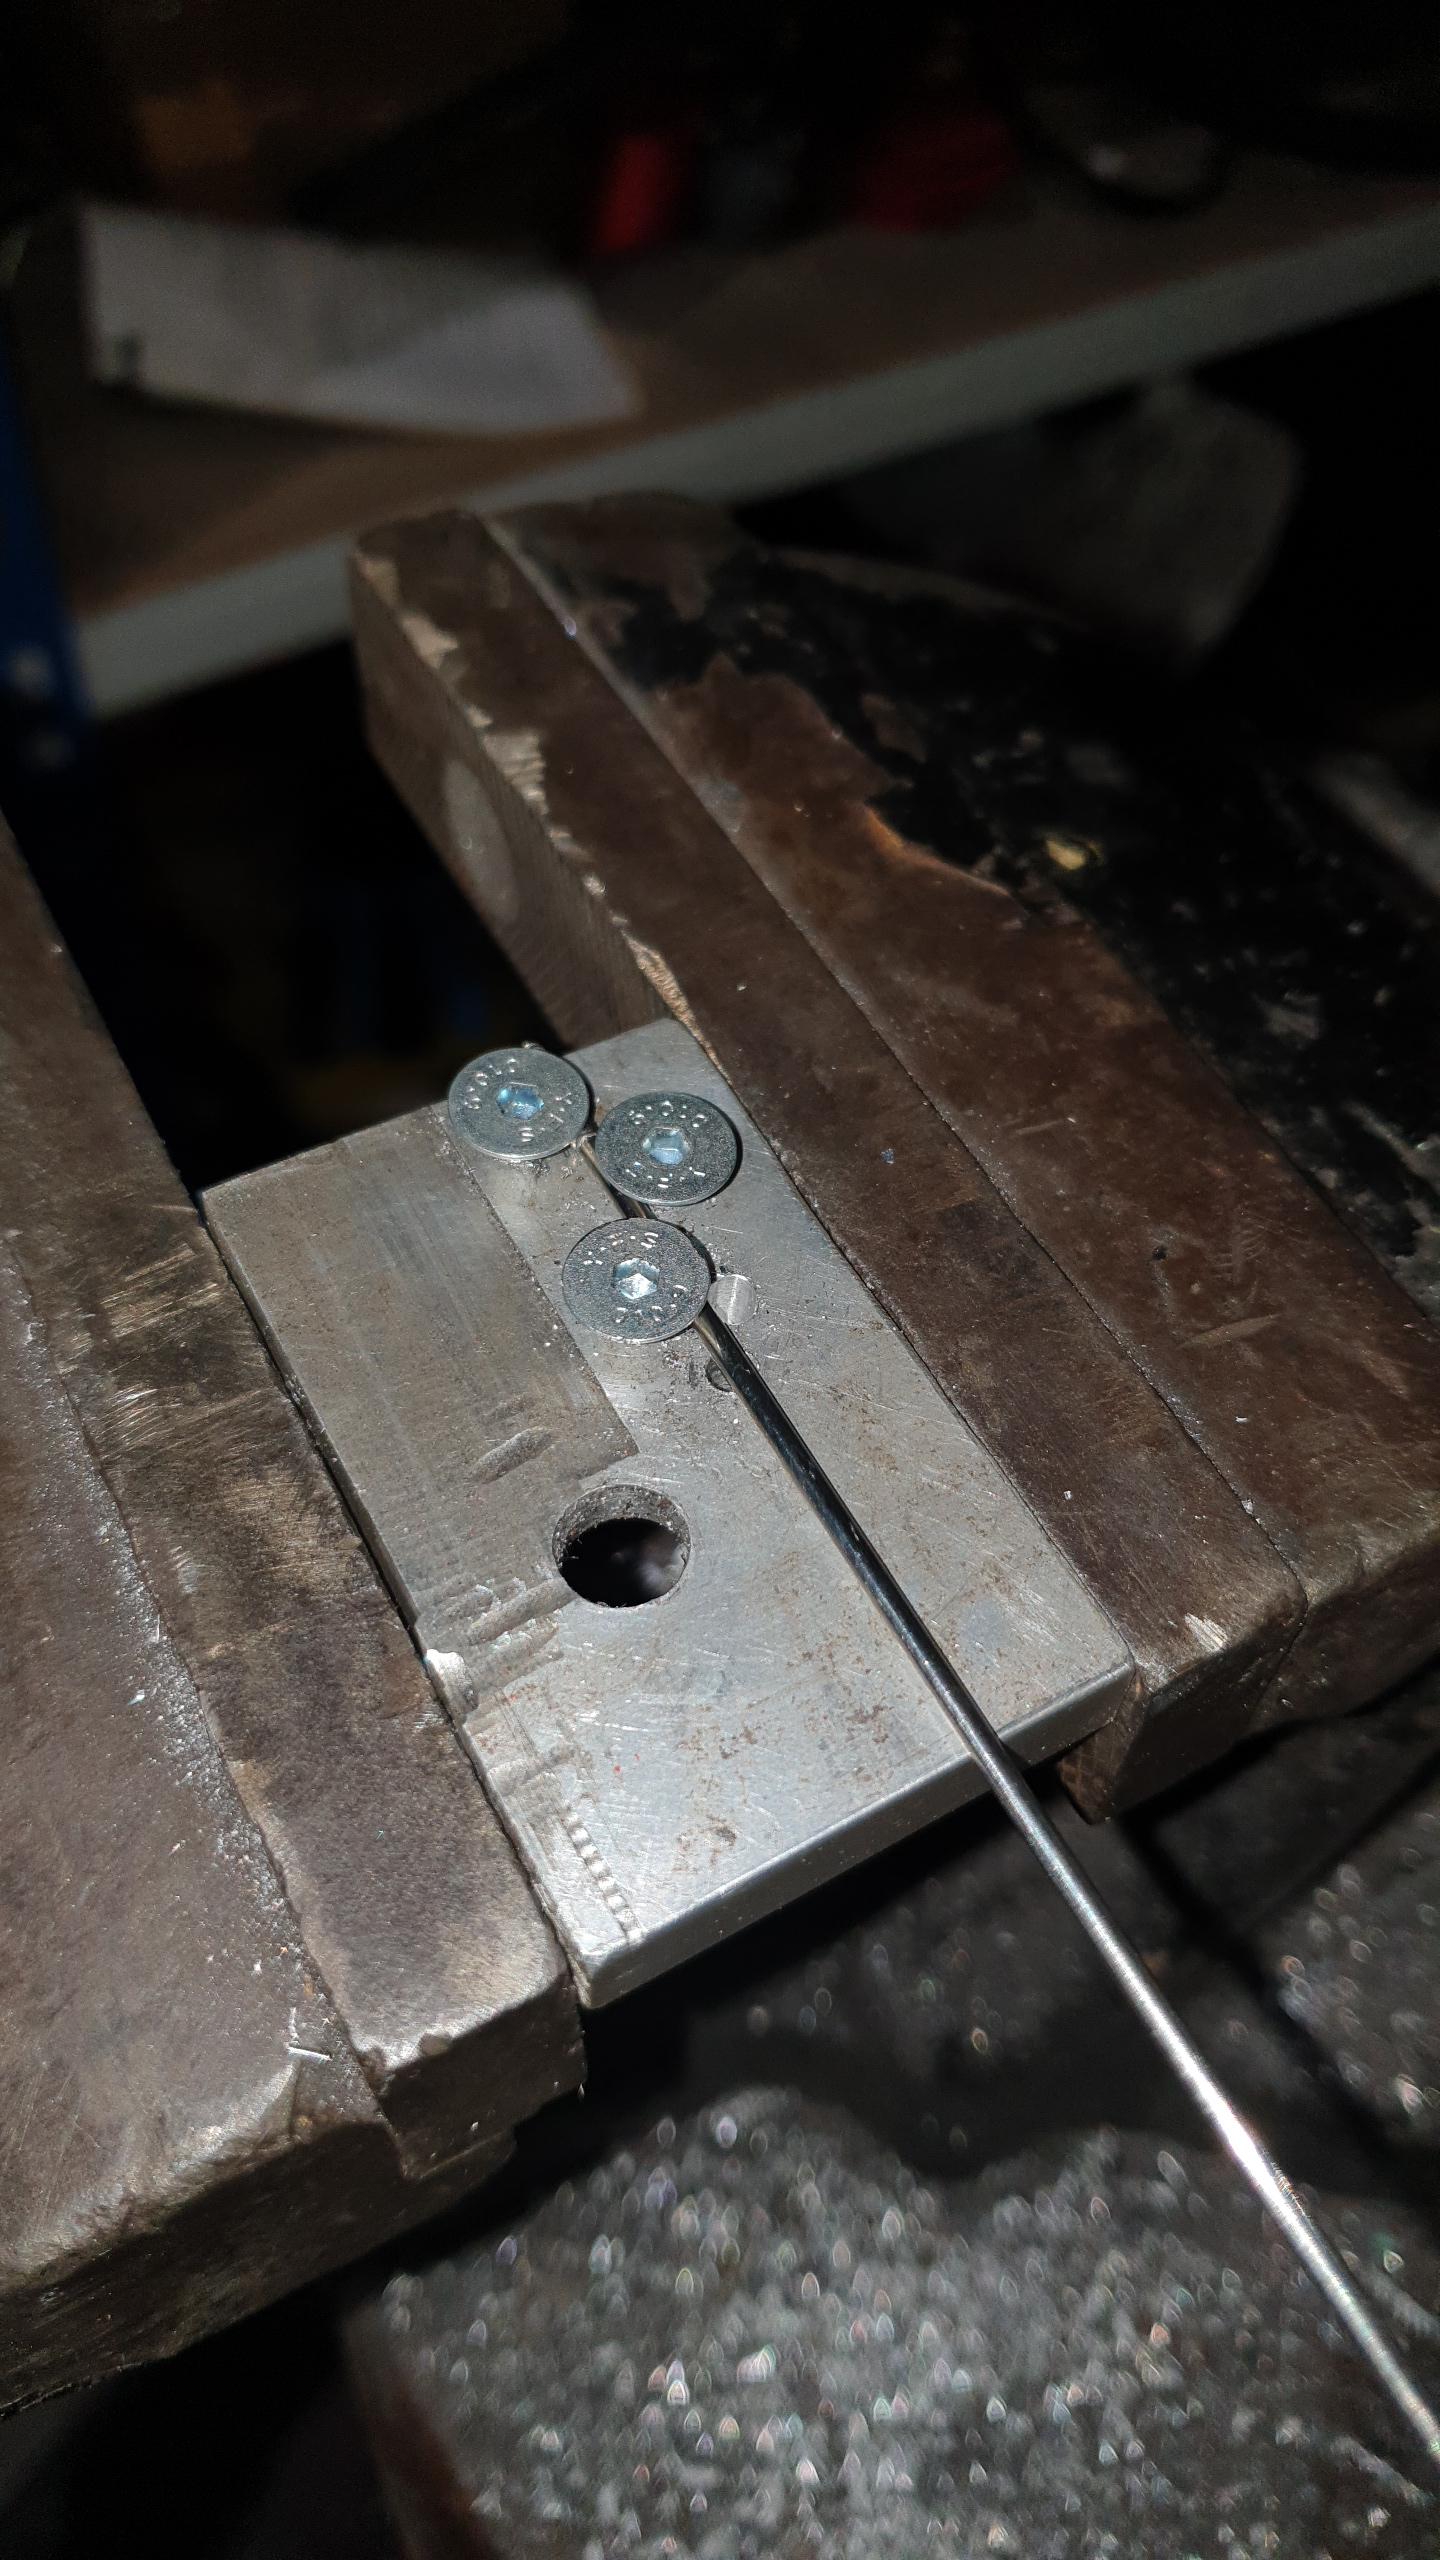
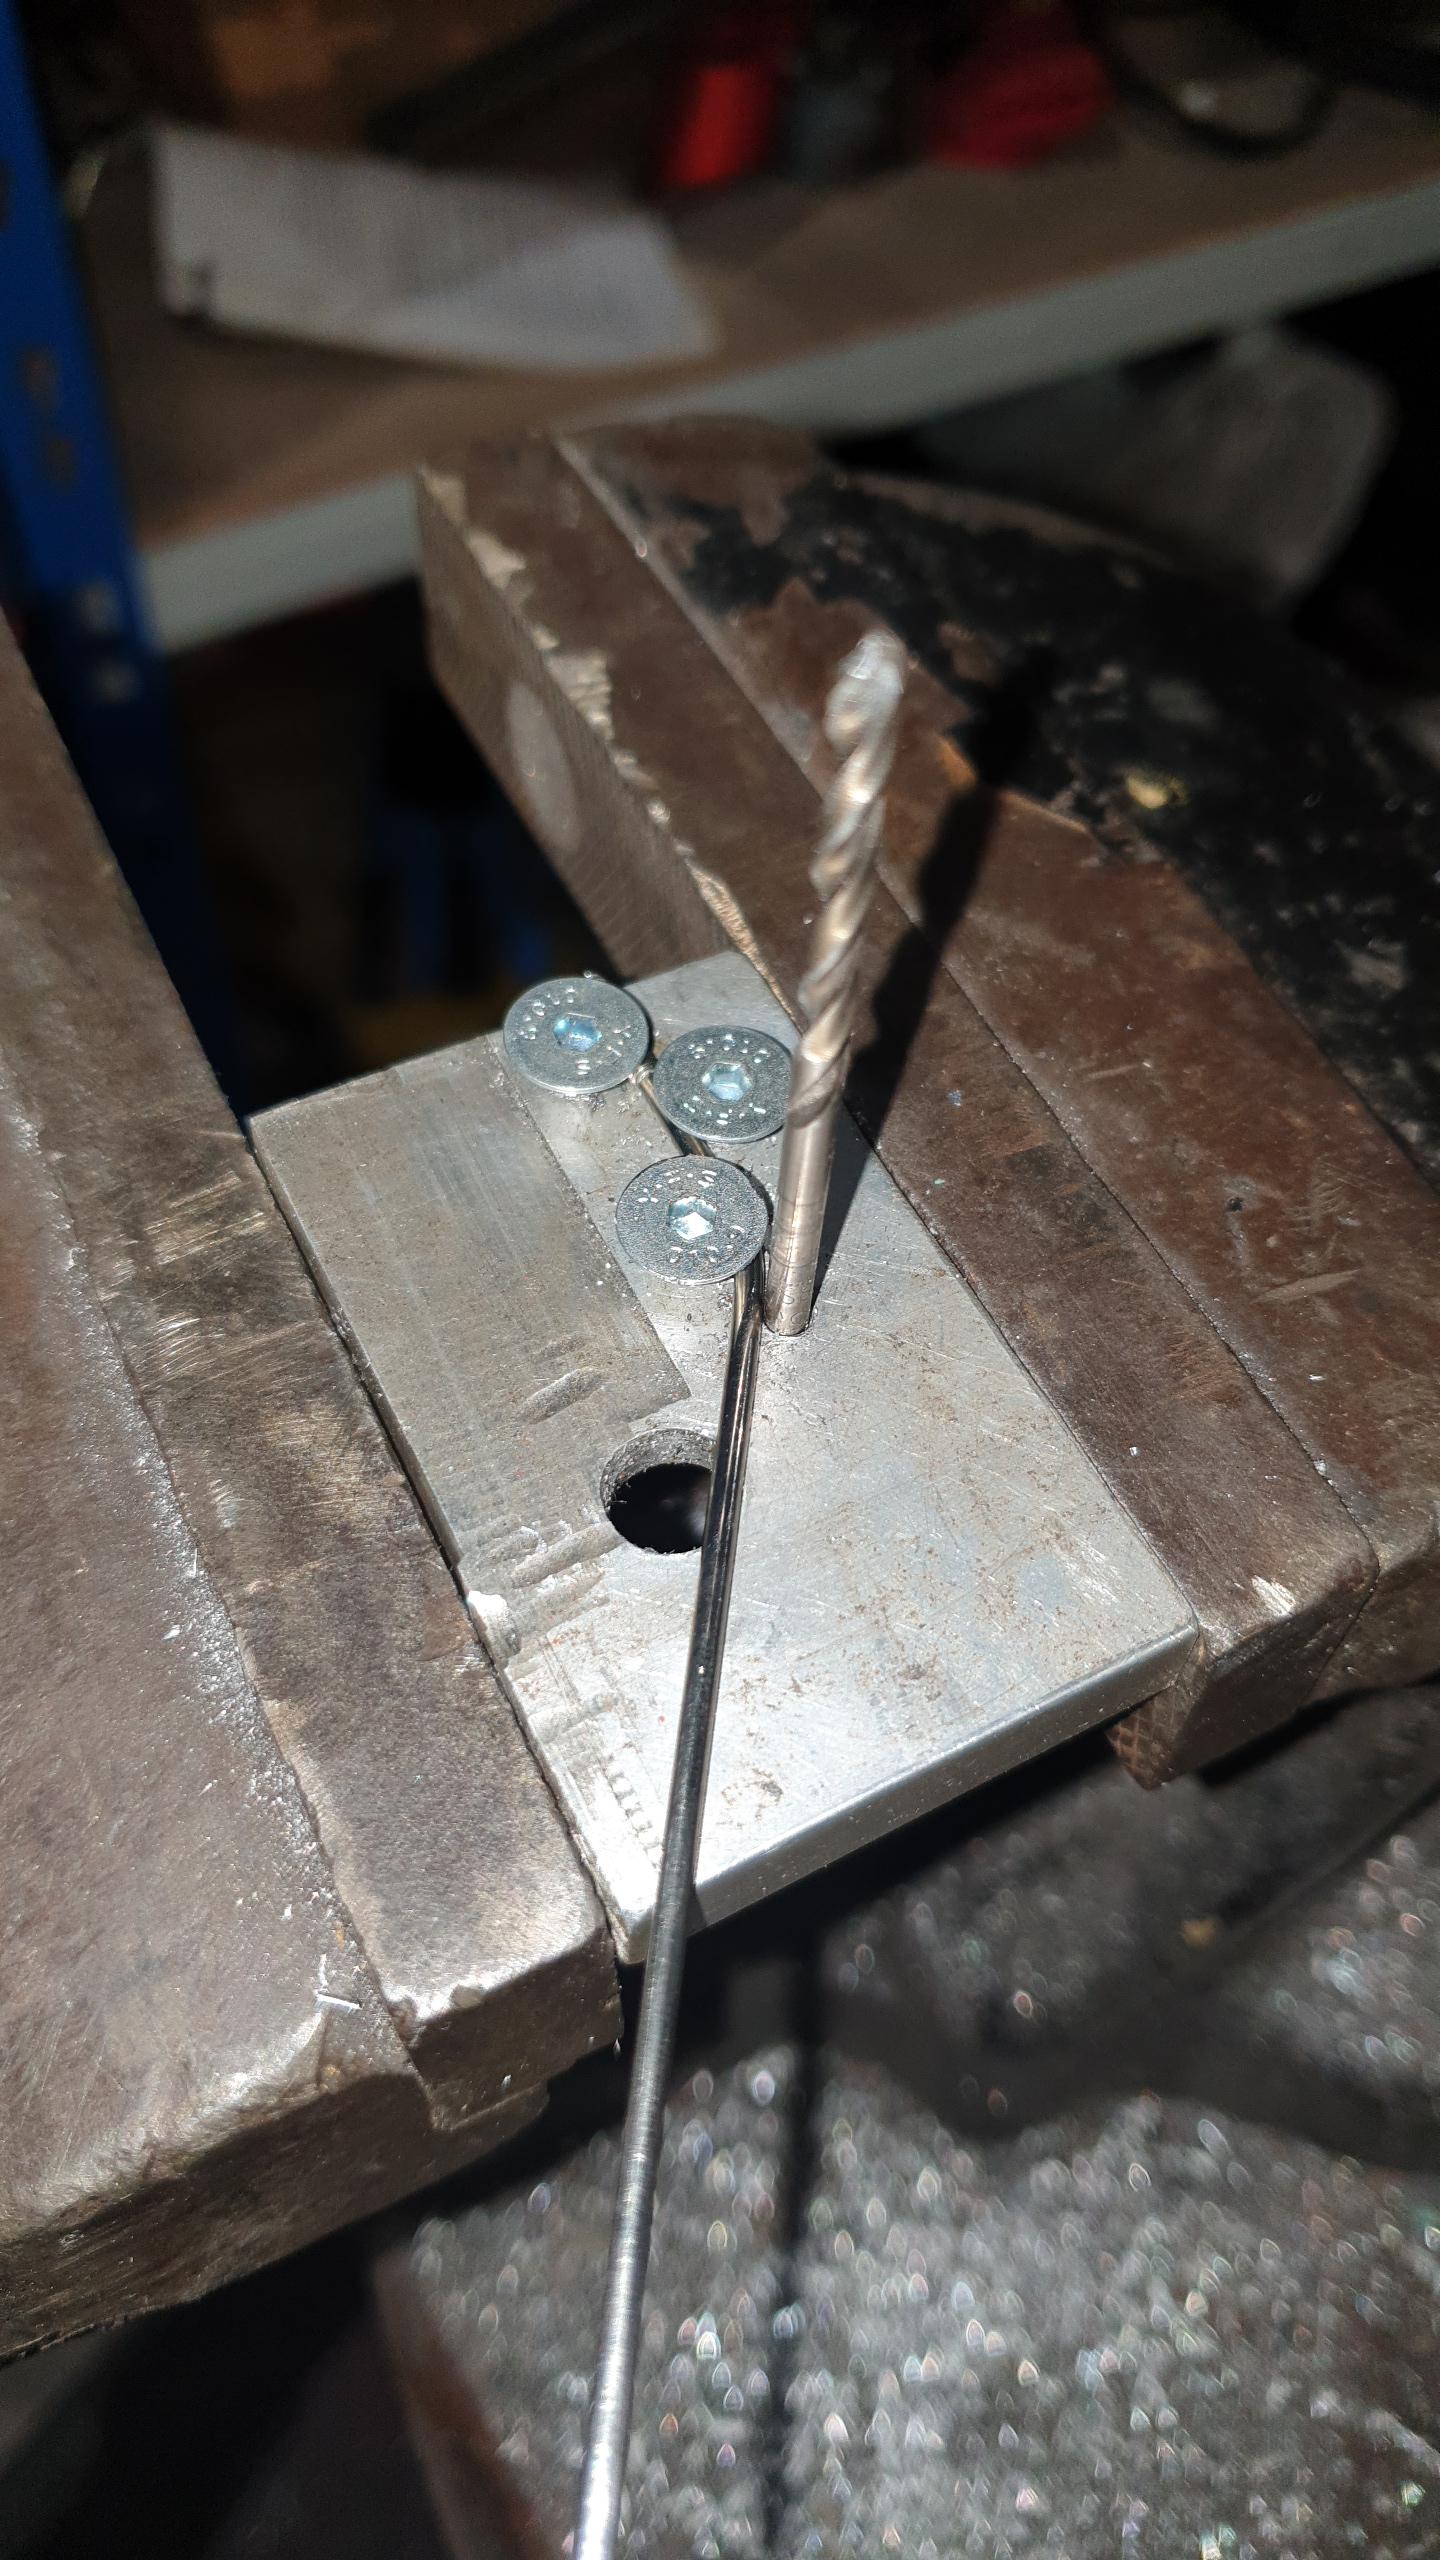
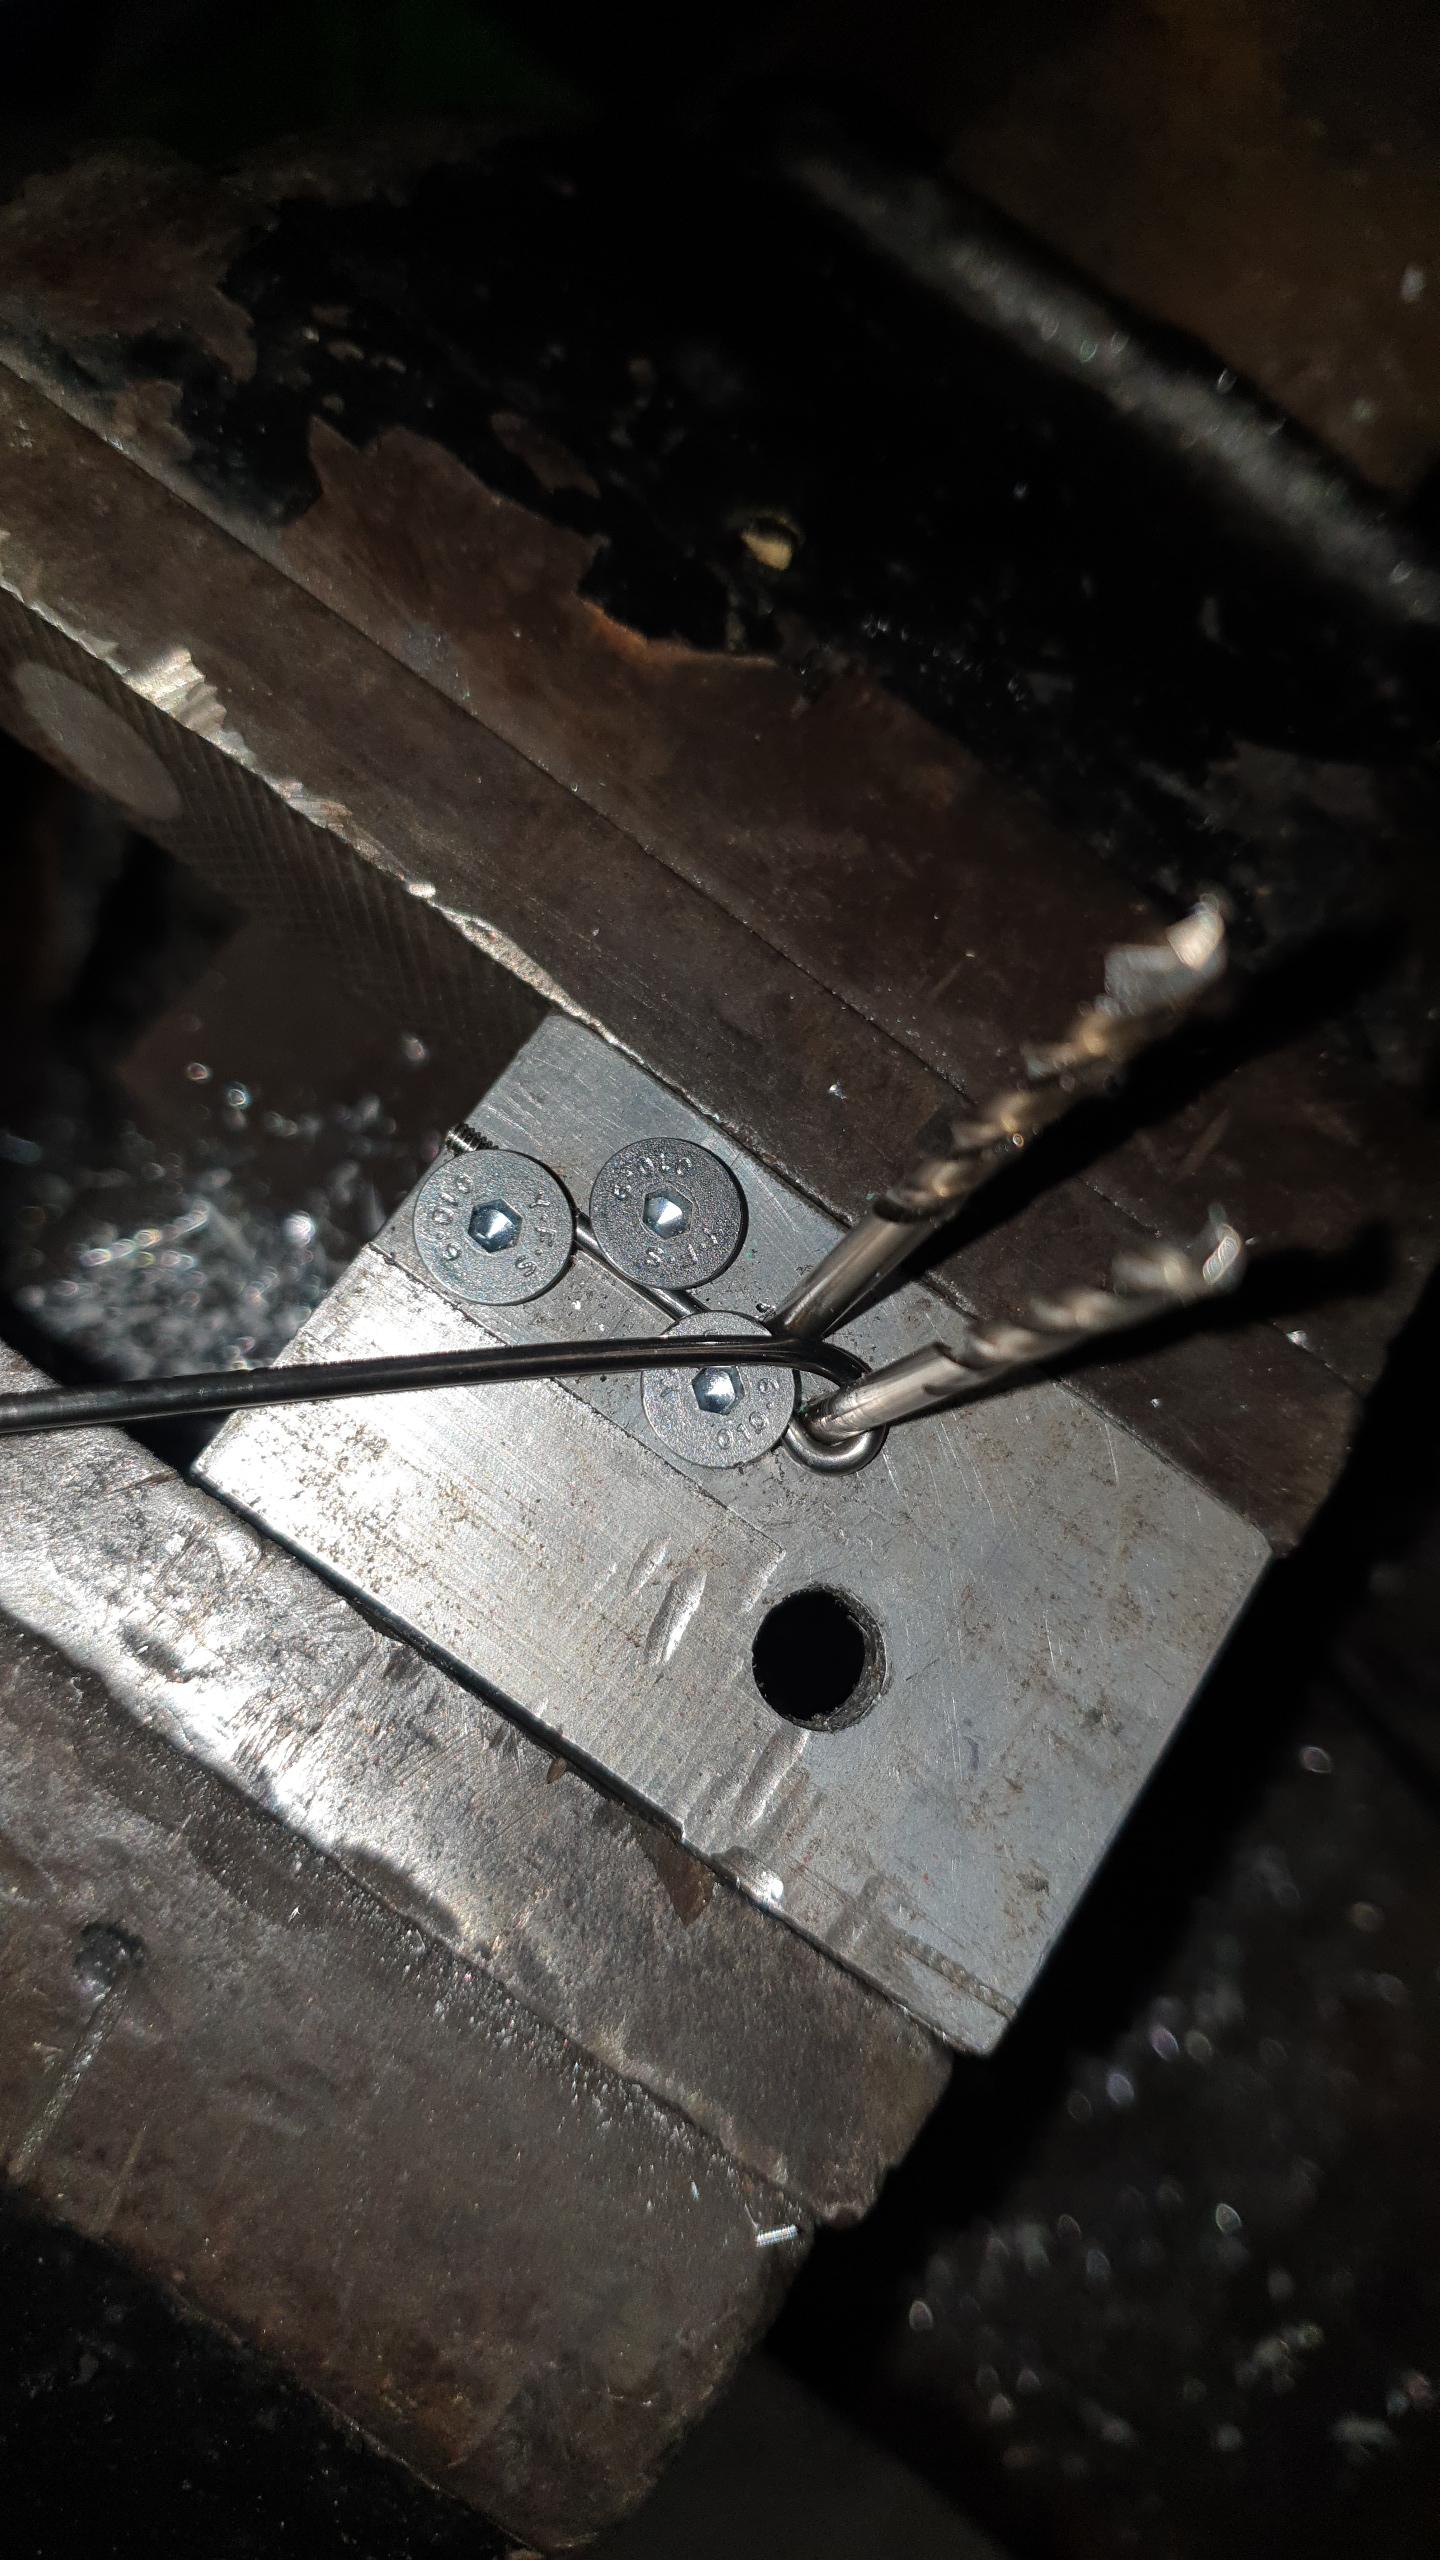
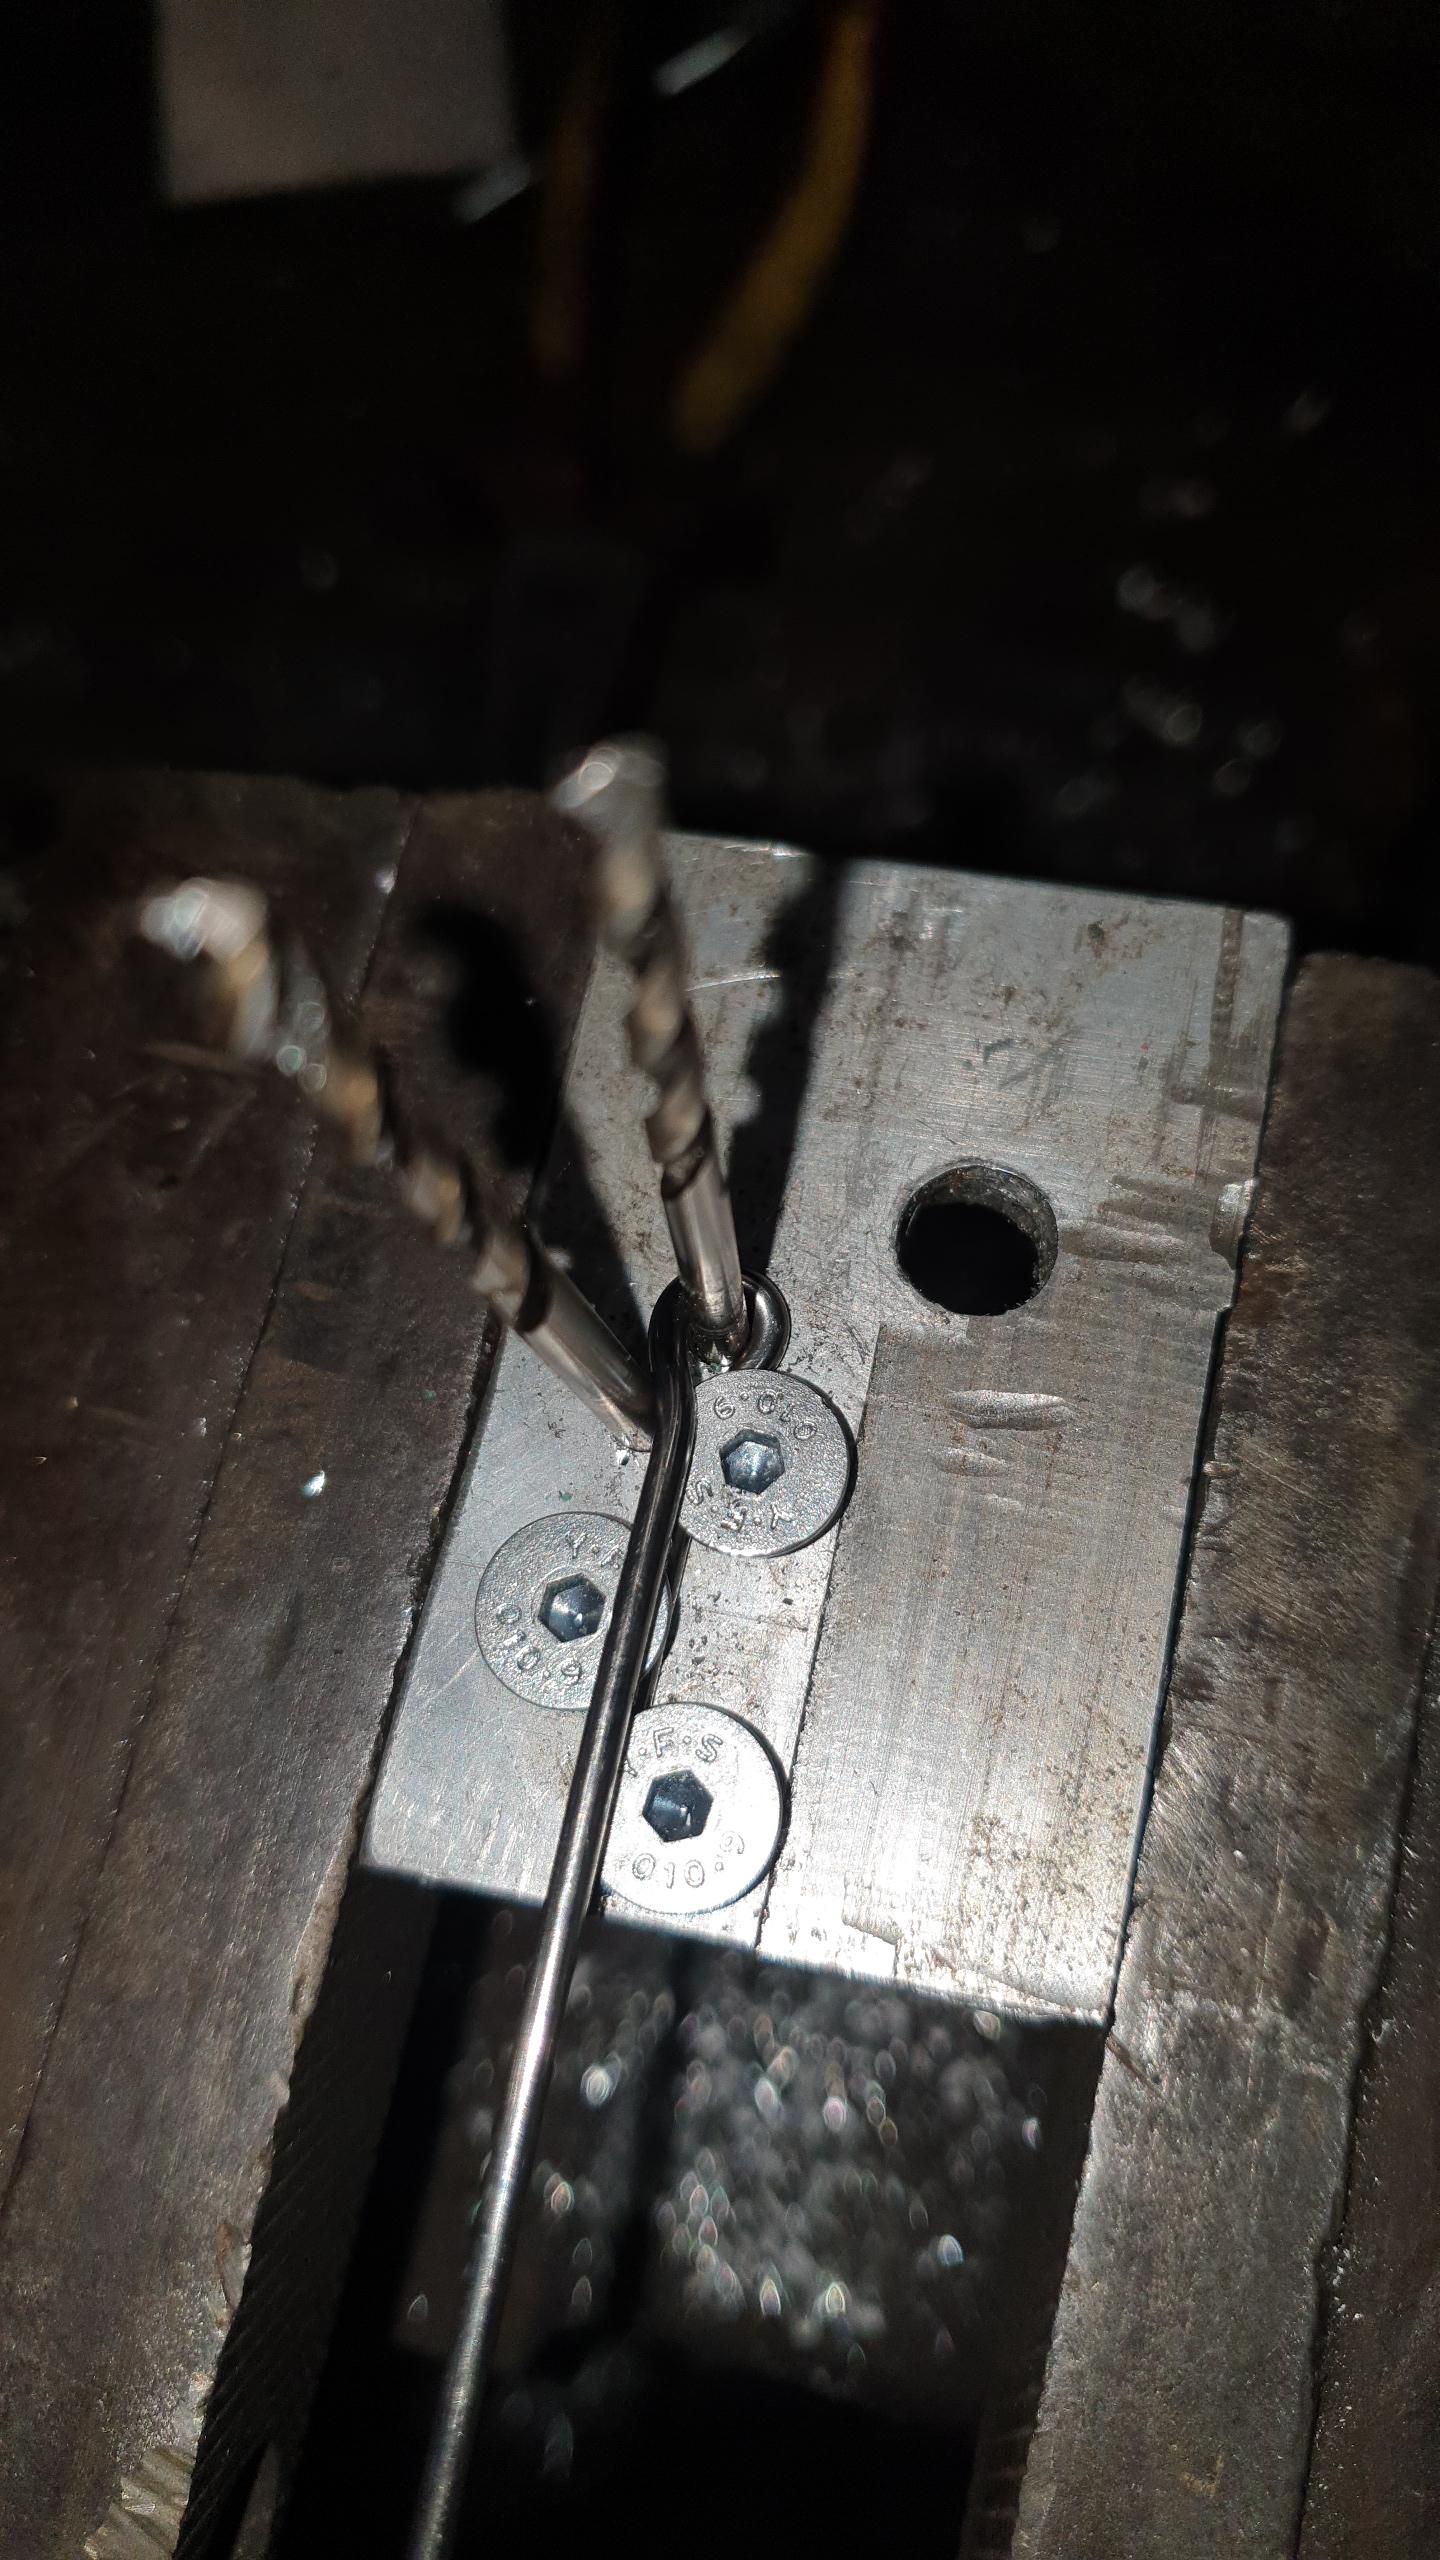
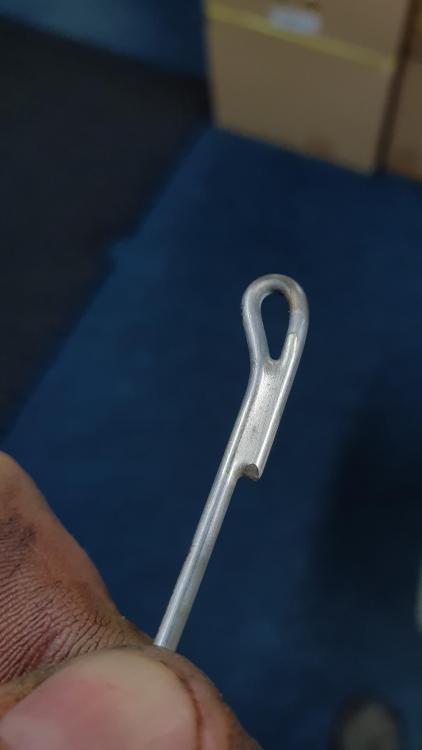
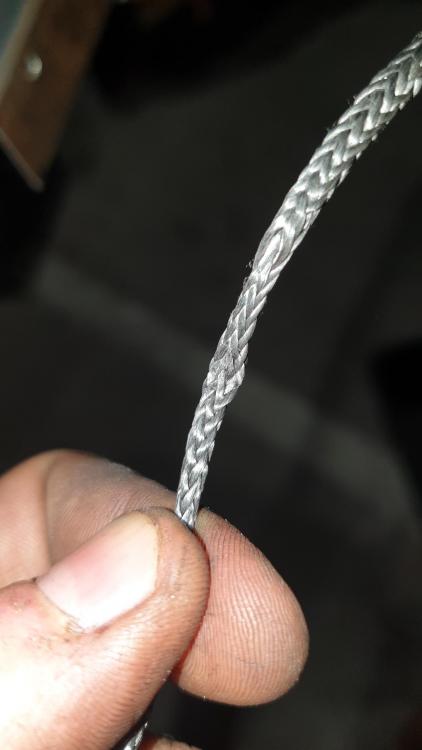
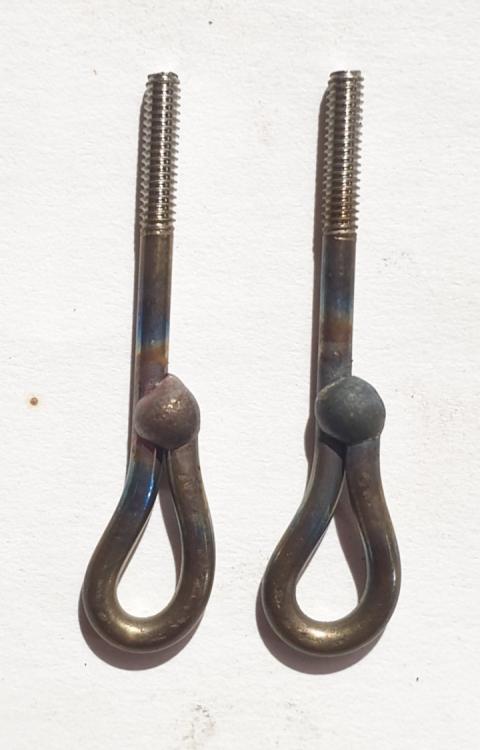
Not sure about the deburr, but I'm doing it anyway to be certain. I tried some glued spokes and wasn't really keen on the results. I would also then have to find a way to stop the spoke rotating while building, that didn't involve gripping it with mole grips or something equally crude. Then I remembered silver soldering! My first 3 attempts, straight after soldering / brazing, covered in flux. This is much less temperamental and a lot easier than welding, plus gives a much neater result IMO. Flux removed and scrubbed with wire wool. Love the way the silver flows! Checked the condition of the rope where it went through an eyelet. This had done 10x cycles to 140kg and a couple to 200. No fraying so I think that's acceptable. And finally, loaded up a soldered eyelet to 200kg, then have left it at 130kg for the weekend to check it doesn't fail.

-
Its no more fiddly. And looks a lot less of a bodge as you said. I think Berd do it the way they do to ensure customers don't have to do a splice, and it allows them to set the spoke length at the factory. I'll try soaking in superglue today as well then...
-
I looked at that... I think the torque from pedalling and braking might be affected significantly as only one of the pair would be pulling tangentially then (hard to explain). Also knotting this stuff really ruins the properties - can't remember exactly but it reduced breaking load by at least half! I think Berd have put a lot of time and effort into these. All the conclusions I'm coming to seem to match what they've done...
-
Yeah thats the plan, ish, though one end of the jig will need to be the hub of course! I think I'll add a good amount of load to the splice / bury at the hub end before making the rim end. Should bed in the splice sufficiently to make any stretch consistently elastic. At the moment it looks like I'll be able to figure out stretch amounts using the jig I made. The idea behind using the double square nipples is so you have an extra 2mm to play with too, so that will help out a little. If I get time today I'm going to try rolling a long thread onto a spoke, coating it with epoxy, sliding the spoke straight inside the rope, adding a coat of epoxy to the outside and then heatshrinking over the top of the lot. Hoping this will create a high enough friction - if only mechanically rather than by adhesion - to allow much easier building and spoke length 'adjustment' than having two buried splices.
-
Apparently so - this stuff is used in sailing rigging, so it's designed to be abrasion resistant. The eyes will need to be longer to allow a spoke key to fit on (though I have got nipples with a 'double square' so you can build from the back - https://www.spoke-store.com/photos/original/sapim-double-square-secure-lock-alu-nipple.jpg) and I'll need a way of stopping them rotating (easy enough). But yes, creating the spokes accurately will take a long while - the reason Berd charge so much I'm sure, given the relatively low material cost.
-
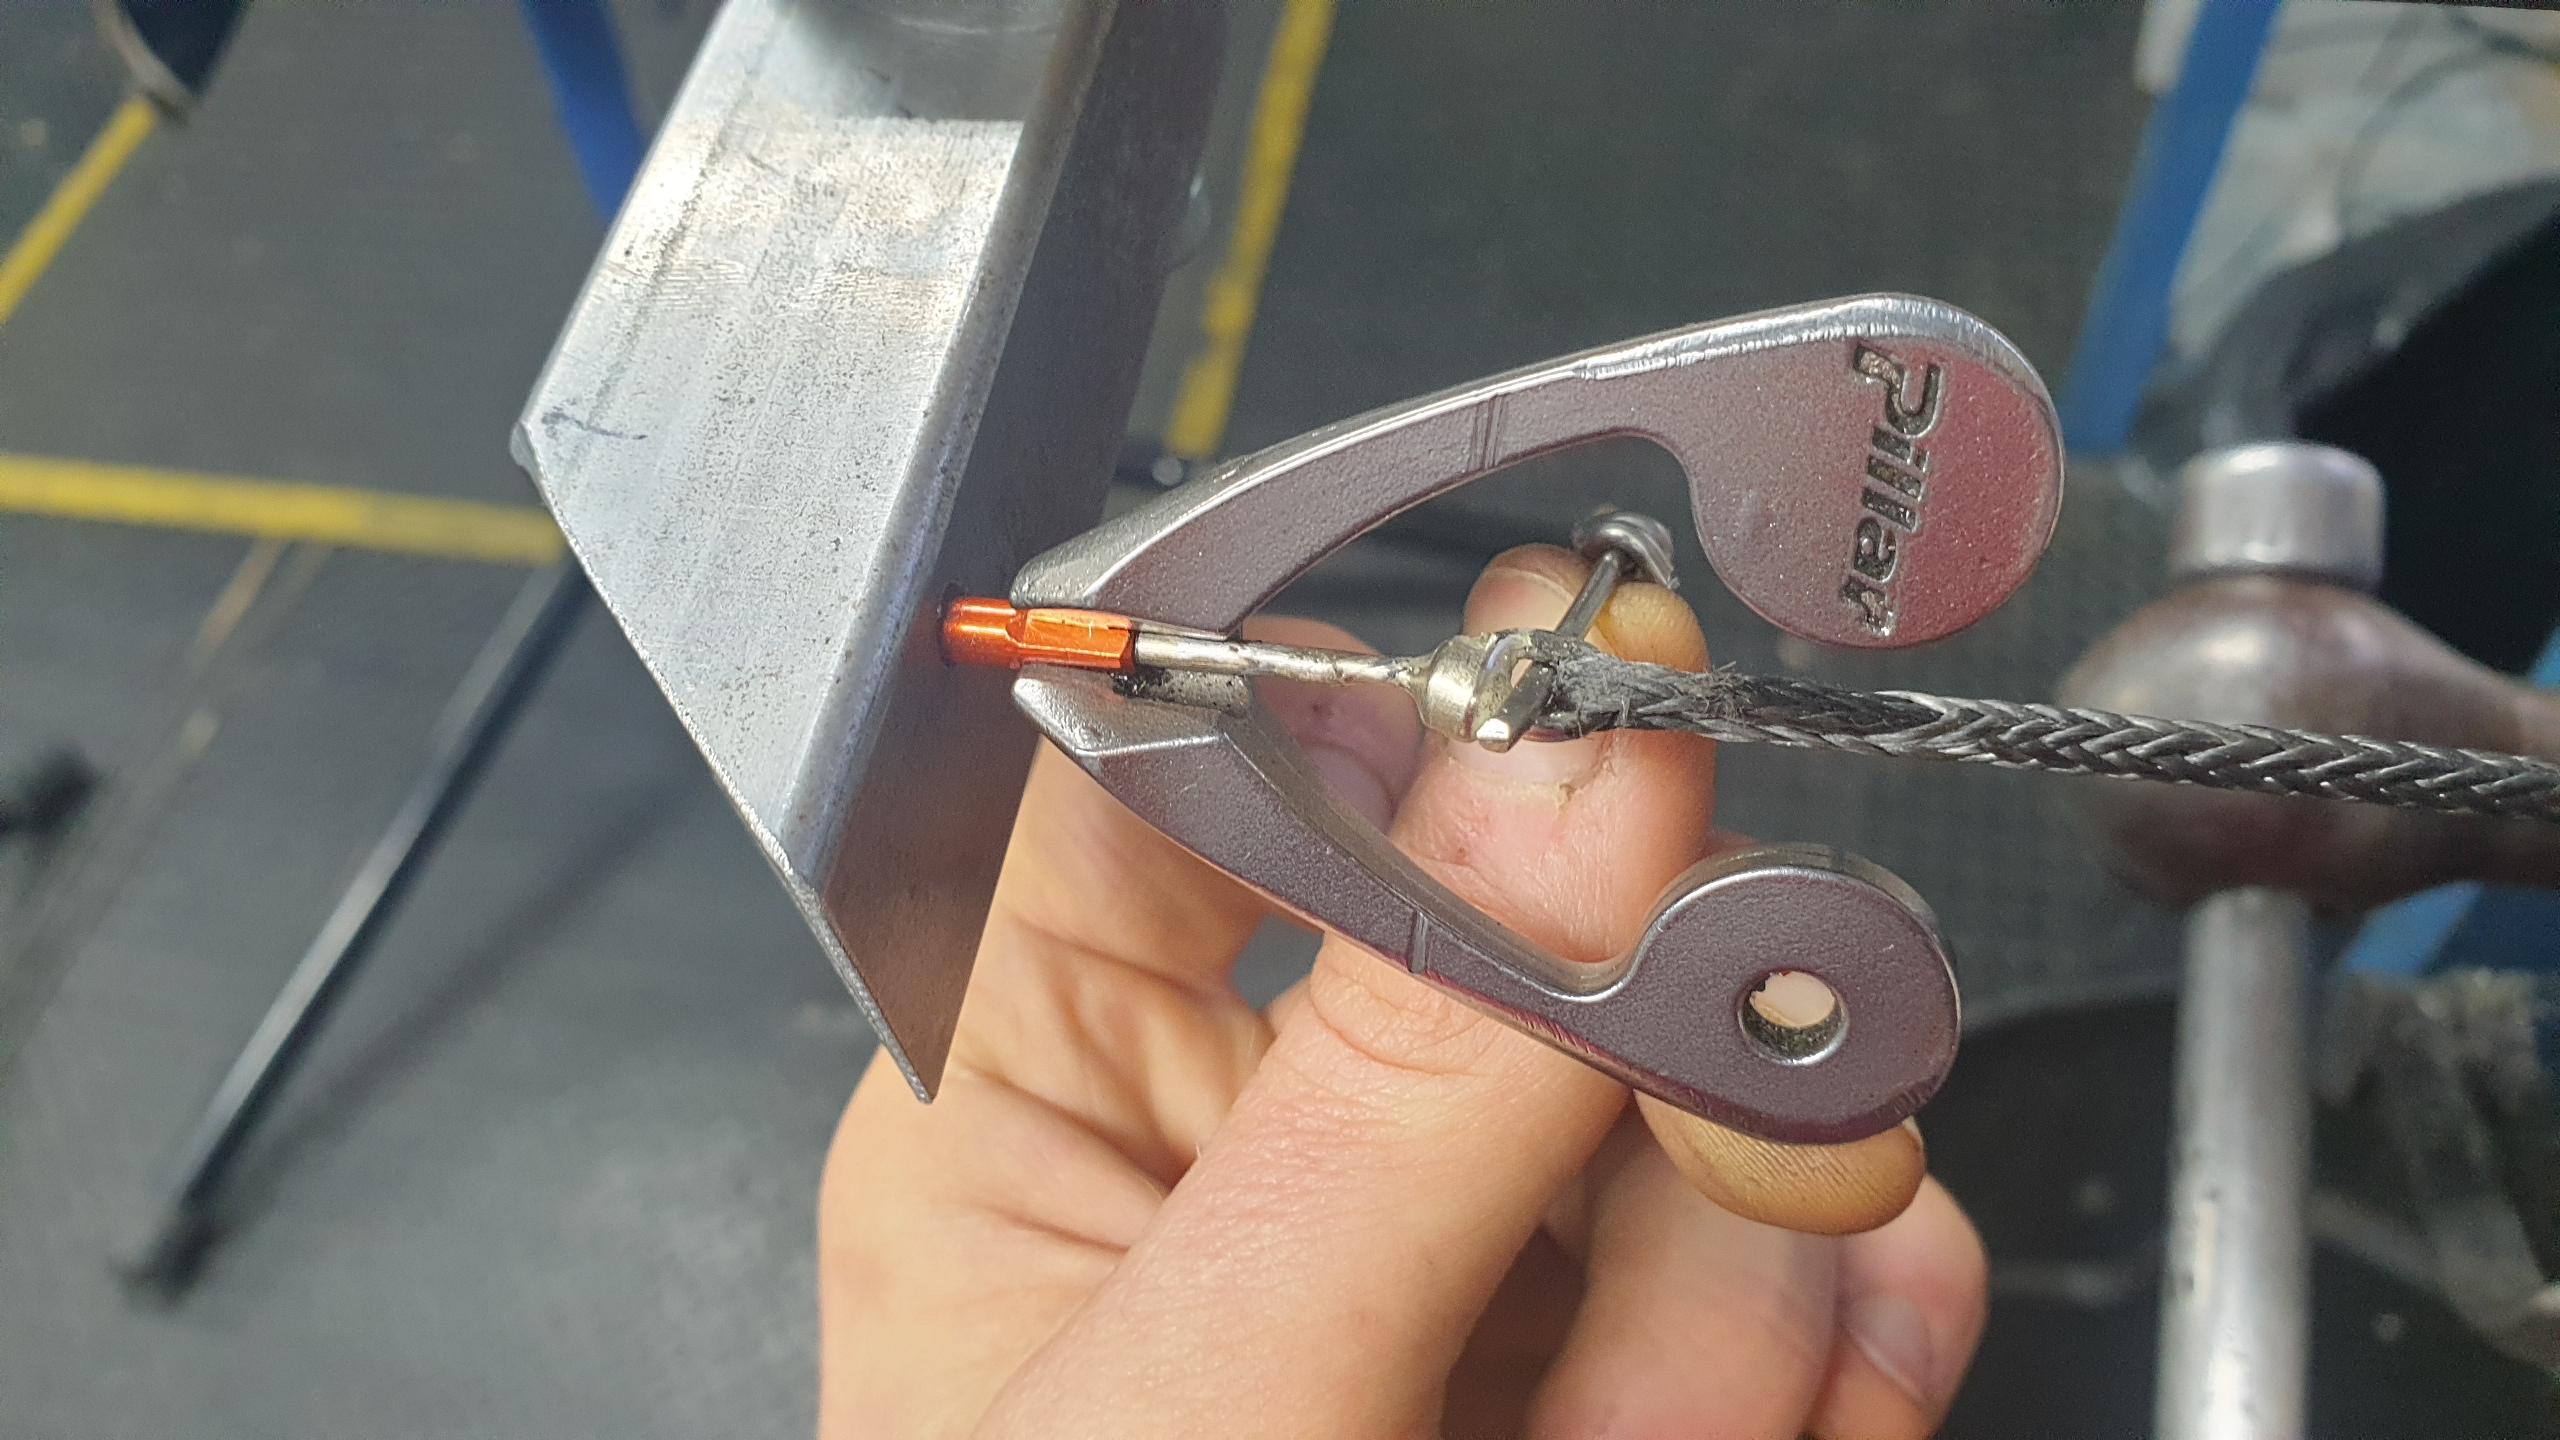
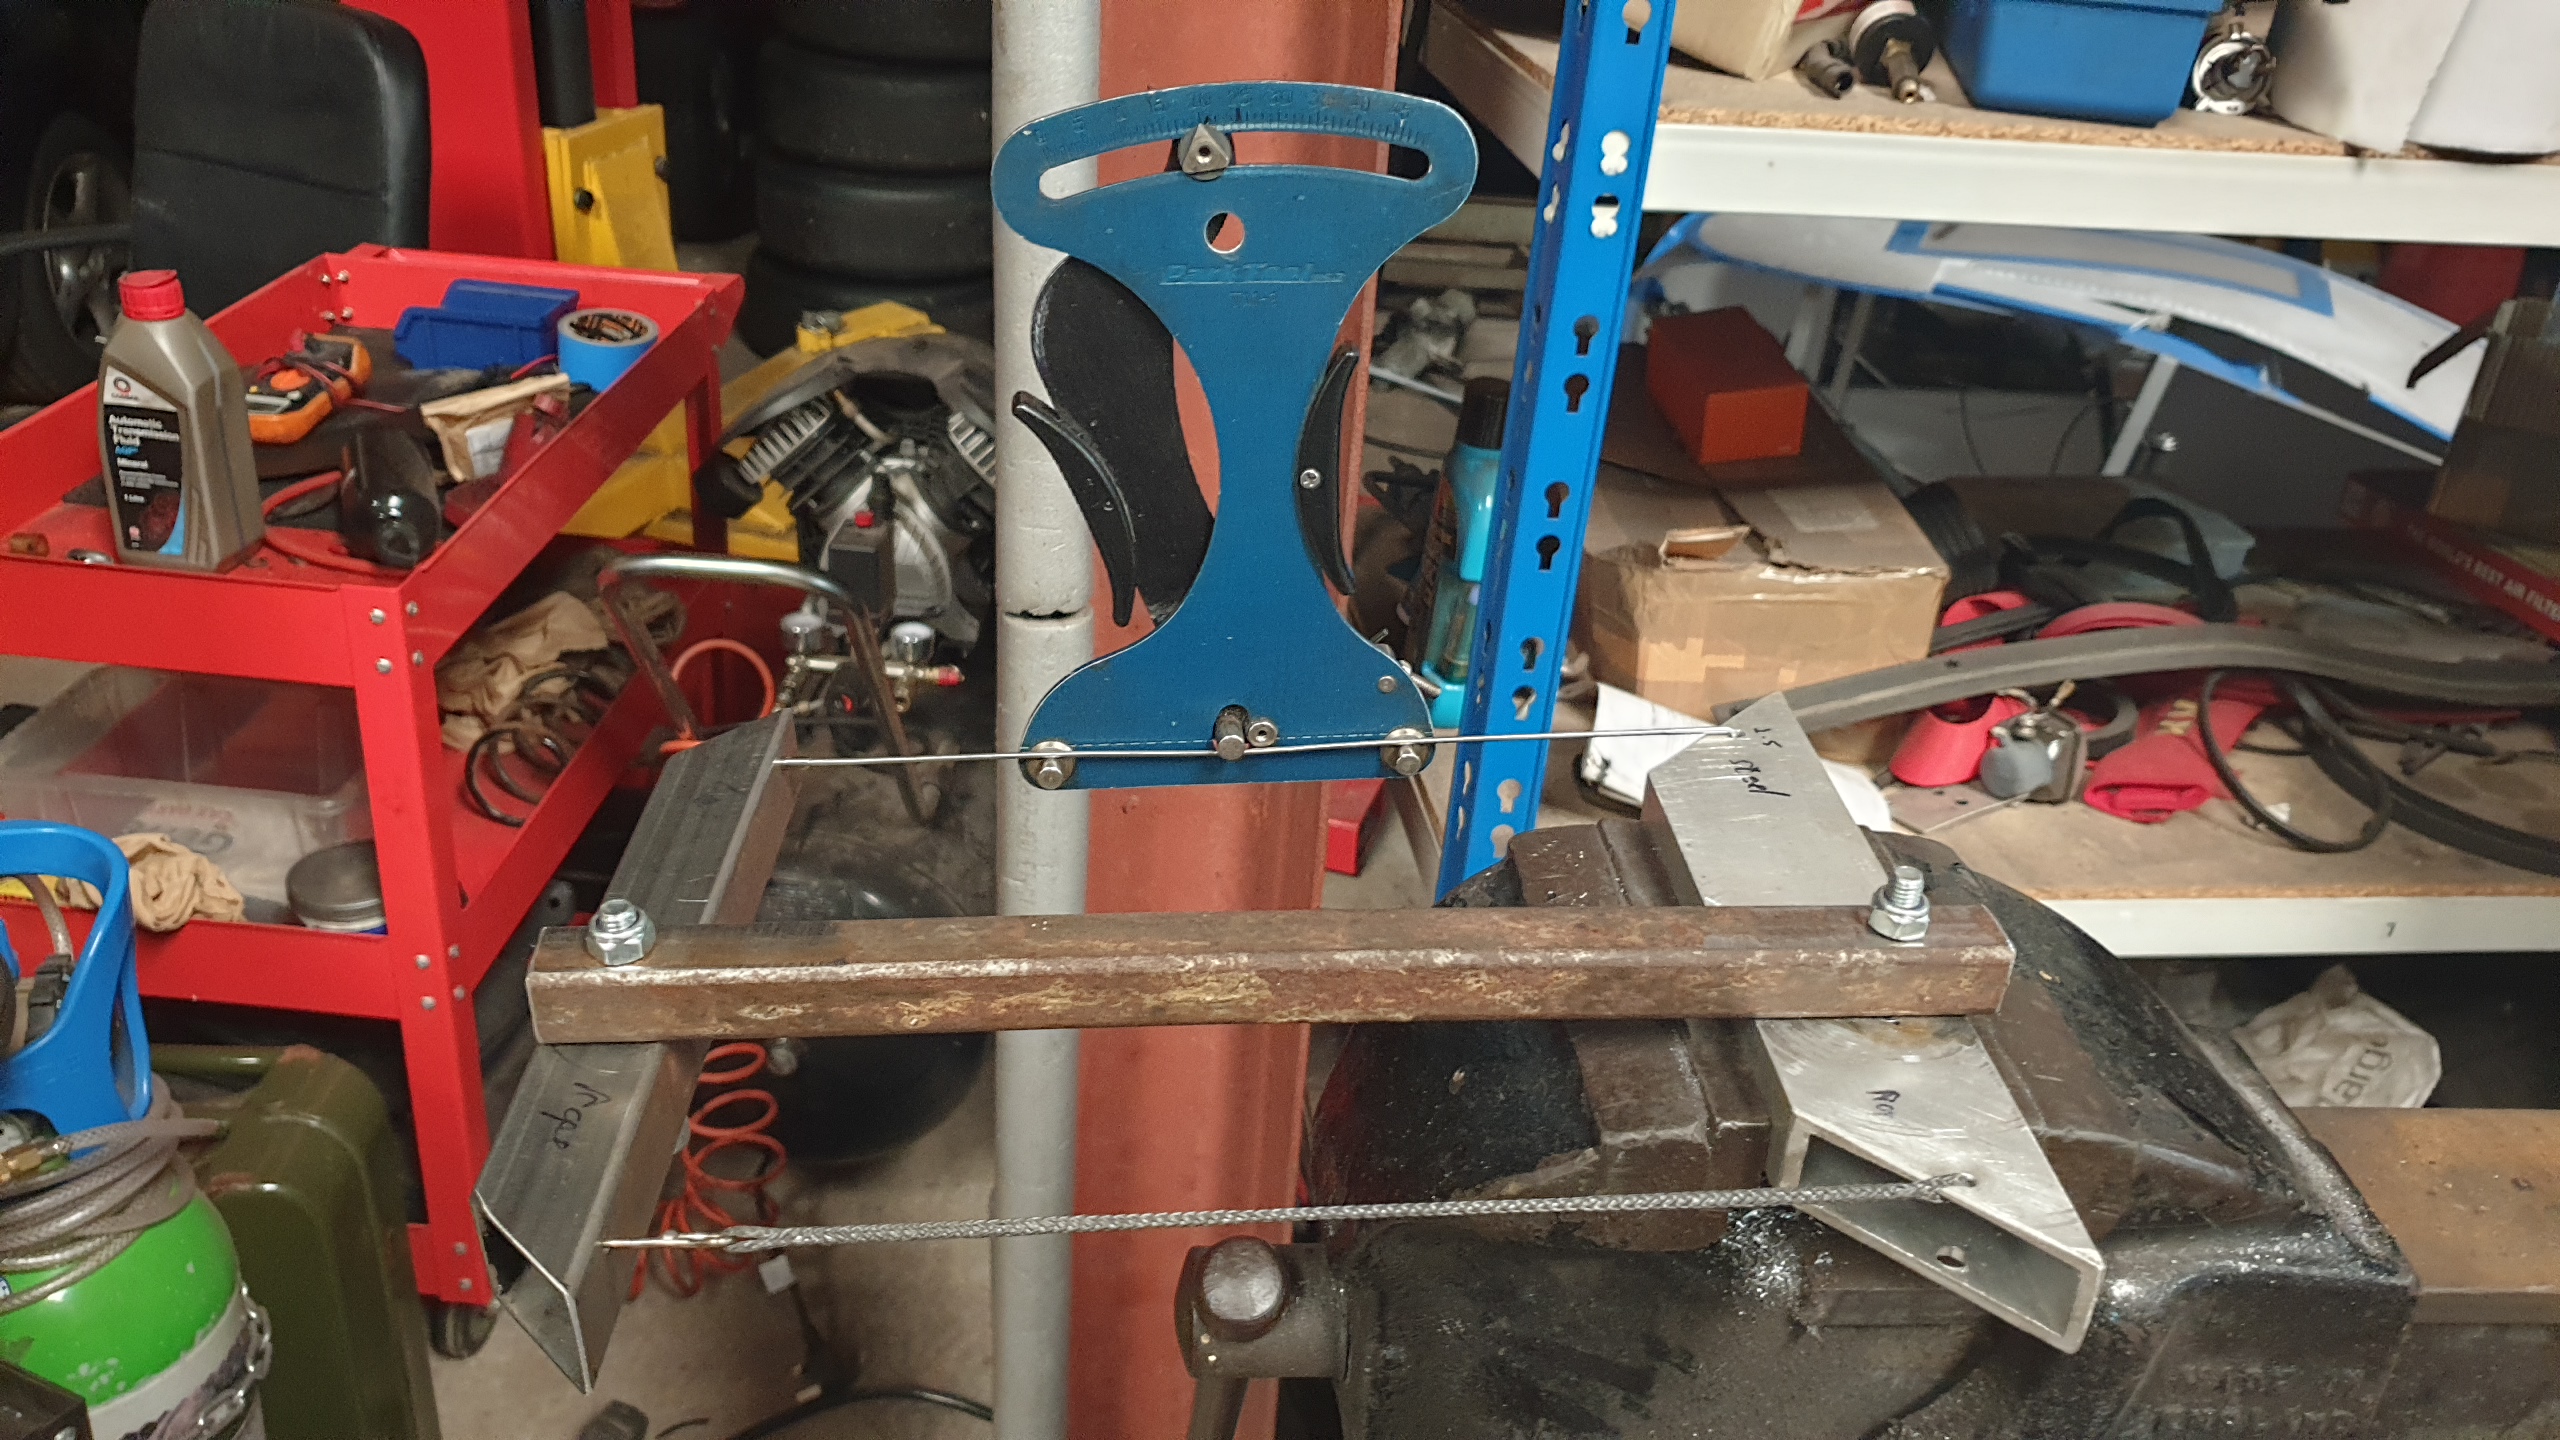
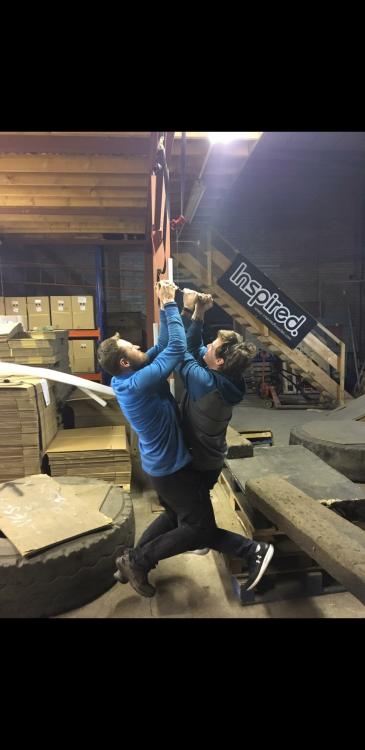
Functional fitness / strength is always impressive I find, seems to build less bulky muscle. Just meant that Dave is a beast! Tested one to 200kg and it holds fine. The eyelet at the 'rim' end has deformed a little though. The spoke stretches by about 3mm at this tension. Normally you'd build an MTB wheel around 100-120kg. The jig below has a 2:1 ratio so the steel spoke is half the tension of the rope one. Also tested spoke tension increase after standing on a bike - it was too small to measure. So I think my estimate of 200kg maximum spoke tension during riding (having started at 120kg) is way over what they'll actually see.

-
Muscle is heavier than fat Yeah I reckon we should try towing a car Ben!
-
Yeah, there looks to be some sort of gluey stuff. Thanks for the heads up on that, will investigate... A long rolled thread doesn't work on its own, I just fell on my arse trying The welded eyelets works to ~145kg though! Normal spoke tension is about 100, a quick bit of maths reckons one single spoke might see 200kg maximum during a very bodged landing... I plan to make a jig to test that full 200kg load, but for now...
-
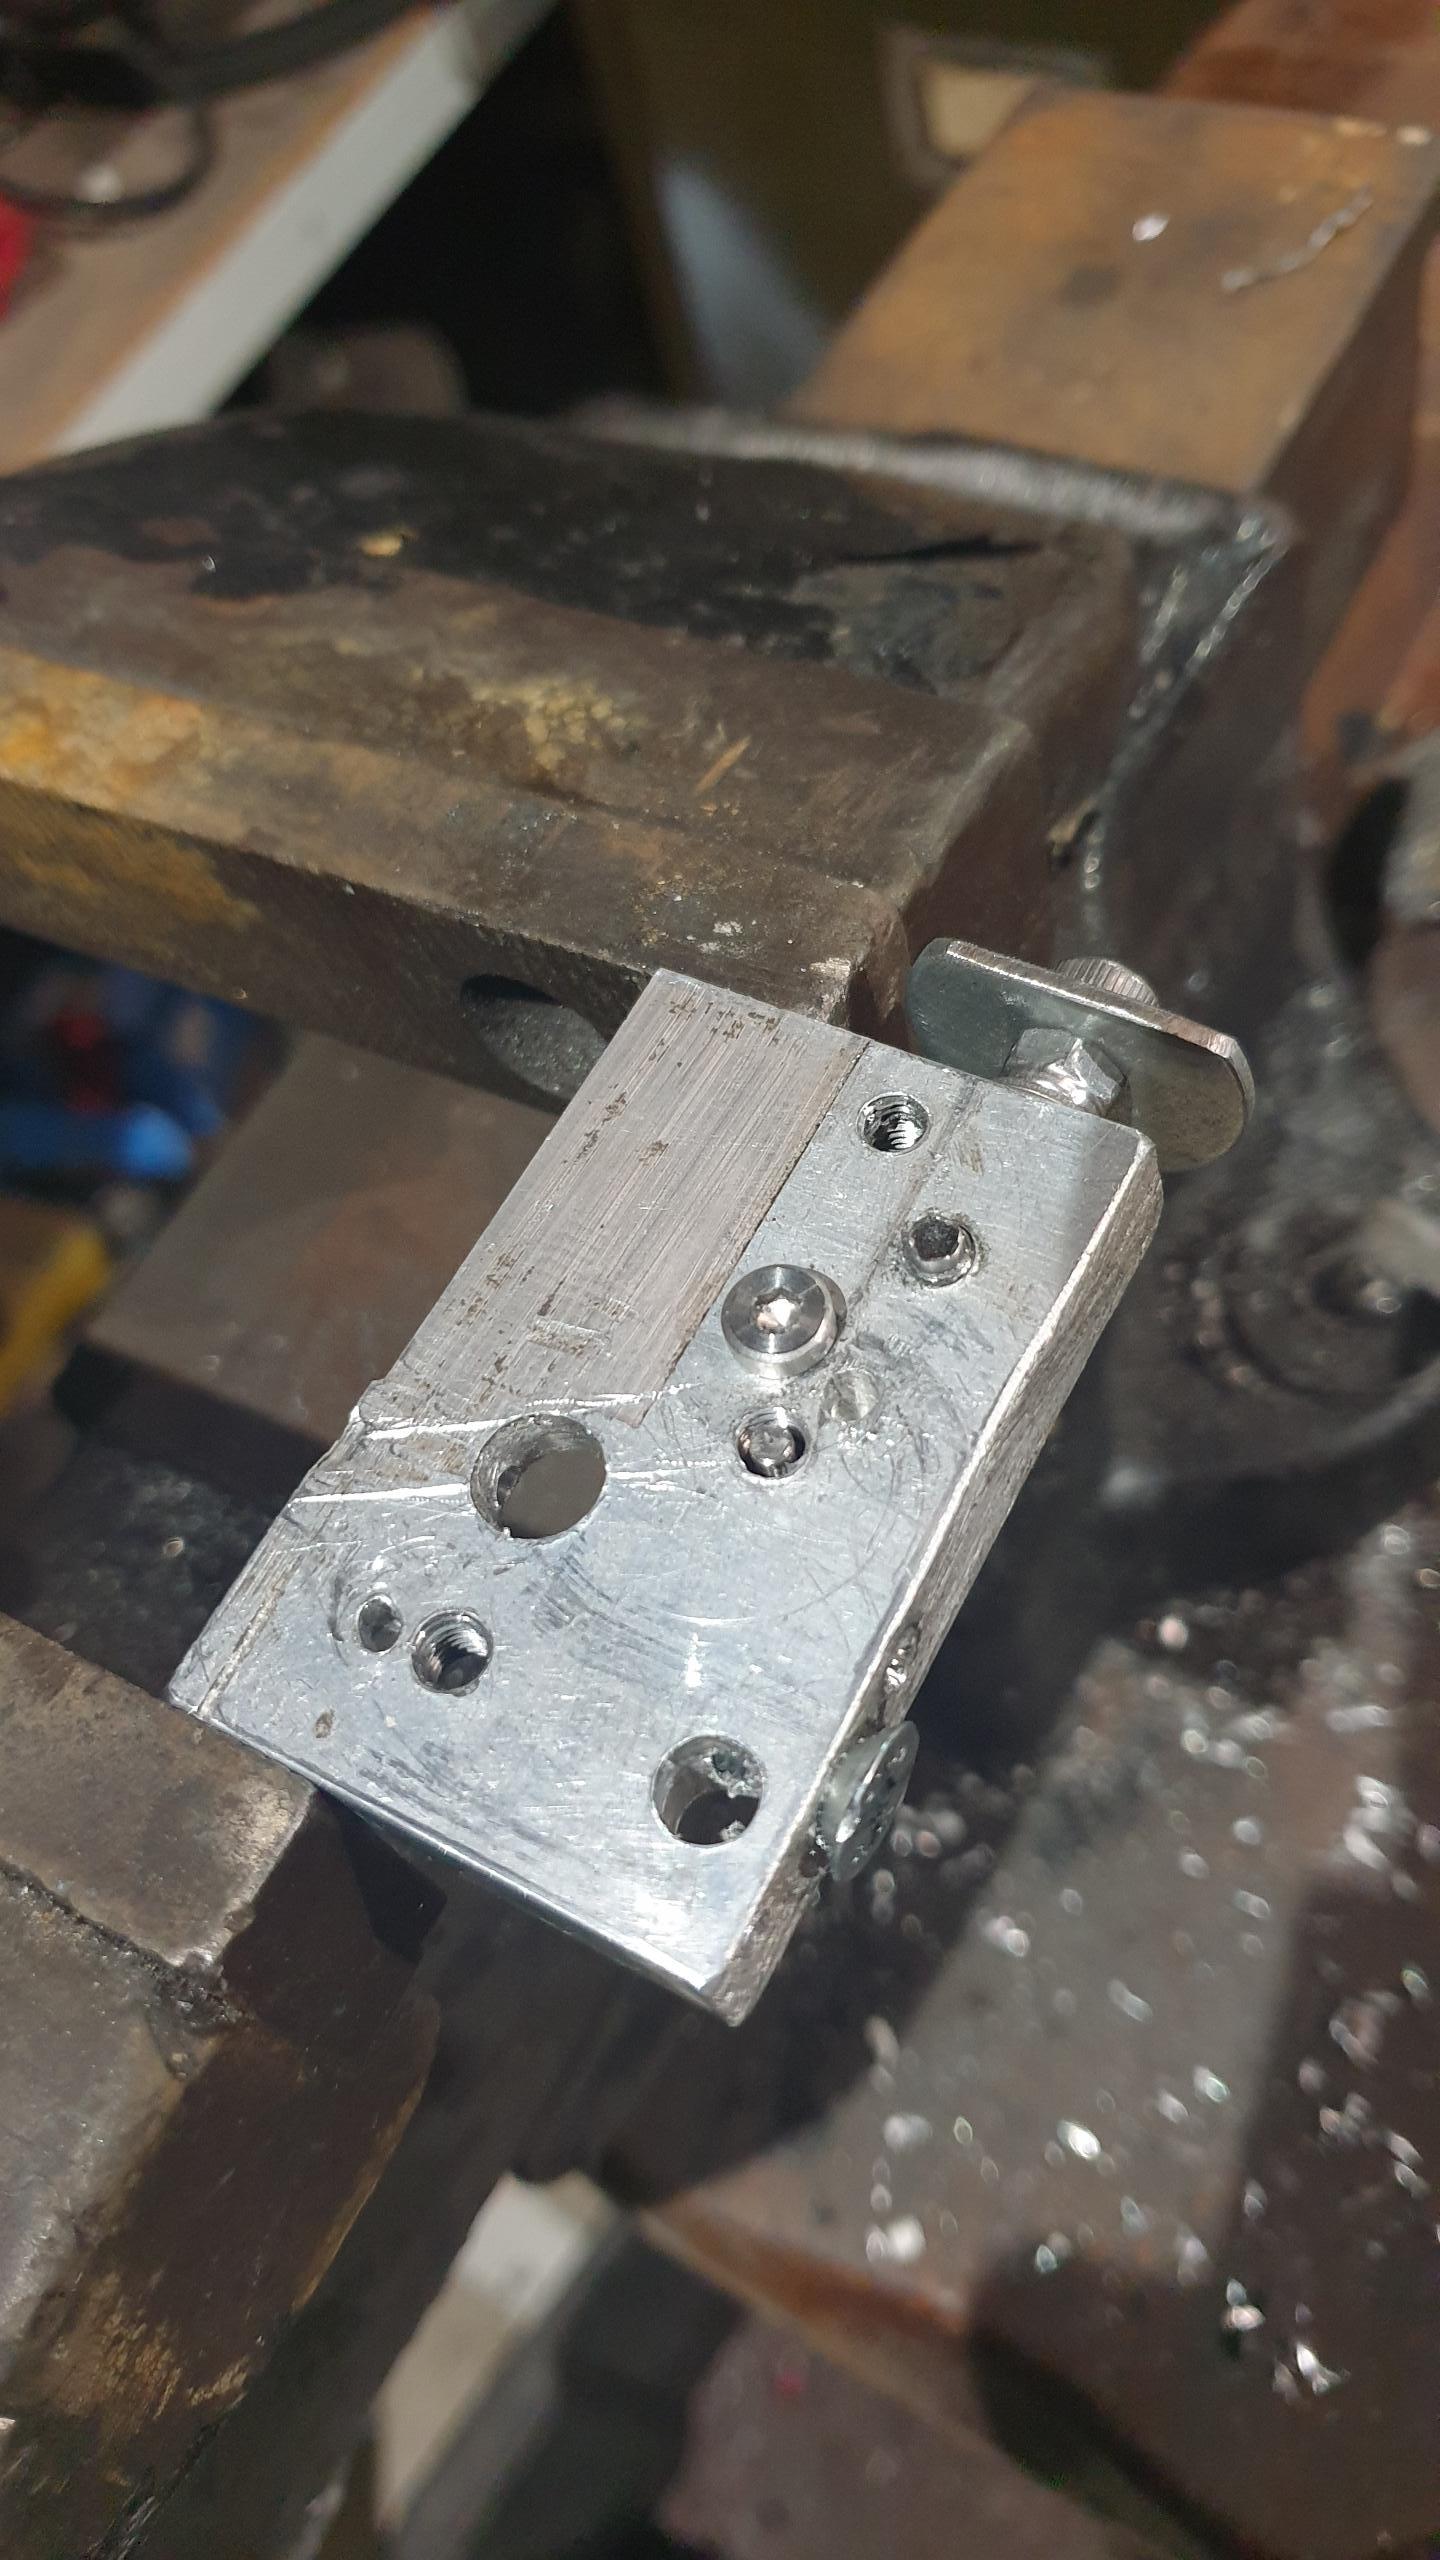
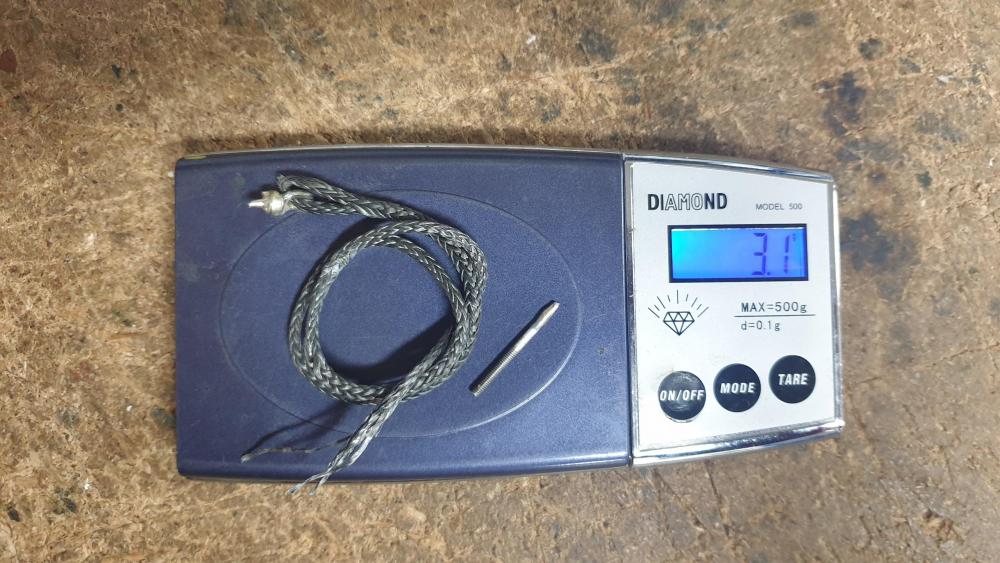
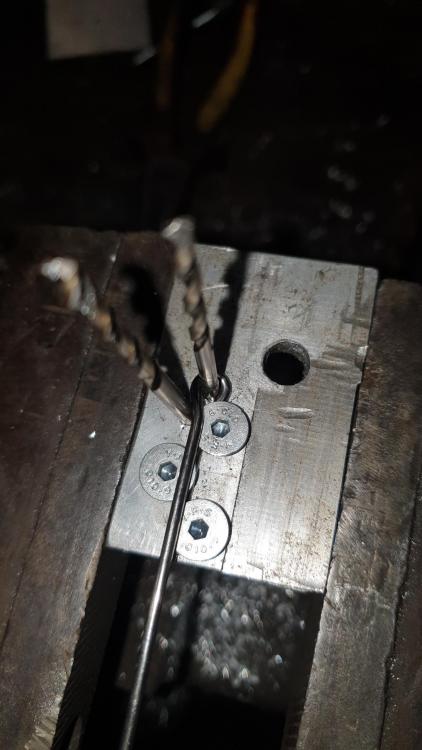
Yeah... ha. Pretty sure this is why Berd charge what they do. Its a lot of labour just to make the spokes! I guess as a DIY project you can write it off as enjoyment. In related news... for the rim end I'm toying with welded eyelets, so made a crude jig to test the idea. Welding spokes is tricky! But comes out ok and pretty repeatable with some practice. They will definitely need load testing though! Berd make the spokes to a length, and I think they glue them to keep everything put when not under tension, but you can quite easily adjust the length of the 'bury' when doing your own. Will need a jig to hold the hub, and a fake spoke hole at X distance away, then make the spokes to fit that. Weight savings are said to be between 100-200g a wheel, depending on wheel size and previous spoke type. The main thing I'm interested in is ride quality though, apparently they damp vibrations significantly. Not really sure how it becomes so strong in tension... This stuff is 12 strand and rated to about 30% more tensile strength than a quality 2.0-1.8-2.0 butted stainless spoke, which is very impressive considering it floats on water! Also tried the "Chinese finger cuff" technique for fitting a spoke inside the rope. It pulls out with a plain spoke, but if you roll a bunch more thread on there it seems to hold well. Not sure if that will damage the fibres though. More tension will create more clamping force too, as this stuff "collapses inwards" under tension, and it appears to be the method Berd use at the rim end. Investigative times ahead...


-
This stuff is proper cool!
-
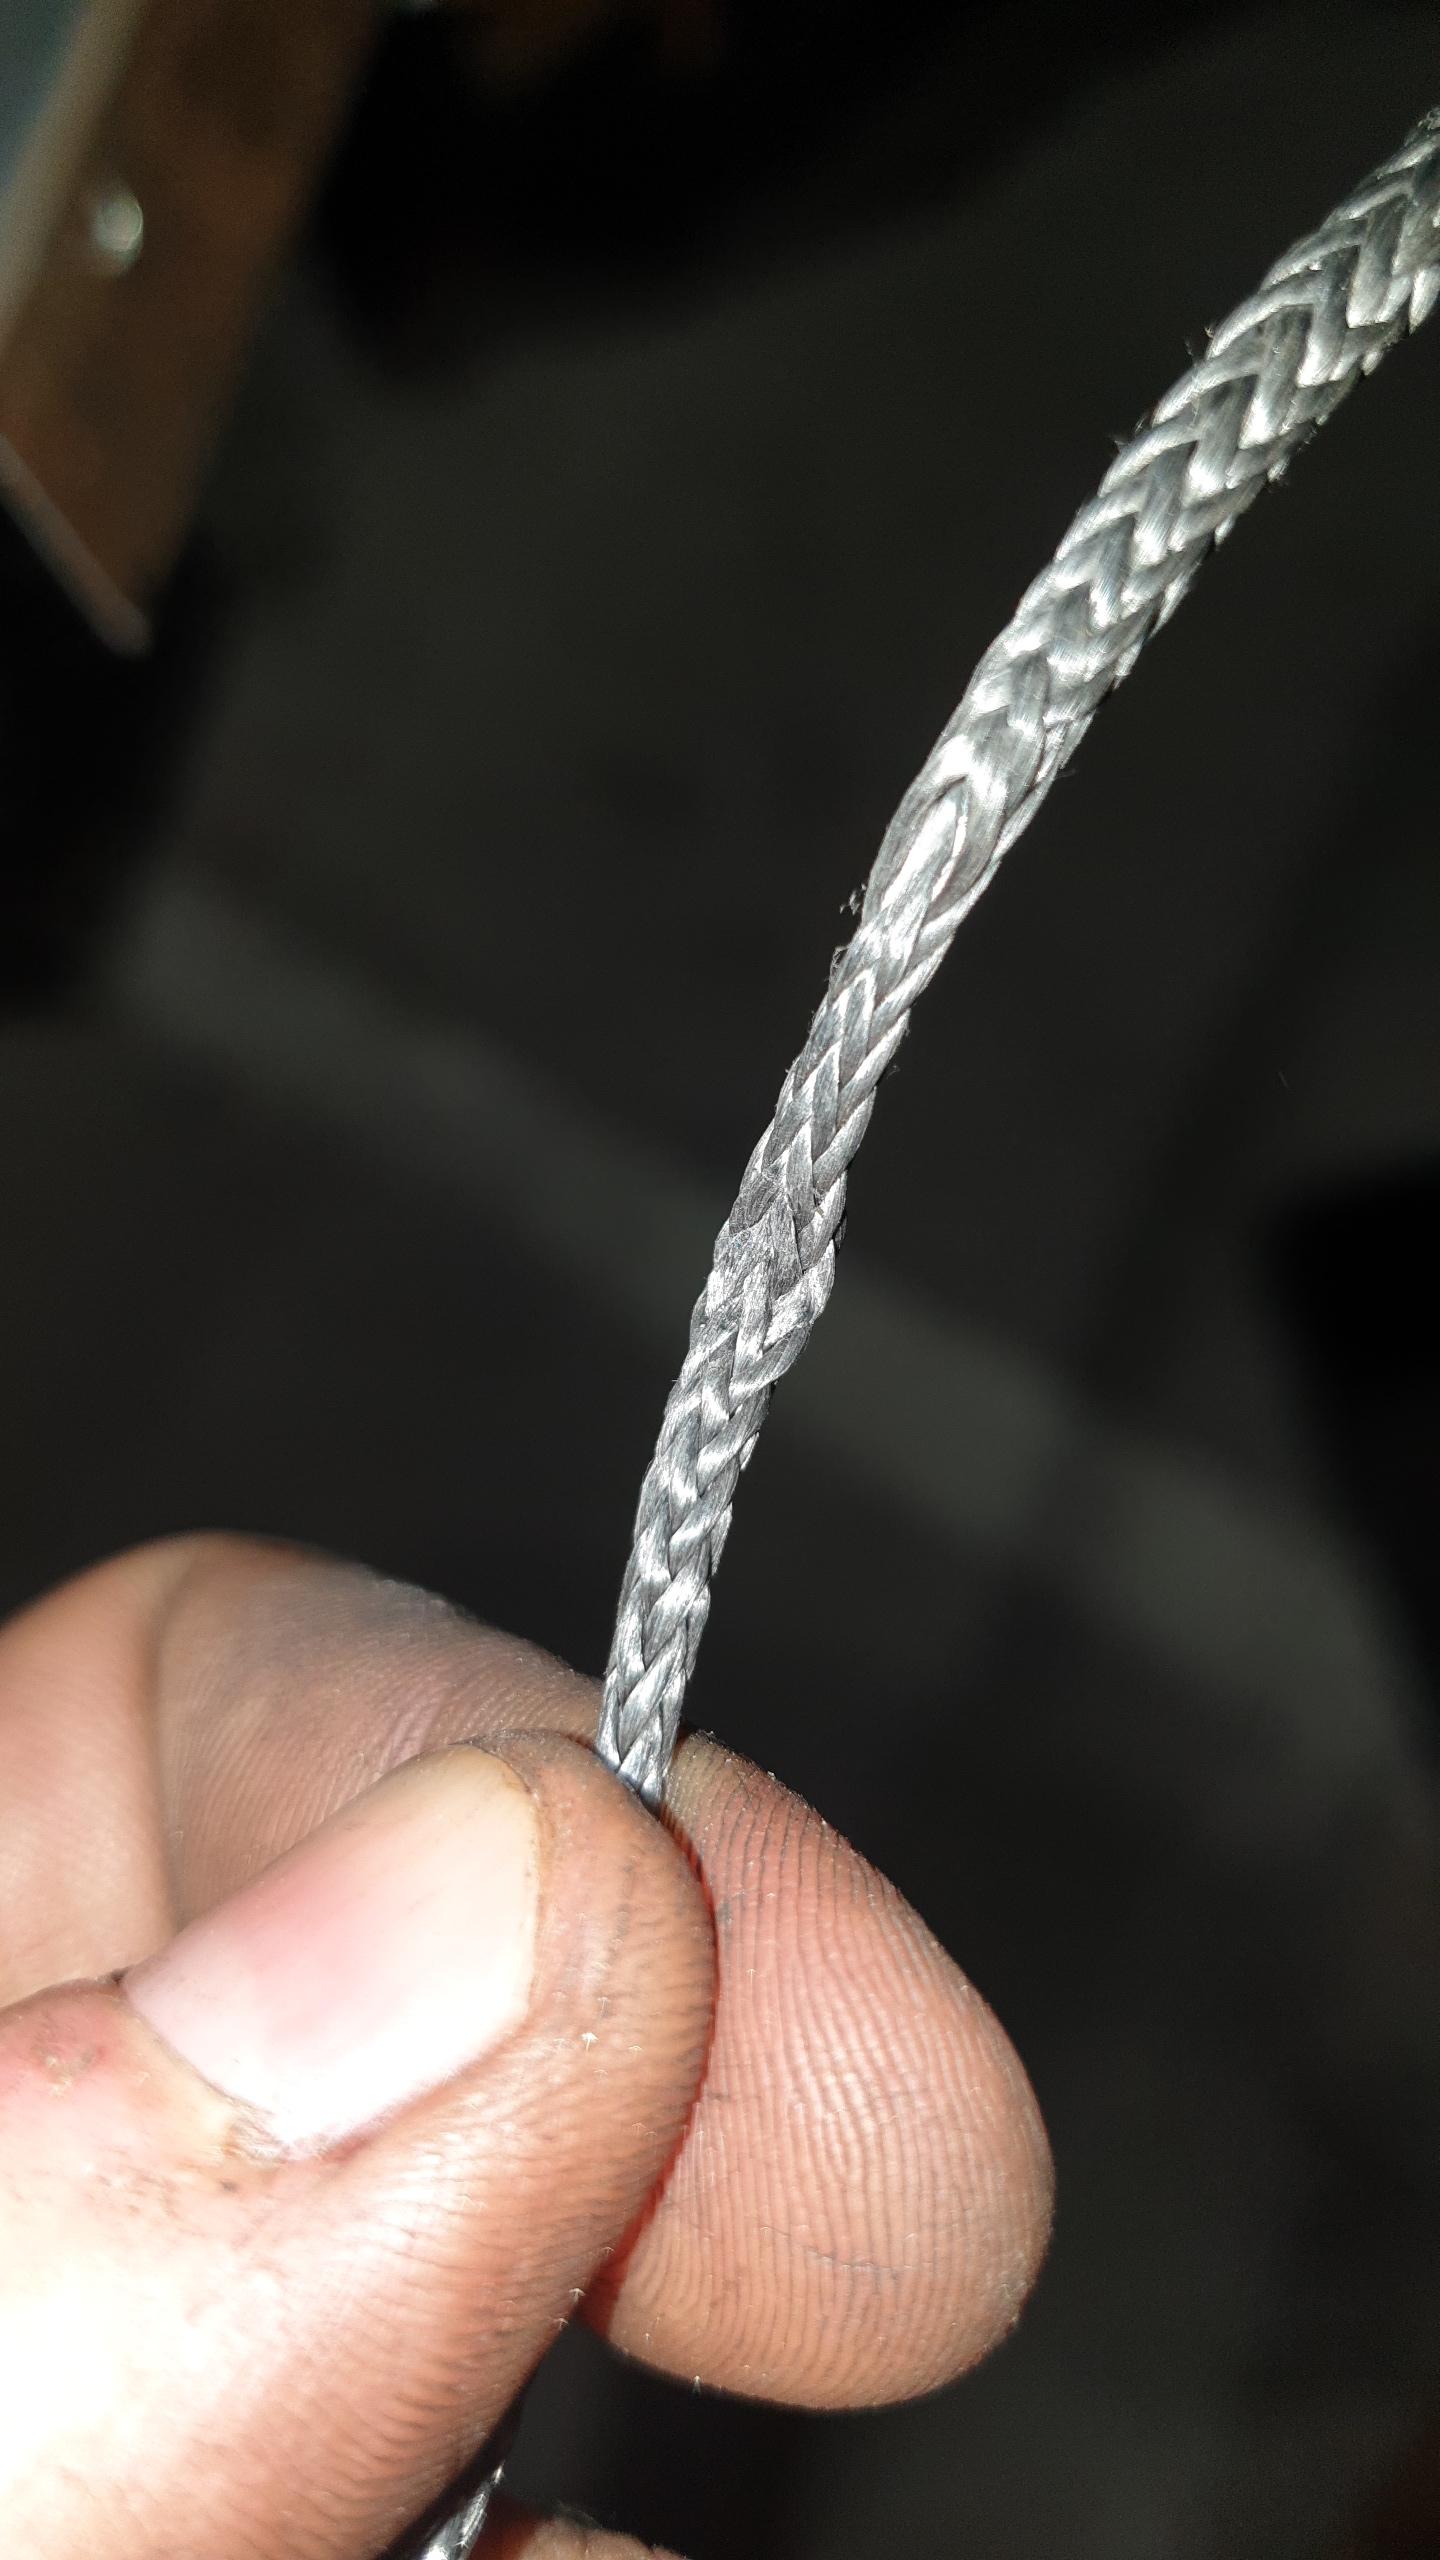
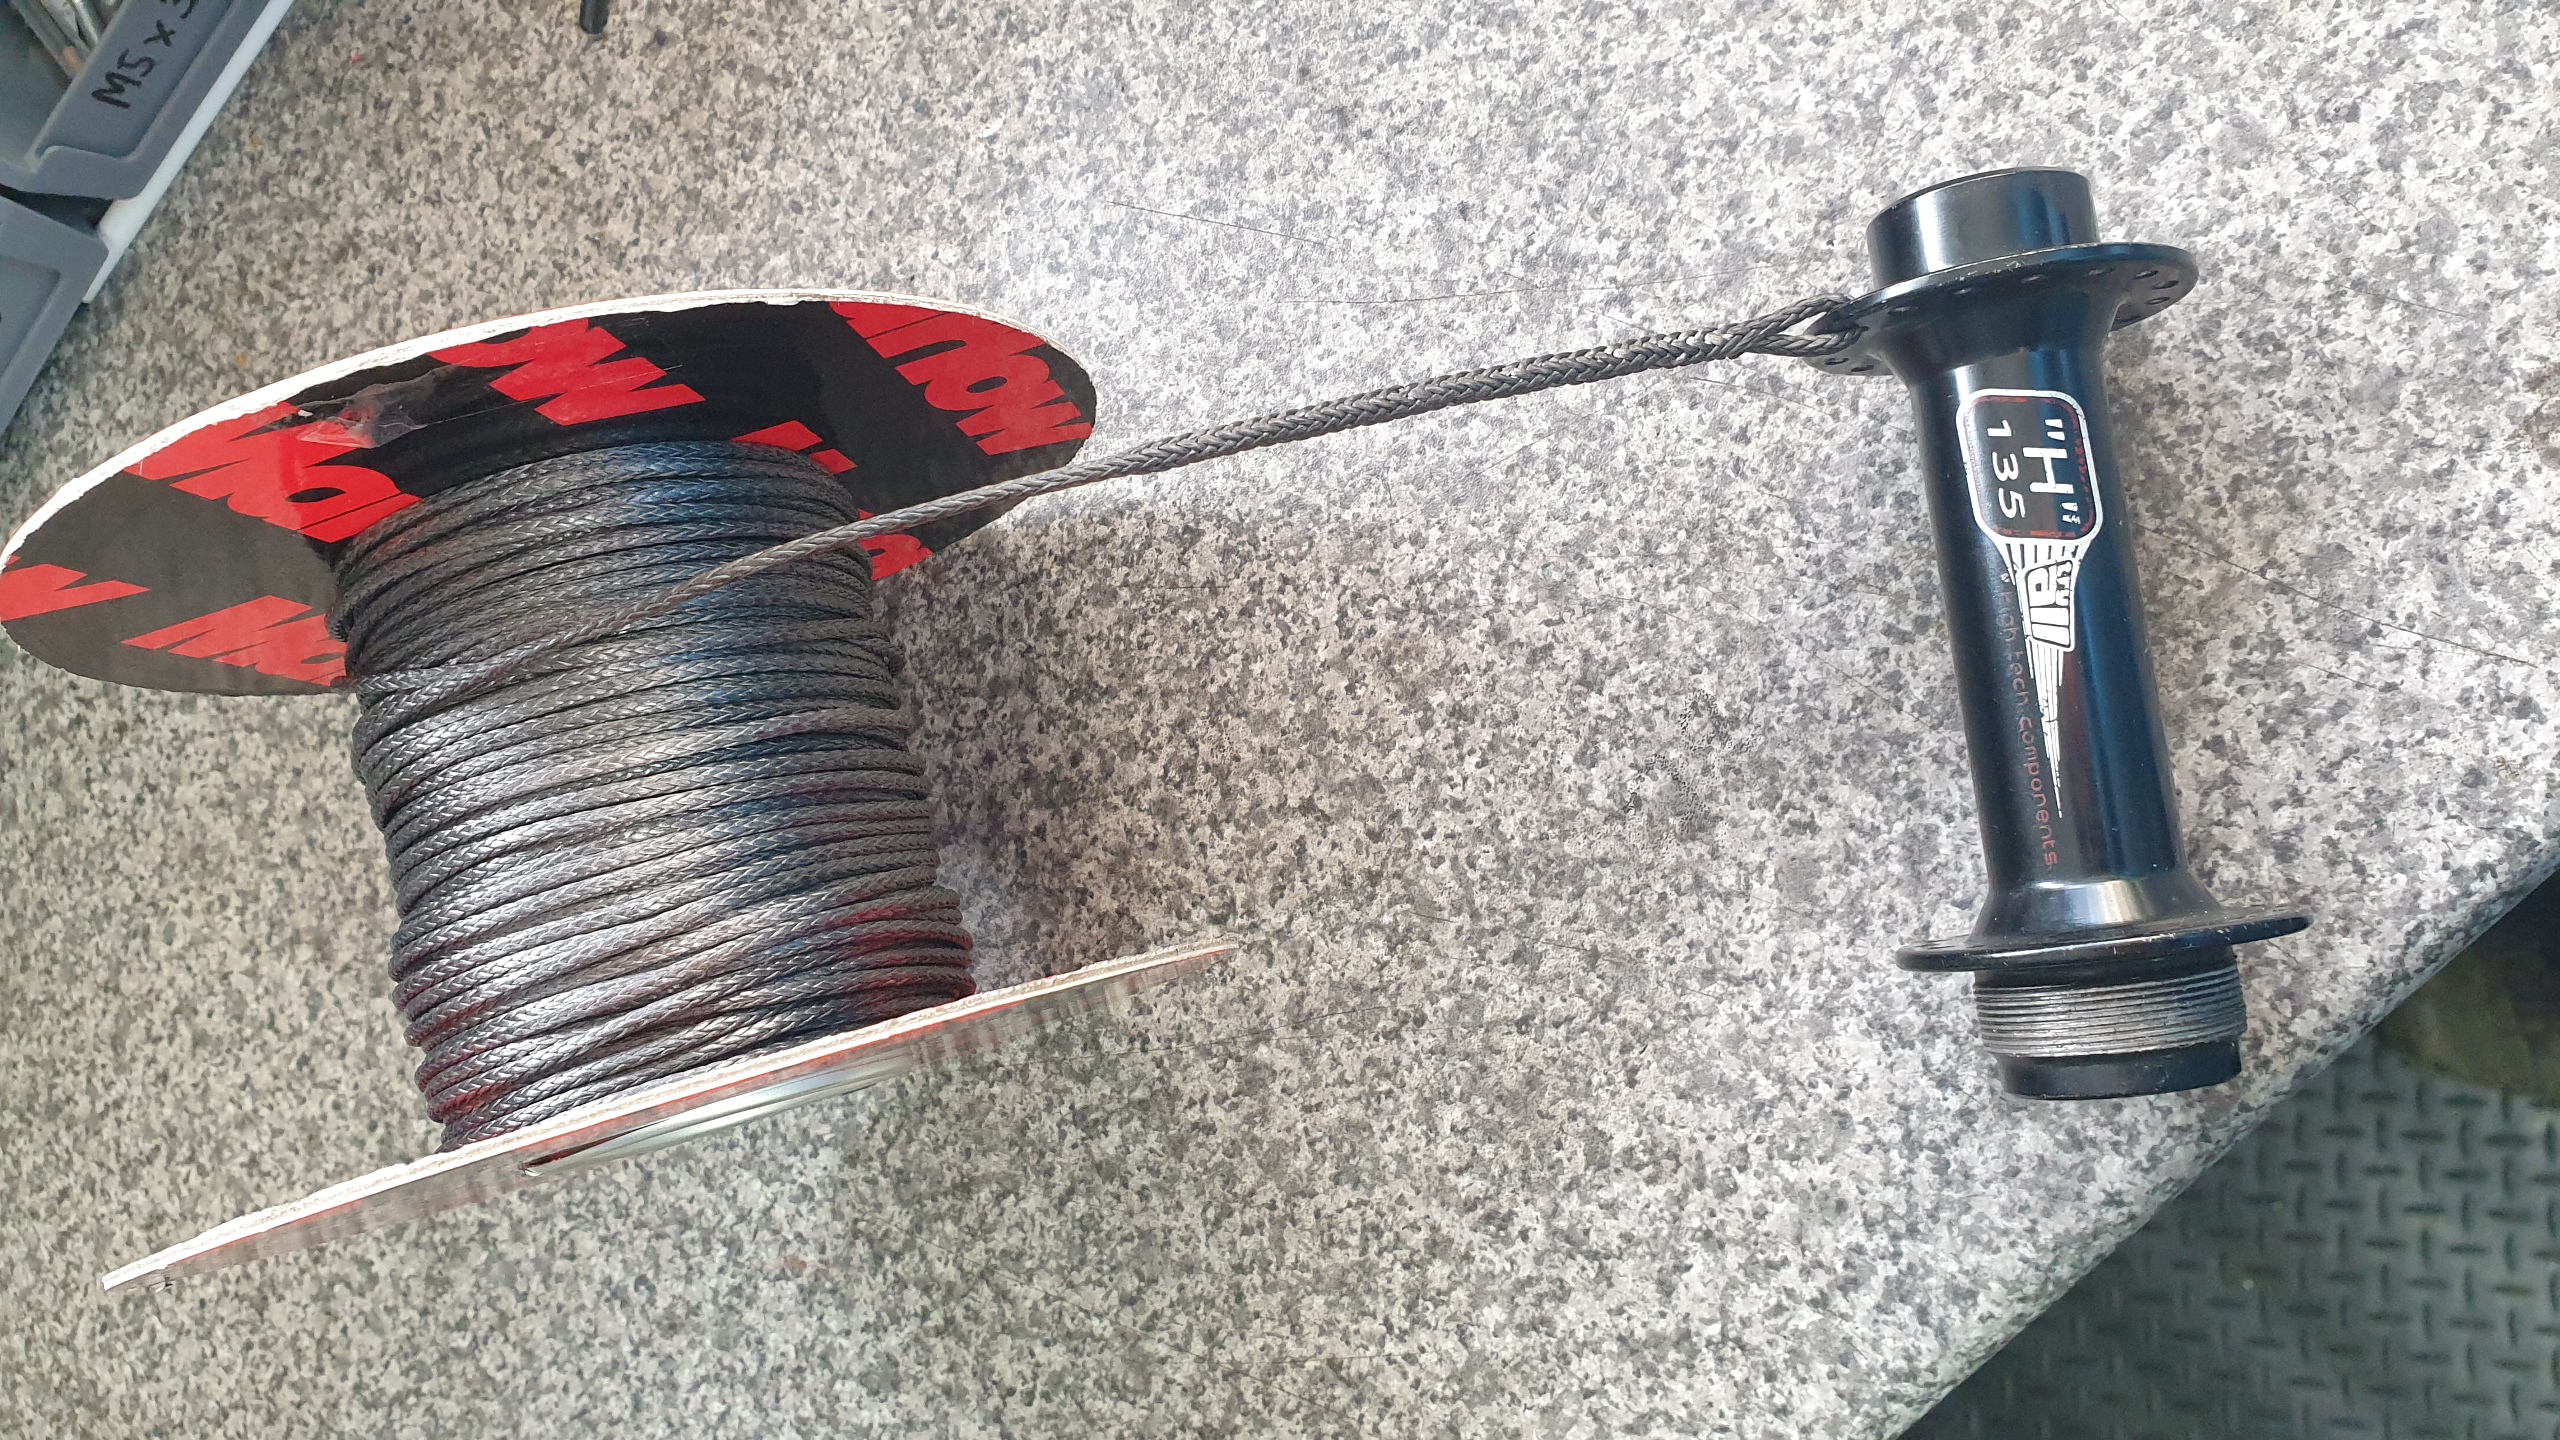
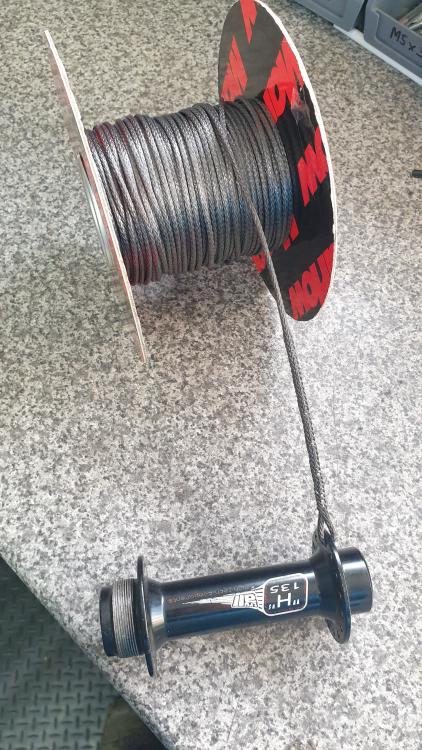
Bit of a bump but... these ended up on my radar again today, and I ended up down a bit of a nerdy spoke rabbit hole for a few hours. Long story short, I've bought 40m of this and going to attempt to make some, just for personal use: https://southeastsailboats.co.uk/products/marlow-sk99-d12-max-2mm
-
Hope / Hunter silicone lube works great.
-
There isn't a lot of choice for 24" tyres that deal with mud, but the DHR is a good shout: https://www.tartybikes.co.uk/24_inch_tyres/maxxis_minion_dhr_ii_24_inch/c85p10803.html
-
Covid tax...
-
I think it will work out lighter than 15mm, while still offering 90% of the benefits. And it'd be expensive to swap now. You can easily convert any hub that's bigger than 9mm down to 9mm with a simple sleeve, fitted inside the hub.
-
Dead good Next up, Flipp rides a shopping trolley better than I ride my M5.
-
Depends on pads and clamps, but assume no more than 38mm - you can just push the pads all the way back though and measure the gap between them.
-
Tried a few, brakes always end up rubbish (needing new pads and rotors to get back to full performance) afterwards.
-
None of them are fine IME.
-
That's great info, thanks Peter! I bitched out and bought something a bit less spendy / easier to get (thanks, Brexit), but great to know that they are still durable even given the amazing weight.
-
Tasty front hub! Have you used one on a trials bike (or other bike) before? I'm interested as to how the bearings hold up...
-
Nice! Try them in 160 and see how you get on first. If you need them to sit a bit lower in the travel just use a bit less pressure and an extra token or two - though I found the Lyrik to sit quite low down anyway. Worst case you can just chop 20mm off the air shaft and they'll be 140s.